Notice: This Wiki is now read only and edits are no longer possible. Please see: https://gitlab.eclipse.org/eclipsefdn/helpdesk/-/wikis/Wiki-shutdown-plan for the plan.
Creating a Java-based Job Launcher with an OSGi ICE plug-in
This tutorial series is for anyone who needs to extend ICE, for whatever reason, to perform custom tasks such as launching new types of jobs or creating new types of input files. In the second part, Using the Job Profile Editor to create Job Launchers, you learned about the Job Profile Editor, which can be used to automate the plug-in creation process for launching jobs. This part continues the tutorial by showing you how to create the same Job Launcher that you did in part two, but with the Java API.
Contents
Using the Java API and putting up with the build
Job Launchers are a special case in ICE where writing native Java code to perform the tasks related to execution may not be worth the effort, because the infrastructure in ICE is already available, well-tested and quite capable. This is not true for other types of tasks, such as generating input from third-party input generators or analyzing domain data. ICE provides access to some utilities for the latter, but in either of those cases, there are normally very specific tasks to be done. The only way to do this is to write the code directly using the Java API.
We will do this for the Job Launcher that you created in the last tutorial to ease you in to your first plug-in. You will not have to implement reviewEntries() or process() for this exercise and your implementation of setupForm() will use some more convenient routines to simplify the programming aspect. This lesson is more about familiarizing you with the process of making the OSGi plug-in and writing the Java code than dealing with ICE's data structures, which will be covered in the next couple of lessons.
The Job Launcher that you created in the last exercise had the benefit of being serialized and interpreted. Unfortunately, it will not be that easy with this plug-in because the Java code must be compiled. This is a good thing if you plan to distribute your plug-in publicly and have a lot of custom work to do, but it can be a pain if you only want to launch a job. Compilation is required for any other type of plug-in, so consider Job Launchers an exception to the rule.
Generating your OSGi plug-in
The first step to develop your Java-based ICE plug-in is to create the actual OSGi plug-in that will serve it. We will walk through that process briefly, but for details on how OSGi bundles work, we ask that you look into tutorials specifically for OSGi bundles. There are a lot of good OSGi tutorials on the internet, such as OSGi Modularity by Lars Vogel.
OSGi bundles can be created by hand, but the easiest way to create one for use with the reference implementation--Equinox--on which ICE is built, is to have Eclipse generate as much of the "boiler plate" coffee and metadata as possible. Since Eclipse itself is based on Equinox and has a large community of developers, it is already very good at doing this.
Open your Eclipse installation and make sure you are in the Plug-in Development perspective by finding the Perspectives bar. It is not explicitly labelled, but it's at the top right of the workbench. If the plug-in development button does not appear in this bar, click the Open Perspective button (first one in the bar) and search for it. If it is not in the list that appears, then you do not have it installed and need to check your Eclipse installation.
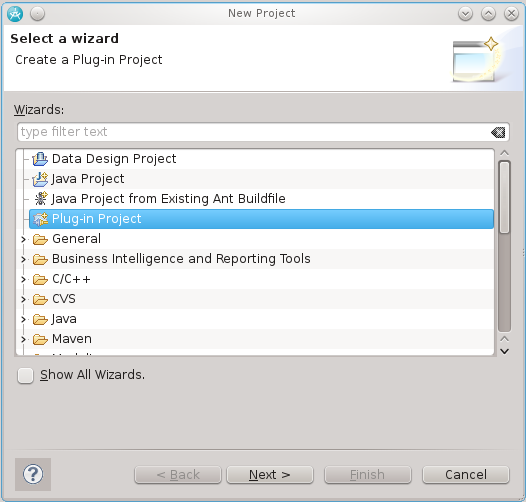
Create a new plug-in project with the wizard. Keep in mind that a plug-in project is not the same as a normal Java project. It has its own wizard, along with some additional files and dependencies.
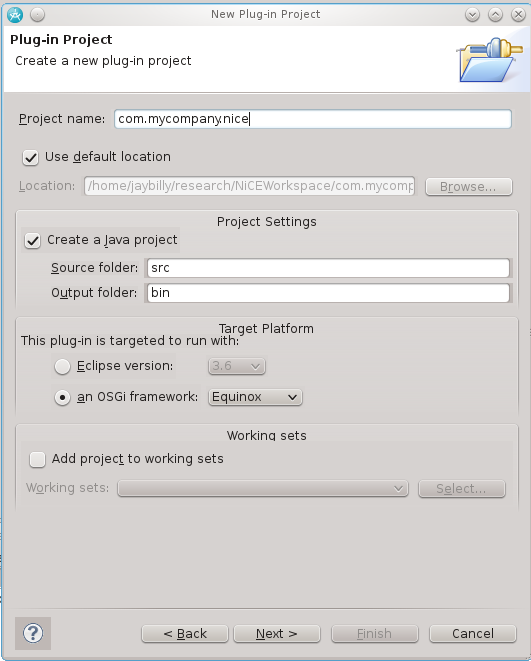
The next window that appears will ask for a project name and some other information. The only information you need to change here is the name. We have used com.mycompany.nice for the name of the plug-in, and we recommend that you use something similar, but with the name of your organization instead of the placeholder. All of the plug-ins in ICE start with gov.ornl.nice, for example, because they were written at Oak Ridge National Laboratory for ICE. Do not change any of the other information on this screen unless you have experience developing plug-ins and know what will happen. You should make sure that the target platform is an OSGi framework and not an Eclipse version. When you are finished, continue to the next screen.
The Content window asks for some more descriptive information about your plug-in here. Again, for the tutorial we have just used com.mycompany.nice, but you can use whatever you want. Be sure to uncheck the box next to Generate an activator... Activators are used to bootstrap your plug-in in the OSGi framework, but for ICE plug-ins, we use an alternative method called OSGi Declarative Services to load our plug-ins.
Here, we used version number 1.0.0. This is fine, but it's worth noting that most of ICE's plug-ins use version 2.0.0, and that is another possible option. Likewise, as a result of updates, your execution environment might be different. Neither discrepancy would make a difference in this tutorial.
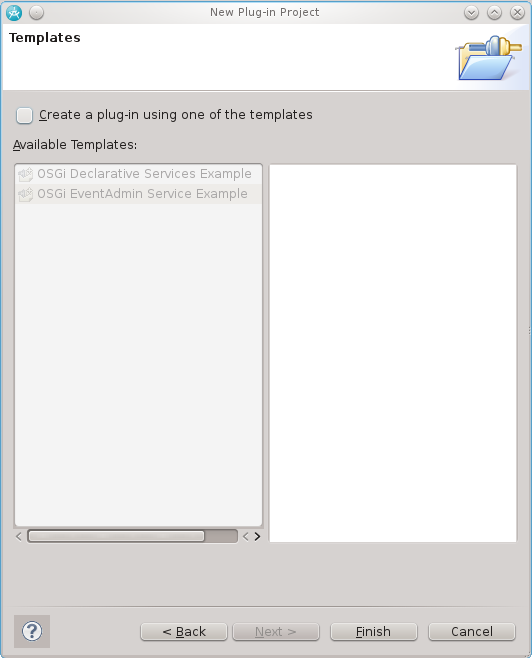
When you continue to the next screen you will be asked to select a template from which your plug-in should be generated. Do not select a template and uncheck the box labeled Create a plug-in using one of the templates.
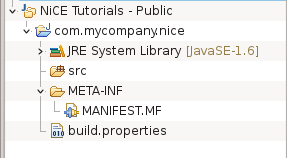
Click Finish when you have supplied all of the information above. Your plug-in should appear in the Package Explorer or Project Explorer views to the left of the workbench and your MANIFEST.mf file should appear in the editor portion of your workbench.
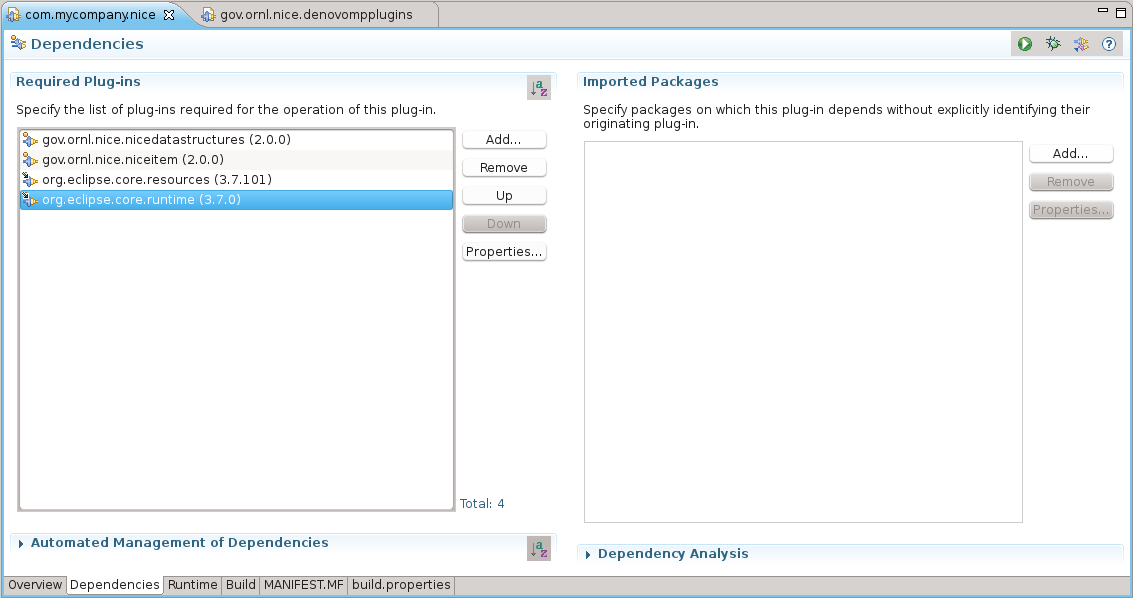
The MANIFEST.mf file editor lets you edit all of the configuration details of your plug-in and is read by the OSGi framework to load your bundle... so don't delete it! :) You need to modify your bundle dependencies to let the framework know that you depend on different pieces of ICE. Click the Dependencies tab of your MANIFEST.mf file and under the Required Plug-ins section, add gov.ornl.nice.nicedatastructures and gov.ornl.nice.niceitem. In an ideal world we would list these dependencies via the Imported Packages mechanism, because it would allow us to change out those bundles more dynamically (because it only describes imports, not hard-links to bundles), but the plug-ins must be required in ICE because the Java Persistence API is used to persist Items. If you use Imported Packages instead of Required Bundles, you may be able to find the pieces of ICE that you need, but the binary build will not work! After you add those two bundles, also add the org.eclipse.core.resources and org.eclipse.core.runtime bundles. If you can not find those bundles, make sure you followed the instructions in Compiling ICE From Scratch to set your target properly. When you finish this step, save your progress. Otherwise, the change won't be processed, and you won't be able to do the next step.
Creating your custom LauncherBuilder and Launcher
A quick software quality note: While we will not show it as part of this tutorial, it is totally possible to and we strongly suggest unit testing and smoke testing your ModelItem and ModelItemBuilder. Those tasks are beyond the scope of the tutorial, but we do it for everything in ICE and we recommend that you do it for your plug-ins too.
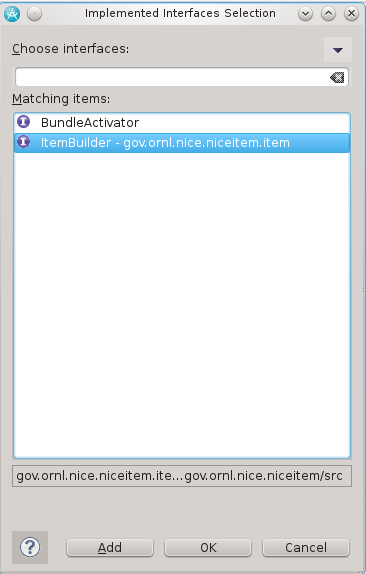
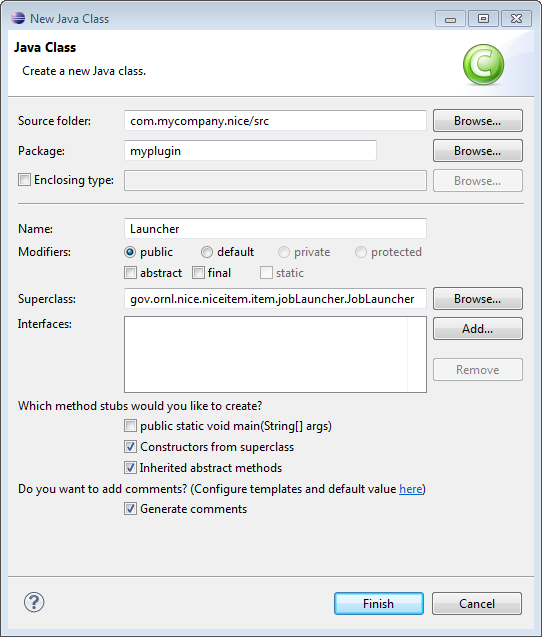
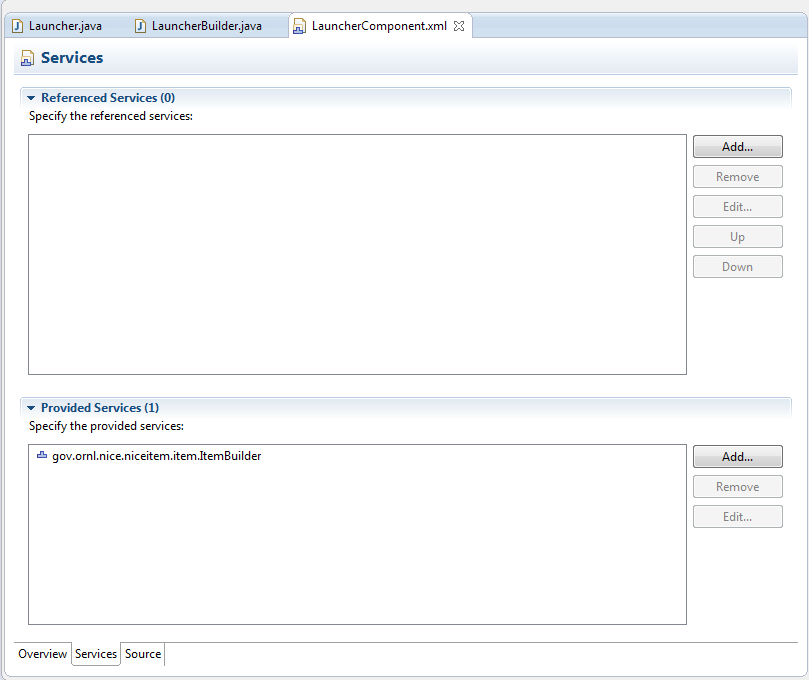
Note that when adding the interface in the table, searching for the class name alone, i.e. ItemBuilder will do the trick.
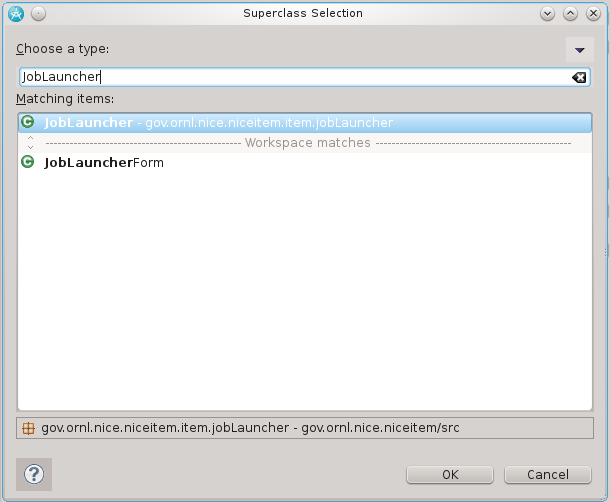
Throughout this tutorial, always keep in mind that a JobLauncher is a type of Item!
  package myplugin;

  import org.eclipse.core.resources.IProject;

  import gov.ornl.nice.niceitem.item.Item;
  import gov.ornl.nice.niceitem.item.ItemBuilder;
  import gov.ornl.nice.niceitem.item.ItemType;

  public class LauncherBuilder implements ItemBuilder {

    // The name of the Item and this builder
    private final String name = "List Directory Contents";

    // The type of the Item
    private final ItemType type = ItemType.Simulation;

    /**
    * The constructor.
    */
    public LauncherBuilder() {
    	// If you require some special initialization stuff, you can do it here.
    	// Otherwise, you don't actually need a constructor for the builder.
    	}

    public String getItemName() {
    	// Just return the name
    	return name;
    	}

    public ItemType getItemType() {
    	// Just return the type
    	return type;
    	}

    public Item build(IProject projectSpace) {
    	// The Item that will be returned
    	Launcher item = null;

    	// Make sure the project space is not null before creating the Item
    	if (projectSpace != null) {
    		item = new Launcher(projectSpace);
    		}
    	return item;
    	}
    }
On to the Launcher class!
  package myplugin;

  import org.eclipse.core.resources.IProject;

  import gov.ornl.nice.niceitem.item.Item;
  import gov.ornl.nice.niceitem.item.jobLauncher.JobLauncher;

  public class Launcher extends JobLauncher {

  /**
  * The constructor.
  *
  * @param projectSpace
  *       The Eclipse project space that will be used for file
  *       management.
  */
   public Launcher(IProject projectSpace) {
    	// Call the JobLauncher constructor to let it know what project space to
    	// use and to setup for the job launch. It will in turn call
    	// Item(projectSpace).
    	super(projectSpace);
    	}

    /**
    * The alternative nullary constructor. In general this should not be used.
    */
    public Launcher() {
    	// Just defer to the other constructor because work does need to be
    	// performed.
    	this(null);
    	}

    /**
    * This operation creates a Form for the FileSimulation with two Entries,
    * one for the file name and one for the computing platform,. It also creates
    * one DataComponent.
    */
    protected void setupForm() {
    	// Set the name and description of the Item
    	setName("List Directory Contents");
    	setDescription("A launcher for the \"ls\" system command on Linux. "
    			+ "This command is used to list the contents of a directory"
    			+ " on the file system.");
        //Note that if you're on a Windows machine, you should use dir instead of ls.

    	// Setup the Form
    	super.setupForm();

    	// Setup the executable information
    	setExecutable(getName(), getDescription(), "ls");

    	// Add a couple of hosts
    	addHost("127.0.0.1", "linux x86_64", "/usr/bin");
    	addHost("localhost.localdomain", "linux x86_64", "/usr/bin");

    	return;
    	}
    }
Create the OSGi component definition
We will now create the OSGi component, which will register your ItemBuilder service and ensure your plug-in is booted by the framework.
We will first go to File --> New --> Folder. Make your plug-in the parent folder, and name the folder OSGi-INF. While we will only make one component definition, creating a folder is standard and will keep everything tidy. Hit Finish.
Next, right-click on the folder you've created, then click New --> Component Definition
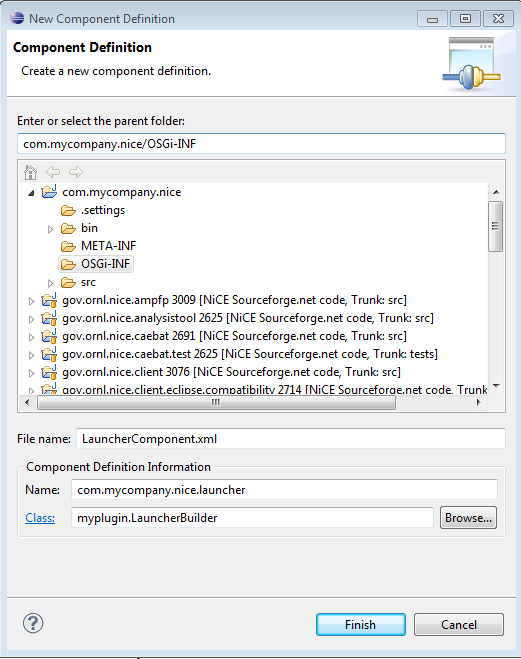
Your window should look something like the picture below. Make sure the parent folder is the name of your plug-in and the File name is something relevant. The Name can be anything, but if it ever matches the name of any other component definition you make, they'll clash and you'll get errors, so it's good practice to name it for its plug-in and class.
Note that the request for the Class is a bit misleading. "Class" must include both your package name, and class name, following the format: package.class
Next, when the component has been created, you should automatically be on the Overview tab. Look to the top right, and under Options, make sure the box next to This component is enabled when started is checked.
Proceed to the Services tab. Under Provided Services, click Add and choose ItemBuilder - gov.ornl.nice.niceitem.item.
Now your component is ready for configuration.
Add your component to the build and launch configurations
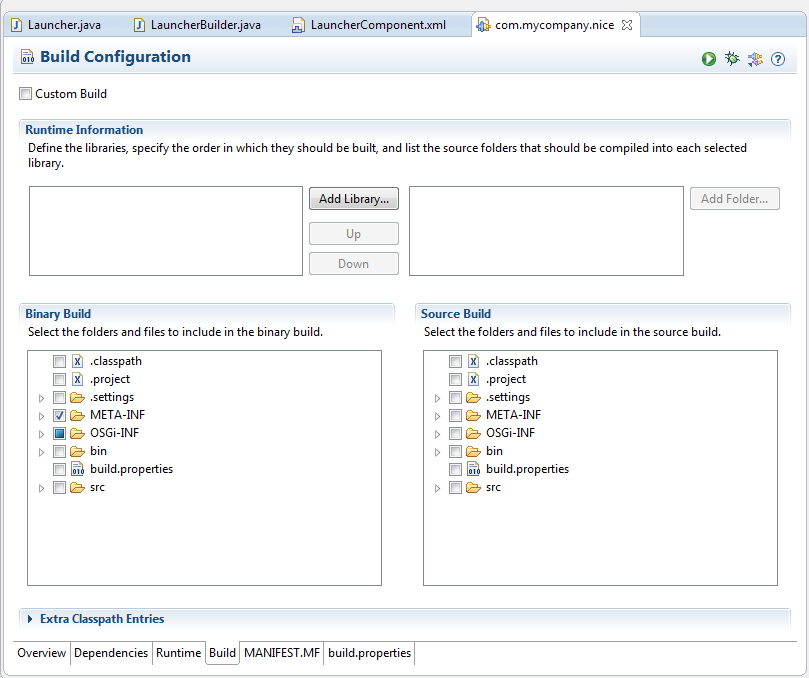
Return to your MANIFEST.MF and select the Build tab. This may have happened automatically, but make sure that in the section titled Binary Build, the square next to your OSGi-INF
file is filled or checked. As you can see, this is also the section you would go to for changing runtime information, but we don't need to do that for this tutorial.
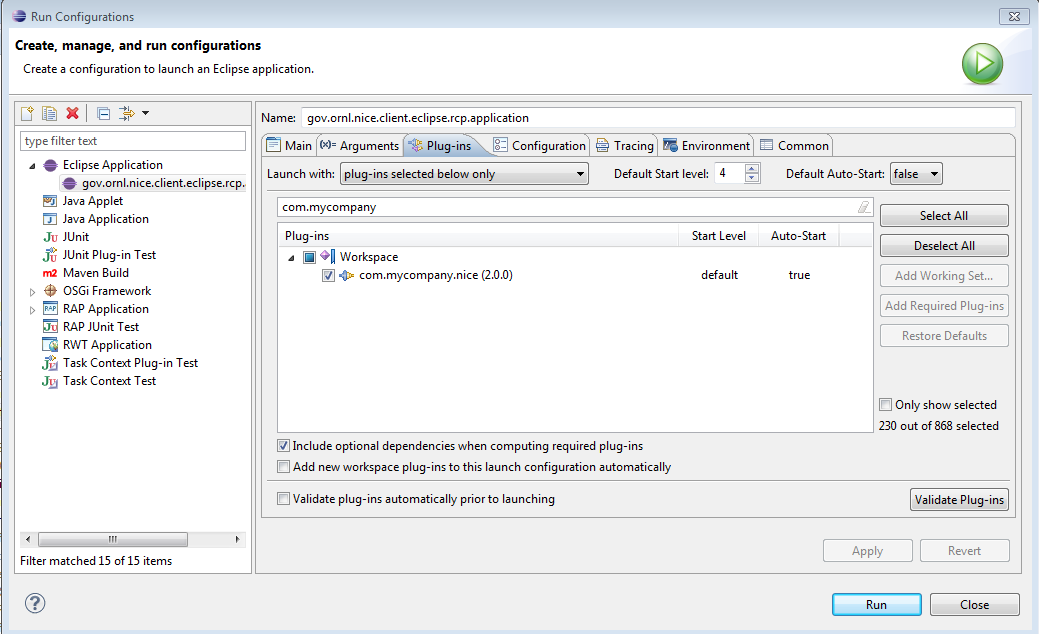
Now we're ready for the final step: adding your plug-in to the launch! When compiling ICE, you should have imported gov.ornl.nice.client.eclipse.rcp. Right-click on this plug-in, go to Run As..., then click on Run Configurations at the bottom.
Go to the Plug-ins tab and search for your plug-in name. Check the box, and then make sure auto-start is set to True. This will ensure the inclusion of your plug-in within ICE.
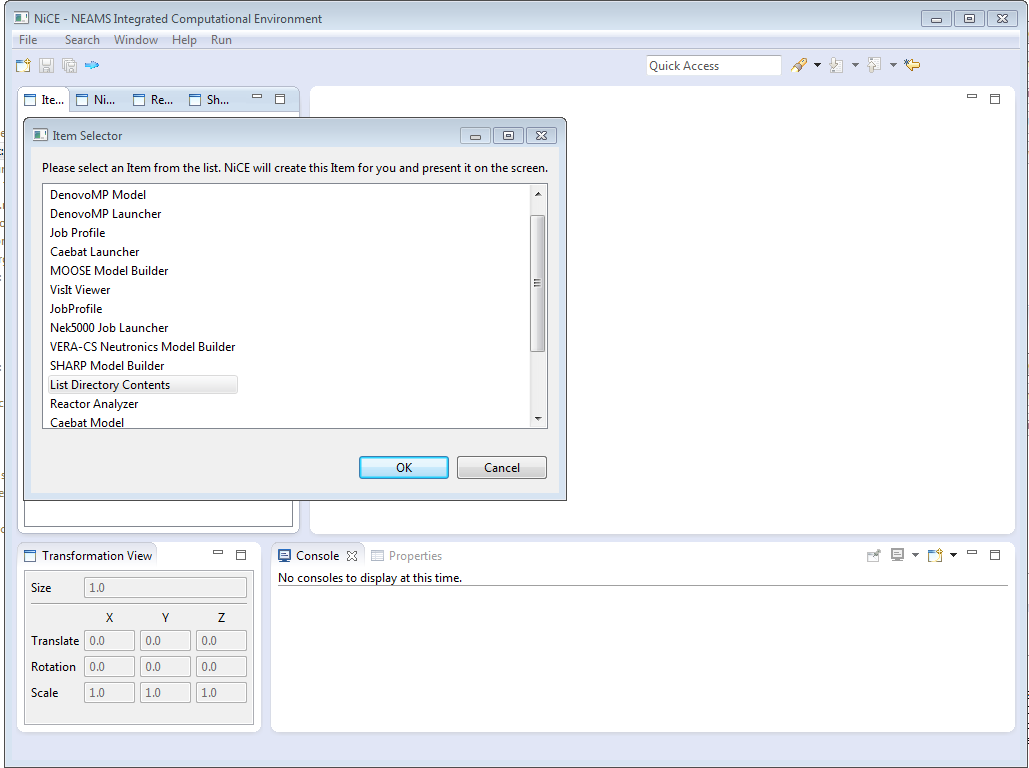
Now select Apply. Now if you select Run, when ICE launches, you should be able to create your customized Item. Remember that ICE must be run as an Eclipse application.
Source code for this exercise
The source code for this section can be checked out from our repo of tutorials here. It will be under ICEYourFirstPluginTutorial > Part 3. The Build tab in the MANIFEST.mf file will look a little bit funky, but hopefully you can make do with the screenshot.
Next Steps
This tutorial allows you to have your plug-in in binary form, so you can customize its behavior, which is necessary for more complex tasks. Users who want to go a step further can check out part 4: Extending your plug-in to generate input files.


