Notice: This Wiki is now read only and edits are no longer possible. Please see: https://gitlab.eclipse.org/eclipsefdn/helpdesk/-/wikis/Wiki-shutdown-plan for the plan.
Connecting to OSGi Endpoint using WSDM Tooling
Connecting to OSGi endpoint using WSDM Tooling
| Author: | Krishna C Shastry |
| email: | krishna.shastry@in.ibm.com |
| Last updated: |
Creating a New WSDM Manageable Endpoint Type
- Create a new Manageability endpoint project by the name Model.
- Select File >> New >> Project... >> Tooling for Web Services Distributed Management >> Manageability Endpoint Project.
- Press Next.
- Give the project name as Model
- Click on Finish
- Now create a MRT file in the above project.
- Right click on project and select New >> other… >> Tooling for Web Services Distributed Management >> New WSDM Manageable Endpoint Type.
- Select Next..
- Give the MRT name as “System Model” and select “Add WSDM Resource Capability” check box.
- Click on “Finish”.


Running OSGi Project
-
Code Generation
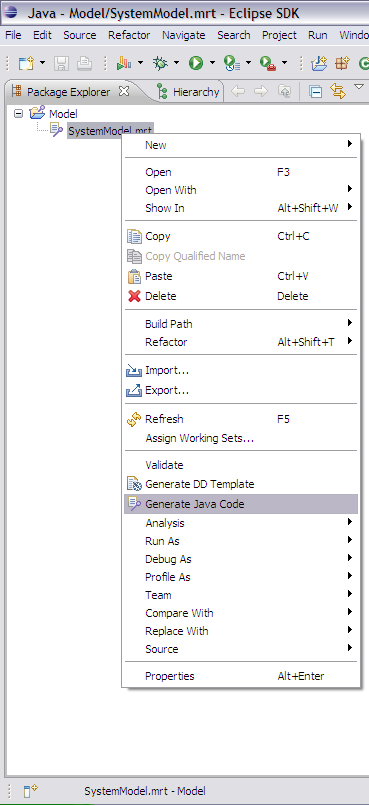
- Right click on the “SystemModel.mrt” file and select “Generate Java Code”.
- Following code generation wizard page will come up. Give a name for the output project.
- Select “OSGi” in the “Platform” combo box and “Axis2” in the “Container” combo box.


Resolving Compilation Errors
- Open the “Manifest.MF” file in the osgi project. Open the “Dependency” tab in it.


File:Addclassfolder.png

Running an OSGi endpoint
- Right click on the “osgi” project
- Select “Run As >> Open Run Dialog” as shown.

- osgi project (i.e.: Project created by you using mrt)
- javax.saaj.api
- org.apache.muse.osgi.wrapper.mini

Connecting to OSGi endpoint using MAX
- Right click on the “osgi” project and select “Profile As >> Open Profile Dialog…” as shown.


Connecting to OSGi endpoint using Proxy
-
Proxy Generation
- Right click on the “SystemModel.mrt” file and select “Generate Java Code”.
- Following code generation wizard page will come up. Give a name for the output project.
- Select “Proxy” in the “Platform” combo box
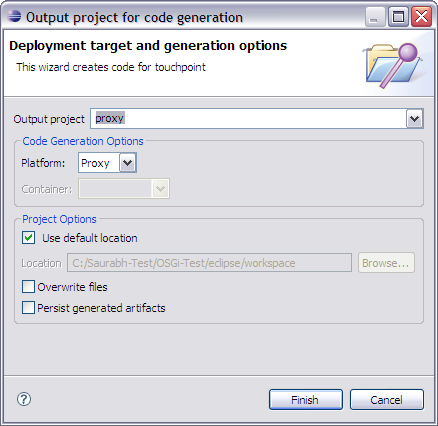
- Click on “Finish” to create a proxy end point project.
- Create a new class called TestClient in the package org.eclipse.www.SystemModel.
- Copy the following code into it.

package org.eclipse.www.SystemModel;

import java.net.URI;

import org.apache.muse.ws.addressing.EndpointReference;
import org.apache.muse.ws.addressing.soap.SoapFault;

public class TestClient
{
	public static void main(String[] args) throws SoapFault
	{
		URI uri = URI.create("http://localhost:81/osgi/services/MyService");
		EndpointReference epr = new EndpointReference(uri);
		MyServiceProxy  proxy = new MyServiceProxy(epr);
		System.out.println(proxy.getResourceId());
	}
}