Notice: This Wiki is now read only and edits are no longer possible. Please see: https://gitlab.eclipse.org/eclipsefdn/helpdesk/-/wikis/Wiki-shutdown-plan for the plan.
STEM Model Generator/Install
Important note: The STEM Model Generator is currently intended for use in the Eclipse SDK only. It is not intended for installation or use within the STEM application.
Before you begin, follow the steps of the STEM/Eclipse Setup to prepare your Eclipse development environment
Contents
Add the STEM Developer Tools Update Site into Eclipse
- Launch your Eclipse SDK
- Select the Help menu and choose Install New Software
-
- When the Available Software dialog opens, click Add
- In Add Repository dialog, enter the following values:
- Name: STEM Developer Tools
- Location: http://download.eclipse.org/stem/update-site/devtools/
-
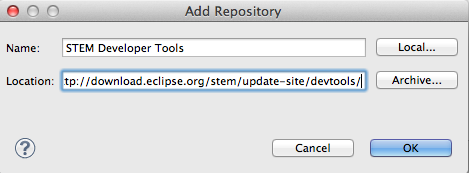
- Click OK


Install the STEM Model Generator
- From the Available Software dialog, select STEM Developer Tools from the drop down
- Choose the STEM Model Generator Feature from the list of available software
- Note: You may have to uncheck Group items by category
-
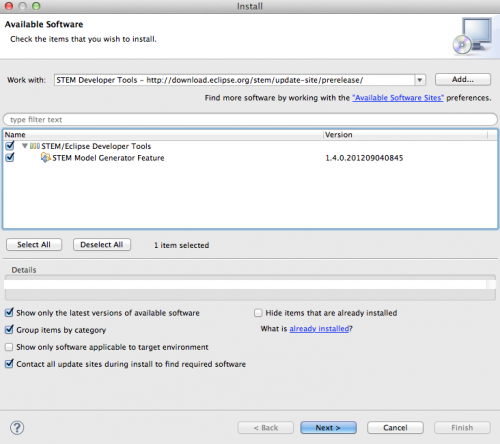
- Click Next
- On the Install Details page, verify STEM Model Generator Feature is listed
- Note: If you did not install the Eclipse Modeling Framework (EMF) previously, it will be installed automatically
-
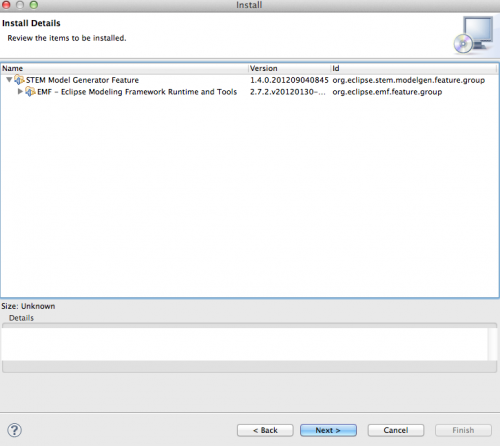
- Click Next
- On the Review Licenses page, review the licenses of the required software
- If you accept all the license terms, select I accept the terms of the license agreements and click Finish
- If you do NOT accept the terms, click Cancel
- The installer will now download and install the software. This process may take 5-10 minutes.
- If prompted with a Security Warning that you're about to install unsigned content, click OK
-
- When the install finishes, you will be prompted to restart Eclipse
- If all your changes are saved, click Restart Now
- Otherwise, click Not Now, save any changes, and restart Eclipse
- After Eclipse restarts, the STEM Model Generator is ready for use


Once you're finished, return to the tutorial and follow the steps to Generate a STEM Computational Model project
Updating the STEM Model Generator
Updating an existing installation of the STEM Model Generator is easy using the Eclipse Update mechanism.
- Launch your Eclipse SDK
- Open the Help menu, select About Eclipse SDK
- On Mac OS X, this is under the Eclipse menu
- In the About Eclipse SDK window, click Installation Details
- In the Eclipse SDK Installation Details window, select STEM Model Generator Feature
-
- Click Update...
- Wait while the Eclipse Updater checks for updates
- If no updates are found, click OK
-
- If updates are found, the Available Updates window will appear
-
- If no updates are found, click OK
- On the Update Details page, click Next
- On the Review Licenses page, review the licenses of the required software
- If you accept all the license terms, select I accept the terms of the license agreements and click Finish
- If you do NOT accept the terms, click Cancel
- The installer will now download and install the updates. This process may take 2-5 minutes.
- If prompted with a Security Warning that you're about to install unsigned content, click OK
-
- When the update finishes, you will be prompted to restart Eclipse
- If all your changes are saved, click Restart Now
- Otherwise, click Not Now, save any changes, and restart Eclipse
- After Eclipse restarts, the STEM Model Generator is updated and ready for use


Uninstall the STEM Model Generator
If you want to completely remove the feature from Eclipse, follow these steps:
- Launch your Eclipse SDK
- Open the Help menu, select About Eclipse SDK
- On Mac OS X, this is under the Eclipse menu
- On the About Eclipse SDK page, click Installation Details
- On the Eclipse SDK Installation Details page, select STEM Model Generator Feature
-
- Click Uninstall...
- Wait while Eclipse calculates the uninstall plan
- When the Uninstall window appears, verify the correct features to uninstall are listed
-
- Click Finish
- Wait while the installer removes the features
- When the uninstall finishes, you will be prompted to restart Eclipse
- If all your changes are saved, click Restart Now
- Otherwise, click Not Now, save any changes, and restart Eclipse
- After Eclipse restarts, the STEM Model Generator is updated and ready for use
