Notice: This Wiki is now read only and edits are no longer possible. Please see: https://gitlab.eclipse.org/eclipsefdn/helpdesk/-/wikis/Wiki-shutdown-plan for the plan.
STEM Model Generator
Contents
- 1 About
- 2 Installation
- 3 Generate a STEM Computational Model Project
- 4 Edit an Existing Computational Model Project
- 5 STEM Metamodel
- 6 Use an existing EMF Ecore/GenModel with the Model Generator
About
The STEM Model Generator supports developers who want to create a new disease or population model in STEM rather than use an existing model. Setting up the basic structure for a new model can be challenging. This tutorial provides step-by-step instructions for using the STEM Model Generator to design and generate the structure of a new STEM computational (disease/population) model project.
Note: This feature is currently intended for use in the Eclipse SDK only.
Acknowledgements
The development of the Model Generator tool was sponsored in part by the German Federal Institute for Risk Assessment (BfR). Additional special thanks to Alex Falenski from BfR for assistance creating and editing this document.
Installation
- See Main Article: STEM Model Generator Installation
Important note: The STEM Model Generator is currently intended for use in the Eclipse SDK only. It is not intended for installation or use within the STEM application.
Generate a STEM Computational Model Project
Launch the STEM Model Generator Wizard
- Open the Eclipse SDK
- Open the File menu, New, and choose Other
- You can also do Control-N (Command-N on Mac OS X)
-

- In the list of Wizards, expand the STEM category and select New STEM Model Project
-
- Click Next
- Choose Create and configure a new STEM Model Package
-
- Click Next


Configure the Model Package
The model package is the container for all models in a given package. A model package generates an Eclipse plug-in project.

Parameter Name Data Type Example Value Package Name String
(Java Identifier)CattleSalmonellosis Package Prefix String
(Java Package Identifier)com.example.diseasemodels
The Package Name and Package Prefix are combined to create the resulting Eclipse plug-in/project identifier. For example, the model package with values above will generate an Eclipse plug-in/project with ID com.example.diseasemodels.cattlesalmonellosis.
Add/Edit a Computational Model
When you're ready to add a computational model to the package, from the Model Package page, click Add Model. To edit an existing computational model, select it in the Contained Models list and click Edit Model. This will launch the Computational Model Wizard.
Configure Model Properties
Model properties are the most basic settings of a STEM Computational Model. Properties include the model's name, the model's type, and which parent model it extends and inherits parameters and compartments from. All are required.

Property Type Example Description Model Name String
(Java Identifier)CattleSalmonella The model's name. This value will be the Java class name of the generated model. Should contain alphanumeric characters, no spaces, and cannot begin with a number. Model Type String from list DiseaseModel The underlying model type. If you're implementing a Disease Model, select DiseaseModel. A Population Model, select PopulationModel. This value is used to find appropriate parent models. Parent model Computational Model SIR The computational model this new model will extend. If you're not sure, select the textbook model that most closely resembles the compartment model you're implementing (SI, SIR, SEIR)
When you're finished, click Next to configure the Model Parameters
Configure Model Parameters
Model parameters - also called rate parameters - represent user-defined variables that are passed into the computational model. The values can represent many things, but are often variables to the differential equations that make up the model. Users are asked to provide values for these parameters when a new Disease/Population/etc is created in STEM. Examples include Transmission Rate, Immunity Loss Rate, etc.

By default, a model inherits parameters from its ancestor models. These are shown in light gray italics. You cannot edit or remove parameters inherited from another model.
To add a new model parameter, click Add Parameter. To edit an existing parameter, select one from the list and click Edit Parameter.

When you click Add or Edit Parameter, the Model Parameter Editor window opens. Use the form provided to set the properties for the model parameter.
Property Required? Type Example Description Name Yes String (Java Identifier) transmissionRate2 The parameter's name. This is the name of the Java member variable in the resulting computational model. This required property is a Java identifier and should contain alphanumeric characters, no spaces, and cannot begin with a number. Display Name Yes String Transmission Rate 2 The display name of the parameter. This should be a short, user-friendly description of the parameter. Data Type Yes EClassifier double The data type of the parameter. This will be the Java type of the resulting member variable. Tip: For models with multiple populations, select a ValueList or ValueMatrix data type. Default Value Yes** Type-specific 0.0 The default value of the parameter if a value is not provided by the user. A default value often accompanies the parameter in literature. **This field is required for numeric data types (like double, integer, float, etc). Constraints No Constraint minValue Parameter constraints are used to restrict the allowed parameter values. See below for more details about Parameter Constraints. Units No String PM/TP User interface message that explains what units are expected for this parameter Help Message No String User interface message that further explains the purpose or other details about this parameter. Missing Message No String User interface message that displays when no value is entered for this parameter. Invalid Message No String User interface message that displays when an invalid value (e.g. violates the constraints) is entered for this parameter.
Parameter Constraints
Parameter constraints are used to restrict the allowed values for a model parameter. A parameter can have multiple constraints. Each constraint is evaluated independently and must be fulfilled for a value to be accepted.
- Note: You can add multiple constraints of the same type. However, for certain constraint types, this may not make sense and may cause a value to never be valid. For example, it does not make sense to create two minValue constraints.
To add a new constraint, click Add . To edit an existing constraint, select one from the constraint list and click Edit.

Use the Constraint Editor to select the Constraint Type and enter a Constraint Value. When finished, click OK.
- Available Constraints
Constraint Type Example Constraint Value Description minValue 0.0 The minimum numeric value allowed for the parameter maxValue 1.0 The maximum numeric value allowed for the parameter More constraint types coming soon...
When you're finished working with Model Parameters, click Next to configure Model Compartments.
Configure Model Compartments
Model compartments are the second type of variable in the computational model and represent the various groupings within the model lifecycle. Unlike Model Parameters, however, these values are not defined by the user, but instead are calculated as the output from the model's differential equations. For more information, please read the Introduction to Compartment Models.

Like Model Parameters, Model Compartments are inherited from the parent model. Compartments inherited from another model are shown in light gray italics and cannot be edited or removed. If the compartments from your parent model do not closely match the compartment model you're implementing, you can elect to choose a different model to inherit compartments from.
- Note: Just because a compartment does not match the compartment name in literature does not mean it's not logically the same or can't be reused. Consider this before deciding not to use an inherited compartment.
To add a new compartment, click Add Compartment. To edit an existing compartment, select it from the list and click Edit Compartment.
Use the Compartment Editor dialog to edit the compartment's properties. All properties are required.. When finished editing the compartment, click OK.

Property Type Example Description Compartment Name String (Java identifier) s The name of the compartment. This is also the name of the resulting Java member variable. It should contain alphanumeric characters, no spaces, and cannot begin with a number. Compartment Type String Standard The property of values stored in the compartment. This helps determine what kinds of underlying calculations occur. Example types are Standard, Incidence, and Deaths. Data Type EClassifier double The data type of the compartment. Currently only valid type is double.
When you're finished working with compartments, the model is complete. Click Finish.
Run the Code Generator
When you're finished working with the computational models in the model package, you're ready to run the code generator.

From the Model Package page, click Next.
On the Generator Options, configure advanced properties for the code generator.
-
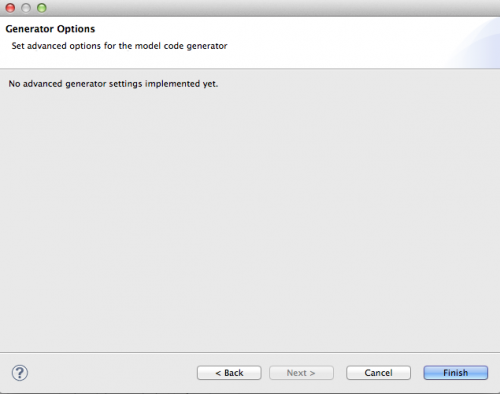
- Advanced Generator Options coming soon!

When finished, click Finish.
If no errors are found, the code generator will now run. This process may take 1-2 minutes.

Work with your Generated Computational Models
Once the code generator finishes, the new computational model project will be imported into your Eclipse Workspace. You can now implement the model's mathematics directly into the new Java classes.
The new project is named after your Package Name and Package Prefix. For example, if you entered CattleSalmonellosis for the name and com.example.diseasemodels as the prefix, the resulting Eclipse project will be com.example.diseasemodels.cattlesalmonellosis.
- In Eclipse's Package Explorer, find your new project and expand it
- Under your project, expand the src tree
- This will list several items that are named [YourProjectName].something.
- Expand [YourProjectName].impl tree
-
- Double click on your computational model's Java class. This is named [YourModelName]Impl.java.
- Note: Double check to be sure you didn't select the LabelImpl/LabelValueImpl.java
- In the Java file editor, scroll down to the calculateDeltas(...) method
-
- Implement Scientific Logic!
- See here for more help
- Save


Load and Run Your Computational Model in STEM
Add Your New Model Project to STEM's Run Configuration
When you're ready to run and test your computational model in STEM, you must first tell Eclipse to include it in STEM's launch profile.
- Please make sure you've previously launched STEM from Eclipse before following these steps. See: Launching STEM from Eclipse
- In Eclipse, open the Run menu and select Run Configurations...
- In the Run Configurations window, select stem.product (or your STEM Launch configuration) from the list of configurations
- Select the Plug-ins tab
- In the Plug-ins tab, find your new new model project in the list and make sure it's checked
-
- Click Add Required Plug-ins
- Click Apply
- Click Run (this will launch STEM)

Create a New Disease/Population in STEM
- When STEM launches, switch to the Designer perspective
- Make sure you have a project in the Project Explorer
- Launch a Disease/Population Wizard from the New menu
- If your computational model is a Disease Model, choose Disease
- If your computational model is a Population Model, choose Population Model
-
- In the New Disease Wizard / New Population Model Wizard, choose your model from the Disease Model / Population Model dropdown
-
- Enter values for the model parameters
- Click Finish
- Compose the rest of your scenario and run it!
- Stop simulation and fix the arithmetic errors :)


Edit an Existing Computational Model Project
If you need to modify a computational model project that has already been code-generated, you do so by launching the Computational Model Project Wizard from the metamodel file.
- In Eclipse, navigate to your computational model project in the Package Explorer
- In the model folder, double click on [YourPackageName].metamodel
-
- In the Metamodel Editor, expand the platform object tree
- Select the Package
- Right click and select Code Generation Wizard
-
- Follow the steps in above sections to Generate a STEM Computational Model Project


Notes About Editing an Existing Computational Model Project
- The Model Generator is not intended for use on existing Disease/Population model projects that were previously created by hand. Please do not try running the Model Generator on projects that it did not originally create. You will almost certainly have to revert to what's in SVN.
- Renaming/removing models, parameters, and compartments may cause compiler errors that will need to be fixed manually
- If you change the name of an existing model, then a new model file will be created. Any code you implemented must be copied manually.
- If you change the Package Name or Package Prefix, then a new model project will be created. Any code you implemented must be copied manually.
- Any custom changes made to the .ecore or .genmodel files will be lost
STEM Metamodel
- See Main Article: STEM Metamodel
The STEM Model Generator is backed by the STEM Metamodel. For more information about the STEM Metamodel, including the schema, see the main article.
Use an existing EMF Ecore/GenModel with the Model Generator
- See Main Article: Model Generator Ecore EAnnotations
It's possible to use the STEM Model Generator without using the Model Generator Wizard by EAnnotating to your EMF Ecore and applying the correct settings to your EMF GenModel. See here for instructions.