Notice: this Wiki will be going read only early in 2024 and edits will no longer be possible. Please see: https://gitlab.eclipse.org/eclipsefdn/helpdesk/-/wikis/Wiki-shutdown-plan for the plan.
Difference between revisions of "Efxclipse/Tutorials/Tutorial2"
(→Create an Eclipse ViewPart) |
|||
| Line 8: | Line 8: | ||
<li>Setup a target platform | <li>Setup a target platform | ||
<ol> | <ol> | ||
| − | <li>On first page select "Default: Default target for running platform"</li> | + | <li>Start Eclipse with no open projects</li> |
| + | <li>On menu item "Window", select "Preferences" and then expand the list item "Plug-in Development"</li> | ||
| + | <li>Click the list item "Plug-in Development" item "Target Platform"</li> | ||
| + | <li><strike>On first page select "Default: Default target for running platform"</strike></li> | ||
<li>Click on "Add..." and select "Software Site"</li> | <li>Click on "Add..." and select "Software Site"</li> | ||
<li>Point to the p2 repository at http://download.eclipse.org/efxclipse/runtime-nightly/site/</li> | <li>Point to the p2 repository at http://download.eclipse.org/efxclipse/runtime-nightly/site/</li> | ||
Revision as of 14:16, 16 March 2014
Create an Eclipse ViewPart
JavaFX allows you to embed JavaFX scenes into SWT UIs using the FXCanvas class. The following tutorial will guide you through the creation of a JavaFX-enabled ViewPart.
- Setup a target platform
- Start Eclipse with no open projects
- On menu item "Window", select "Preferences" and then expand the list item "Plug-in Development"
- Click the list item "Plug-in Development" item "Target Platform"
On first page select "Default: Default target for running platform"- Click on "Add..." and select "Software Site"
- Point to the p2 repository at http://download.eclipse.org/efxclipse/runtime-nightly/site/
- Expand the "FX Target" entry and select "RCP 3.x Target Platform Feature"
- UNCHECK "Include Required software"
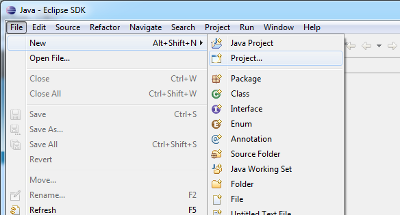
- File > New > Project ...
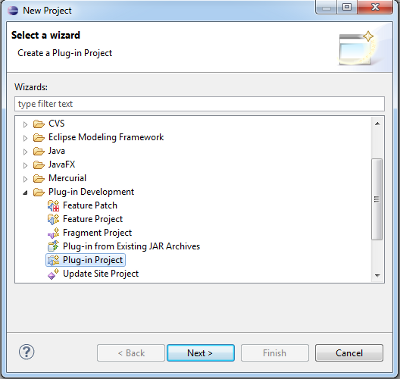
- Select "Plug-in Project" and click the "Next" button.
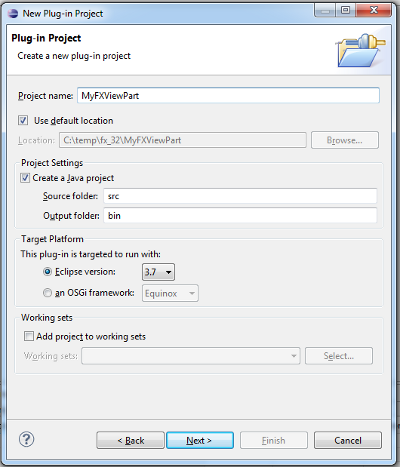
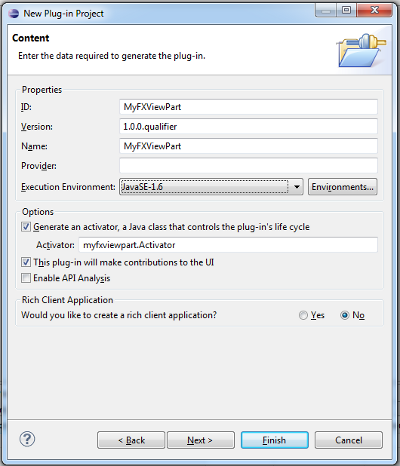
- Enter a project name and click the "Next" button.
- Make sure that "This plug-in will make contributions to the UI" is checked and deselect the RCP creation. Click "Next".
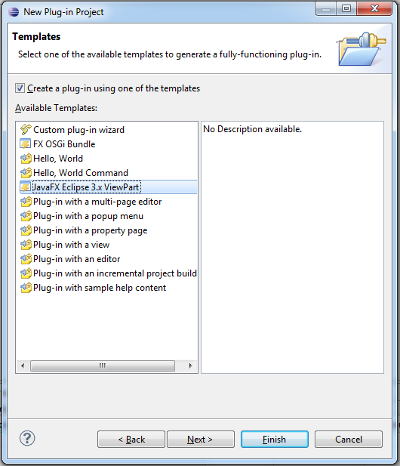
- Select the "JavaFX Eclipse 3.x ViewPart" template and click "Next".
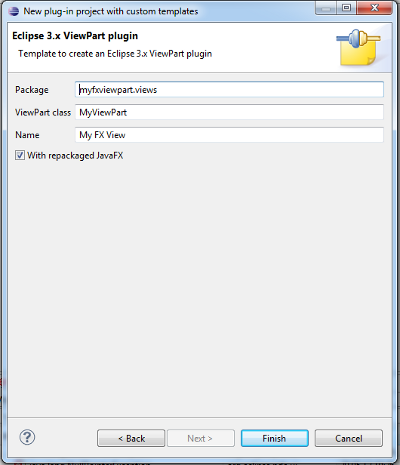
- Keep the default settings and click "Finish".
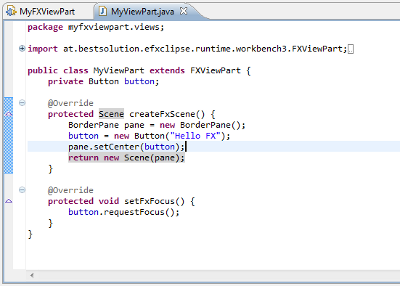
- The result of the wizard is a new OSGi bundle with your ViewPart class.

- Implement your view by adding some JavaFX code to your ViewPart class.
- Launch an "inner Eclipse" by bringing up the context menu on your project and select Run As > Eclipse Application.
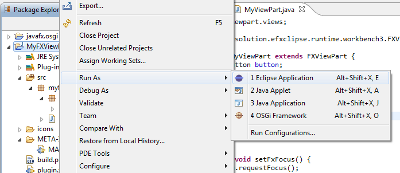
- Close the launched instance and open your the Launch Configuration and add -Dosgi.framework.extensions=org.eclipse.fx.osgi to your VM args and launch once more
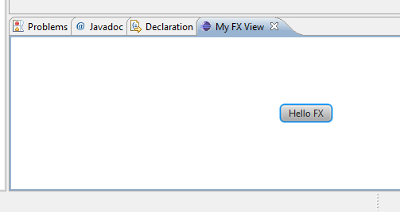
- In the running application, bring up Quick Access (Ctrl+3) and enter "My Fx View". Select the presented choice to open your view.
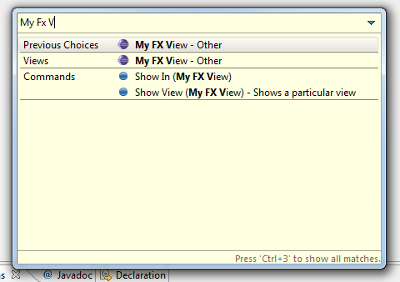
- A view with your JavaFX content will be shown at the bottom.