Notice: This Wiki is now read only and edits are no longer possible. Please see: https://gitlab.eclipse.org/eclipsefdn/helpdesk/-/wikis/Wiki-shutdown-plan for the plan.
Difference between revisions of "Qt Selector Account UI"
| Line 3: | Line 3: | ||
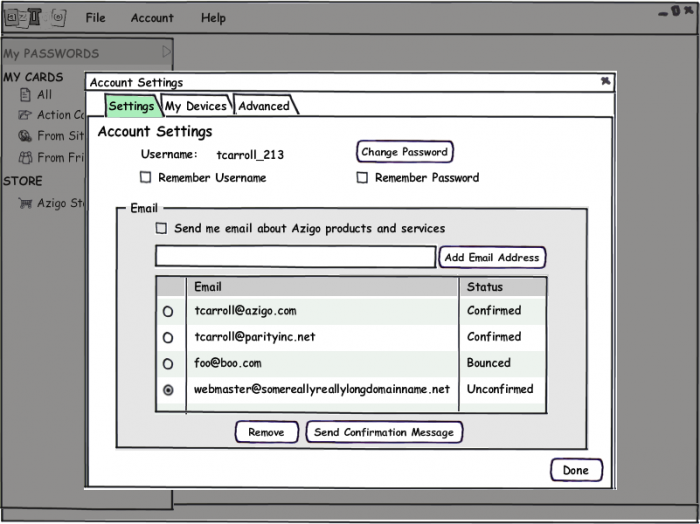
This page is to contain mockups and description of the Account Selector UI. | This page is to contain mockups and description of the Account Selector UI. | ||
| − | == Background == | + | == Background == |
| − | The selector can optionally connect to an external [[Authentication Service 1.1]] for the purpose of gaining access tokens that it can use to access other selector supporting services such as the [[Attribute Service 1.1]], [[CardSynce Service 1.1]]. | + | The selector can optionally connect to an external [[Authentication Service 1.1]] for the purpose of gaining access tokens that it can use to access other selector supporting services such as the [[Attribute Service 1.1]], [[CardSynce Service 1.1]]. |
== Case 1: User does not have account at authentication service:<br> == | == Case 1: User does not have account at authentication service:<br> == | ||
| Line 63: | Line 63: | ||
<br> | <br> | ||
| − | [[Image:Accounts-settings.png|700px]] | + | [[Image:Accounts-settings.png|700px]] |
| + | |||
| + | == See Also == | ||
| + | |||
| + | *[[Qt Selector 1.1 UI]] | ||
Revision as of 10:46, 26 October 2009
{{#eclipseproject:technology.higgins|eclipse_custom_style.css}}This page is to contain mockups and description of the Account Selector UI.
Contents
Background
The selector can optionally connect to an external Authentication Service 1.1 for the purpose of gaining access tokens that it can use to access other selector supporting services such as the Attribute Service 1.1, CardSynce Service 1.1.
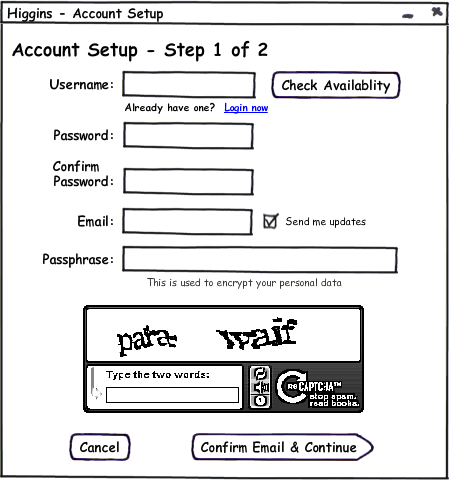
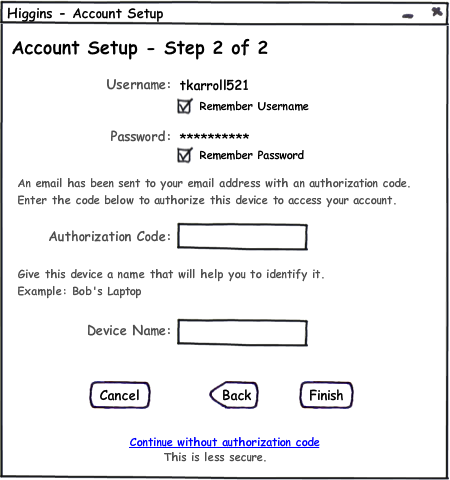
Case 1: User does not have account at authentication service:
- Clicking Login Now switches to Case 2.
- After Step 1, server sends the OTP password for serialized selector.
- Continue without authorization code creates the account in the "non-serialized" mode (does not require enrollment of selectors).
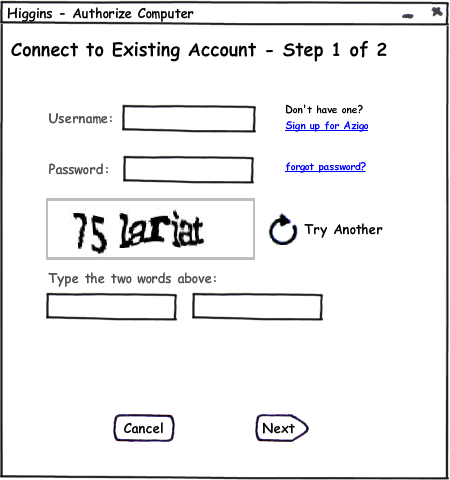
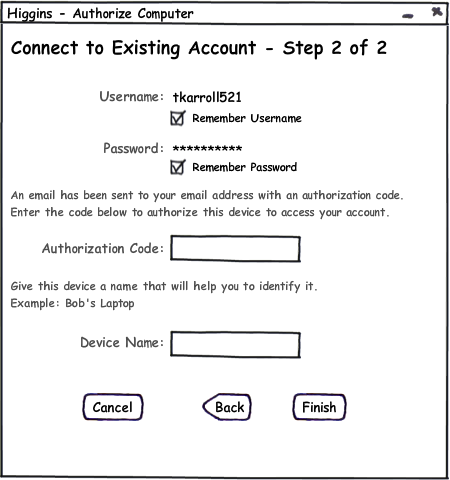
Case 2: User has account at auth service.
- Clicking Sign up for Account switches to Case 1.
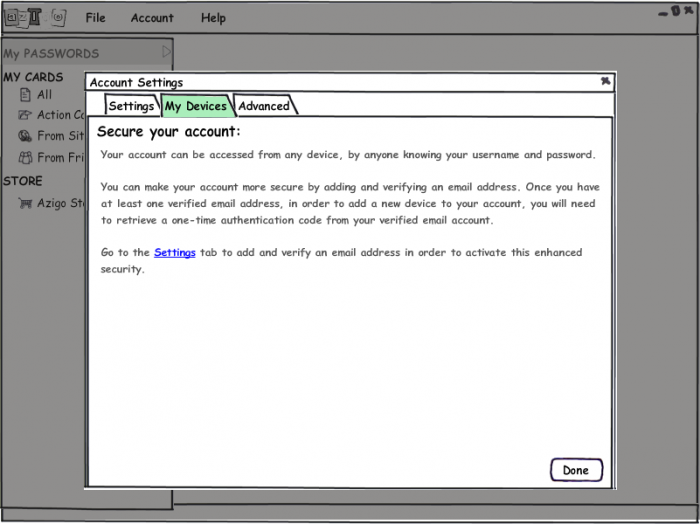
In this case, if the account is already "serialized", they get the below message. If the account is not "serialized" then there is no step 2 - they just are connected.
Case 3: Selector previously configured
- If the device is not logged-in, but it does have one or more saved usernames, this should be the screen that is first shown to the user.
- Username is a pick list of all usernames that are authorized and "remembered" on this device.
- Clicking Add another username switches to Case 2.
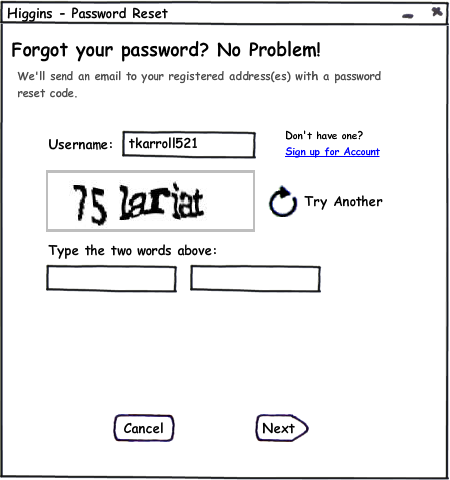
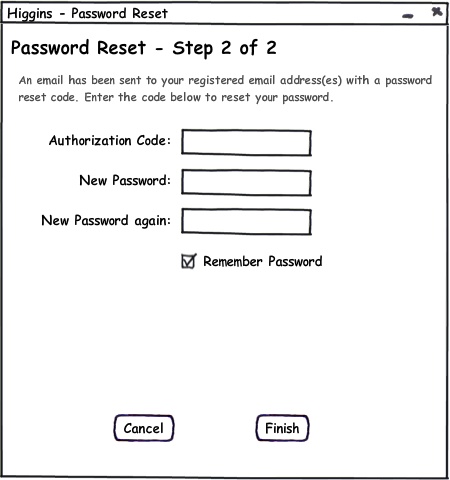
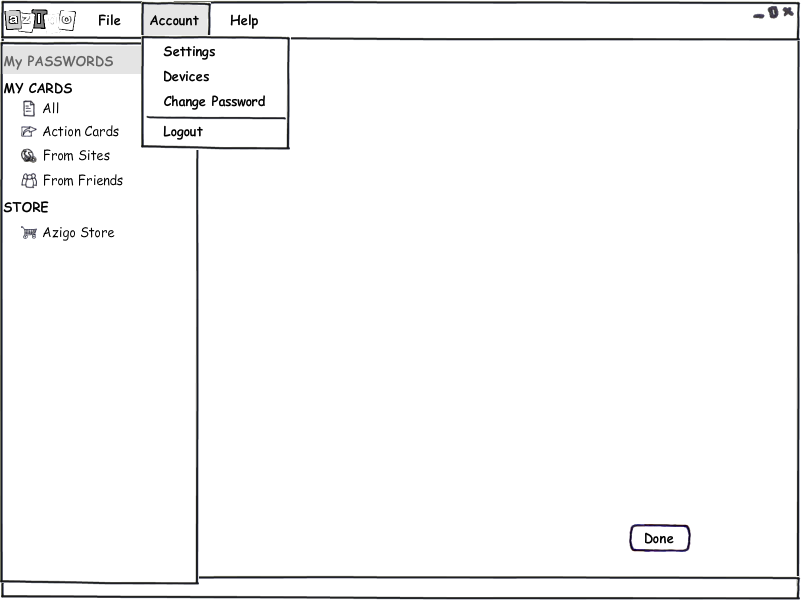
Case 4: Forgot Password
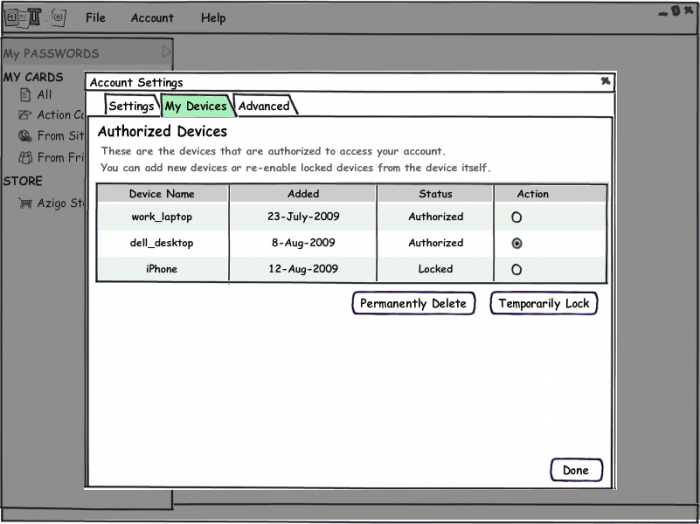
Case 5: Manage Selectors


