Notice: This Wiki is now read only and edits are no longer possible. Please see: https://gitlab.eclipse.org/eclipsefdn/helpdesk/-/wikis/Wiki-shutdown-plan for the plan.
Qt Selector Account UI
This page is to contain mockups and description of the Qt Selector Account UI, which is a portion of the Qt Selector 1.1 UI.
Contents
Background
- The selector can optionally connect to an external Authentication Service 2.0 for the purpose of gaining access tokens that it can use to access other selector supporting services such as the Attribute Service 1.1, CardSynce Service 1.1.
- See Field Validation for validation rules for text entry fields.
Use Cases
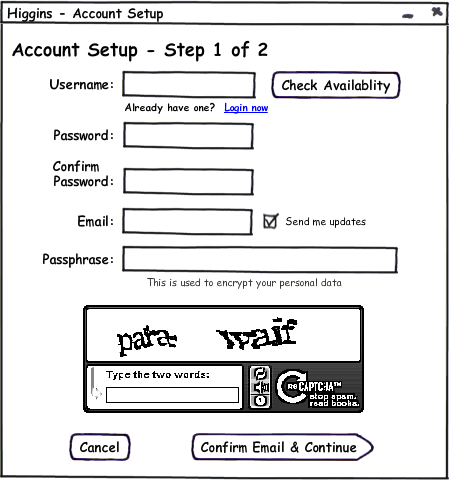
Case 1: User does not have account at authentication service:
- Clicking Login Now switches to Case 2.
- No CAPTCA is required to complete the Check Availablity transaction, unless too many attempts have been made, in which case the user is challenged with a CAPTCHA.
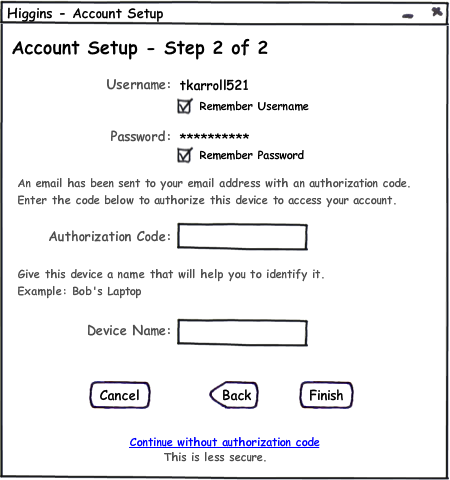
- After Step 1, server sends the OTP password for serialized selector.
- Continue without authorization code creates the account in the "non-serialized" mode (does not require enrollment of selectors).
- Passphrase is used to locally create an encryption key, for instance by means of PBKDF2. It is not sent to the Auth service. Alternatively, if the Password is not know to the auth service (i.e., only proof of it is known), then the Password can be used to locally create an encryption key, and the Passphrase is not necessary.
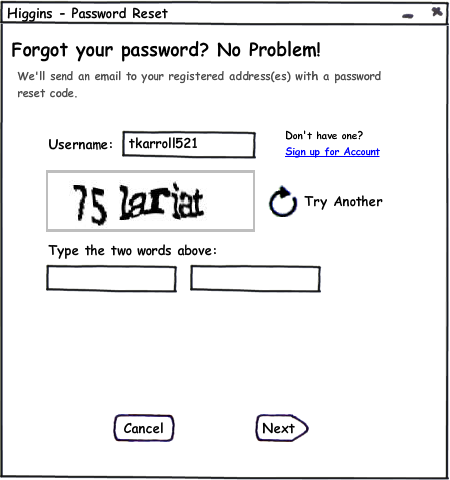
- Different mockups are shown with different captchas just to spur ideas. When implementing, pick one CAPTCHA technology that allows the user to:
- Request a new CAPTCHA if the one they have is indeciperable
- Request an audio CAPTCHA
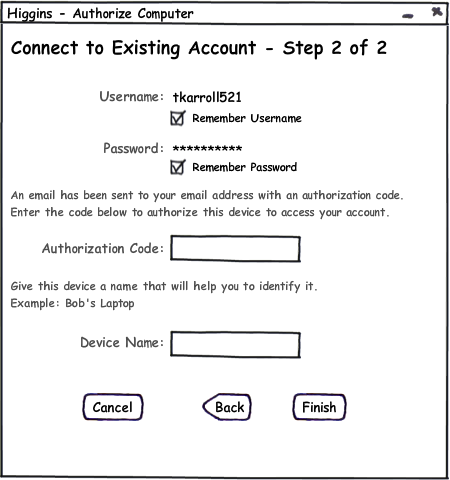
- Authorization Code is the OTP sent to the user
- Device Name is a user-chosen name for this device. It would be nice to allow spaces in the names. Device Name must be unique for the user account.
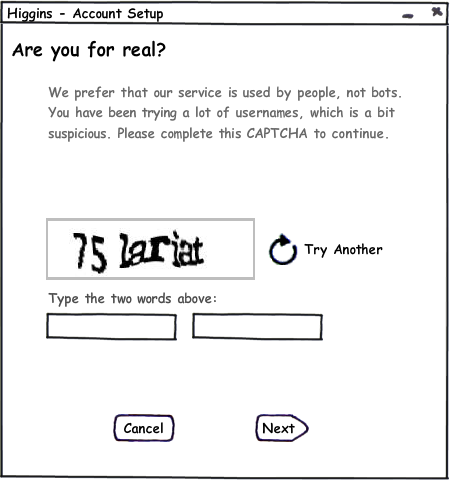
This is the screen for the case where the user has exceeded the allowed number of tries to find an available username:
After completing this CAPTCHA, they return to Step 1, but should not have to do another CAPTCHA there.
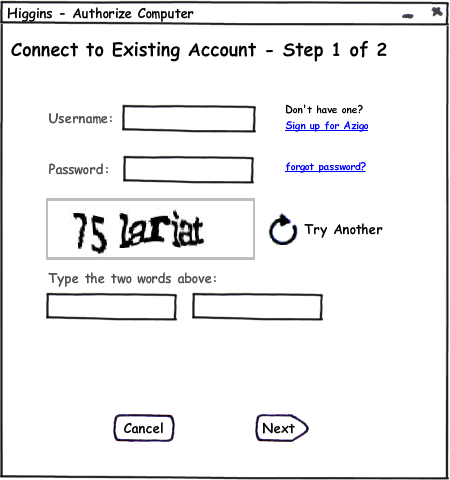
Case 2: User has account at auth service.
- Clicking Sign up for Account switches to Case 1.
- Clicking forgot password? initiates the password reset flow.
- If the selector was downloaded directly from a logged-in session at the Auth service, the Username field would be pre-filled. The password would still need to be entered.
- In this case, if the account is already "serialized", they get the Step 2 screen, below.
- If the account is not "serialized" then there is no step 2 - they just are connected.
- In order to prevent an auth code guessing attack, the auth code for a user should be expired after 5 failed attempts, and a 5-minute lock set preventing them from requesting another auth code.
Case 3: Selector previously configured
This is the screen first shown to the user in the following situation:
- The device is not currently logged-in
- it does have one or more saved usernames
- The user did not set the "remember password" flag
Behavior is as follows:
- Username is a pick list of all usernames that are authorized and "remembered" on this device.
- Clicking Add another username switches to Case 2.
- Clicking forgot password? initiates the password reset flow.
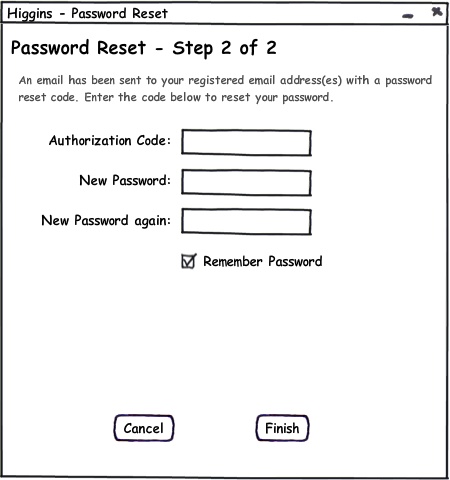
Case 4: Forgot Password
- Clicking Sign up for Account switches to Case 1.
- Upon clicking Next, the server sends an OTP to the all the registered contact points (just email for now, but in the future it could include SMS, phone, etc.).
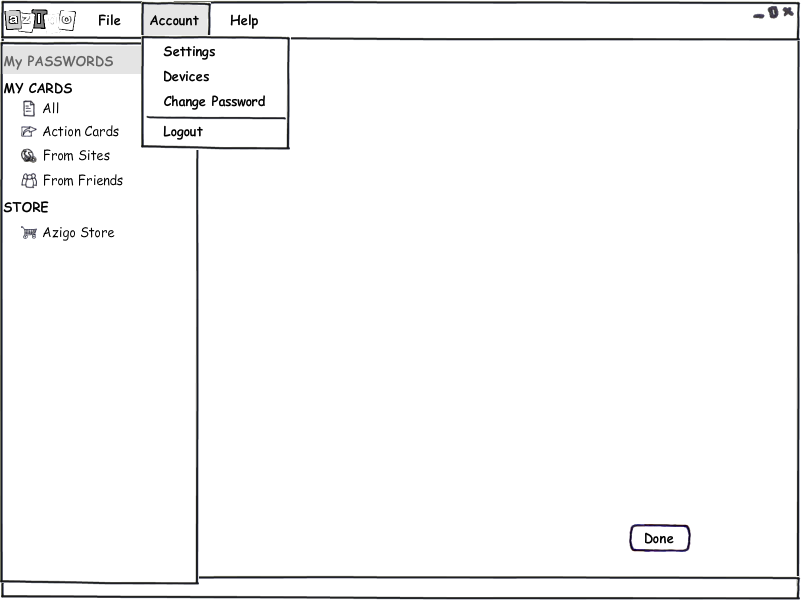
Case 5: Manage Selectors
- This is from a logged-in session in the selector.
Devices Tab
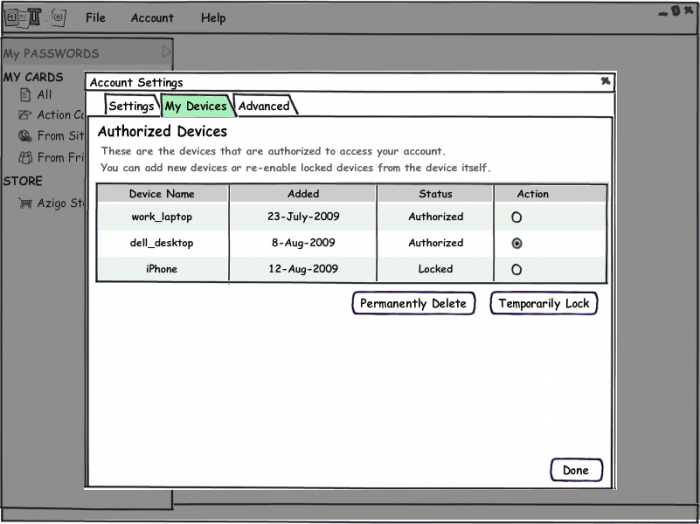
- The My Devices tab shows a list of devices that are authorized to connect to the account.
- Device Name is what the user entered in Step 2 of Case 1 or Case 2.
- Actions
- Permanently Delete - this removes the record of the device from the account, including removing it from this list. If a user subsequently tries to use that device, it will behave as if it is a new selector, never authorized to the account.
- Temporarily Lock - this sets a flag in the account that the device is locked. The device stays in this list, and can be un-locked from this list. If a user tries to use a locked device, they get a message that it is locked, and are not allowed to access.
- Device in use - should locking/deleting of the device being used to do the locking/deleting be allowe? If yes, then need to give the user a warning, and then immediately log them out.
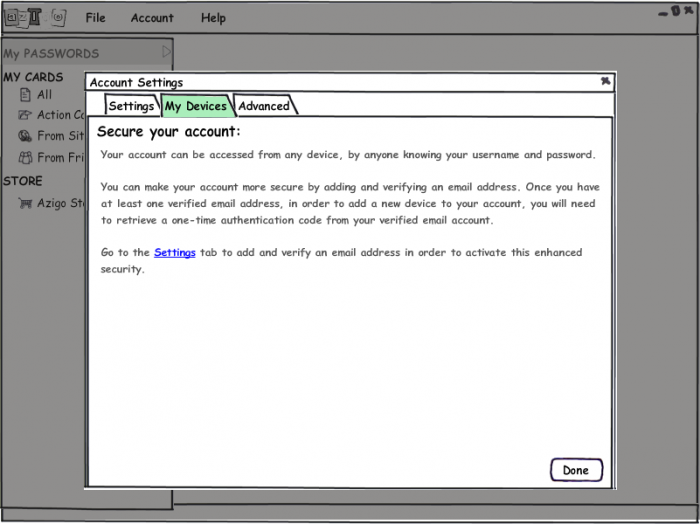
- If the account is not "serialized", then this screen is shown for the My Devices tab.
Settings Tab
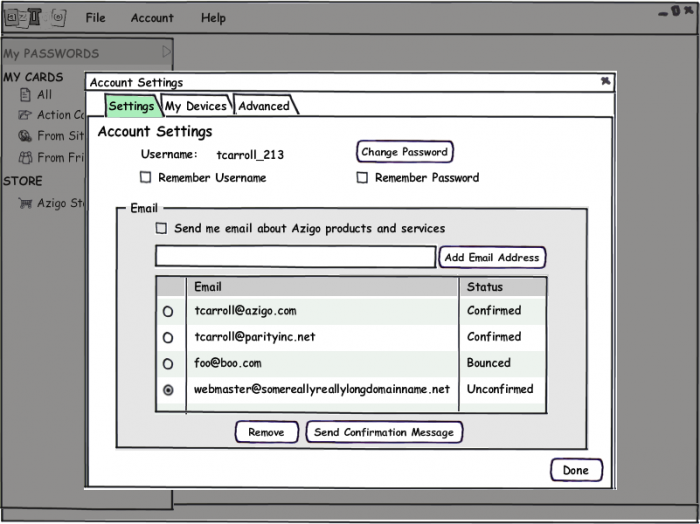
- While the initial account setup collects one email address, this screen allows the user to add/remove additional email addresses. It could be expanded to support other contact points (SMS, voice phone, etc. in the future)
- Status column shows if an email has been entered but not confirmed, confirmed (user entered correct OTP), or bounced (server recieved hard bounce when sending an OTP.
- Entering a new email or clicking Send Confirmation Message sends a new OTP to the user - for instance, if they have adjusted their SPAM filter after not getting the initial message, or if the initial message expired. Since this process is just proving control of an an email, and not a specific selector, the feedback of this OTP to the Auth service can be via a web page - i.e., just click a link in the email to confirm. Alternatively, we could present a UI in the selector similar to Step 2 of Case 1 or Case 2.
Case 6: "Remembered" Password
In the case where a user has chosen the "remember password" option, then on startup, the login trasaction happens automatically without displaying any Accounts UI.
Auto-Start
The Accounts UI should auto-start whenever the selector is started, in the correct mode corresponding to the state of the stored account data:
- No account info stored in selector - start in Case 1
- Account data is stored in selector, password is not 'remembered' - start in Case 3
- Account data is stored in selector, password is 'remembered' - bypass the account UI - just do a login and open the selector without showing the account UI, as per Case 6.


