Notice: This Wiki is now read only and edits are no longer possible. Please see: https://gitlab.eclipse.org/eclipsefdn/helpdesk/-/wikis/Wiki-shutdown-plan for the plan.
VIATRA2/BPELVerif
This page is dedicated to the BPEL Verification Tool case study, which incorporates an end-to-end business process verification toolset.
Contents
Description
Installation
The solution can be easily installed into an Eclipse (3.5+) using our dedicated update site. However, first you have to add several other update sites as well, including VIATRA2 core, Eclipse BPEL Project and Sensoria Development Environment. After selecting the BPEL Verification feature, the plugin dependencies are automatically resolved, as long as you have the default Eclipse update site (Galileo/Helios), the three additional sites in your site list, and have the "Contact all update sites..." enabled.
Execution
Open the two views included in the tool, the BPEL Verification Tool and the BPEL Animation Controller, both can be found by selecting "Window/Show View/Other..." and then opening the BPEL Verification category.
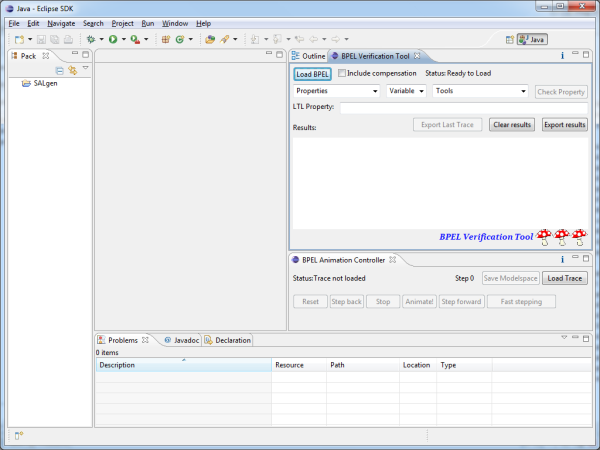
The suggested layout for the opened views can be observed in the following image (drag and drop the views to move them to the side bar and resize them as necessary):
Next, the "Load BPEL" button (BPEL Verification Tool view) is used to create a verifiable formal specification (by selecting a .bpel and it's corresponding .wsdl file, the resulting .sal is created in the SALgen project folder), then the Properties, Variables and Tools drop-down menus help in defining the requirement and selecting the appropriate model checking tool. The "Check Property" button starts the verification and the results can be viewed textually in the same view when it finishes. In the case of a counter-example (trace), the "Export Last Trace" button allows the user to save it to a .cex file.
The saved counter-examples are opened with the "Load Trace" button (.bpel, .sal, .cex), after which the extended BPEL Designer editor is opened automatically and the trace is processed by the back-annotation transformation (this operation may take some time on larger processes). The animation can be started, when the control buttons become enabled and the names of the variables in the BPEL editor change to yellow (uninitialized state).
Use the "Step forward", "Step back" buttons to navigate step-by-step, or click on "Animate!" to start a continuous playback. You can return to the beginning of the trace with the "Reset" button or enable faster animation (useful for larger models) with the "Fast stepping" toggle button.
The "Save Modelspace" button exports the current state of the underlying VIATRA2 modelspace so that it can be opened for manual execution and traceability visualization.
Further information may be found in the Eclipse Help of the tool, reachable through the small "i" in the upper right corner of both view.


