Notice: this Wiki will be going read only early in 2024 and edits will no longer be possible. Please see: https://gitlab.eclipse.org/eclipsefdn/helpdesk/-/wikis/Wiki-shutdown-plan for the plan.
Swordfish Documentation: ODE deployment wizard
Contents
Creating the ODE depoyment project
Select File > New Wizard > Swordfish > ODE deployment project

Next follow the standard New Eclipse Plugin project wizard. Basically that's it
The functionality provided by the ODE depoyment project
The created ODE deployment project is the ordinary Eclipse plugin project with Java nature installed. The only difference is that this project type leverages the custom builder to create/modify ode configuration. If one opens the projects properties->builders dialog he shall see the following
 br>
br>
The OdeArtifactsProjectBuilder is responsible for creating two spring xml application context files in the META-INF/spring directory:
- bpel-exporter.xml that points to the folder containing deploy.xml and bpel process files being deployed
- http-endpoints.xml containing the configuration for the servicemix http outbound/inbound endpoints used by the bpel process
The OdeArtifactsProjectBuilder tracks changes in the project's source folders, and creates/modifies the listed configuration files.
The builder works by the following scenario:
- it scans the deploy.xml file to retrieve the partner links used in the deployed process
- examines the bpel process file to extract wsdl locations used by the partner links
- parses wsdl files to build the http endpoint configuration
- rebuilds bpel-exporter.xml and http-endpoints.xml files
If no deploy.xml or bpel process file can be found within the project's source folders, no artifacts will be produced by the builder. If any resource tracked by the builder is changed(e.g. .wsdl files, deploy.xml or .bpel ) the artifacts will be modified correspondingly
The example
- Create the new ODE deployment project by selecting File > New Wizard > Swordfish > ODE deployment project. Specify the name of the project e.g. SampleODEProject
The project should look like: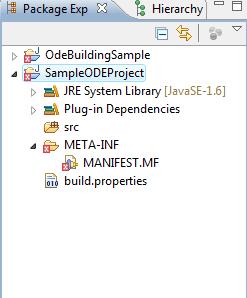
- create the new folder "ode" within the SampleODEProject /src directory
- paste into the created folder all the files from https://dev.eclipse.org/svnroot/rt/org.eclipse.swordfish/trunk/org.eclipse.swordfish.tooling.ode.ui.test/test/resources/ode/flight_booking

The OdeArtifactsProjectBuilder will create bpel-exporter.xml and http-endpoints.xml files within the META-INF/spring dir

The content of the bpel-exporter.xml:
<beans xmlns="http://www.springframework.org/schema/beans"
    xmlns:xsi="http://www.w3.org/2001/XMLSchema-instance"
    xmlns:osgi="http://www.springframework.org/schema/osgi"
    xmlns:util="http://www.springframework.org/schema/util"
    xmlns:p="http://www.springframework.org/schema/p"
    osgi:default-cardinality="0..X"
    default-lazy-init="false"
    xsi:schemaLocation="
  	http://www.springframework.org/schema/beans
  	http://www.springframework.org/schema/beans/spring-beans.xsd
  	http://www.springframework.org/schema/util
  	http://www.springframework.org/schema/util/spring-util.xsd
  	http://www.springframework.org/schema/osgi
  	http://www.springframework.org/schema/osgi/spring-osgi.xsd">


    <bean id="bpelArtifactExporter"
          class="org.eclipse.swordfish.plugins.ode.support.BpelArtifactExporter"
          p:bpelArtifactDirectory="classpath:/ode/"/>


</beans>
The content of the http-endpoints.xml:
<beans xmlns="http://www.springframework.org/schema/beans"
       xmlns:xsi="http://www.w3.org/2001/XMLSchema-instance"
       xmlns:osgi="http://www.springframework.org/schema/osgi"
       xmlns:http="http://servicemix.apache.org/http/1.0"
       xmlns:jaxws="http://cxf.apache.org/jaxws"
       xmlns:booking="http://www.eclipse.org/swordfish/samples/FlightBooking/"
       xmlns:reservation="http://www.eclipse.org/swordfish/samples/FlightReservation/"
       xmlns:payment="http://www.eclipse.org/swordfish/samples/PaymentProcessing/"
       xsi:schemaLocation="
       http://www.springframework.org/schema/beans http://www.springframework.org/schema/beans/spring-beans-2.0.xsd
       http://www.springframework.org/schema/osgi  http://www.springframework.org/schema/osgi/spring-osgi.xsd
       http://servicemix.apache.org/http/1.0 http://servicemix.apache.org/http/1.0/servicemix-http.xsd">

    <bean class="org.apache.servicemix.common.osgi.EndpointExporter" />

    <http:endpoint
                 endpoint="FlightBookingSOAP"
                 service="booking:FlightBookingService"
                 soap="true"
                 role="consumer"
                 defaultMep="http://www.w3.org/2004/08/wsdl/in-out"
                 locationURI="http://localhost:8198/FlightBooking_Service/"
                 wsdlResource="classpath:/ode/FlightBooking.wsdl"/>
    <http:endpoint
                 endpoint="FlightReservationSOAP"
                 service="reservation:FlightReservationService"
                 soap="true"
                 role="provider"
                 defaultMep="http://www.w3.org/2004/08/wsdl/in-out"
                 locationURI="http://localhost:8197/FlightReservation_Service/"
                 wsdlResource="classpath:/ode/FlightReservation.wsdl"/>
    <http:endpoint
                 endpoint="PaymentProcessingSOAP"
                 service="payment:PaymentProcessingService"
                 soap="true"
                 role="provider"
                 defaultMep="http://www.w3.org/2004/08/wsdl/in-out"
                 locationURI="http://localhost:8197/PaymentProcessing_Service/"
                 wsdlResource="classpath:/ode/PaymentProcessing.wsdl"/>

</beans>
Running the example
Just launch the Swordfish http://wiki.eclipse.org/Swordfish_Documentation:_Running_Target_Platform
Please note, that you should add the ODE related bundles to the target platform . Go to Window > Preferences > Plug-in Development > Target Platform.
Choose Swordfish Runtime target platform and press edit button. Next press add button. In the opened dialog select Software Site. Add the http://odeintegration.googlecode.com/svn/tags/tag1/site/ site and install the Swordfish ODE 1.2 Integration Components feature to the target platform.
Launch configuration should contain the SampleODEProject from the workspace