Notice: This Wiki is now read only and edits are no longer possible. Please see: https://gitlab.eclipse.org/eclipsefdn/helpdesk/-/wikis/Wiki-shutdown-plan for the plan.
Stardust/Knowledge Base/Integration/Camel/DB Monitor using JPA and Camel
Contents
Introduction
This article explains the usage of Camel JPA and JMS components to integrate external systems with Stardust. It is assumed that the reader has basic knowledge of Camel concepts like routes, exchange and components. If you are new to this technology, please read the following introductory article: Getting Started with Apache Camel. It is further assumed that a Stardust runtime environment has already been setup and is ready for use. The reader may refer to the online documentation for setting up and getting started with Stardust available here. Since this discussion involves the use of JMS components it is essential the Stardust be configured with an external JMS provider like ActiveMQ. This configuration is detailed in the following article. In the following sections we will see how to setup and configure various pieces required to monitor the database, process the record, and send it as part of a JMS message to Stardust to start the process.
Plugin Project in Eclipse
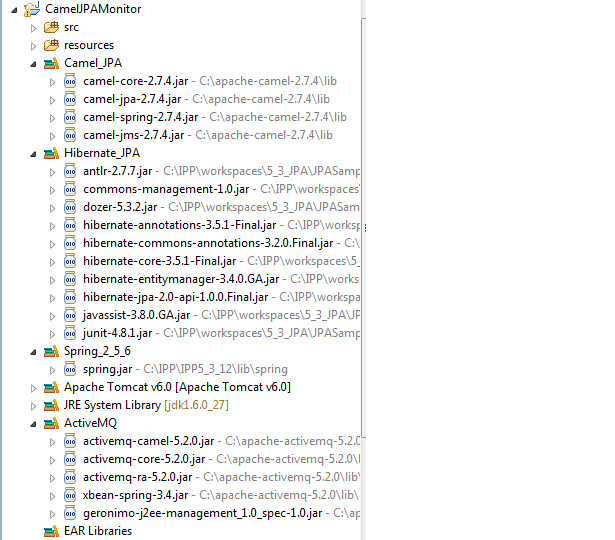
The first step involves creating an Stardust plugin project in Eclipse (Java Project type) to hold the classes for the database entities, Camel route and other artifacts including the JPA persistence and Hibernate configuration files, Spring context file etc. The build path for this project would also include the third-party JARs to support the above functionality. A sample project structure is shown below along with its dependencies.
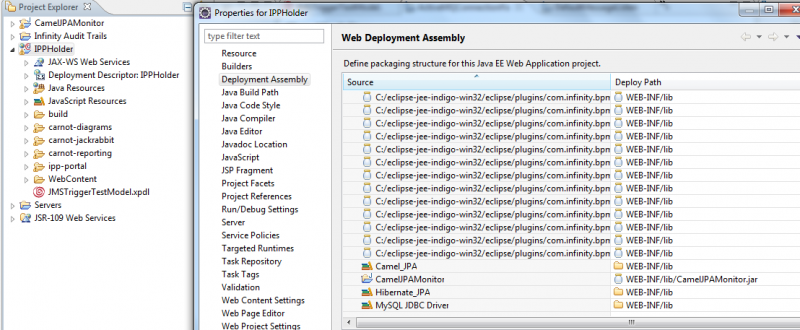
This project and its associated dependencies are required to be added to the “Deployment Assembly” section of the Stardust dynamic web application as shown below. This ensures that they are added to the WEB-INF/lib directory of the resultant web application (WAR).
Stardust Model
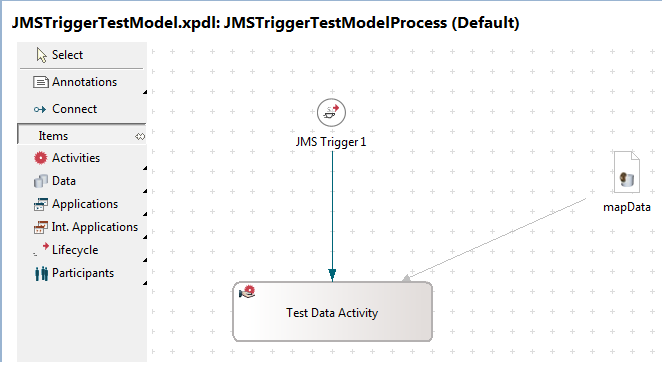
We will use a simple Stardust process as shown below. This process is started with a JMS trigger and displays the details of the entity received in the JMS message (row data from the configured table). This model may be downloaded from here.
Entity To Be Monitored
In this example we choose to monitor a table called “jpatest”. The table consists of two columns, the primary key “id” field and a text field called “text”. The associated entity class consists of two properties and getters/setters for these fields as shown below.
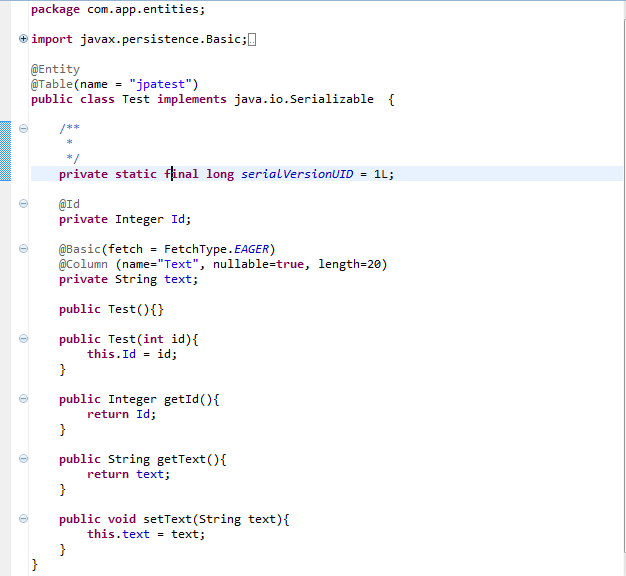
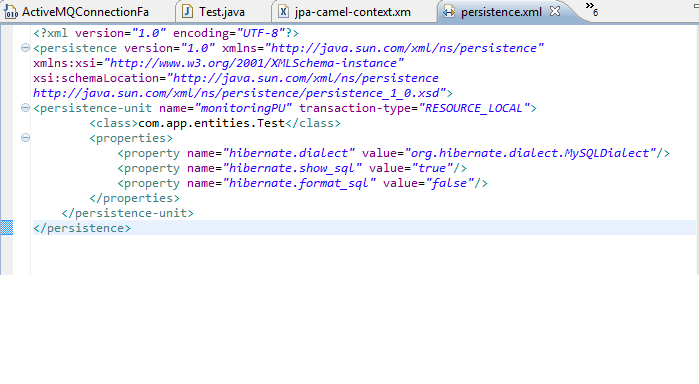
The JPA persistence.xml for this project looks like the following:
Here, the JPA entity, com.app.entities.Test, stored in the MYSQL table “jptatest” will be monitored using the Camel JPA component for new records. The persistence unit is named “monitoringPU”.
Camel Context Defined
So far we have created the Test entity and its persistence configuration. Now we need to define the entity manager factory for the above persistence unit.
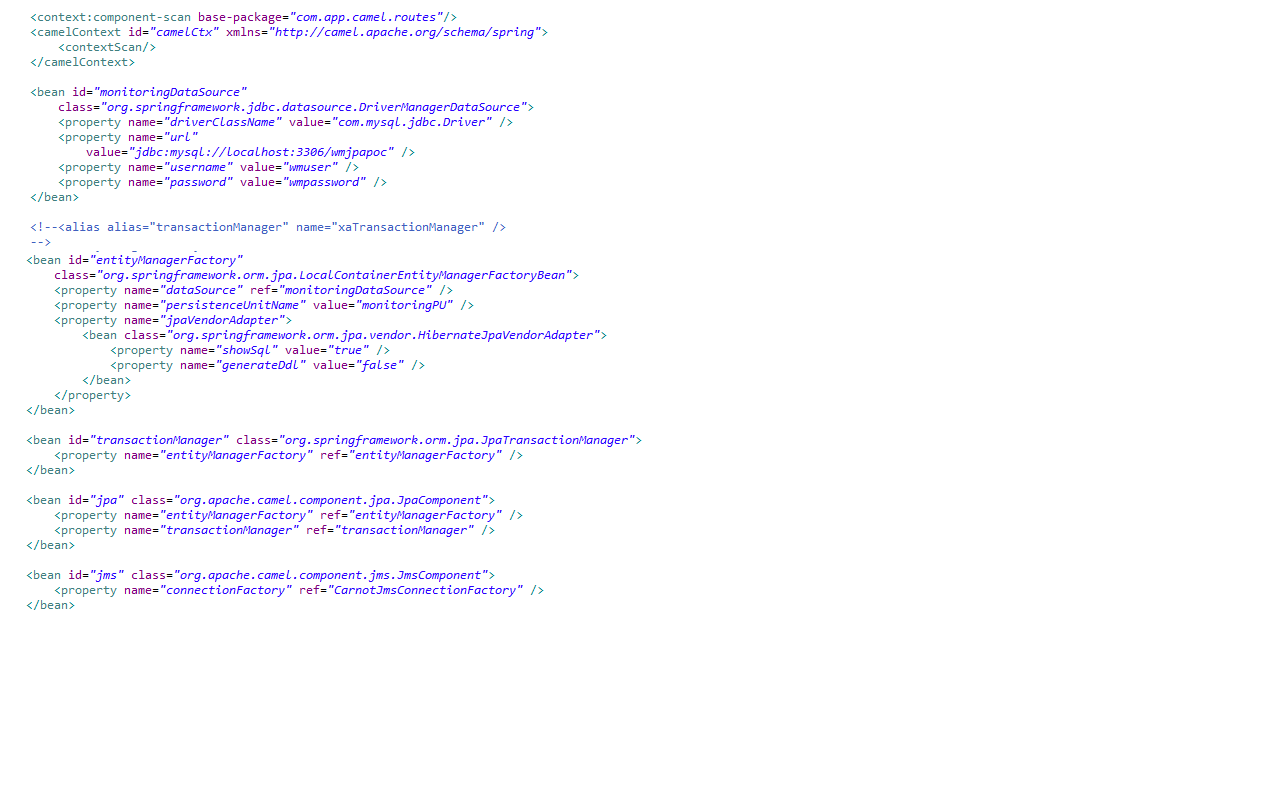
The following Spring context file defines the data source and Entity Manager factory for our persistence unit. Also you will notice that the Camel context with id “camelCtx” is defined with a context scan option. This means that the Camel context will scan the available packages to build routes having a @Component annotation.
You will also notice the “jpa” and “jms” beans defined in the Spring context. These are Camel components configured with our desired Entity Manager factory and Connection factory. These components are automatically recognized and made available as part of the Camel context.
Route in Java DSL
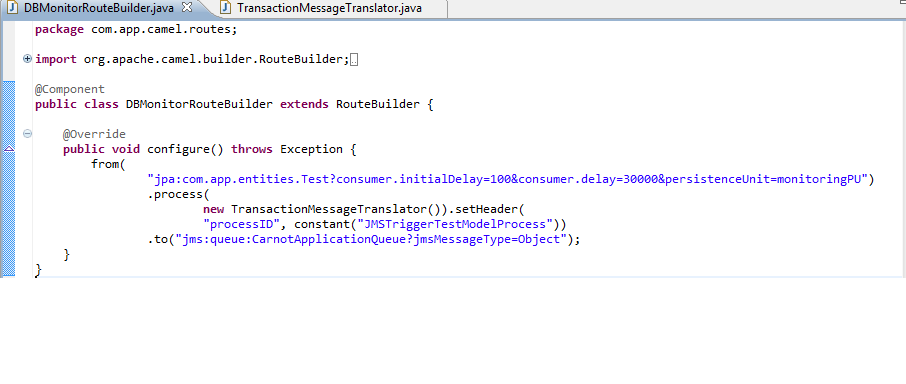
Having defined the JPA entity, Camel components and Spring context, the final piece we need to add is the Camel route that scans the database table for new records and passes on the data via JMS to Stardust. That Camel part is called a "route". The Camel route creates the active endpoints (things that can produce or consume message/data) using components available in the Camel context. In our case, the following Java DSL code snippet creates a route which will monitor/poll the Test entity every 30 seconds and if found, executes our custom TransactionMessageTranslator processor, sets the message header “processID”, and finally sends the translated message to the CarnotApplicationQueue.
Seeing It All Running
1. To run this example, create the plugin project as outlined above. All artifacts discussed above including the Java classes, Camel route, Spring configuration file and JPA persistence unit can be downloaded from here and added to the project.
2. Create a database table to persist the Test entity. The example discussed here has been tested on MYSQL. You will need to modify your persistence.xml and jpa-camel-context.xml files if you use a different database.
3. Change the resources \META-INF\spring\jpa-camel-context.xml file so that the data source and JMS connection factory use the correct values.
4. Deploy the dynamic web application project on a web server like Tomcat.
5. Ensure that the Stardust portal and Camel context are deployed successfully
6. Enter a new record in the table and after 30 seconds log into the Stardust portal as an “Administrator”. If everything has gone fine, you should see a new worklist entry available representing a manual activity in a new process instance that has been created due to the JMS trigger. Opening the activity will display the details of the new row created in the table.

