Notice: This Wiki is now read only and edits are no longer possible. Please see: https://gitlab.eclipse.org/eclipsefdn/helpdesk/-/wikis/Wiki-shutdown-plan for the plan.
Scout/HowTo/3.8/Changing outlines with the SWT client
The Scout documentation has been moved to https://eclipsescout.github.io/.
While Swing clients automatically show buttons at the top to switch between outlines if theses were added using the Scout SDK, the SWT client lacks this feature. This how-to describes various ways to change outlines in SWT.
Contents
This method is the most straigth forward. Just add a menu entry for each Outline you want to switch to. Overwriting the getConfiguredIconId(), getConfiguredText() and execAction() methods are sufficient for this:
@Order(10.0)
public class AdministrationOutlineMenu extends AbstractMenu {

  @Override
  protected String getConfiguredIconId() {
    return org.eclipse.minicrm.shared.Icons.Administration;
  }

  @Override
  protected String getConfiguredText() {
    return TEXTS.get("AdministrationOutline");
  }

  @Override
  protected void execAction() throws ProcessingException {
    setOutline(AdministrationOutline.class);
  }
}
Using OutlineButtons on a form
Another option is to place an instance of an AbstractOutlineButton on a form. After adding the Button, it needs to be configured:
@Order(20.0)
public class AdministrationButton extends AbstractOutlineButton {
  @Override
  protected String getConfiguredLabel() {
    return TEXTS.get("AdministrationOutline");
  }

  @Override
  protected Class<? extends IOutline> getConfiguredOutline() {
    return AdministrationOutline.class;
  }
}
Using a SnapBox above the TreeView
This method is a little more elaborate and requries code changes beyond the Scout SDK.
Modify the class org.eclipse.minicrm.client.ui.desktop.Desktop as follows:
@Override
protected void execOpened() throws ProcessingException {
// outline tree
if (org.eclipse.scout.rt.shared.ui.UserAgentUtility.isSwtUi()) {
  // swt
  ExtendedOutlineTreeForm treeForm = new ExtendedOutlineTreeForm();
  treeForm.setIconId(Icons.EclipseScout);
  treeForm.startView();
}
else {
  // swing
  DefaultOutlineTreeForm treeForm = new DefaultOutlineTreeForm();
  treeForm.setIconId(Icons.EclipseScout);
  treeForm.startView();
}

// leave rest of method unchanged
// ...
}
Open the source code of DefaultOutlineTreeForm and save it as org.eclipse.minicrm.client.ui.desktop.ExtendedOutlineTreeForm. Scroll down to the following part of the code:
@Order(10.0f)
public class OutlineTreeField extends AbstractTreeField {
and change its order to 20:
@Order(20.0)
public class OutlineTreeField extends AbstractTreeField {
then add the following code before the OutlineTreeField:
@Order(10.0)
public class OutlineSelectorField extends AbstractSnapBox {

  @Override
  public int getConfiguredGridH() {
    return 1;
  }

  @Override
  protected int getConfiguredGridW() {
    return 1;
  }

  @Override
  protected boolean getConfiguredGridUseUiHeight() {
    return true;
  }

  @Order(10.0)
  public class StandardOutlineButton extends AbstractButton {
    @Override
    protected String getConfiguredIconId() {
      return org.eclipse.minicrm.shared.Icons.Standard;
    }

    @Override
    protected String getConfiguredLabel() {
      return TEXTS.get("StandardOutline");
    }

    @Override
    protected void execClickAction() throws ProcessingException {
      changeOutline();
    }

    @Override
    protected void execToggleAction(boolean selected) throws ProcessingException {
      changeOutline();
    }

    protected void changeOutline() {
      getDesktop().setOutline(StandardOutline.class);
      StandardOutline outline = (StandardOutline) getDesktop().getOutline();
      CompanyTablePage page = outline.findPage(CompanyTablePage.class);
      outline.selectNode(page);
    }
  }

  @Order(20.0)
  public class AdministrationOutlineButton extends AbstractButton {
    @Override
    protected String getConfiguredIconId() {
      return org.eclipse.minicrm.shared.Icons.Administration;
    }
    @Override
    protected String getConfiguredLabel() {
      return TEXTS.get("AdministrationOutline");
    }

    @Override
    protected void execClickAction() throws ProcessingException {
      changeOutline();
    }

    @Override
    protected void execToggleAction(boolean selected) throws ProcessingException {
      changeOutline();
    }

    protected void changeOutline() {
      getDesktop().setOutline(AdministrationOutline.class);
      AdministrationOutline outline = (AdministrationOutline) getDesktop().getOutline();
      RoleTablePage page = outline.findPage(RoleTablePage.class);
      outline.selectNode(page);
    }
  }
}
The reason that AbstractButtons are used instead of AbstractOutlineButtons is that the OutlineButtons in the SnapBox don't properly toggle and need clicking on twice to change outlines. Using the normal button and overwriting both the execClickAction as well as the execToggleAction solves this problem.
One caveat of this solution is, that buttons in the SnapBox only show an icon, the text is only shown as tooltip.
Adding a toolbar to the SWT application
This is the approach that most closely mirrors the Swing buttons. It, too, requires changes outside the Scout SDK. The following classes need to be modified or added:
- org.eclipse.minicrm.ui.swt.SwtEnvironment
- org.eclipse.minicrm.ui.swt.application.ApplicationWorkbenchWindowAdvisor
- org.eclipse.minicrm.ui.swt.application.ApplicationActionBarAdvisor
- org.eclipse.minicrm.ui.swt.application.CoolbarButton
The following changes need to be made to each of these classes:
org.eclipse.minicrm.ui.swt.SwtEnvironment
Add the following private member:
public class SwtEnvironment extends AbstractSwtEnvironment {
private ApplicationActionBarAdvisor m_advisor;
In the constructor add the following line to the second environment listener:
m_advisor.initViewButtons(d);
so that it looks as follows:
addEnvironmentListener(new ISwtEnvironmentListener() {
  @Override
  public void environmentChanged(SwtEnvironmentEvent e) {
    if (e.getType() == SwtEnvironmentEvent.STARTED) {
      removeEnvironmentListener(this);
      IDesktop d = getClientSession().getDesktop();
      if (d != null) {
        setWindowTitle(d.getTitle());
        d.addPropertyChangeListener(IDesktop.PROP_TITLE, new PropertyChangeListener() {
          @Override
          public void propertyChange(PropertyChangeEvent evt) {
            setWindowTitle((String) evt.getNewValue());
          }
        });
        m_advisor.initViewButtons(d);
      }
    }
  }
});
Add the following method to the class:
public void setAdvisor(ApplicationActionBarAdvisor advisor) {
  m_advisor = advisor;
}
org.eclipse.minicrm.ui.swt.application.ApplicationWorkbenchWindowAdvisor
Change the following line in preWindowOpen()
configurer.setShowCoolBar(false);
to
configurer.setShowCoolBar(true);
org.eclipse.minicrm.ui.swt.application.ApplicationActionBarAdvisor
Add the following private members:
  private static final int NUM_OUTLINE_BUTTONS = 10;
  private CoolbarButton[] m_coolbarButton = new CoolbarButton[NUM_OUTLINE_BUTTONS];
  private IActionBarConfigurer m_configurer;
The value of NUM_OUTLINE_BUTTONS must be large enough to contain all Outlines and any ToolButton defined on the desktop as well.
Mofiy the constructor so it looks like this:
  public ApplicationActionBarAdvisor(IActionBarConfigurer configurer) {
  super(configurer);
  this.m_configurer = configurer;
  ((SwtEnvironment) Activator.getDefault().getEnvironment()).setAdvisor(this);
}
Add the following methods:
@Override
protected void makeActions(IWorkbenchWindow window) {
  for (int i = 0; i < NUM_OUTLINE_BUTTONS; i++) {
    m_coolbarButton[i] = new CoolbarButton();
  }
}

public void initViewButtons(IDesktop d) {
  IViewButton[] viewButtons = d.getViewButtons();
  int start = 0;
  int end = Math.min(m_coolbarButton.length, viewButtons.length);
  for (int i = start; i < end; i++) {
    CoolbarButton b = m_coolbarButton[i];
    IViewButton v = viewButtons[i];

    b.setEnabled(v.isEnabled() && v.isEnabledGranted());
    if (v.isVisible() && v.isVisibleGranted()) {
      b.init(v);
      register(b);
    }
    else {
      b.setEnabled(false);
    }

    m_configurer.getCoolBarManager().update(true);
  }

  IToolButton[] toolButtons = d.getToolButtons();
  start = end + 1;
  end = Math.min(m_coolbarButton.length, start + toolButtons.length);
  for (int i = start; i < end; i++) {
    CoolbarButton b = m_coolbarButton[i];
    IToolButton v = toolButtons[i - start];

    b.setEnabled(v.isEnabled() && v.isEnabledGranted());
    if (v.isVisible() && v.isVisibleGranted()) {
      b.init(v);
      register(b);
    }
    else {
      b.setEnabled(false);
    }
  }
}

@Override
protected void fillCoolBar(ICoolBarManager coolBar) {
  IToolBarManager toolbar = new ToolBarManager(SWT.FLAT | SWT.RIGHT);
  coolBar.add(new ToolBarContributionItem(toolbar, "main"));
  for (Action a : m_coolbarButton) {
    toolbar.add(a);
  }
}
org.eclipse.minicrm.ui.swt.application.CoolbarButton
Add this class with the following content:
public class CoolbarButton extends Action {
  private IAction m_button;

  public CoolbarButton() {
    setText(" ");
    setEnabled(false);
  }

  public void init(IAction b) {
    setText(b.getText());
    setId(b.getActionId());
    setActionDefinitionId(b.getActionId());
    setToolTipText(b.getTooltipText());
    setImageDescriptor(Activator.getDefault().getEnvironment().getImageDescriptor(b.getIconId()));
    m_button = b;
  }

  @Override
  public void run() {
    Runnable r = new Runnable() {
      @Override
      public void run() {
        m_button.setSelected(true);
        m_button.getUIFacade().fireActionFromUI();
      }
    };
    Activator.getDefault().getEnvironment().invokeScoutLater(r, 10000);
  }
}
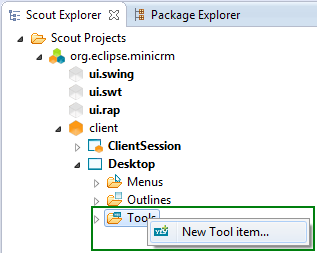
The advantage of this method is not only that the buttons show both the configured icon and text of the outlines but that it also supports tool buttons added to the desktop by right clicking on the Tools item below the desktop and choosing "New Tool item..."
The following configuration with two outlines and one tool button would look as follows in the SWT client:
Using view specific toolbars
Have a look at Adding toolbars to views to see how expand and collapse buttons can be added to a toolbar of the OutlineView.


