Notice: This Wiki is now read only and edits are no longer possible. Please see: https://gitlab.eclipse.org/eclipsefdn/helpdesk/-/wikis/Wiki-shutdown-plan for the plan.
Papyrus/customizations/manufacturing/aas/modeling
Contents
AAS modeling in Papyrus
Creation of a new project
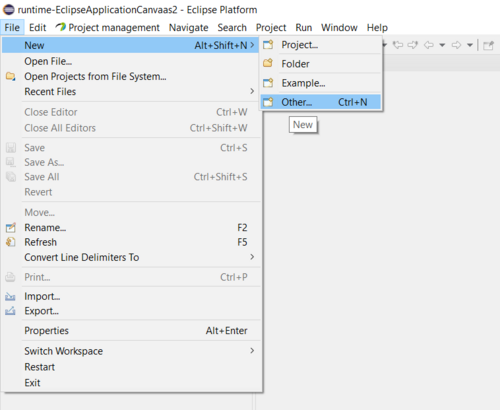
To create a new project for AAS modeling, File -> new -> Others.
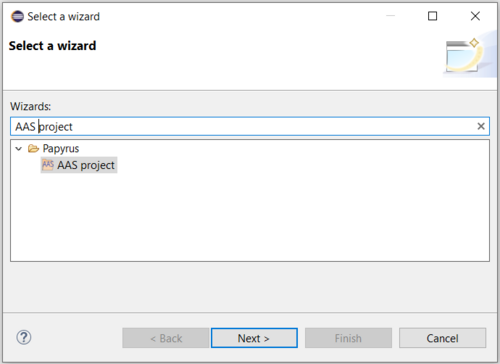
Choose the AAS project Wizard.
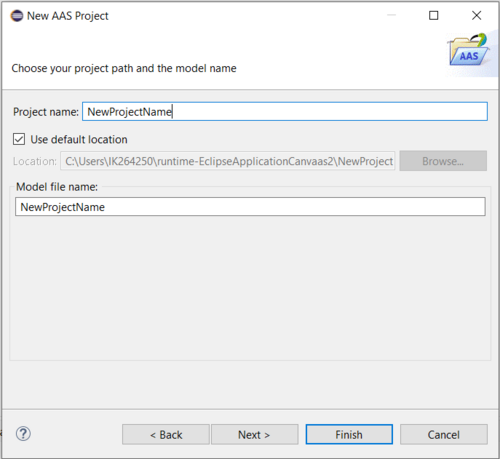
Then in the window press Next to give a name to the project.
Naming a new project.
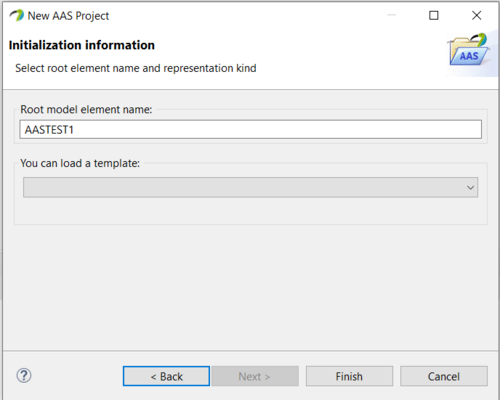
Initialization of a new the project.
For the initialization of the model, press ‘Next’ in the previous window, then you can:
• Create an empty model by selecting "AAS design diagram".
• Or create a model using an existing template by choosing a template in the "you can load a template" field.
The template allows to have an initial structure and contents to your project, for example by choosing the "AAS Festo Robotino model" you will have a model with three packages for assets, submodels and AASs.
Create a new diagram
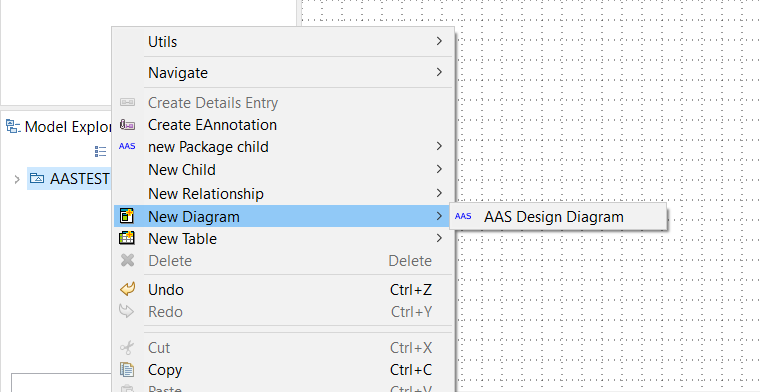
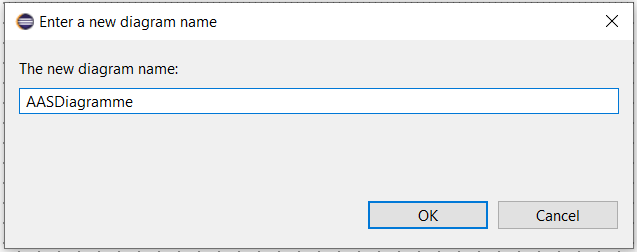
To create a new diagram, Right click on the package where to create the diagram in the model explorer (the selected package could be the root) -> choose "Create new diagram" -> choose "AAS design diagram" -> then give a name to the diagram as illustrated.
Create elements in the diagram from Palette
To create new elements in the diagram, you need first to drag and drop the element to create (AAS, Asset, Submodel, etc.) from the Palette view to the Multi Diagram Editor view then you need to edit it to add information.
Create and configure an AAS
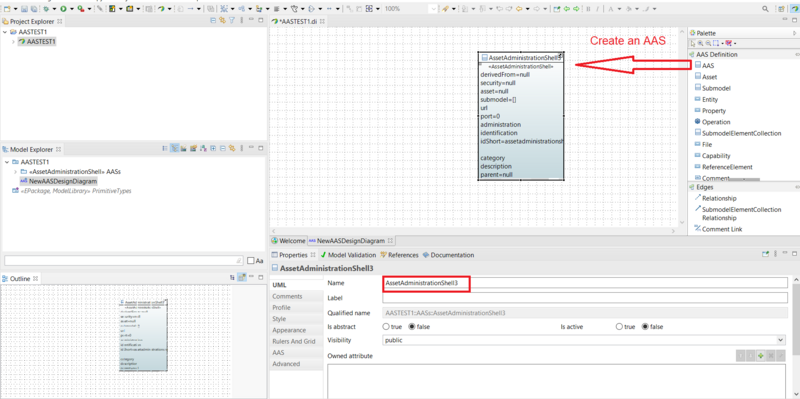
• Add an AAS to the diagram:
Drag and drop an AAS element from the palette -> select the created AAS -> in the Properties view/Advanced tab give a name to created AAS.
• Associate an Asset to the AAS:
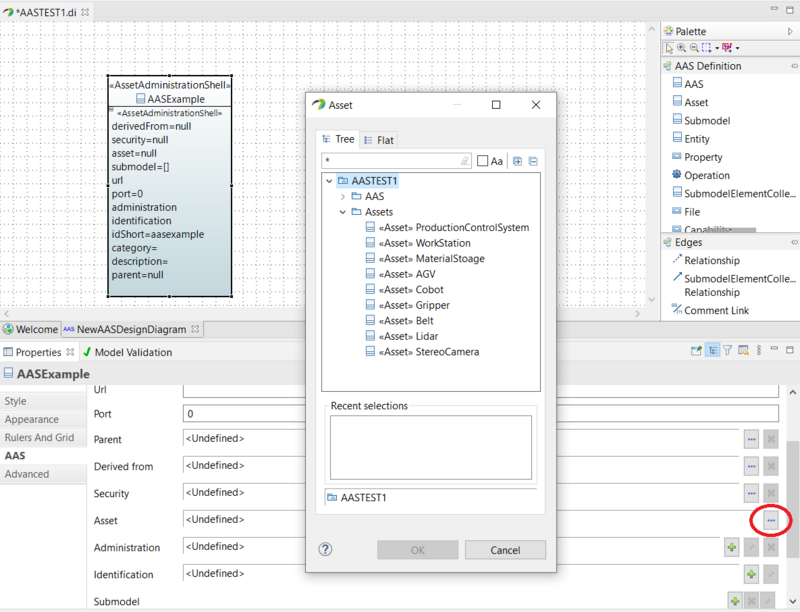
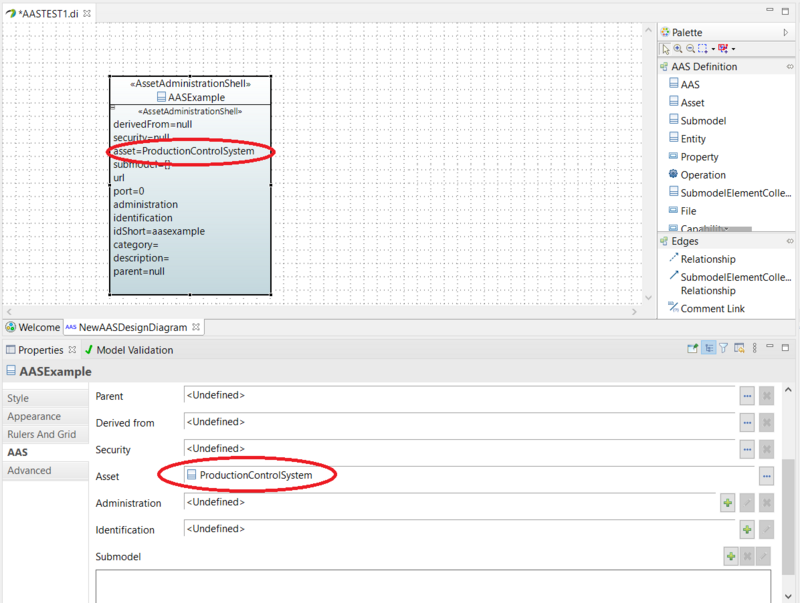
In the Properties view/AAS tab, add an asset in the Asset property by clicking on the button surrounded with a red circle.
Associating an asset to an AAS -> then select an asset from the window "Asset".
The Asset should be already created.
The result:
• Associate submodels to the AAS:
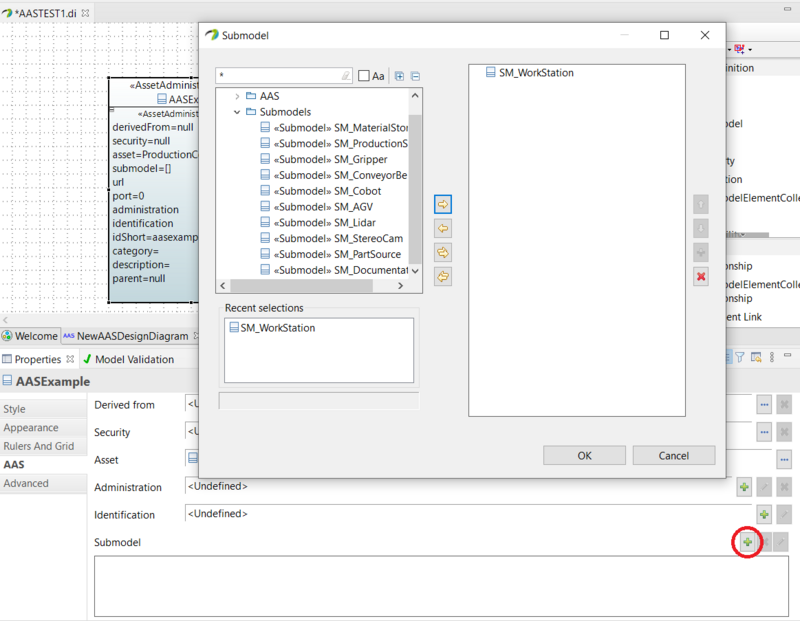
In the Properties view/AAS tab, add a submodels in the Submodel property by clicking on the button surrounded with a red circle. Associating an asset to an AAS -> then select the submodels from the left side of the window "Submodel" and press on the arrow to add.
The list of the submodels to add should appear on the right side of the window "Submodel".
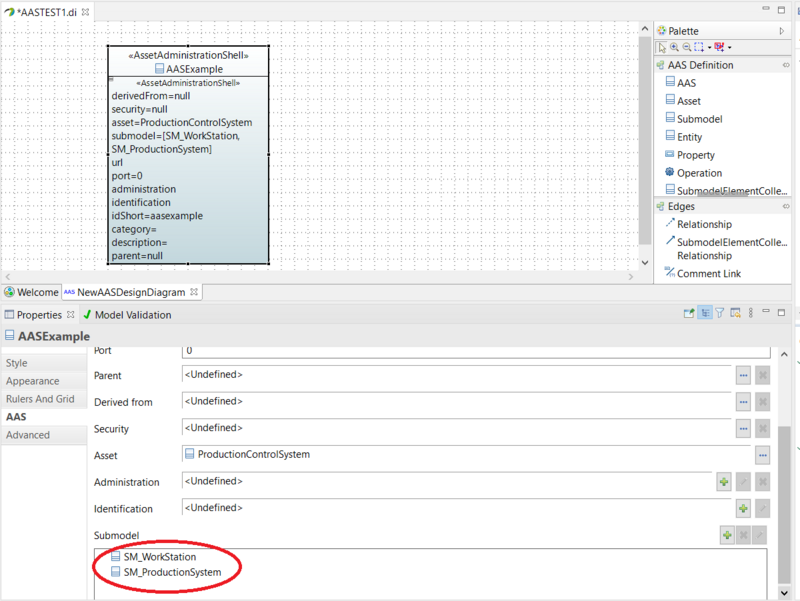
The result:
Create and configure an Asset
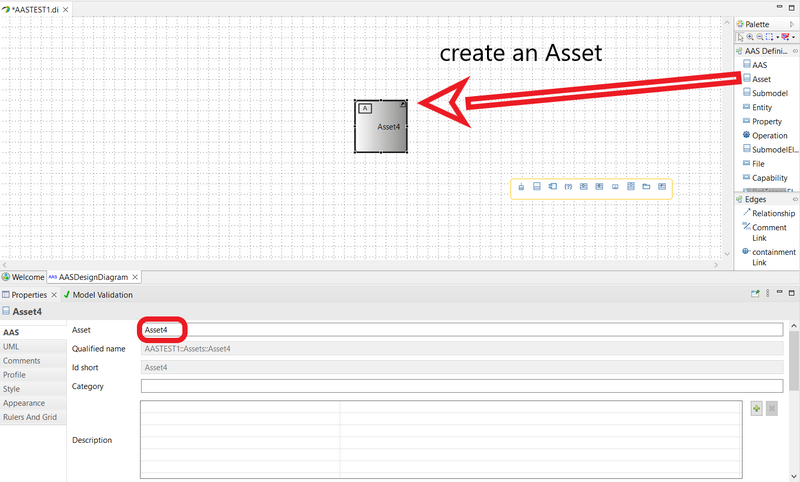
• Add an asset to the diagram:
Drag and drop an Asset element from the palette -> select the created asset -> in the Properties view/advanced tab give a name the asset.
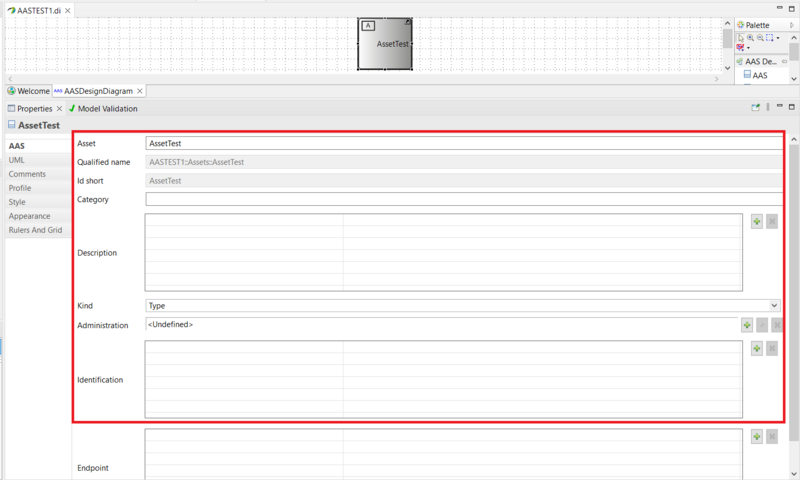
• Configure an asset:
In the Properties view/AAS tab edit the properties to configure the created asset.
Create and configure an Submodel
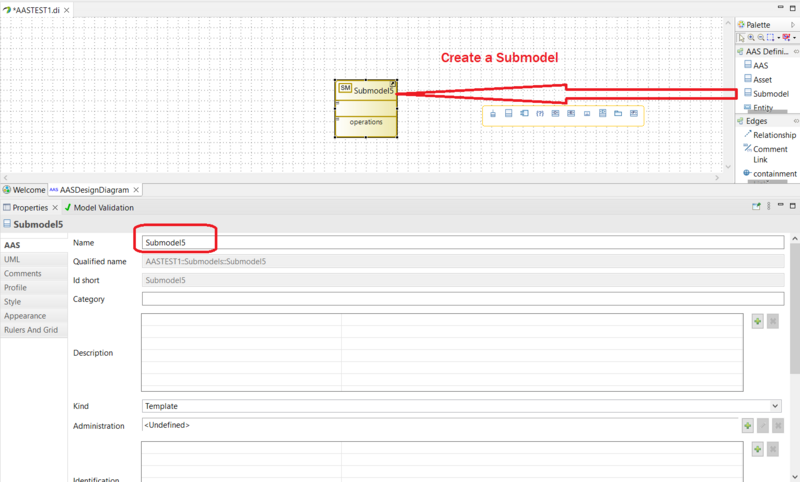
• Add a submodel to the diagram:
Drag and drop a submodel element from the palette -> select the created submodel -> in the Properties view/advanced tab give a name the submodel.
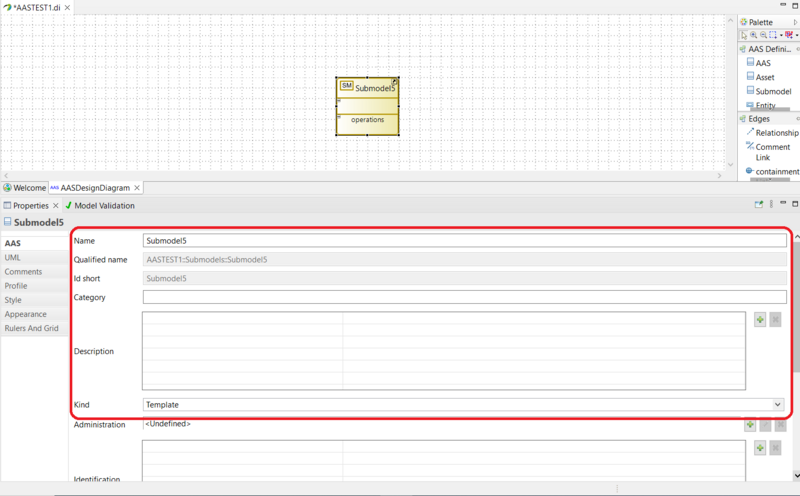
• Configure a submodel:
In the Properties view/AAS tab edit properties to configure the created submodel.
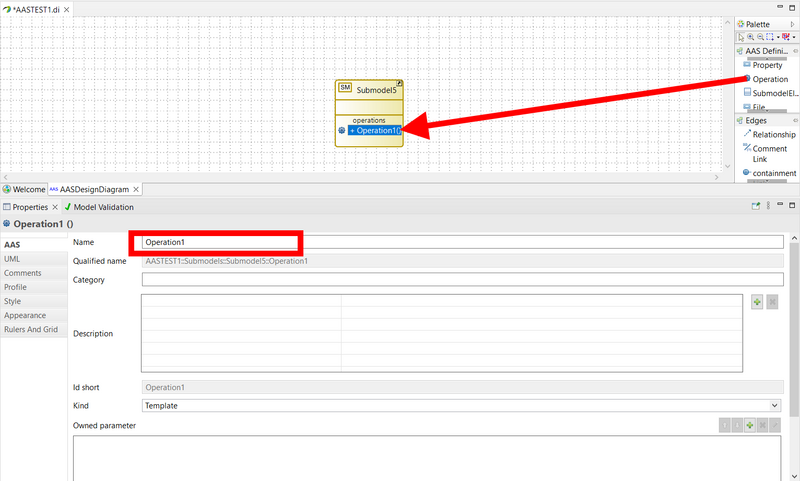
• Add operations to the submodel:
From the palette, drag and drop an Operation element in the Operation compartment of the created submodel -> then give a name to the operation in the Properties view/advanced tab.
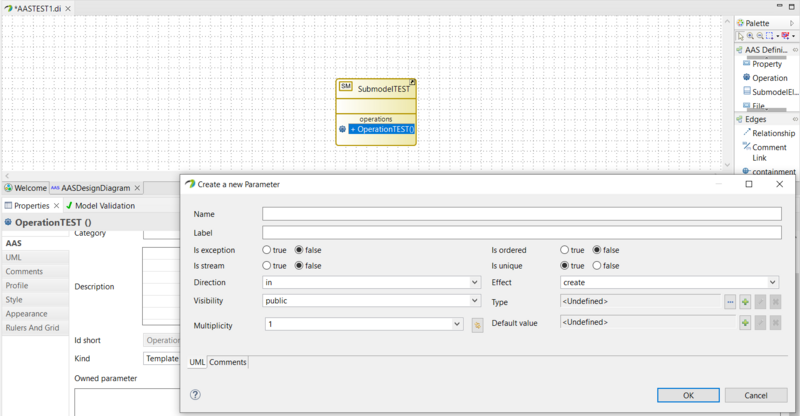
We can add parameters for the operations.
• Add properties to the submodel:
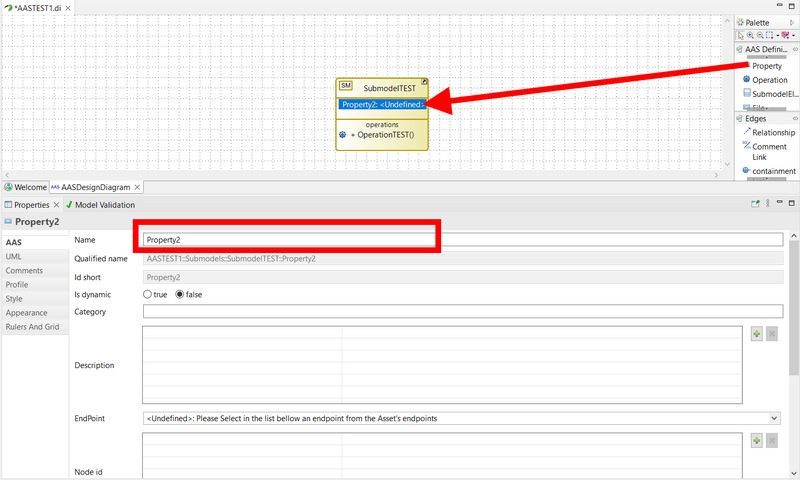
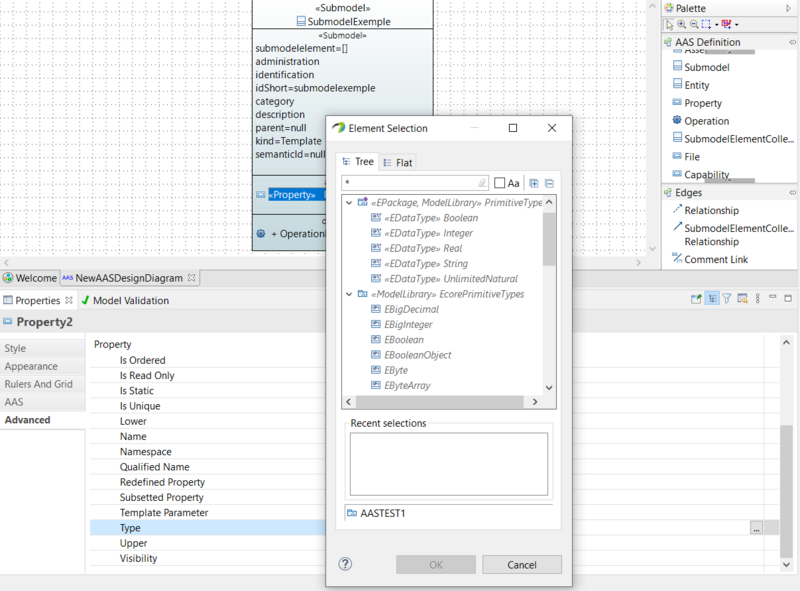
From the palette, drag and drop a Property element in the Attributes compartment of the created submodel -> Select the property -> edit a name to the property in the Properties view/Advanced tab Then select the type of the property by click on the surrounded button -> choose a type from primitive types.
Choose the type of the properties:
• Delete a created element:
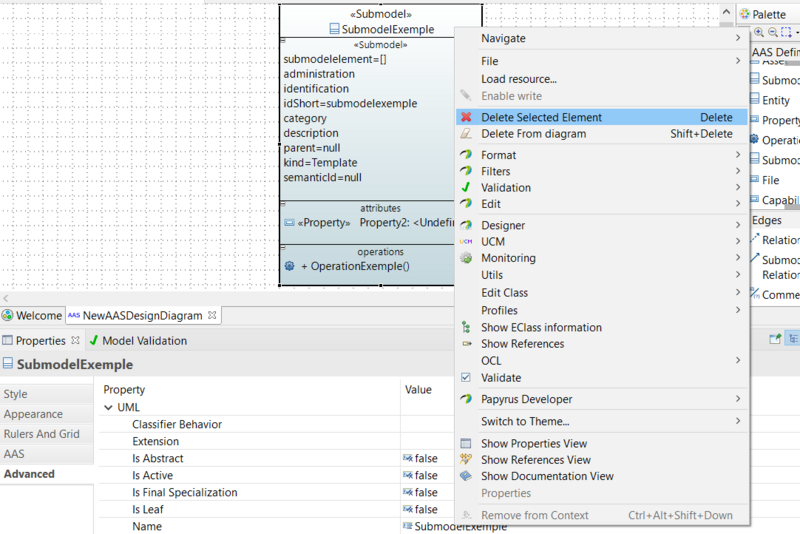
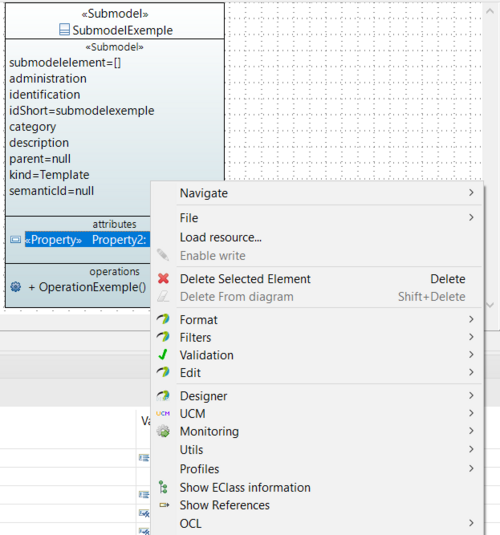
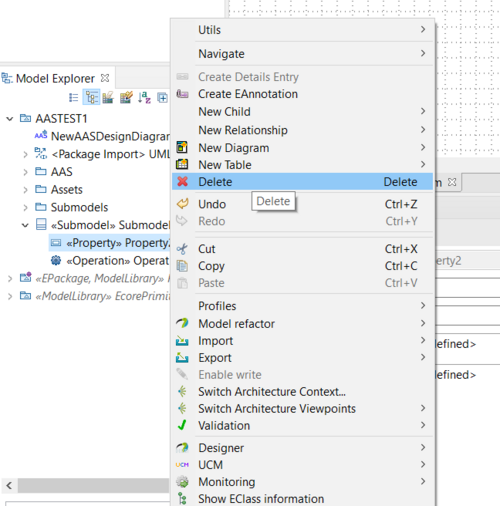
You can delete an element you created either in a diagram view or in the model explorer view by right click on the element -> choose "delete selected element" . This action will definitively delete the element.
If you need to delete an element only from a diagram then:
right click on the element in the diagram à choose "delete from the diagram".
We can also delete an element from the model explorer.
Configure the communication protocol for an Asset
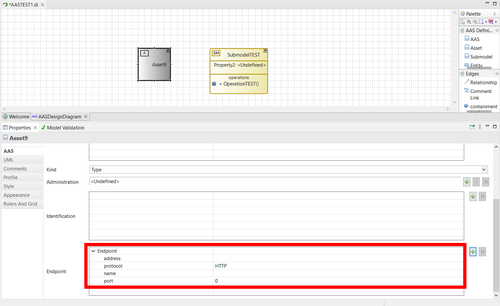
Click on an Asset and go to the properties view to create an endpoint for the asset.
It is possible to create a list of endpoints for an asset to enable deployment to different physical servers.
Then edit the endpoint information: server address and communication protocol kind.
Create elements in the diagram from Model Explorer
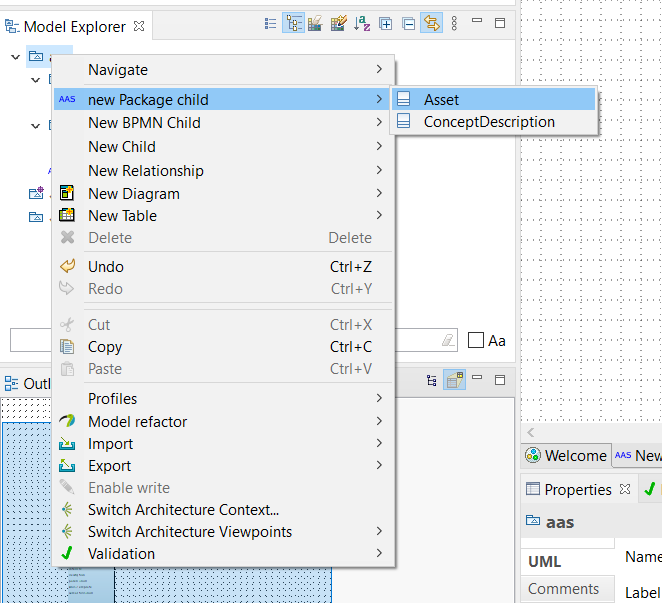
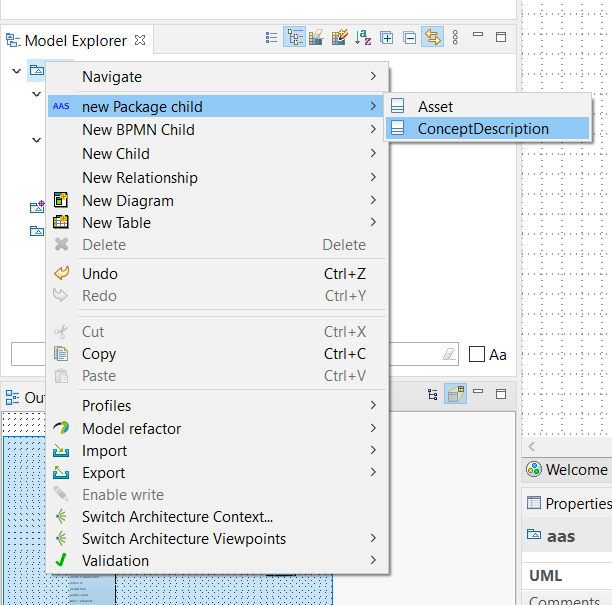
from the model we can only create an Asset or a ConcepDescription
Create an Asset
We can create an Asset from the model Explorer; choose "New package child" -> Asset.
Create a ConcepDescription
We can create a concepDescription from the model in the Explorer; choose "New package child" -> ConceptDescription.
Create a submodel
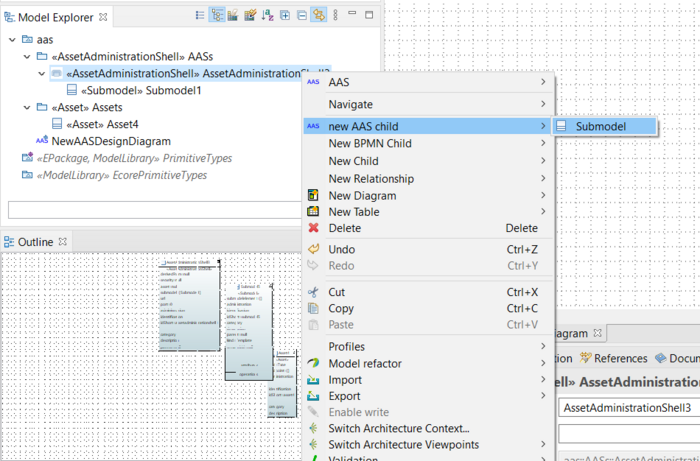
we can create a submodel from an AAS ; choose "New AAS child" -> Submodel.
Create an AAS
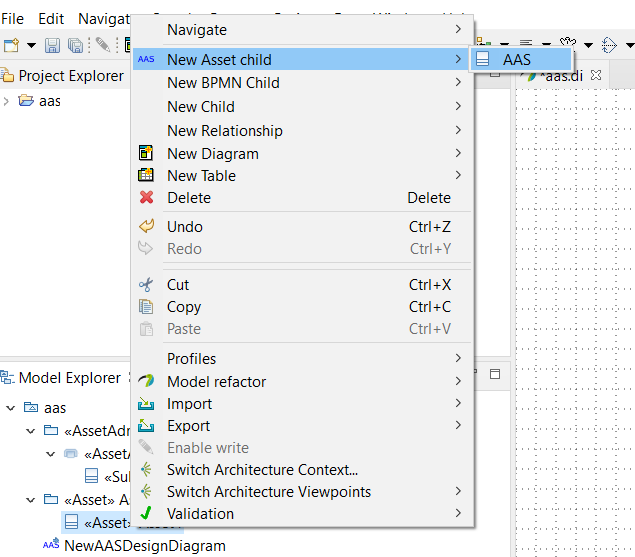
we can create an AAS from an Asset ; choose "New Asset child" -> AAS

