Notice: This Wiki is now read only and edits are no longer possible. Please see: https://gitlab.eclipse.org/eclipsefdn/helpdesk/-/wikis/Wiki-shutdown-plan for the plan.
EclipseLink/Examples/JPARS/Simple
Simple Example - student
The student example is intended to provide a simple example of using JPA-RS with a single entity persistence unit in a web application.
Environment
The following are the minimal requirements for this example:
- EclipseLink 2.4.2
- Eclipse Java EE IDE - Juno Release, make sure Maven Integration for Eclipse WTP is installed.
- Git access to eclipselink examples git repository. The steps to connect to the repo can be found below.
- GlassFish 3.1.2.2
- REST client (Chrome Postman REST Client is used in this example, but you can use your favorite REST Client)
Overview
The following steps will be performed in setting up and running this example in your own environment:
- Installation & Configuration
- Install GlassFish 3.1.2.2 & EclipseLink 2.4.2
- Checkout student example from GIT
- GlassFish Datasource Configuration
- Verify Configuration
- Deploy Web Application
- Running the Example
- View the Metadata
- Create an Entity
- Execute a Query
- Switch between XML and JSON
- Customize XML/JSON representation using MOXy Bindings
- Delete an Entity
Installation and Configuration
Download EclipseLink 2.4.2
Download EclipseLink 2.4.2 binaries from 2.4.2 Nightly Builds and replace the following files under $GLASSFISH_HOME/glassfish/modules with the corresponding jars you downloaded:
- javax.persistence.jar
- org.eclipse.persistence.antlr.jar
- org.eclipse.persistence.asm.jar
- org.eclipse.persistence.core.jar
- org.eclipse.persistence.dbws.jar
- org.eclipse.persistence.jpa.jar
- org.eclipse.persistence.jpa.jpql.jar
- org.eclipse.persistence.jpa.modelgen.jar
- org.eclipse.persistence.moxy.jar
- org.eclipse.persistence.oracle.jar
Make sure you clear the GlassFish osgi cache by removing the $GLASSFISH_HOME\glassfish\domains\<your_domain>\osgi-cache directory after you have replaced the bundles listed above, and before you restart GlassFish.
Note: If you want to see JPA-RS logs, add a logger for org.eclipse.persistence.jpars. Currently exceptions are logged at "FINER" log level, so configure the logger to FINER or FINEST. Use GlassFish Admin Console > Configurations > default-config > Logger Settings > Log Levels tab > Add Logger to add a logger for JPA-RS.
Clone examples from GIT
The student example is stored under the jpars/student folder.
git clone git://git.eclipse.org/gitroot/eclipselink/examples.git
Configure a Datasource
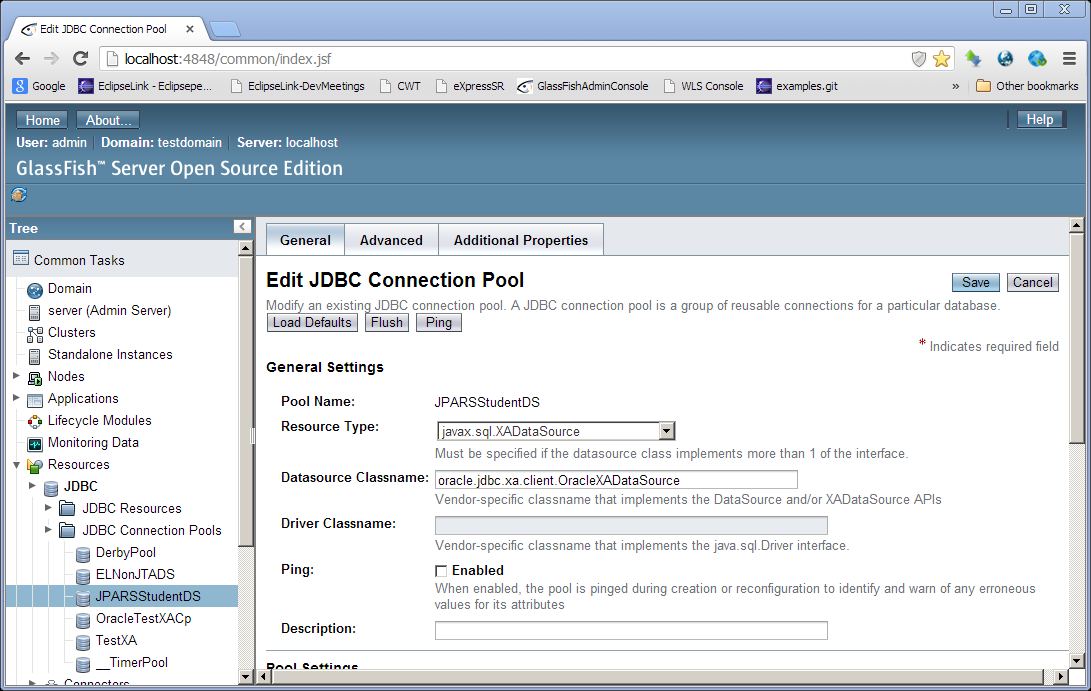
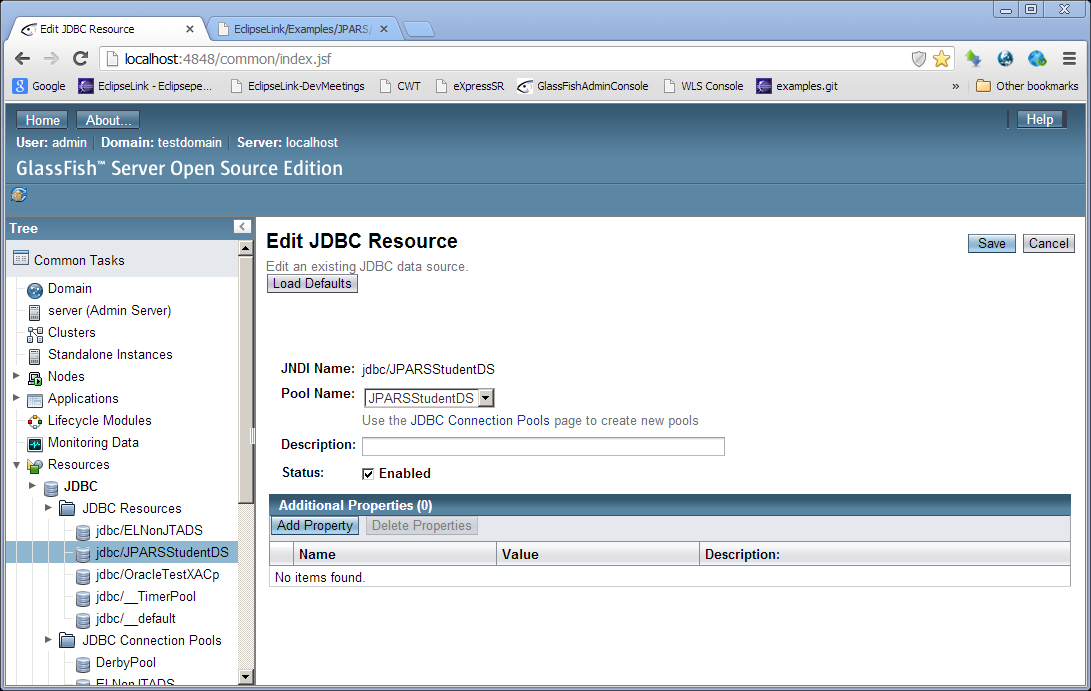
Create an XA Datasource connection pool called JPARSStudentDS and define a new JDBC Resource using this connection pool. You can use any of the databases supported by EclipseLink. Your database driver should be placed under $GLASSFISH_HOME/glassfish/domains/<your_domain_folder>/lib/ext. Use the "Additional Properties" tab (shown below) to specify the database URL, User and Password (and any other mandatory properties that your database requires).
Import Maven Projects into Eclipse
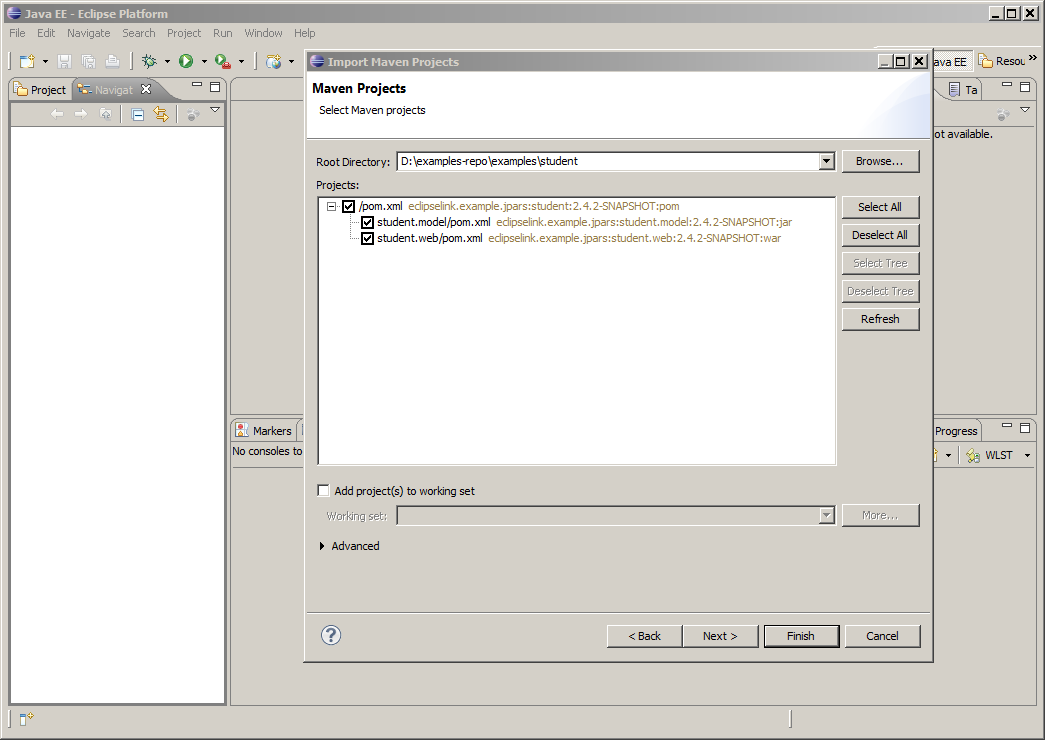
Launch Eclipse and select File > Import > Maven > Existing Maven Projects, hit Next and point Root Directory to the student folder. Hit Finish.
Build the student Project
Right-click on the student project and select Maven > Update Project..., then click OK.
Configure a GlassFish 3.1.2 Server
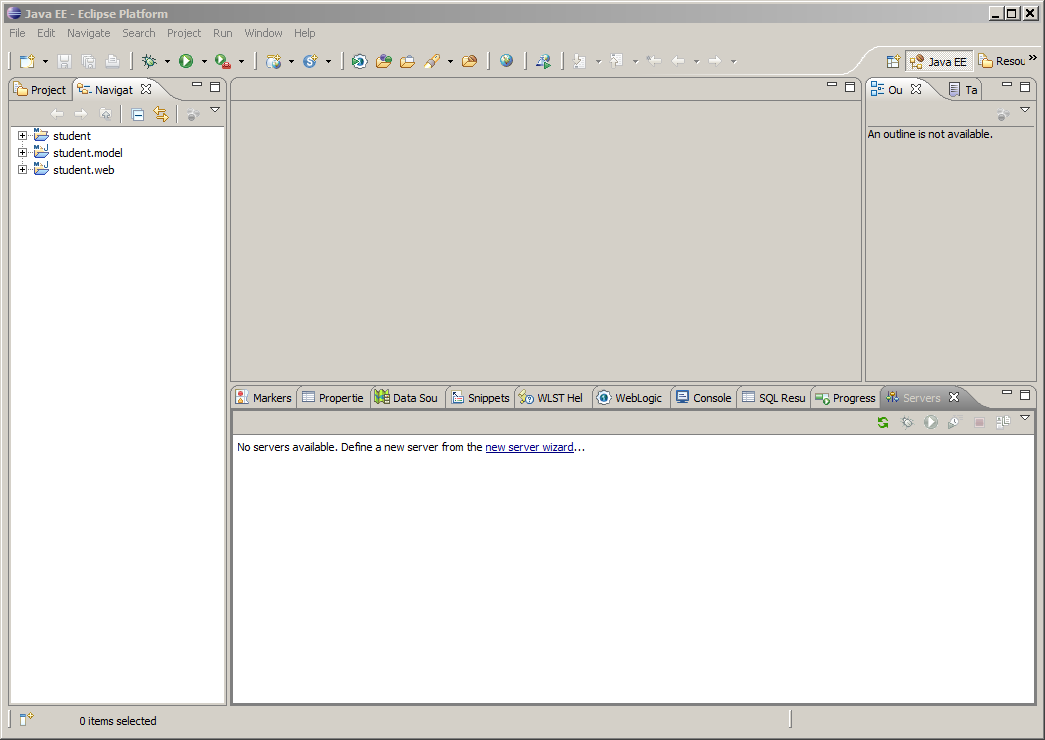
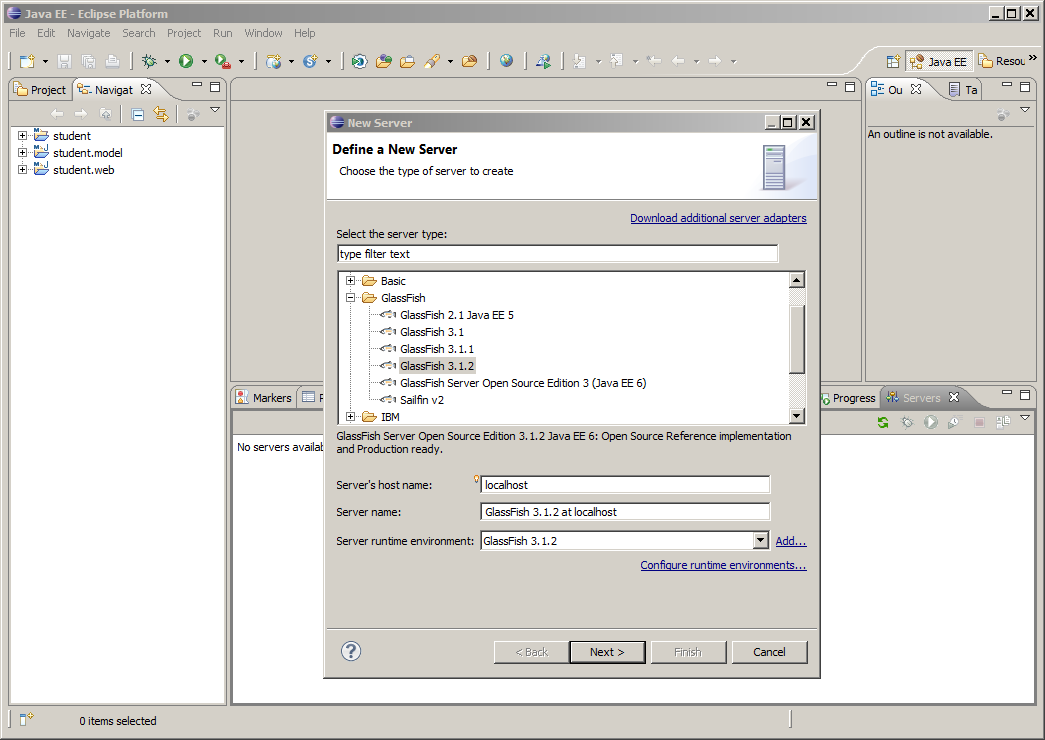
Click the "New Server Wizard" link on the Servers tab. If you don't see GlassFish listed under available server types, click "Download additional server adapters" and select Oracle GlassFish Server Tools to install the GlassFish server adapter.
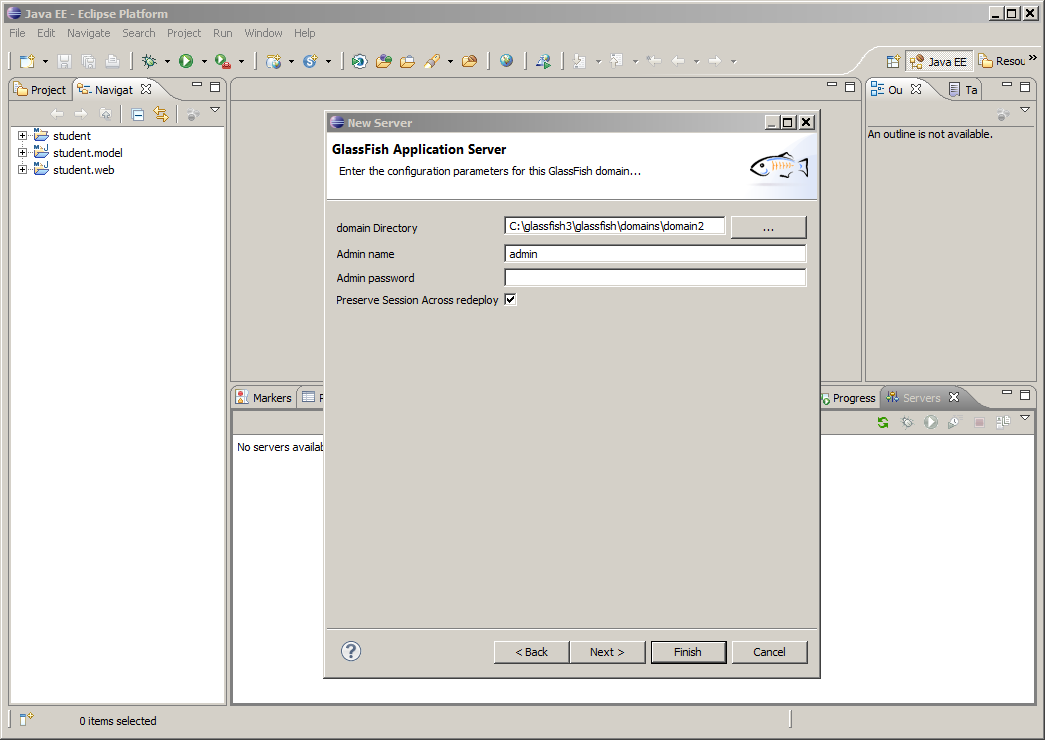
Enter domain directory, admin name and password based on your installation and hit Finish.
Deploy student.web
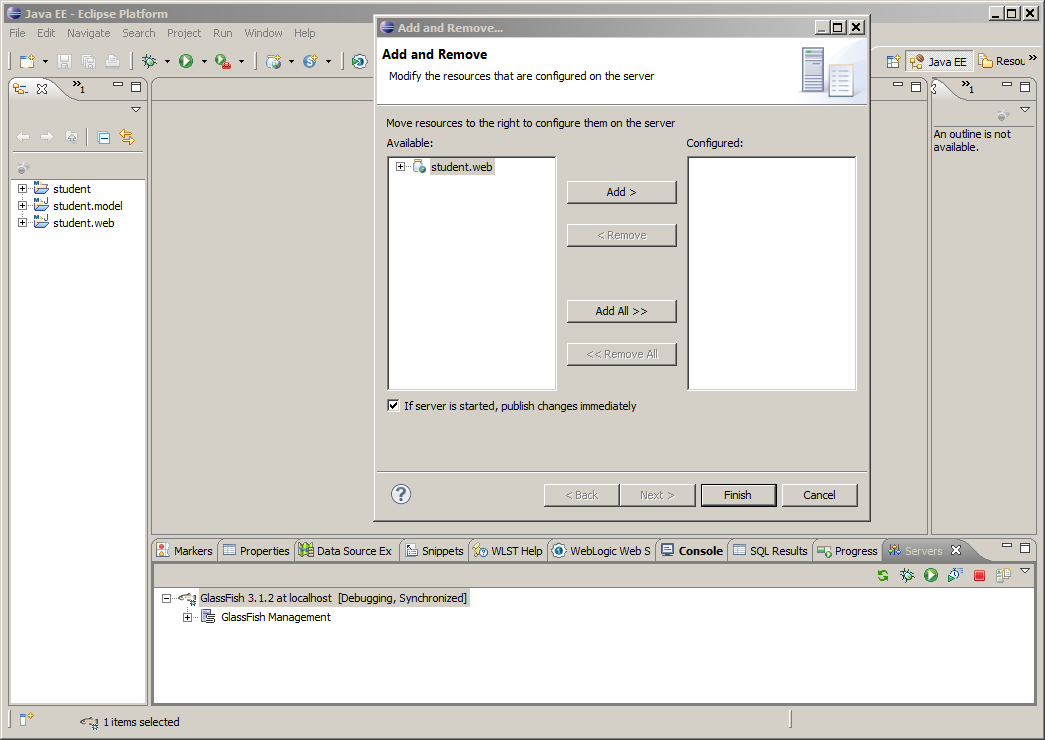
Right click on GlassFish (on the Servers tab), choose "Add and Remove", and select student.web in the available resources list. Hit Add and Finish.
You are now ready to run the example.
Running the Example
Launch Chrome and Postman
Please see Creating and sending requests using Postman if you are not familiar with creating and sending REST requests using Postman. If you are using another tool to construct REST requests, please make sure you set the Accept header correctly. The Accept header is used by HTTP clients to tell the server what content types will be accepted. The server will then send back a response, which will include a Content-Type header telling the client what the content type of the returned content actually is. HTTP requests can also contain Content-Type headers. With POST or PUT requests, the client sends data to the server as part of the request, and the Content-Type header tells the server what the data actually is (and thus determines how the server will parse it). JPA-RS accepts both application/json and application/xml, and for now we will focus on JSON.
View the Metadata
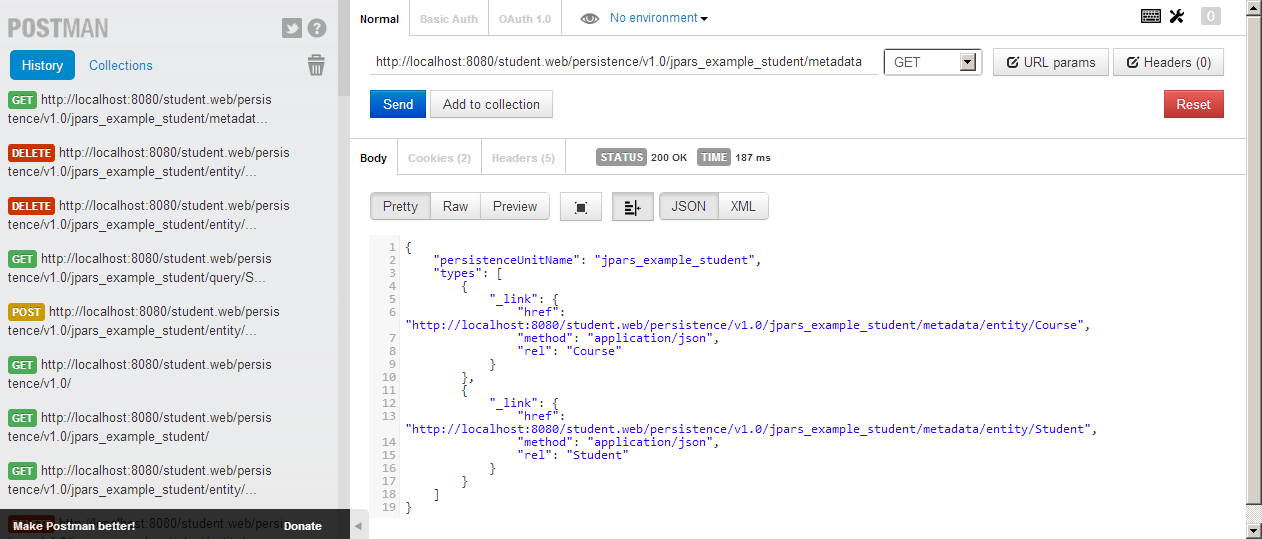
Execute a GET http://localhost:8080/student.web/persistence/v1.0/jpars_example_student/metadata
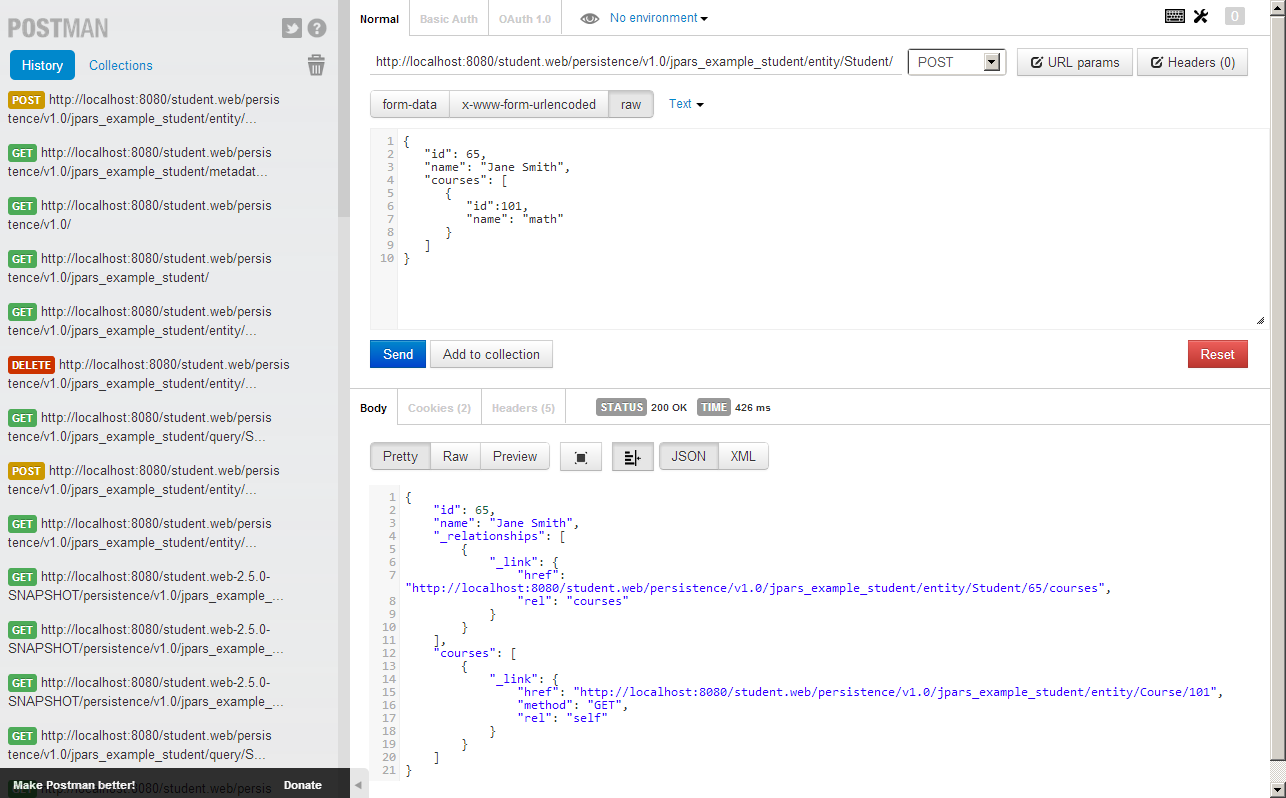
Create a Student with a Course
Execute a POST http://localhost:8080/student.web/persistence/v1.0/jpars_example_student/entity/Student/ (with the following body as an example):
{
  "id": 65,
  "name": "Jane Smith",
  "courses": [
       {
           "id":101,
           "name": "math"
       }
  ]
}
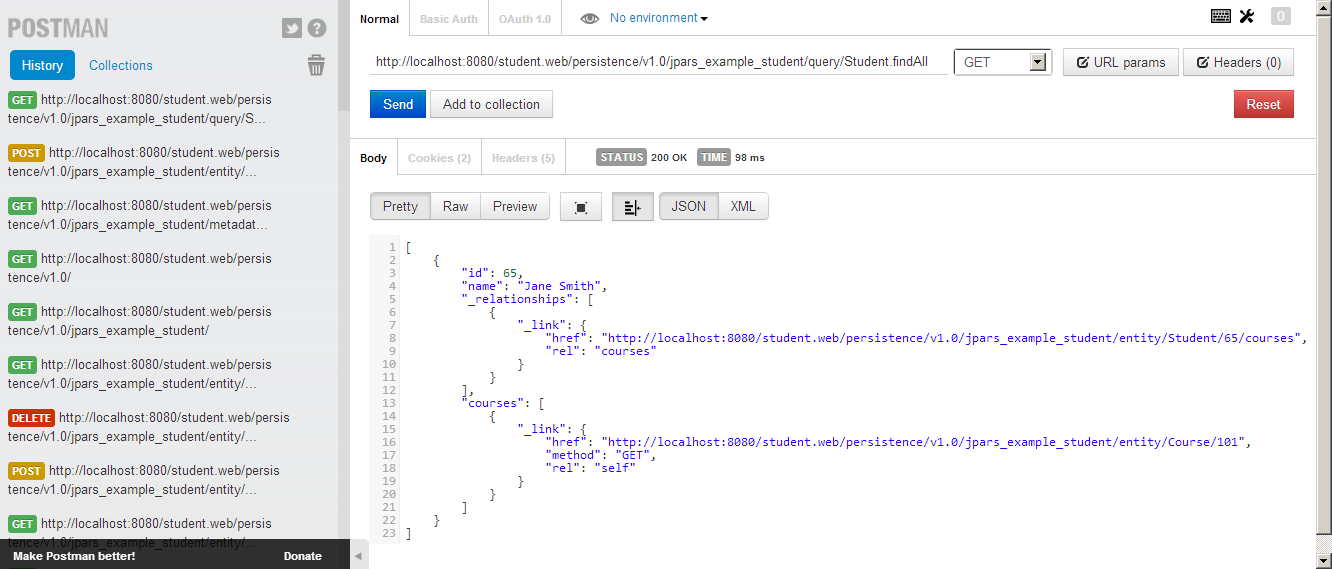
Execute a Named Query
Execute a GET http://localhost:8080/student.web/persistence/v1.0/jpars_example_student/query/Student.findAll to execute the named query findAll as defined in the eclipselink.example.jpars.student.model.Student entity.
Switch between JSON and XML
Add a Header called accept with value application/xml and execute the findAll query again. This time you will see the result in XML format:
<?xml version='1.0' encoding='UTF-8'?>
<List>
    <student>
        <id>65</id>
        <name>Jane Smith</name>
        <_relationships>
            <_link
                href="http://localhost:8080/student.web/persistence/v1.0/jpars_example_student/entity/Student/65/courses"
                rel="courses" />
        </_relationships>
        <courses>
            <_link
                href="http://localhost:8080/student.web/persistence/v1.0/jpars_example_student/entity/Course/101"
                method="GET" rel="self" />
        </courses>
    </student>
</List>
Changing the accept Header to application/json can also be used to accept/output JSON (which is the default).
Customize JSON/XML using MOXy
By specifying a MOXy bindings file in persistence.xml, you can modify the format of the XML and JSON produced and accepted by your JPA-RS application, without having to modify your JPA entities. Uncomment the following line in persistence.xml:
<property name="eclipselink.jpa-rs.oxm" value="META-INF/oxm-bindings.xml"/>This will specify that the JSON/XML mappings for your JPA entity should be overridden by the mapping metadata in the MOXy bindings file. The MOXy bindings change the element name of the Student's name field to student-name. Additionally, it changes the XML representation of name to be an XML attribute, instead of an element (the JSON representation will show a key named student-name, as attributes and elements are treated the same in JSON).
<?xml version="1.0" encoding="UTF-8"?>
<xml-bindings package-name="eclipselink.example.jpars.student.model" xmlns="http://www.eclipse.org/eclipselink/xsds/persistence/oxm">
    <java-types>
        <java-type name="Student">
            <java-attributes>
                <xml-attribute java-attribute="name" name="student-name"/>
            </java-attributes>
        </java-type>
    </java-types>
</xml-bindings>
Redeploy student.web and create the sample Student again as shown above (but this time, use student-name in your JSON input). Now, when you run the findAll query again, you will see the modified JSON/XML format:
[{
    "student-name": "Jane Smith",
    "id": 65,
    "_relationships": [{
        "_link": {
            "href": "http://localhost:8080/student.web/persistence/v1.0/jpars_example_student/entity/Student/65/courses",
            "rel": "courses"
        }
    }],
    "courses": [{
        "_link": {
            "href": "http://localhost:8080/student.web/persistence/v1.0/jpars_example_student/entity/Course/101",
            "method": "GET",
            "rel": "self"
        }
    }]
}]
<?xml version='1.0' encoding='UTF-8'?> <List> <student student-name="Jane Smith"> <id>65</id> <_relationships> <_link href="http://localhost:8080/student.web/persistence/v1.0/jpars_example_student/entity/Student/65/courses" rel="courses" /> </_relationships> <courses> <_link href="http://localhost:8080/student.web/persistence/v1.0/jpars_example_student/entity/Course/101" method="GET" rel="self" /> </courses> </student> </List>
Note: the same behaviour could be achieved by adding a JAXB annotation to the name field of the Student class:
@XmlAttribute(name="student-name")
private String name;
Delete a Student
Execute a DELETE http://localhost:8080/student.web/persistence/v1.0/jpars_example_student/entity/Student/65

