Notice: This Wiki is now read only and edits are no longer possible. Please see: https://gitlab.eclipse.org/eclipsefdn/helpdesk/-/wikis/Wiki-shutdown-plan for the plan.
EEF/Tutorials/First Generation
This page is now deprecated starting with EEF 1.6.0, find the updated documentation on the EEF homepage.
Presentation
This first tutorial will show you the common use of EEF. It describes the steps to obtain the EEF models and generate the associated code. Finally, it shows how to link the generated code with a simple EMF treeview editor.
Environment
To do this tutorial, you need to have an "EEF ready" environment. To obtain this environment, read the EEF Installation Guide.
EEF Models initialization
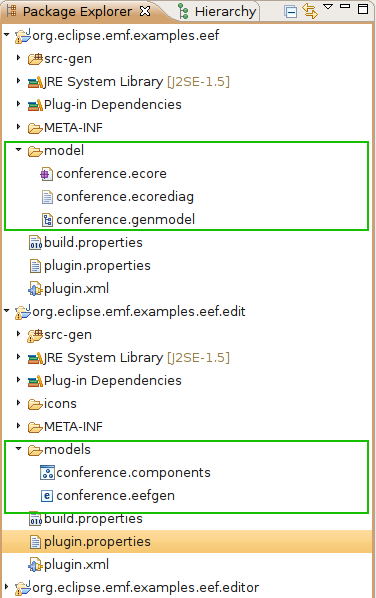
In the EEF environment, the first step is to initialize the EEF models. These models describe the visual elements of the generated editing components and the binding between these elements and the meta-classes of your meta-model. EEF provides an action to create these models. To call this action, perform a right click on the .genmodel file generated from your metamodel and select the action EEF > Initialize EEF models.
Generation and parameterization
The initializer has just created elements for meta-class attributes choosing predefined default widgets. So you need to parameterize the EEF models to model correctly the generation. For example, references representations, widgets changes...
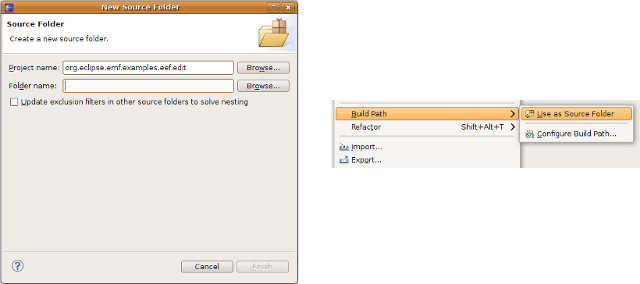
In the EEFGen created, the generation directory is a "src-gen" folder in the project where this model. You can keep this value or choose another folder. In any case, the target folder must exist and be a source folder. If the folder doesn't exist, you can create it with the "File > New > Source folder" wizard. If the folder exist but isn't a source folder, you can configure the build path of the project with the menu "Right click > Build Path > Use a source folder".
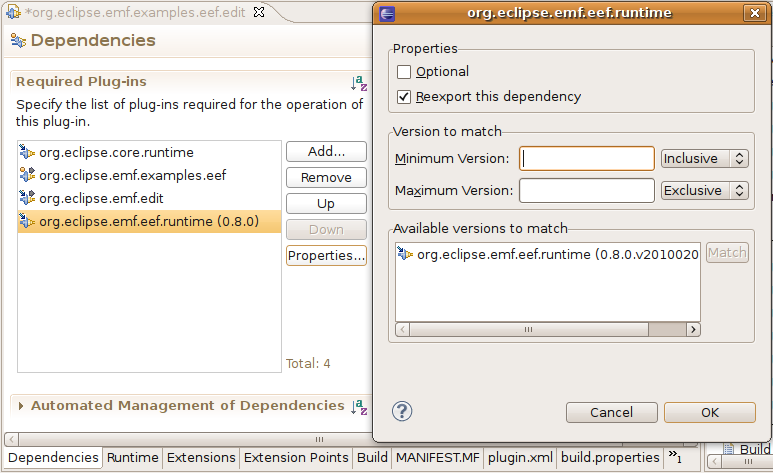
For an optimal course of the generation process, you have to add a dependency to the EEF Runtime project. To do that, open the plugin.xml file and add a dependency to the bundle "org.eclipse.emf.eef.runtime" in the "Dependencies" tab.
Once these steps done, generation can be called with the action "Generate EEF Architecture", just right click on the EEFGen model.
The generation creates an architecture displaying properties views corresponding to the parametrized models. What is generated is :
- Components for the control part
- Parts for views
- Providers for the structure instantiation
Global providers are also generated. They defined the structure instantiation and the elements edition strategies. Three providers have to be declared in the plugin.xml file with the extension points defined by the EEF runtime (explained in the next part : #EEF generation with EMF treeview editor).
The package containing the generated providers should be exported. To do so :
- Edit the plugin.xml in the edit project
- On the runtime tab, add the "providers" (with a final "s") in the exported packages list.
EEF Generation in EMF treeview editor
Extension points declaration
EEF provides 3 extensions points that are needed to use the generated code with any EMF edit. These extensions point are declared in the EEF runtime, so you need to add a dependency on it. The generation produce a partial plugin.xml that you can use to fill your own plugin.xml with. It is located in the generation root folder and is named like "XXX_properties.plugin.xml".
Here is an example for the demo project :
 <extension
        point="org.eclipse.emf.eef.runtime.PropertiesEditionProvider">
   <PropertiesEditionComponentProvider
        providerClass="org.eclipse.emf.eef.nonreg.providers.NonregPackagePropertiesEditionProvider">
   </PropertiesEditionComponentProvider>
 </extension>
 <extension
      point="org.eclipse.emf.eef.runtime.PropertiesEditionPolicyProvider">
   <PropertiesEditionPolicyProvider
        providerClass="org.eclipse.emf.eef.nonreg.providers.NonregPackagePropertiesEditionPolicyProvider">
   </PropertiesEditionPolicyProvider>
 </extension>
 <extension
      point="org.eclipse.emf.eef.runtime.PropertiesEditionPartProvider">
   <PropertiesEditionPartProvider
        providerClass="org.eclipse.emf.eef.nonreg.providers.NonregPropertiesEditionPartProvider">
   </PropertiesEditionPartProvider>
 </extension>
You need also to declare properties views in the edit project. This extension point is provided by the eclipse platform, and is needed to show up the EEF views in the properties view. the generated properties file ( XXX_properties.plugin.xml ) contains all the necessary code to declare the properties views, so you can copy/paste the contents in your plugin.xml file.
For example :
 <extension
         point="org.eclipse.ui.views.properties.tabbed.propertyContributor">
      <propertyContributor
            contributorId="org.eclipse.emf.eef.components.properties">
         <propertyCategory
               category="default">
         </propertyCategory>
         <propertyCategory
               category="extended">
         </propertyCategory>
         <propertyCategory
               category="advanced">
         </propertyCategory>
      </propertyContributor>
   </extension>
   <extension
         point="org.eclipse.ui.views.properties.tabbed.propertyTabs">
      <propertyTabs
            contributorId="org.eclipse.emf.eef.components.properties">
         <propertyTab
               label="Base"
               category="default"
               id="Base">
         </propertyTab>
      </propertyTabs>
   </extension>
   <extension
         point="org.eclipse.ui.views.properties.tabbed.propertySections">
      <propertySections
            contributorId="org.eclipse.emf.eef.components.properties">
         <propertySection
               tab="Base"
               class="org.eclipse.emf.eef.runtime.ui.properties.sections.PropertiesEditionSection"
               id="org.eclipse.emf.eef.components.section.PropertiesEditionContext">
             <input
                    type="org.eclipse.emf.eef.components.PropertiesEditionContext">
             </input>
         </propertySection>
         <propertySection
               tab="Base"
               class="org.eclipse.emf.eef.runtime.ui.properties.sections.PropertiesEditionSection"
               id="org.eclipse.emf.eef.components.section.PropertiesEditionComponent">
             <input
                    type="org.eclipse.emf.eef.components.PropertiesEditionComponent">
             </input>
         </propertySection>
         <propertySection
               tab="Base"
               class="org.eclipse.emf.eef.runtime.ui.properties.sections.PropertiesEditionSection"
               id="org.eclipse.emf.eef.components.section.PropertiesEditionElement">
             <input
                    type="org.eclipse.emf.eef.components.PropertiesEditionElement">
             </input>
         </propertySection>
         <propertySection
               tab="Base"
               class="org.eclipse.emf.eef.runtime.ui.properties.sections.PropertiesEditionSection"
               id="org.eclipse.emf.eef.components.section.PropertiesMultiEditionElement">
             <input
                    type="org.eclipse.emf.eef.components.PropertiesMultiEditionElement">
             </input>
         </propertySection>
      </propertySections>
   </extension>
EMF treeview editor modification
The standard EMF codegen generates an editor that uses standard properties views (with grid layout). So, you need to update it to use the EEF properties view (with tabs).
You might create a dependency between the EEF runtime ('org.eclipse.emf.eef.runtime') and the EMF generated editor plugin.
Open the XYZEditor.java located in the EMF generated xxx.editor plugin.
- The editor must implement an additional interface : "org.eclipse.ui.views.properties.tabbed.ITabbedPropertySheetPageContributor". Use "@implements ITabbedPropertySheetPageContributor" in between the user section (html comments) in the Javadoc at the class definition to keep the next code regeneration from reverting the change.
- With this interface, you have to implement the methods "getContributorId()"
/** (non-Javadoc)
 * @see org.eclipse.ui.views.properties.tabbed.ITabbedPropertySheetPageContributor#getContributorId()
 * @generated NOT
 */
public String getContributorId() {
    return PROPERTIES_CONTRIBUTOR;
}
- The identifier returned by this method is a constant which is added to the editor. It is generated by EEF with the following pattern : "<basepackage>.<packagename>.properties".
For example, for our example demo :
/**
 * @generated NOT
 */
public static final String PROPERTIES_CONTRIBUTOR = "org.eclipse.emf.eef.nonreg.properties";
- Then, you need to replace the declaration of the Eclipse standard properties view by a tabbed properties view.
The original code :
/**
 * This is the property sheet page.
 * <!-- begin-user-doc -->
 * <!-- end-user-doc -->
 * @generated
 */
protected PropertySheetPage propertySheetPage;
becomes
/**
 * This is the property sheet page.
 * <!-- begin-user-doc -->
 * <!-- end-user-doc -->
 * @generated NOT
 */
protected TabbedPropertySheetPage propertySheetPage;
- Replace also its instantiation, done in the method "getPropertySheetPage()" :
The original code :
/**
 * This accesses a cached version of the property sheet.
 * <!-- begin-user-doc -->
 * <!-- end-user-doc -->
 * @generated
 */
 public IPropertySheetPage getPropertySheetPage() {
     if (propertySheetPage == null) {
         propertySheetPage = new ExtendedPropertySheetPage(editingDomain) {
               @Override
               public void setSelectionToViewer(List<?> selection) {
                    NonregEditor.this.setSelectionToViewer(selection);
                    NonregEditor.this.setFocus();
               }
               @Override
               public void setActionBars(IActionBars actionBars) {
                    super.setActionBars(actionBars);
                    getActionBarContributor().shareGlobalActions(this, actionBars);
               }
        };
        propertySheetPage.setPropertySourceProvider(new AdapterFactoryContentProvider(adapterFactory));
     }
     return propertySheetPage;
}
becomes
/**
 * This accesses a cached version of the property sheet.
 * <!-- begin-user-doc -->
 * <!-- end-user-doc -->
 * @generated NOT
 */
 public IPropertySheetPage getPropertySheetPage() {
     if (propertySheetPage == null || propertySheetPage.getControl().isDisposed()) {
        propertySheetPage = new TabbedPropertySheetPage(XXXEditor.this);
     }
    return propertySheetPage;
 }
- Finally, it is possible to add properties edition wizard on double click on a tree element. You just have to call the following listener in the method "createPages()" in the editor (on the selectionViewer) :
selectionViewer.addDoubleClickListener(new OpenWizardOnDoubleClick(editingDomain, adapterFactory));
- Note that an OpenTransactionalWizardOnDoubleClick class exists in case you want to use a TransactionalEditingDomain.


