Notice: This Wiki is now read only and edits are no longer possible. Please see: https://gitlab.eclipse.org/eclipsefdn/helpdesk/-/wikis/Wiki-shutdown-plan for the plan.
Creating an ICE XML File From Schema
Contents
Introduction
From designing plugins in NiCE to examining output data, NiCE uses a common XML architecture for persisting data to disk. These XML files represent a one to one relationship between the elements in the file to the data structures within the program.
Background Information: Types of Schemas
Depending on the file type, there will be multiple types of schemas. For more information on NiCE DataStructure's overall architecture, please examine the Data Structures in NiCE page.
DataComponent Schema
There are three major pieces within the DataComponent schema. The Entry is an entity with values and validation. It contains an AllowedValueType, AllowedValues for the type, and the selected value and default value. The DataComponent is the container structure for a given set of entries. Both the DataComponent and Entry inherit — or contain — name, ids, and descriptions from the NiCEObject piece. Other than for data input from NiCEObject, the DataComponent and Entry are the only two pieces to be concerned with.
How to get started
To get started, please download the appropriate schema file for the required task. All files to be downloaded can be located on the main sourceforge website for NiCE, found here. The following tutorials and examples require the Eclipse IDE and the XML Editor plugin. The Eclipse IDE can be downloaded at the main Eclipse website under the downloads section. Some Eclipse IDE packages are already bundled with an XML Editor by default. To find out if your version of Eclipse already has an XML Editor, or to learn how to install one, please refer to the Eclipse help documentation.
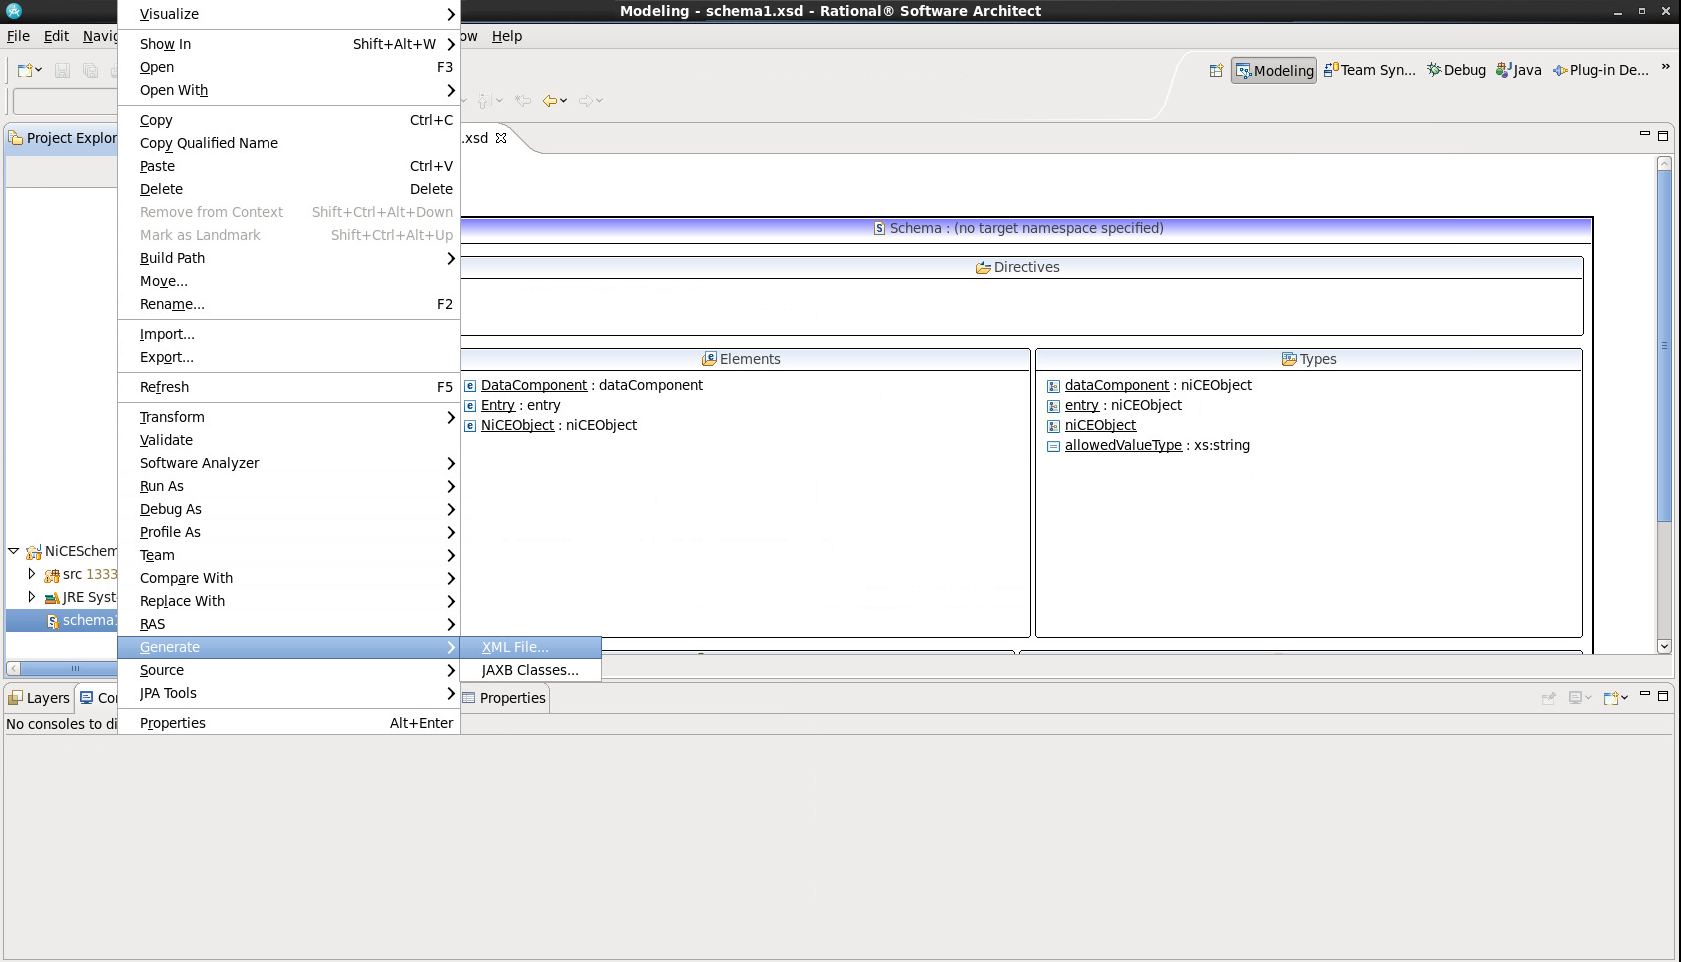
Once Eclipse and the XML editor is installed correctly, create a new project (Java, C++, etc.) and place the downloaded schema file in that directory. To create an XML file from the schema file, right click on the schema file and select Generate->XML File. Rename the file something appropriate other than NiCESchema.xml; on the next page, select the root element as DataComponent, and make sure to check the Create optional attributes and elements options in the editor before selecting finish. It may be better to allow it to automatically fill elements and attributes with some default data.
Examples
The list below will be examples of how to use the schemas to generate XML files for NiCE. Some of them will overlap, so it will be important to read all the examples for overall clarity. This assumes that the user has eclipse, has the appropriate plugins for eclipse, and understands how a schema file is generated and its purpose.
DataComponent Schema
For this example, download the appropriate DataComponent.xsd file from the listing on the NiCE website. Next, create a new XML file from the xsd file by following the "how to get started" instructions above. Please name the XML file DataComponent1.xml for this tutorial, and check the boxes for automatic data fill-out and to generate all the pieces of the XML file. The resulting XML should look like the following:
(You can open up the text-only by right-clicking the file and selecting Open With->Text Editor in Eclipse)
    <Entry changeState="true" defaultValue="" description="" errorMessage="" id="0"
    name="" parent="" ready="true" secretFlag="true" tag="" value="">
        <AllowedValueType>Discrete</AllowedValueType>
        <allowedValues>allowedValues</allowedValues>
      </Entry>
    </DataComponent>
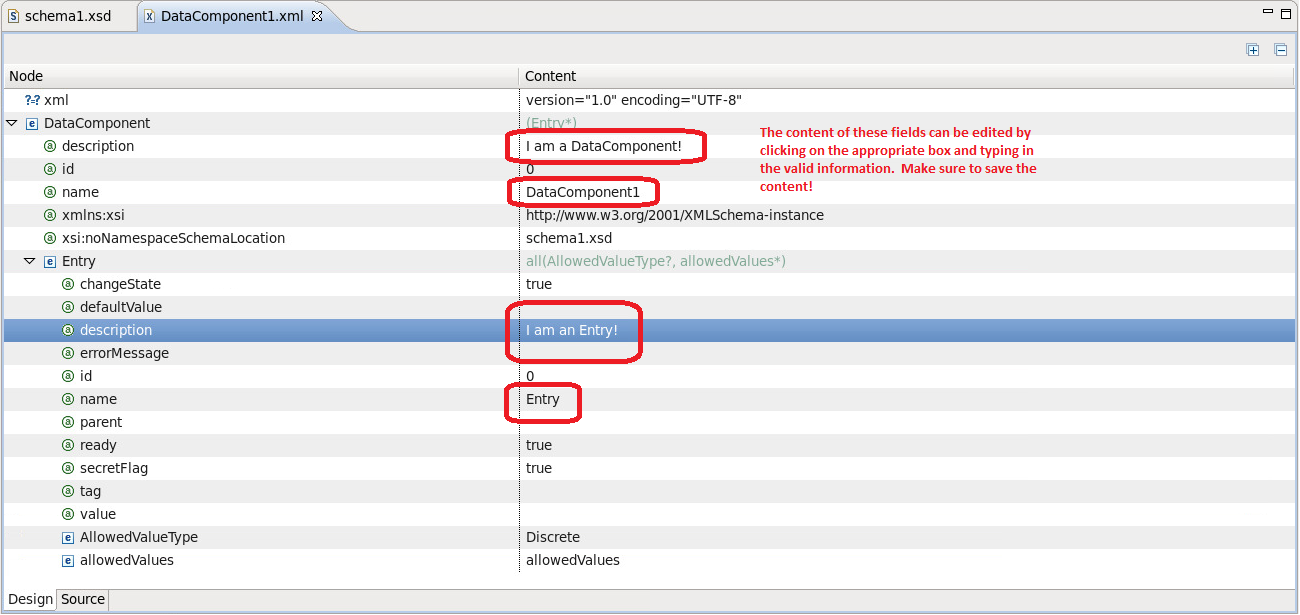
Now there are some pieces missing, so let's fill in the blanks. DataComponent and Entry do not have a description or name for their elements. Open up the DataComponent.xml by right-clicking on the file, Open with->XML Editor. When the editor opens, the sections will need to be expanded to get a full view of the DataComponent. Right now, DataComponent contains only one entry. There are also two columns, one is called Node and another is called Content.
- The node represents the tag, or "key".
- The content represents the "value" to the key association.
Most of these values can be edited by double-clicking on the appropriate content box and filling in the required information.
Please fill in the name and description fields for DataComponent and Entry. It should look similar to the first thumbnail. 
Once the name and description fields are taken care of, there are two important pieces on Entry to examine. One is the AllowedValueType, or a set list of values to describe the entry. An entry can be at least these three types: Undefined, Discrete, or Continuous. There is also a place for AllowedValues, or values that represent restrictions of value types on the entry. A description of the AllowedValueTypes are listed below:
- Undefined entries represent no limitations values. Leave the AllowedValues blank.
- Continuous entries are numerical between a boundary of two points. These values require two numerical values, the first being less than the second.
- Discrete entries are a list of specific values. There should be at least one value of AllowedValues, but can contain many different possibilities.
The AllowedValueType can be changed in the editor by selecting one of the three types. The AllowedValues's content can be changed by adding phrases, or by right-clicking on the AllowedValues node and selecting AddChild->String.
Finally, new Entries can be added by right-clicking on the DataComponent and selecting Add Child->Entry.
Conclusion
If there are any problems, like dead links or missing schema files, please send us an email. Thank you!

