Notice: this Wiki will be going read only early in 2024 and edits will no longer be possible. Please see: https://gitlab.eclipse.org/eclipsefdn/helpdesk/-/wikis/Wiki-shutdown-plan for the plan.
Difference between revisions of "Batch Mode (Running Experiments)"
| Line 31: | Line 31: | ||
| − | This will launch a new dialog to help you create a modifier that can be added to an experiment (see Figure | + | This will launch a new dialog to help you create a modifier that can be added to an experiment (see Figure 1b). In the new modifier dialog, for example, under Transmission rate select "range" |
| − | (sequence not yet enabled) and specify the range as shown | + | (sequence not yet enabled) and specify the range as shown. |
| + | 3) On top, select "New Experiment" from the toolbar to launch the New Experiment wizard (Figure 2). Specify a name for your experiment and click Finish. | ||
| − | + | 4) Open your new Experiment in the editor and drag the Scenario you created into the experiment. | |
| − | + | ||
| − | Drag any number of modifiers into the experiment. | + | 5) Drag any number of modifiers into the experiment. |
Click on the experiment, right click, and run it. | Click on the experiment, right click, and run it. | ||
| − | [[Image:Exper2. | + | [[Image:Exper2.png]] |
'''Figure 2:''' The New Experiment Wizard. | '''Figure 2:''' The New Experiment Wizard. | ||
Revision as of 18:23, 30 September 2009
Overview
The purpose of Experiments is to allow running a set of scenarios, one after another, each modifying some aspect of a "base" scenario. As an example, suppose you do not know the transmission rate for a disease. One can set up an experiment that varies the transmission rate through a range of values and the result for each run can be analyzed (via log files).
STEM uses components called "Modifiers" to modify the base scenario from one run to the next. A modifier is attached to another component in your scenario. for instance a disease model or a infector. The modifier is responsible for changing one or more attributes of the attached component between runs.
An experiment is a collection of modifiers with a link to a scenario, and an experiment can run just like a scenario can run. When you run an experiment it creates a batch
that will spawn off (a sequence of) simulations.
Creating an Experiment
1) Create a scenario (follow instructions here).
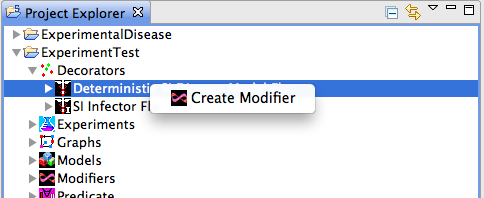
2) Create one or more modifiers. Modifiers can be created for for models, disease models, infectors, inoculators or graphs. To create a modifier for a disease, for example, find your disease in the STEM Project Explorer. Select it, right click on your disease, and chose create a modifier as shown in Figure 1.
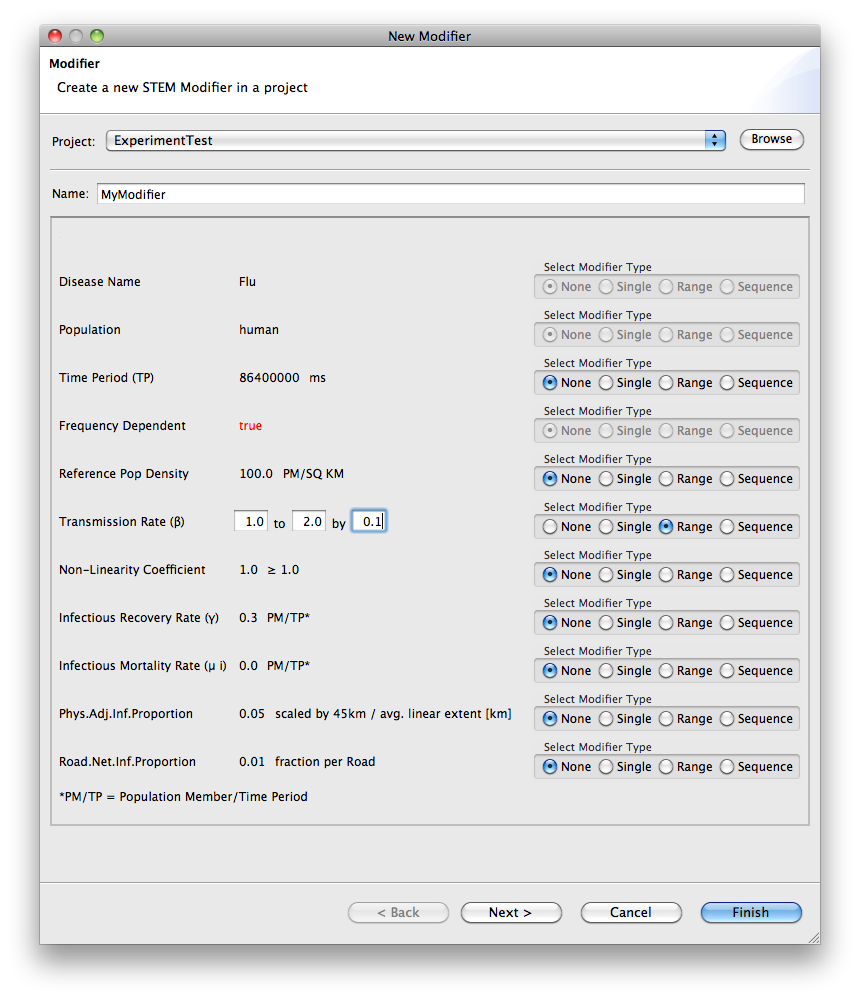
Figure 1a,b: Creating a new modifier for a particular disease in an existing scenario
This will launch a new dialog to help you create a modifier that can be added to an experiment (see Figure 1b). In the new modifier dialog, for example, under Transmission rate select "range" (sequence not yet enabled) and specify the range as shown.
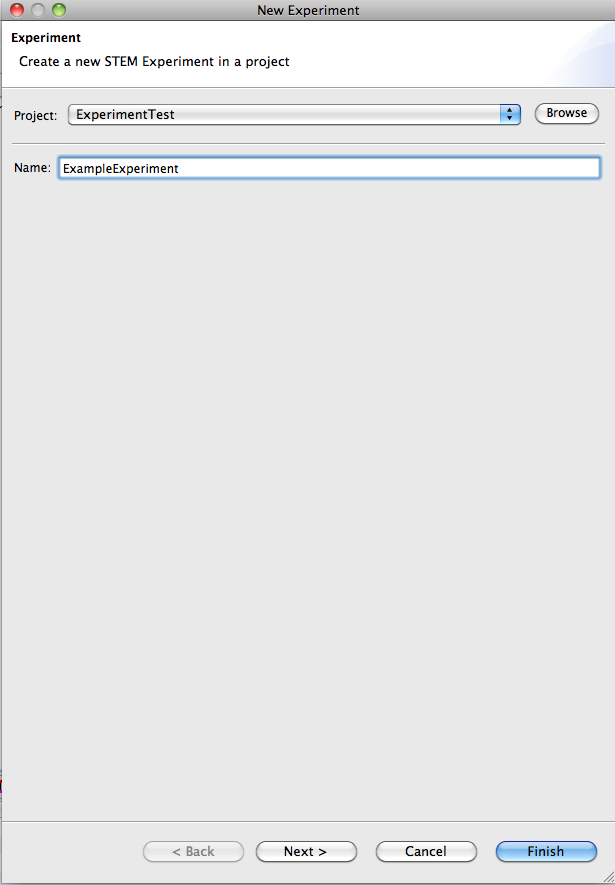
3) On top, select "New Experiment" from the toolbar to launch the New Experiment wizard (Figure 2). Specify a name for your experiment and click Finish.
4) Open your new Experiment in the editor and drag the Scenario you created into the experiment.
5) Drag any number of modifiers into the experiment.
Click on the experiment, right click, and run it.
 Figure 2: The New Experiment Wizard.
Save your work at this point by hitting ctrl-s
You run an experiment the same way you run a scenario. In the STEM Project Explorer click on the experiment, right click, and select run.


