Notice: This Wiki is now read only and edits are no longer possible. Please see: https://gitlab.eclipse.org/eclipsefdn/helpdesk/-/wikis/Wiki-shutdown-plan for the plan.
Difference between revisions of "UFaceKit/Development Setup In Eclipse"
< UFaceKit
(→Setting up a Target-Platform) |
(→Setting up a Target-Platform) |
||
| Line 31: | Line 31: | ||
</ul> | </ul> | ||
| − | Now our target is complete and | + | Now our target is complete and when checking out code from UFaceKit it should compile without errors now. |
Revision as of 20:45, 15 January 2009
Install a Subversion-Plugin
UFaceKit code is found inside a subversion repository so to directly install it inside Eclipse you have to install Subversion plugin:
TODO: I'm using Subclipse and the Team-Project-Sets provided are for Subclipse
Setup a Subversion Repository
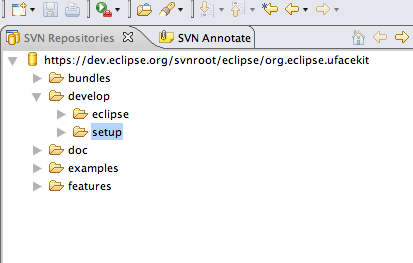
After having installed a subversion plugin you need to switch into the Subversion-Perspective and add a new repository point to http://dev.eclipse.org/svnroot/eclipse/org.eclipse.ufacekit.
Setting up a Target-Platform
Setting up a target platform allows allows you to program with another version of Eclipse against a specific target. In the following lines we are going to setup a target with dependencies UFaceKit-Code needs.
- Checkout the setup-Folder from Subversion-Repository
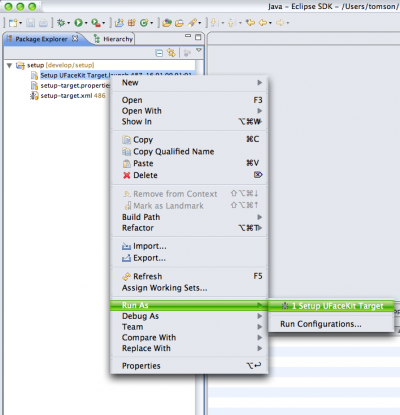
- Launch the setup-target.xml
For easy setup we provide an ANT-Script you can use to setup automatically.
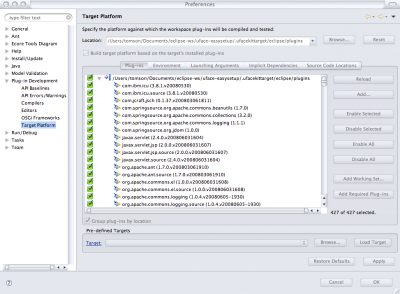
In the setup folder is a file named setup-target.properties. If you want you can point there to another download server by modifying the eclipse.url - Set our newly created target
Open the Perfernces-Dialog and navigate to Plug-in Development > Target Platform and set the location to $yourworkspace/.ufacekittarget/eclipse/plugins where $yourworkspace is the path to the workspace you are currently in.


Now our target is complete and when checking out code from UFaceKit it should compile without errors now.