Notice: This Wiki is now read only and edits are no longer possible. Please see: https://gitlab.eclipse.org/eclipsefdn/helpdesk/-/wikis/Wiki-shutdown-plan for the plan.
OSEE/OTE/Users Guide/Getting Started
Contents
Overview
The OSEE Test Environment (OTE) provides a framework for the testing of complex software systems. The test environment manages models, messages, remote communication, and logging.
Environments provide the core configuration of the tests, there is generally a 1 to 1 mapping between environments and labs. Generally, tests are written which set input and check output against the unit under test. These tests are sent to the Test Environment which then will coordinate with the unit under test to run the submitted test, or set the requested input.
These outputs can be imported into the OSEE Disposition tool for multi-run disposition of the test failures. And the OSEE Continuous Integration tool can accept changes, launch builds, run test scripts and report to common location for analysis.
The OSEE Coverage tool can take instrumented test output and determine Level A, B and C coverage throughout multiple runs.
Requirements
- OS: OTE can run anywhere Java can run but for this excercise we will focus on Windows
- RAM: recommend at least 8 GB of RAM
- HDD: At least 4 gigs of free disk space
- Java: JDK for java version 11 or newer.
Steps to running the OTE Simple Automated Test
Clone org.eclipse.ote
- Create a folder for containing your Git repository/ies.
- Navigate to Gerrit link here: https://git.eclipse.org/r/admin/repos/osee/org.eclipse.ote,general
- Use one of the clone commands to clone the OTE source repository.
- Once cloned, navigate into that repository folder on your machine and checkout the branch feature/Java11
Install OTE Client and Server
- Download the latest client for your OS here: https://ci.eclipse.org/osee/view/OTE_DEV/job/org.eclipse.ote.simple.oteide.product__DEV/lastSuccessfulBuild/artifact/org.eclipse.ote/org.eclipse.ote.simple.oteide.product/target/products/
- Download the latest server for your OS here: https://ci.eclipse.org/osee/view/OTE_DEV/job/org.eclipse.ote.test.server__DEV/lastSuccessfulBuild/artifact/org.eclipse.ote/org.eclipse.ote.test.server.p2/target/ote.server.runtime.zip
Unzip each zip into unique destination folders.
Set up the client
The OTE client is where you will connect to the OTE server, develop and run the automated tests, as well as develop OTE itself.
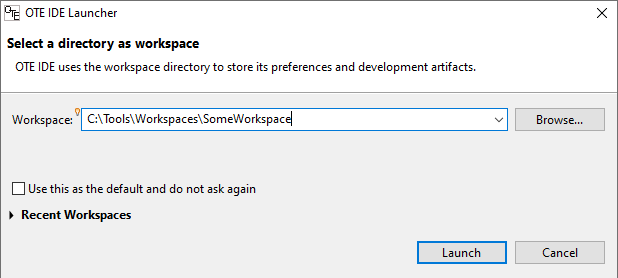
- Launch the OTE client by running ote.exe from the folder that the client was unzipped.
- When asked, select a workspace to contain the automated tests. The default workspace is fine.
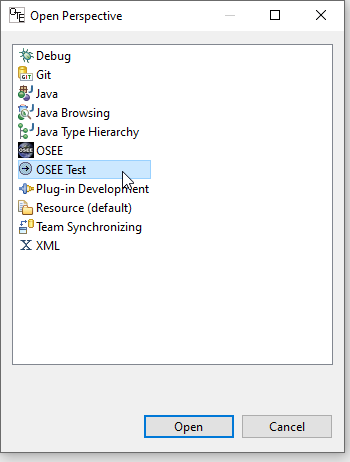
- In the new workspace that comes up, ensure you are in the OSEE Test Perspective:
- In the upper right of the workspace, click on the "Open Perspective" button and select "OSEE Test"


Import the Simple Automated Tests:
- From the top menu select File->import...
- Select General->"Existing Projects into Workspace"
- Hit the Browse button and find the root folder where you cloned org.eclipse.ote
- Once selected, there should be many projects automatically selected under "Projects"
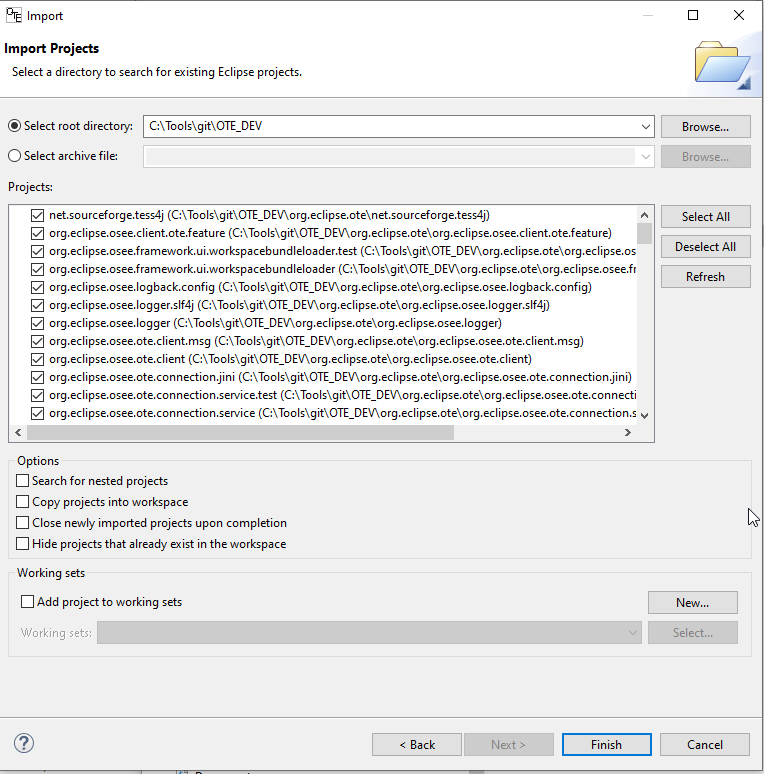
- To run tests, you only need to import a single project from this list so hit the "Deselect all" button.
- Scroll through the list put a checkbox on the "org.eclipse.ote.simple.test.script"
- Hit the Finish button and wait for the workspace to populate and compile completely

Start the OTE Test Server
The test server is where tests are actually going to be executed and allows for remote testing on machines anywhere in the world. For this excercise you will be launching a test server locally.
- Navigate to the directory you unzipped the ote server
- Execute the runWinSimpleServer.bat
- A new console will launch and start printing out log information. When ready to connect you will see something like the following:

- The SERVER CONNECTION URI is key. Highlight and copy the text "tcp://11.22.33.44:18501"

Connect to the test server
The Test Manager is where you will be managing which server you connect to as well as which tests to run. There are also some controls for HOW a script batch is to be run such as result file location, logging level, etc.
- Back in the client, open the OTE Navigator:
- If you are in the OSEE Test perspective as set up above, this should appear in the left side of the workspce next to the Package Explorer
- If you do not see the navigator, select the magnifying glass in the upper right corner and search for "OTE Navigator"
- In the navigator, double-click on the "Open OTE Test Manager" selection
- In the dialog, select a previous configuration if it exists or select "Create New configuration file"
- In the Test Manager, notice there are some subviews in the lower left of the frame. By default it will launch in the "Hosts" tab.
- In the "Hosts" tab you will find a list of available servers that the Client knows about. At the moment it should be empty.
- In the host table, right-click somewhere in the table and select
- In the dialog, paste the TCP connection string your copied from the OTE test server before.
- If successful, there should be a connection icon attached to the entry in the Host Table


Run the Simple Test
Now you will use the OTE Test Manager to load and run the Simple Test
- In the OTE Test Manager, switch to the "Scripts" tab
- Now open the Package Explorer view on the left frame and find the SimpleTestScript.java file
- You can find it by expanding the org.eclipse.ote.simple.test.script pacakge and searching around or you can do a Java type search with CTRL+SHIFT+T and type in "SimpleTestScript"
- Once you find the SimpleTestScript java file, drag that file from the package explorer into the scripts table in the OTE Test Manager
- Optionally you can right-click on the file and select OTE->Add to Test Manager
- Once added, the test should be automatically selected to run in the Scripts table
- To run the selected test, click on the Green play button at the top of the Test Manager
- The Test Manager will show periodic updates of the running test as it goes through its automation
- Note that this test will never pass completely as there are intentional failures as well as some test that require setup to pass
- There will be some examples of manual prompts as the test runs that you must click through to advance the test


Related Documentation
For overviews, tutorials, examples, guides, and tool documentation, please see:
Refer to the OSEE Team generated information included in the eclipse help subsystem.
White Paper - The Java Language Enviornment