Notice: This Wiki is now read only and edits are no longer possible. Please see: https://gitlab.eclipse.org/eclipsefdn/helpdesk/-/wikis/Wiki-shutdown-plan for the plan.
JSF Tools Smoke Tests
NOTE: Draft version, subject to change Reference
Tests
JSF_001-Create JSF Library in preference page
- Steps
- Window -> Preferences…->Web and XML -> JSF Libraries
- Criteria
- JSF Library is created successfully.
JSF_002-JSF Project Facets Wizard Page
- Steps
- Select ""JavaServer Faces v1.1 Project"" preset in Project Facet Wizard page.
- Criteria
- Can select JavaServer Faces preset and move to next page.
JSF_003-JSF Capabilities: JSF Library Wizard Page
- Steps
- Check JSF Capabilities wizard on libraries selection and check for deployment.
- Criteria
- Can configure selection of JSF libraries and check for deployment and finish project creation.
JSF_004-Project Creation: JSF Library Reference Property Page
- Steps
- Project properties -> JSF Library Reference.
- Criteria
- See the same configuration as configured in JSF_003.
JSF_005 Project Creation: J2EE Module Dependencies
- Steps
- Project properties --> J2EE Module Dependencies
- Criteria
- All JARs from JSF libraries checked for deployment should listed in the table.
JSF_006-Project Creation: Java Build Path
- Steps
- Project properties -> Java Build Path
- Criteria
- All JARs from selected JSF libraries should be listed in path.
JSF_007-JSF Library Reference Property Page: J2EE Module Dependencies update
- Steps
- Project properties -> JSF Library Reference.
- Uncheck/check a selected JSF libraries for deployment.
- Criteria
JARs from changed JSF library should be added/removed from J2EE Module Dependencies.
JSF_008 JSF Library Reference Property Page: Java Build Path update
- Steps
- Project properties -> JSF Library Reference.
- Add/Remove a selected JSF component library.
- Criteria
- JARs from the added/removed JSF library should be added/removed from build path.
JSF_009 JSF Facet installation + JSF library reference
- Steps
- Create a web application w/o JSF facet installed during project creation.
- Project properties->Project Facets -> Add/Remove Project Facet.
Criteria JSF library references are added. Module dependencies and build path are updated accordingly.
JSF_010 JSF Facet installation/un-installation
- Steps
- Create a web application w JSF facet installed during project creation.
- Uninstall JSF facet. Project properties->Project Facets -> Add/Remove Project Facet.
- Criteria
- A JSF facet is uninstalled. But, JSF library reference remain unchanged. Designed behavior.
JSF_011 Syntax Checking
- Steps
- Follow steps in tutorial document.
- Criteria
- Syntax checking performed as suggested in tutorial document.
JSF_012 Semantic Checking
- Steps
- Follow steps in tutorial document.
- Criteria
- Semantic checking performed as suggested in tutorial document.
JSF_013 Quick Fix
- Steps
- Follow steps in tutorial document.
- Criteria
- Quick fix performed as suggested in tutorial document.
JSF_014 Content Assist
- Steps
- Follow steps in tutorial document.
- Criteria
- Content assist performed as suggested in tutorial document.
JSF_015 FacesConfig Editor: Add Managed Bean
- Steps
- Follow steps in tutorial document.
- Criteria
- Managed bean is added successfully.
JSF_016 FacesConfig Editor: Add JSP pages in Navigation rule tab.
- Steps
Follow steps in tutorial document.
- Criteria
- JSP pages are added successfully.
JSF_017 FacesConfig Editor: Connect JSP pages in Navigation rule tab.
- Steps
- Follow steps in tutorial document.
- Criteria
- JSP pages are connected successfully.
JSF_018 FacesConfig Editor: Link properties set up in Navigation rule tab.
- Steps
- Follow steps in tutorial document.
- Criteria
- Link properties are set up properly as suggested in tutorial document.
JSF_019 Runtime: Module dependencies are deployed
- Steps
Deploy a JSF web application to a container.
- Criteria
- Check if JARs are deployed with the application
JSF_020 Runtime: Login page displayed
- Steps
- Right-click on login.jsp page and perform ""Run on Server""."
- Criteria
- Web application should be deployed and login page should display properly.
JSF_021 Runtime: Page navigation.
- Steps
- Enter a value for name and click Login.
- Criteria
- Navigate to a welcomed page with name populated from login page.
JSF_022 Documentation
- Steps
- Open the Eclipse Help, Help->HelpContents
- Check the links in the JavaServerFaces Tooling User Guide and JavaServerFaces Tooling Developer Guide
- JavaServerFaces Tooling Developer Guide->Programmer's guide->JSF Expression Language->(All the links)
- JavaServerFaces Tooling Developer Guide->Tutorial->Implementing a New Tag based EL variable contributor for JSP
- Criteria
- The pages should open successfully.
Test Case JSF_023: Project Creation: Loading Resource Bundles
Steps
- Add a Properties File
- As outlined in the tutorial, move the static strings that you have used in the JSP file to a resource bundle. To do this, add a file called say messages.properties in the folder com.tutorial for example. Define the properties as shown below and save the file.

-
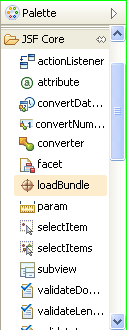 You can drag-and-drop the tag from the JSF Core section of the Palette View

- Add the loadBundle Tag
- Add the JSF tag, loadBundle as shown below.

- Instead of typing it in, you may also drag-and-drop the loadBundle tag from the JSF Core section of the Palette View, as shown in the image on the right. If you choose to do it this way, double-click on the loadBundle widget that appears on the page and enter the basename and var attributes.
- Test whether Content-Assist Works
- Delete a hard-coded string from a value attribute in a JSF tag and replace it with "#{}"
- Now place the cursor inside the braces, and press Ctrl+Space (or equivalent). You should see a popup with a list that includes the msg variable defined in the loadBundle tag. Select it.

- Enter a dot after msg and and hit Ctrl+Space (or equivalent). You should see a pop-up with a list of properties defined in the messages.properties file. Select the property name

- Test the Preview
- Click on the Preview tab on the editor

- Ensure that you can see all the output labels replaced with their appropriate values from the properties resource bundle.

- Test the Rendered Output on the Server
- Right click on your JSP file and select "Run on Server". Test whether the property values are rendered correctly.
Criteria
Ensure that the following criteria are met:
- loadBundle. You should be able to add a loadBundle tag successfully.
- Content-Assist. All the properties of the resource bundle should be displayed correctly when Ctrl+Spacebar (or equivalent) is pressed.
- Preview. The preview should display correctly (with appropriate values from the properties file)
- Run on Server. When run on the server, the rendered JSP page should display correctly.