Notice: this Wiki will be going read only early in 2024 and edits will no longer be possible. Please see: https://gitlab.eclipse.org/eclipsefdn/helpdesk/-/wikis/Wiki-shutdown-plan for the plan.
Facelet Functional Test
Contents
- 1 Project Creation and Facet Installation
- 2 XHTML Editor
- 3 Validation
- 4 File Creation Templates
- 5 Facelet Tag Support
- 6 Tag Registry and Component Tree Support
Project Creation and Facet Installation
New Project Creation with Default Settings
- Open the New Dynamic Web Project Wizard.
- Name the project Facelet1
- Select Facelet 1.0 Project in the Configuration drop down box.
- Hit Next.
- Hit Next on the Web Module page without changing the defaults.
- In the JSF facet install page:
- Select a JSF 1.2 runtime, adding one if not present.
- Select the Facelet JSF library, creating one if not present.
- Hit Next.
- Verify that the Facelet install page appears:
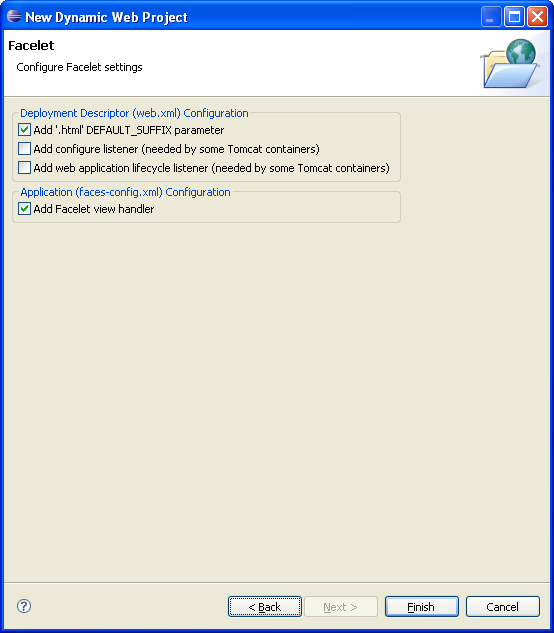
- Hit Finish without changing the defaults.
- Verify that the facets are installed correctly.
- Open the WEB-INF/faces-config.xml and verify that the facelet view handler has been registered.
- Open the web.xml file and verify that the DEFAULT_SUFFIX has been correctly initialized.

New Project Creation with additional web.xml Settings
- Create a new dynamic web project in the same way as the method in the test above, except in the Facelet install page, select all check boxes.
- Verify the same as above, plus the creation of the ConfigureListener and WebappLifecycleListener in the web.xml.
Add facet to existing JSF Project
- Create a JSF 1.2 faceted Dynamic Web Project with no Facelet facet.
- Open Project->Properties...->Project Facets.
- Select the Facelet check box.
- Hit Ok.
- Verify that the faces-config.xml is updated with the Facelet view handler and the web.xml has the DEFAULT_SUFFIX property updated.
Facet Add and Remove
Default create/remove
- Create a JSF 1.2/Facelet faceted project using the default settings.
- Verify that web.xml contains the .xhtml DEFAULT_SUFFIX setting and the faces-config.xml has the view handler.
- Right-click Project->Properties.. Project Facets and remove the Facelet facet without changing the remove settings.
- Verify that neither the web.xml nor the faces-config.xml has had the facet install changes removed.
Default add/remove
- Create a JSF 1.2 faceted project (Do not add the Facelet facet on creation).
- Verify that the web.xml and faces-config.xml files have been configured for JSF but not Facelets.
- Right-click on Project->Properties.. Project Facets and add the Facelet facet.
- Apply the add without changing the default settings.
- Verify that the DEFAULT_SUFFIX has been added to the web.xml and the Facelet view handler has been added to the faces-config.xml file.
- Right-click on Project->Properties.. Project Facets and remove the Facelet facet.
- Do not change the default settings and confirm the remove.
- Verify that neither the web.xml nor the faces-config.xml has had the facet install changes removed.
Default create/remove with matching remove settings
- Create a JSF 1.2/Facelet faceted project using the default settings.
- Verify that web.xml contains the .xhtml DEFAULT_SUFFIX setting and the faces-config.xml has the view handler.
- Right-click Project->Properties.. Project Facets to remove the Facelet facet.
- Open the further configuration dialog for the Facelet remove and select to remove the DEFAULT_SUFFIX and the view handler options.
- Confirm the remove.
- Verify that both the DEFAULT_SUFFIX and facelet view handler values have been removed from the project.
Default add/remove with matching remove settings
- Create a JSF 1.2 faceted project (Do not add the Facelet facet on creation).
- Verify that the web.xml and faces-config.xml files have been configured for JSF but not Facelets.
- Right-click on Project->Properties.. Project Facets and add the Facelet facet.
- Apply the add without changing the default settings.
- Verify that the DEFAULT_SUFFIX has been added to the web.xml and the Facelet view handler has been added to the faces-config.xml file.
- Right-click on Project->Properties.. Project Facets and remove the Facelet facet.
- Open the Further Configuration dialog and select removal of the DEFAULT_SUFFIX and Facelet view handler
- Verify that the web.xml and the faces-config.xml has had the facet install changes removed.
Add all, remove all
- Create a JSF 1.2 and Facelet faceted project and select all available Facelet configuration options.
- Verify that all Facelet configuration options were applied to the faces-config.xml and web.xml files
- Remove the Facelet facet, selecting removal of all Facelet configuration options.
- Verify that all Facelet configuration options were removed.
Add all, remove some
- Create a JSF 1.2 and Facelet faceted project and select all available Facelet configuration options.
- Verify that all Facelet configuration options were applied to the faces-config.xml and web.xml files
- Remove the Facelet facet, selecting removal of only the configure listener and Facelet view handler to remove.
- Verify that only the selected configuration options were removed.
Remove JSF and Facelet
- Create a JSF 1.2 and Facelet faceted project using the default configurations.
- Verify that the faces-config.xml and web.xml configurations are set up properly.
- In the Project Facets menu, select remove both the JSF and Facelet facets.
- In the facelet removal dialog, select to remove the DEFAULT_SUFFIX and Facelet view handler options.
- Accept the changes and verify that everything was correctly removed.
XHTML Editor
For all these tests, start with a Dynamic Web Project with the JSF 1.2/Facelet facets. Ensure that JSF runtime, JSTL 1.2 and the facelet jars in the classpath. Create an XHTML 1.0 Transitional file in the WebContent root directory.
Content Assist
Namespace Assist
Basic insertion
- Place the cursor inside the html tag.
- Add the text xmlns:f=. Verify that content assist activates after the equals sign.
- With the cursor after the = sign, and Ctrl-Space.
- Verify again the content assist is activated with the following options:
- Select on of the options and verify that it is correctly inserted.

No duplicate insertion
- With one of the namespace options inserted into the HTML from the test above.
- Create a new attribute for xmlns:h=
- Verify that the options list for content assist (which should again appear after entering hitting the = sign) includes all valid namespace options 'except' the one already inserted.
- Select an option and verify that it inserts correctly.
Tag Assist
Basic insertion
- Create an XHTML document and add the core and html namespaces to the page.
- Save the page.
- Create an opening less-than (<) and hit Ctrl-Space.
- Verify that all the core and html tags are present.
- Select h:form and verify it is correctly inserted.
Prefix selection
- Add the text <f: to a document with core declared with the f prefix.
- Hit Ctrl-Space after the : and verify that only the core tags are listed in the content assist.
- Add the text <h:in to a document with html declared with the h prefix.
- Hit Ctrl-Space after the text and verify that only inputHidden, inputSecret, inputText, inputTextarea are present.
Attribute Name Assist
Basic insert
- In a no-attribute h:outputText tag, activate content assist.
- Verify that the attribute options are listed.
- Select value and verify it inserts correctly.
- In an h:message tag, activate content assist for attributes.
- Verify that the attribute for is marked to indicate it is required.\
- Select for and verify it inserts correctly.
Attribute Name Prefix
- In a no-attribute h:outputText tag, add the a v at the beginning of an attribute.
- Activate content assist after the v.
- Verify that only assists for validator, validatorMessage, value, valueChangeListener.
- Select the validator and verify it inserts correctly.
Static Attribute Value Assist
- Starting with the tag, <h:outputText dir=""> activate content assist inside the double-quotes.
- Verify that assists for ltr and rtl are present.
- Select ltr and verify that it inserts correctly.
Dynamic Attribute Value, Non-EL Assist
- Create a page navigation from login.xhtml to welcome.xhtml in the faces-config (pages must exist). Call the outcome login in the faces-config file.
- In login.xhtml, add an h:commandButton.
- Add an action attribute to the commandButton tag.
- In the value for the action attribute, activate content assist.
- Verify that an assist is included: login: goto /welcome.xhtml.
- Use the assist and verify that it inserts login into the attribute value.
EL Content Assist
For these tests, add a beans.LoginBean class to the src folder and create a session bean of that type called loginBean to the faces-config. Also, create a login.xhtml Transitional XHTML file in a Facelet faceted project. Add name and password bean properties to the LoginBean type.
Variable Assist, Blank EL
- Create an h:inputText tag and add a value attribute to it.
- Set the value of the value attribute to "#{}".
- Activate content assist inside the braces.
- Verify that loginBean and all the implicit variables are present
- Scroll in the list to loginBean
- Verify that additionalInfo appears with name, type and scope correctly set.
- Select the loginBean action and verify it is correctly inserted.
Variable Assist, Variable Present
- Start with <h:inputText value="#{p}"/> in an XHTML document.
- After the p in the EL expression, activate content assist.
- Verify that only param and paramValue (the only ones starting with p) are present.
- Verify the correct insertion for paramValue.
Property Assist, No Property
- Add an <h:inputText value="#{loginBean.}"/>.
- Position the cursor after the . and hit Ctrl-Space.
- Verify that name and password and class appear as options.
- Backspace to delete the ..
- Re-enter the . and verify that the same assist options as above appear automatically.
- Select the name property in the list and verify that the additional info provides correct type and assignability.
- Select name and verify it inserts properly.
Property Assist, Existing Property
- Add an <h:inputText value="#{facesContext.r}"/>.
- After the r, press Ctrl-Space.
- Verify that only assists starting with r are present: renderKit, renderResponse, responseComplete, responseStream, responseWriter.
- Scroll through each and verify in the additionalInfo window in order: javax.faces.render.RenderKit, read-only, boolean, read-only, boolean, read-only, javax.faces.context.ResponseStream, read/write, javax.faces.context.ResponseWriter, read/write.
- Select the renderKit property and verify it inserts correctly.
Property Assist, Property of Property
- Starting from the result of the above, Property Assist, Existing Property.
- Activate content assist after renderKit by entering a . character.
- Verify that the assist window opens with class and responseStateManager present.
- Verify additionalInfo on the responseStateManager property as javax.faces.render.ResponseStateManager, read-only.
- Verify that the responseStateManager property inserts correctly.
EL Hover Help
For all hover help tests, start with a <h:inputText value="#{loginBean.name}"/> in an xhtml file.
Simple variable hover
- Place mouse over the loginBean. Verify that a hover help window appears with correct name, type and scope.
Simple property hover
- Place mouse over name.
- Verify that type and accessibility are correct.
Simple property hover with Javadoc
- Add Javadoc with a @return statement to the getter for the name property.
- Save and rebuild.
- Place mouse over the name property in the xhtml document.
- Verify that the return text appears in the hover help in addition to the basic type and accessibility information.
Hyperlink
Start with <h:inputText value="#{loginBean.name}"/>.
Variable
- Position mouse cursor over loginBean.
- Hold down ctrl and verify that a hyperlink appears under the text.
- Left mouse click and verify that the LoginBean class is opened in a Java editor with the class name selected.
Property
- Position mouse cursor over name.
- Hold down ctrl and verify that a hyperlink appears under the text.
- Left mouse click and verify that the LoginBean class is opened in a Java editor with the getName() method is selected.
Validation
For all these tests, start with a Dynamic Web Project with the JSF 1.2/Facelet facets. Ensure that JSF runtime, JSTL 1.2 and the facelet jars in the classpath. Create an XHTML 1.0 Transitional file in the WebContent root directory.
For all EL validation tests, start additionally with a loginBean EL variable declared in the usually way and tied to a class beans.LoginBean with name and password bean properties.
Non-EL validation, Static
- Add <h:panelGrid columns=""/> to the an XHTML document.
- Validate the page and verify that the empty value for columns is flagged with a warning for invalid integer value.
- Change the value for columns to 2.
- Revalidate and verify that the warning goes away.
- Change the value for columns to d.
- Revalidate and verify that the warning reappears flagging the value as not a valid integer.
Non-EL validation, Dynamic
- Add a h:commandButton action="login"/> and validate.
- Verify that the login value is flagged as not a valid navigation outcome value.
- Create a page navigation from login.xhtml to welcome.xhtml in the normal smoke test way and create the login outcome.
- Revalidate and verify that the validation message goes away.
- Change the value of the action attribute to login2.
- Revalidate and verify that the validation message reappears on the action value.
- Change back the action value to login again, revalidate and verify no problems.
EL validation, no EL
- Add an <h:inputText value="#{}" />.
- Validate and verify that the {} is flagged as a warning for empty EL expression.
EL validation, invalid variable
- Add a <h:inputText value="#{notAVariable}" /> tag.
- Validate and verify that notAVariable is flagged as not a known variable.
EL validation, no property
- Add a <h:inputText value="#{loginBean.notAProperty}" /> tag.
- Validate and verify that notAProperty is flagged as not a known property.
EL validation, valid variable.property
- Add a <h:inputText value="#{loginBean.name}" /> tag.
- Validate and verify that EL expression passes validation.
- Change loginBean to loginBean2, revalidate and verify that loginBean2 is flagged with a warning.
- Change loginBean2 back to loginBean.
- Change name to name2, revalidate and verify that name2 is flagged with a warning.
- Change name2 back to name.
- Validate and verify that EL expression again passes validation.