Notice: this Wiki will be going read only early in 2024 and edits will no longer be possible. Please see: https://gitlab.eclipse.org/eclipsefdn/helpdesk/-/wikis/Wiki-shutdown-plan for the plan.
Difference between revisions of "Xtext/GettingStarted"
(→DSL Generation) |
(→Model) |
||
| Line 24: | Line 24: | ||
= Model = | = Model = | ||
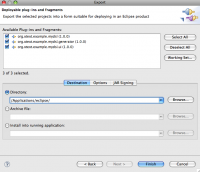
To use the DSL editor which was generated in the last step, you have to provide it to Eclipse. So, choose ''File > Export...'' and ''Plug-in Development > Deployable plug-ins and fragments'', select all three plug-ins and choose the Eclipse’s plugin directory as destination directory. Press ''Finish'' and restart Eclipse. After that, you are able to open generator project’s ''MyModel.mydsl'' with the MyDsl editor. This example model already comes with two class definitions from which one extends the other. As well, you find the package ''templates'' which contains an Xpand template and Xtend extensions. The former is used to define the files you want to generate according to the model, the latter supports the template definitions by providing functions which can be called. | To use the DSL editor which was generated in the last step, you have to provide it to Eclipse. So, choose ''File > Export...'' and ''Plug-in Development > Deployable plug-ins and fragments'', select all three plug-ins and choose the Eclipse’s plugin directory as destination directory. Press ''Finish'' and restart Eclipse. After that, you are able to open generator project’s ''MyModel.mydsl'' with the MyDsl editor. This example model already comes with two class definitions from which one extends the other. As well, you find the package ''templates'' which contains an Xpand template and Xtend extensions. The former is used to define the files you want to generate according to the model, the latter supports the template definitions by providing functions which can be called. | ||
| + | |||
| + | [[Image:ExportPlugin.png|170px|Export as Plugin]] [[Image:ChooseDeployable.png|200px|top|Choose Deployable Plug-Ins and Fragments]] [[Image:ChoosePlugins.png|200px|Choose Plugins and their Destination]] | ||
= Content Generation = | = Content Generation = | ||
Revision as of 08:04, 12 March 2009
Presented below are a few steps to gain a first impression of how Xtext works. We are assuming that you already set up your Eclipse IDE (version 3.4 (Ganymede) required, version 3.5+ (Galileo) preferred) and dropped in the plugins from our download page or installed the whole distribution.
Contents
Wizard
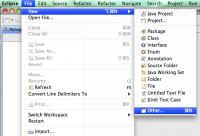
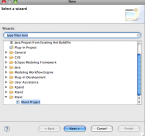
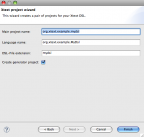
Let us start with using the wizard to create projects which represent the example we will go through. Choose File > New > Other... and then Xtext > Xtext Project to open the wizard. Here you can enter the main project name, the name of your domain-specific language (DSL) you are about to design, and the default extension for DSL files. As a start, just leave the given values (assumed below). Additionally, you could uncheck the creation of the generator project. Since in most cases a generator is needed, you usually have to leave it checked. So do now and press Finish.
Project Overview
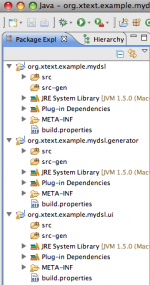
In the Package Explorer you can see three new projects. In org.xtext.example.mydsl you can define the grammar of your DSL, in org.xtext.example.mydsl.generator you will be able to create instances of your DSL – the so-called model –, and into org.xtext.example.mydsl.ui editor classes for your DSL will be generated. It is good to be clear and unambiguous whether the code is generated or is to be manipulated by the developer. Thus, the generated code should be seperated from the manual code. We follow this pattern by giving a folder src and a folder src-gen in each project. Keep in mind not to make changes in the src-gen folder. They would be overwritten in the next generation process.
Grammar
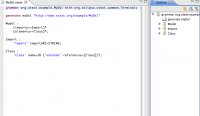
If everything went well, the example grammar file MyDsl.xtext from the first project is opened with the Xtext Editor. That equates the meta level, i.e. the model which describes your model. As you can see, an example is already given. Besides the grammar’s name declaration (grammar...) and the declaration of the further generation process (generate...) you find rules for Model, Import, and Class. The model consists of an arbitrary number of imports and elements. The former is the word import followed by a URI string, the latter is the word class followed by a name and an optional reference to another class.
DSL Generation
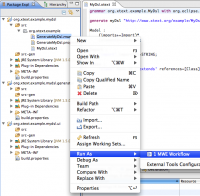
In the same directory you find GenerateMyDsl.mwe which is a workflow configuration for the Modeling Workflow Engine. Right-click this file in the Package Explorer and choose Run As > MWE Workflow. You can observe the generation process so triggered in the console view. After it, files are added in all projects. You are almost ready to design your model that follows the DSL.
Model
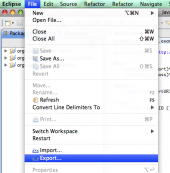
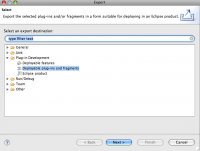
To use the DSL editor which was generated in the last step, you have to provide it to Eclipse. So, choose File > Export... and Plug-in Development > Deployable plug-ins and fragments, select all three plug-ins and choose the Eclipse’s plugin directory as destination directory. Press Finish and restart Eclipse. After that, you are able to open generator project’s MyModel.mydsl with the MyDsl editor. This example model already comes with two class definitions from which one extends the other. As well, you find the package templates which contains an Xpand template and Xtend extensions. The former is used to define the files you want to generate according to the model, the latter supports the template definitions by providing functions which can be called.
Content Generation
To see your template in action locate workflow > MyDslGenerator.mwe, right-click it and choose Run as > MWE Workflow. You can see the generator running and logging into the console view. The result will be stored in src-gen > output.txt.
Refining
To learn more about Xtext and the modeling process, refine your DSL and your model by going through the generation processes again. This time you could add some rules in the grammar, define constraints for the model (MyDslChecks.chk) and play around with the template and the workflow files (.mwe). Color Coding and Content Assistance will help you, in the documentation everything is explained in detail.

