Notice: this Wiki will be going read only early in 2024 and edits will no longer be possible. Please see: https://gitlab.eclipse.org/eclipsefdn/helpdesk/-/wikis/Wiki-shutdown-plan for the plan.
Difference between revisions of "Visualizing Output with ICE"
(→Prerequisites) |
(→Connecting to VisIt) |
||
| Line 54: | Line 54: | ||
Regardless of which method you choose to connect to VisIt, enter a ''Connection name'' at the bottom of the pop-up dialog. This will allow you to re-use this connection information in the future. | Regardless of which method you choose to connect to VisIt, enter a ''Connection name'' at the bottom of the pop-up dialog. This will allow you to re-use this connection information in the future. | ||
| − | If you are connecting to an already existing session, specify a ''Window ID'' between 1 and | + | If you are connecting to an already existing session, specify a ''Window ID'' between 1 and 16 as well. Which ''Window ID'' to use depends on how you'd like to connect to VisIt. If multiple users connect using the same ''Window ID'', they will both see and be able to interact with the same screen. However, if you'd like multiple users to each have their own unique session, assign a unique ''Window ID'' to each user. The VisIt installation will be able to serve up to 16 unique connections at a time. |
Once you are done, click the ''Finish'' button at the bottom, and ICE should begin connecting to VisIt. | Once you are done, click the ''Finish'' button at the bottom, and ICE should begin connecting to VisIt. | ||
Revision as of 12:00, 18 December 2014
| This page is under construction |
Currently, ICE features two plugins for visualizing and plotting simulation output data:
- VisIt Tools - An interactive 3D visualization tool for rendering meshes, scalar plots, contour plots, and more.
- CSV Plotting Tools - A fully-customizable 2D .csv data plotting utility.
Contents
Installation and Configuration
Prerequisites
To use the VisIt Tools, ICE requires the installation of VisIt (minimum version 2.8.2) developed by Lawrence Livermore National Laboratory, either locally or on a remote machine.
The CSV Plotting Tools require no additonal software to be installed.
Visualization Perspective
To use ICE's visualization tools, you first must switch to the Visualization Perspective. The Visualization Perspective is an alternative workbench that contains UI components necessary for visualization that are not normally exposed in the default ICE perspective.
To access the Visualization Perspective, use the the ICE toolbar at the top and navigate to:
Window > Open Perspective > Other...
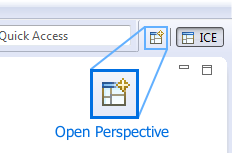
Select Visualization in the window that pops up and click OK. Alternatively, you can also access the same pop-up menu by clicking the Open Perspective button in the upper right-hand corner of the ICE workbench.
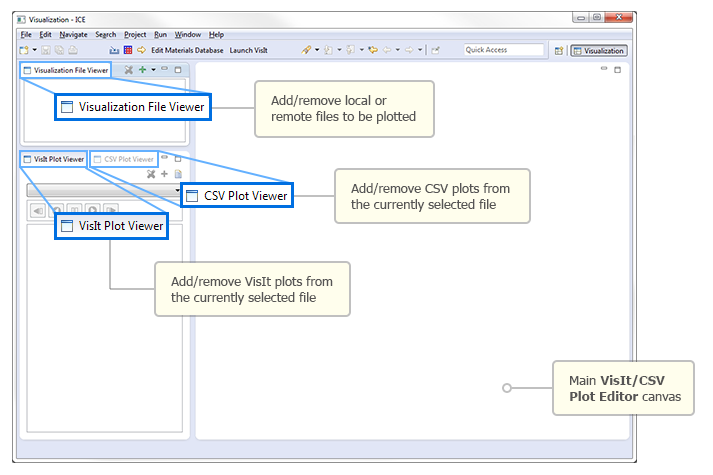
Once the Visualization Perspective opens, you should notice the workbench contains some new UI components. Make note of the following panels, as we'll be referring to them in the following sections.
Visualizing Output
VisIt
Connecting to VisIt
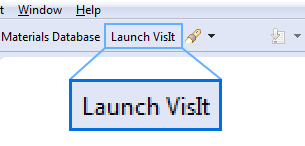
Once you've switched to the Visualization Perspective, the first step necessary is to connect to your VisIt installation through ICE. To do this, click on the Launch VisIt button located in the ICE toolbar near the top.
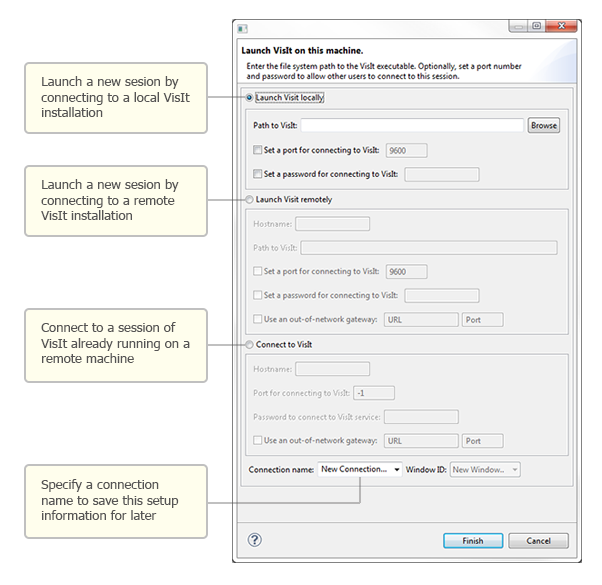
A dialog will pop up offering you three options for connecting to VisIt:
- Launch VisIt locally
If you installed VisIt on your local machine, use the Browse button to direct ICE to your local installation directory. Using this method of connecting will launch a new VisIt session. Optionally, you can also set a port number (default 9600) and password if you might want to share your VisIt session with another user. - Launch VisIt remotely
If you installed VisIt on a remote machine, specify the hostname and full path to the VisIt installation directory. Using this method of connecting will launch a new VisIt session. Optionally, you can specify a port number (default 9600) and password if you might want to share your VisIt session with another user. If you need or want to use an external gateway, you may specify a URL and port number as well. - Connect to VisIt
If you'd like to connect to session of VisIt already running somewhere else, specify the hostname, port number and password set on the VisIt session; you will need to obtain this information from the person who initially launched the VisIt session. If you need or want to use an external gateway, you may specify a URL and port number as well.
Regardless of which method you choose to connect to VisIt, enter a Connection name at the bottom of the pop-up dialog. This will allow you to re-use this connection information in the future.
If you are connecting to an already existing session, specify a Window ID between 1 and 16 as well. Which Window ID to use depends on how you'd like to connect to VisIt. If multiple users connect using the same Window ID, they will both see and be able to interact with the same screen. However, if you'd like multiple users to each have their own unique session, assign a unique Window ID to each user. The VisIt installation will be able to serve up to 16 unique connections at a time.
Once you are done, click the Finish button at the bottom, and ICE should begin connecting to VisIt.
Adding/Deleting Files
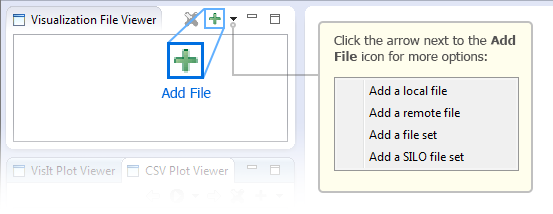
To open a file, find the green "+" icon in the Visualization File Viewer. Clicking directly on the green "+" icon will prompt a local file browser to pop up. However, if your file is located on a remote machine, or if you'd like to add a file set, click on the drop-down button next to the green "+" icon.
This will offer you four ways to open file(s):
- Open a local file
- Open a remote file
- Open a local file set
- Open a local SILO set
Once you've selected your file(s), they should appear in the Visualization File Viewer.
Lastly, if you'd like to remove a file from the Visualization File Viewer list, select it click the red "x" button.
Adding/Removing Plots
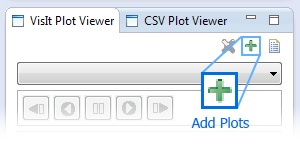
To begin adding plots, select your file in the Visualization File Viewer and click the green "+" icon in the VisIt Plot Viewer.
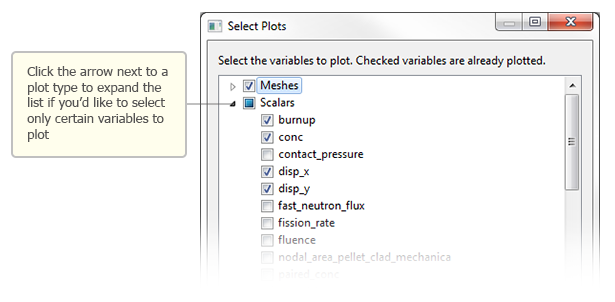
If there is any plottable data associated to your file, a dialog will pop up with a list of options to chose from. This can include mesh plots, scalar plots, vector plots, material block plots, and so forth. If there are multiple plots of each type available, you can select them all by checking off the entire category, or expand it to check off only selected plots.
When you're done selecting your plot(s), click OK. The selected plots should appear as a list in the VisIt Plot Viewer.
Lastly, if you'd like to remove a plot from the VisIt Plot Viewer list, select it and click the red "x" button.
Rendering Plots
To render a plot, simply click on it in the VisIt Plot Viewer and it will appear in the main VisIt Editor canvas.
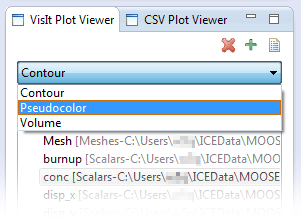
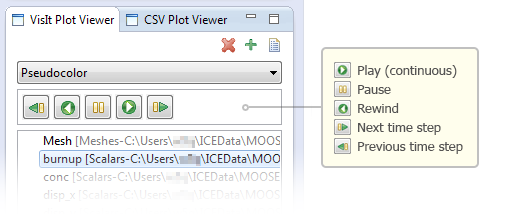
The VisIt Plot Viewer contains a drop-down menu with a list of plotting styles available for the currently selected plot. Depending on your selected plot, this can include mesh, pseudo-color, contour, volume, and so forth. Use this drop-down menu to select the plotting style you prefer, and the VisIt Editor will update in real time.
The VisIt Editor is also interactive in that you can move your plot around by clicking and dragging the canvas. This may not necessarily be particularly useful for 2D plots, however, it allows you take a fully rotatable look at 3D plots like in the example below.
And lastly, if there any time series data associated to your plot, you can manually walk through the time steps, or play them continuously as a short video, using the playback buttons located in the VisIt Plot Viewer.
Below is a short example of a 2D time series being played continuously.
Executing Python Commands
While many of VisIt's features are already accessible in ICE, work to enable a more robust list is continually on-going. In the meantime, features not yet integrated into ICE can still be accessed via Python commands by clicking the Python script button located in the VisIt Plot Viewer.
Writing Python scripts for VisIt is beyond the scope of this tutorial, however, you are welcome to refer to the VisIt Python Interface Manual provided by the VisIt development team at Lawrence Livermore National Laboratory.

