Notice: this Wiki will be going read only early in 2024 and edits will no longer be possible. Please see: https://gitlab.eclipse.org/eclipsefdn/helpdesk/-/wikis/Wiki-shutdown-plan for the plan.
Using the Job Profile Editor to create Job Launchers
This tutorial series is for anyone who needs to extend ICE, for whatever reason, to perform custom tasks such as launching new types of jobs or creating new types of input files. In Part 1: Extending ICE with custom Items, you learned about the architecture of ICE and how it performs tasks. You also learned the steps necessary to add a new plug-in to ICE.
This part continues the tutorial with a discussion of the Job Profile Editor that can be used to automate the plug-in creation process for launching jobs. This article describes how to create a JobLauncher in ICE without writing any source code. This is a good tool to use if you'd like to create a quick and simple JobLauncher for your own personal use, however, may not be ideal for situations where multiple users need to use it, or the job launching process for your code involves complex commands. For creating a JobLauncher by writing source code, skip to Part 3: Creating a Java-based Job Launcher with an OSGi ICE plug-in.
Contents
Launching a Job with ICE
ICE is pretty good at launching jobs (also "executing codes," "running jobs," etc.) on local and remote machines. It can even be set up to launch jobs locally or remote in sequential, "sequential and chained", and parallel (launching all the jobs at once) modes via the MultiLauncher.
It is very simple to launch a job with ICE and there are normally only a couple of decisions required: where the job should be launched, and which input files (if any) to use. Many codes also support a number of MPI processes or threads for parallelism.
The Job Profile Editor
Launching jobs is so common and simple that many users eventually want to add jobs of their own or customize the ones that are already available in ICE. As you may have noticed in the last part of this tutorial, it is not a terribly difficult task to add a new plug-in to ICE directly with Java code.
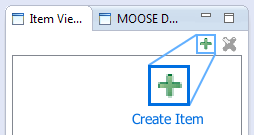
The JobLaunchers in ICE (at least those developed by the ICE team) do not directly inherit from the Item class as described in the last tutorial. There is a subclass of Item called JobLauncher that can launch jobs on local or remote systems and provides many convenience operations and security checks to boot. Developing specialized subclasses of JobLauncher for your first plug-in will be covered in Part 3: Creating a Java-based Job Launcher with an OSGi ICE plug-in. However, since there are so many codes to be launched and they all do it in pretty much the same manner, the ICE team developed a special Item in ICE that can generate JobLauncher plug-ins automatically, the Job Profile Editor. The Job Profile Editor does not write Java code to add a new launcher to ICE. Instead, it instantiates a JobLauncher, uses the convenience operations to load up the class with all of the details about the job (name, executable, parameters, etc.) and serializes that launcher to disk in a special file that ICE can read and bootstrap back into a JobLauncher after restarting it. This is all done with ICE's Serialized Item System (but that does not matter much for the rest of the discussion). Using the Job Profile Editor is very straight forward. Start ICE and select the green 'x' icon to create a new Item.
Select Job Profile from the pop-up list and click Finish. A new Job Profile will be created and displayed in your ICE workbench.
The Job Profile is the aforementioned special file that ICE writes to disk. The editor shows all of the different options that can be used with the launch. The options are not discussed in detail here because they are self-describing: just hover your mouse over one and a text box will appear describing what that option does.
If you are feeling brave, you should try to follow this guide and use one of your own test codes. We will create a JobLauncher using the ls shell command (for Unix-based systems) as a test code to list the contents of the working directory. If you are on Windows, we recommend using the dir command to accomplish the same task. This is not the most rigorous way to demonstrate the capability to create a JobLauncher, but it will give you a basic idea of how JobLauncher is built, and you can later replace ls (or dir) with whatever command executes your own codes.
The first thing to do is to get rid of the horribly generic JobProfile name and replace it with something sensible that describes the task that will be performed, such as "List Directory Contents" (spaces are permitted). Next, in the Executable Name field, specify the command we will be issuing: ls (*nix systems) or dir (Windows). In the parameters block, add -l so that the input file will be listed in "long form" when we launch the job (on Windows, the equivalent command option is /n). The default installation directory is correct for this command, so the only thing left to do is generate the launcher.
There are some options for the Executable Name available that bear mentioning. You can use ${installDir} as a prefix for your executable name if it is not installed on your PATH, and ${inputFile} as a place holder for the name of the input file. ICE is "smart" enough to automatically resolve these variables at runtime. By default, JobLaunchers append the name of the input file at the end of your issued command, but if you include the ${inputFile} flag, it will put the name of the input file exactly in place of that variable.
You can also add a couple more machines to the Launcher in the Hostnames table; these are the machine names that will always show up in your JobLauncher by default. For this exercise, it is sufficient to add localhost and 127.0.0.1 to the list (even though localhost is already there).
If you have [MPI](http://en.wikipedia.org/wiki/Message_Passing_Interface) installed on your machine, go ahead and check the _Enable MPI_ box, click the _Save_ button and then set the _Default Number of Processes_ that appears in the box.
Your JobProfile should now look something like this:
If there were no errors when you clicked the Save button, you should see Ready to Process! beside the Job Profile Editor name at the top of the form. Click the Process drop-down box, select Create a Job Launcher and click Go! If everything was OK in your configuration, Done! will appear in place of Ready to Process!.
Launching your new Job Launcher
The new JobLauncher that you created is ready to be loaded into ICE and used. You must restart ICE for this to work. The JobProfile that you created will appear in the ICE Item Viewer and you may modify it as you wish, but keep in mind that each time you change it you will have to restart ICE to load those changes.
Note: There is currently no good way refresh ICE's list of Items, so for now, we just have to live with a full restart.
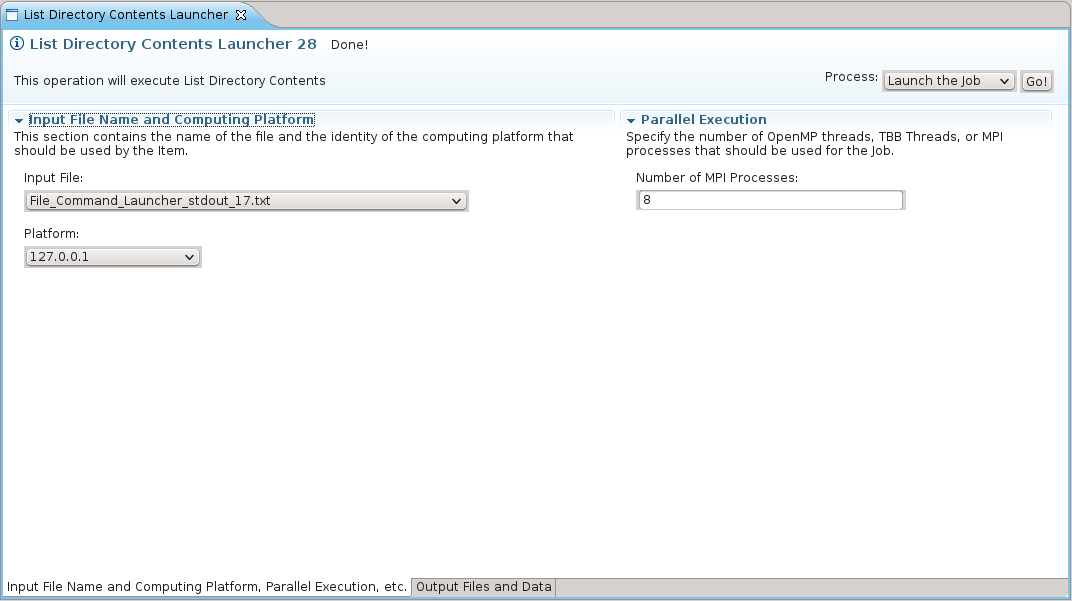
Create a new launcher based on your JobLauncher by clicking the Create an Item button and selecting List Directory Contents from the list. A new instance of the List Directory Contents launcher should appear. Feel free to set change some options, such as the input file, number of cores or the target hostname. If you change any options, be sure to save!
Select Launch the Job from the Process drop-down box and click Go. You should see the word Done! appear in the status box when the job is finished. If you do not, there was a problem.
You will notice the results of your job launch will be displayed in the Console output tab. You can also view all of the output from the job by clicking the the Output Data tab at the bottom of the form and selecting an output file from the list.
Next Steps
The Job Profile Editor is a great way to get a job launching in ICE quickly and it works for almost every type of scientific simulation or script out there. However, there are the rare situations where it is better to have a Java-based plug-in, like when a third-party library needs to be queried before the job can be launched, or when input needs to be generated on the fly. It is also much easier to deploy a Java-based plug-in as part of ICE because it can be packaged with the executable, whereas the file written by the Job Profile Editor would need to be distributed to each user manually. It is perfectly sufficient, however, if you'd like to create a simple JobLauncher for your own use only.
For more information on how to build a Java plug-in, continue to the next part, Part 3: Creating a Java-based Job Launcher with an OSGi ICE plug-in.


