Notice: this Wiki will be going read only early in 2024 and edits will no longer be possible. Please see: https://gitlab.eclipse.org/eclipsefdn/helpdesk/-/wikis/Wiki-shutdown-plan for the plan.
UFaceKit/Development Setup In Eclipse
< UFaceKit
Revision as of 20:45, 15 January 2009 by Tom.schindl.bestsolution.at (Talk | contribs) (→Setting up a Target-Platform)
Install a Subversion-Plugin
UFaceKit code is found inside a subversion repository so to directly install it inside Eclipse you have to install Subversion plugin:
TODO: I'm using Subclipse and the Team-Project-Sets provided are for Subclipse
Setup a Subversion Repository
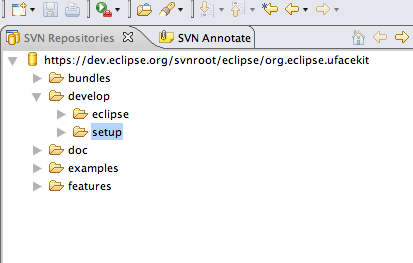
After having installed a subversion plugin you need to switch into the Subversion-Perspective and add a new repository point to http://dev.eclipse.org/svnroot/eclipse/org.eclipse.ufacekit.
Setting up a Target-Platform
Setting up a target platform allows allows you to program with another version of Eclipse against a specific target. In the following lines we are going to setup a target with dependencies UFaceKit-Code needs.
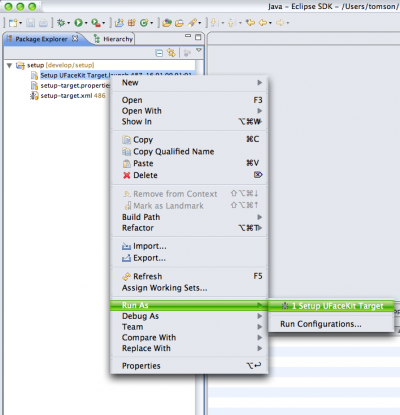
- Checkout the setup-Folder from Subversion-Repository
- Launch the setup-target.xml
For easy setup we provide an ANT-Script you can use to setup automatically.
In the setup folder is a file named setup-target.properties. If you want you can point there to another download server by modifying the eclipse.url - Set our newly created target
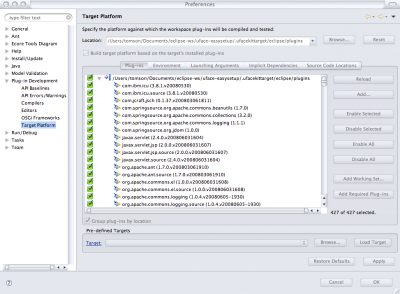
Open the Perfernces-Dialog and navigate to Plug-in Development > Target Platform and set the location to $yourworkspace/.ufacekittarget/eclipse/plugins where $yourworkspace is the path to the workspace you are currently in.


Now our target is complete and we can go when we checkout code from UFaceKit it should compile without errors now.