Notice: this Wiki will be going read only early in 2024 and edits will no longer be possible. Please see: https://gitlab.eclipse.org/eclipsefdn/helpdesk/-/wikis/Wiki-shutdown-plan for the plan.
Difference between revisions of "Trace Compass/News/NewIn40"
(→Time Event Highlighting and Filtering) |
|||
| Line 1: | Line 1: | ||
= Time Event Highlighting and Filtering = | = Time Event Highlighting and Filtering = | ||
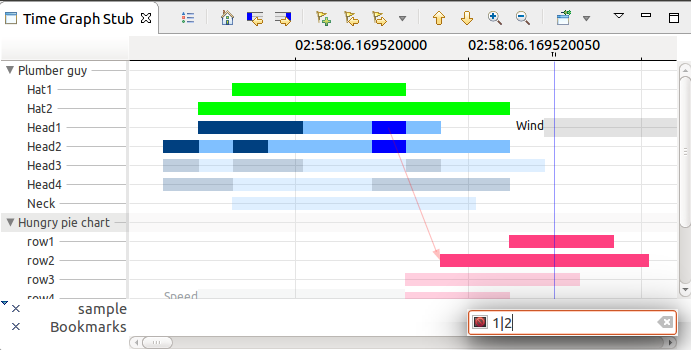
| − | It is now possible to filter | + | It is now possible to filter on time events in a Time Graph view and at the current zoom level. To filter the Time Graph view, press '''/''' in the timegraph view. When the filter dialog will show up, users can enter a regular expression in the text box. The filter is applied and the view is updated as the user types the text. All time events matching the filter will be highlighted and non-matching items will be dimmed. |
[[File:FilterDialog.png]] | [[File:FilterDialog.png]] | ||
Revision as of 14:07, 22 May 2018
Time Event Highlighting and Filtering
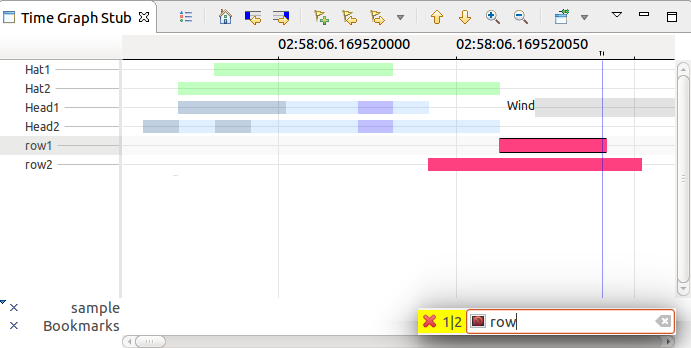
It is now possible to filter on time events in a Time Graph view and at the current zoom level. To filter the Time Graph view, press / in the timegraph view. When the filter dialog will show up, users can enter a regular expression in the text box. The filter is applied and the view is updated as the user types the text. All time events matching the filter will be highlighted and non-matching items will be dimmed.
Pressing enter will save the filter string and the time events that are not matching will be filtered-out and won't be drawn. Multiple saved filters are possible and highlighting can be applied on top that.
Enabling and disabling XML analysis files
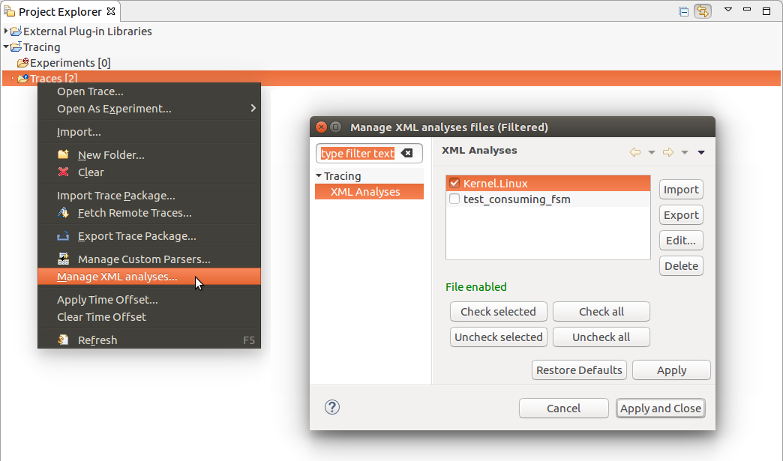
XML files containing analyses can now be enabled or disabled individually. To open the Manage XML Analyses preference page, select Window > Preferences from the main menu bar, then click on XML Analyses under the Tracing section. The preference page can also be opened using the Project Explorer.
To enable a file and its analyses, check the box to the left of the file, then press Apply or Apply and close to save the changes. Unchecking a box and saving the changes will disable the corresponding file. When selecting an enabled file, a confirmation message will be displayed. Note that invalid files cannot be enabled; if one is selected, an error message will be displayed.
Bugs fixed in the 4.0.0 release
See Bugzilla report Bugs Fixed in Trace Compass 4.0.0


