Notice: this Wiki will be going read only early in 2024 and edits will no longer be possible. Please see: https://gitlab.eclipse.org/eclipsefdn/helpdesk/-/wikis/Wiki-shutdown-plan for the plan.
Scout/Tutorial/3.7/Minicrm Step-by-Step
< Scout | Tutorial | 3.7
Revision as of 19:12, 24 March 2010 by Nina.bugzilla.gmail.com (Talk | contribs)
Contents
Prerequisites
- Have a look at the EclipseScout Client Component Model: Main Concepts
Installation / Set Up
Create a new EclipseScout project
- If you haven't done so yet, change to the Scout perspective. On the folder Scout Projects, right click and choose New Scout Project in order to create a new Scout project. As project name, enter eclipse.org.minicrm.
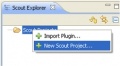
The context menu to create a new Scout Project
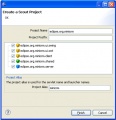
The wizard to create a new Scout Project
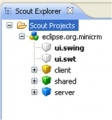
What the project tree should like after you have created your project


- Start Server

- Login on Webpage
- Start Client
Add the SqlService
- New SqlService...
- The DB


Create an Outline
- New Outline
- New Table
- Add Columns
- getConfiguredDisplayable vs. getConfiguredVisible
- Get Data for Table
- BindBases
Create a Form
- New Form
- FormHandler
- ProcessService
- FormData
- SQL.selectInto
Start the Form
- New Menu
- execAction
Modify the Form
- Validation
- Formatting
- Changing Background or Foreground
Extend the Form
- Smartfield
- HtmlField
- Button
Create a SearchForm
Expand the Tree
- NodePage
Bing Webservice
- Scope
- execLoad
- Add variables