Notice: this Wiki will be going read only early in 2024 and edits will no longer be possible. Please see: https://gitlab.eclipse.org/eclipsefdn/helpdesk/-/wikis/Wiki-shutdown-plan for the plan.
Scout/Contributions Cloning Scout Manually
How to clone Scout repositories manually is shown here:
GIT Repositories
All Eclipse Scout Git repositories are listed under http://git.eclipse.org/c/scout/.
maven-master.git                  // used for general properties and profiles for scout repositories
oomph.git                         // used to simplify setup for scout demo applications
org.eclipse.scout-aggregator.git  // used for building and aggregation (p2 repositories) and deployment
org.eclipse.scout.rt.git          // Scout Runtime
org.eclipse.scout.sdk.git         // Scout Tooling
scout.rt.incubator.git            // Scout Incubation Components (currently only runtime)
You need to clone all repositories that you need for your daily work. In most cases this will be the org.eclipse.scout.rt.git and maybe the org.eclipse.scout.sdk.git repository.
Because we are using Gerrit for code review, you need to setup this as well.
Clone Git repositories
Here is a step-by-step guide how to clone a repository. We use Scout RT as an example:
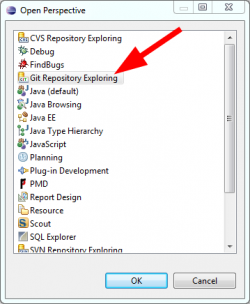
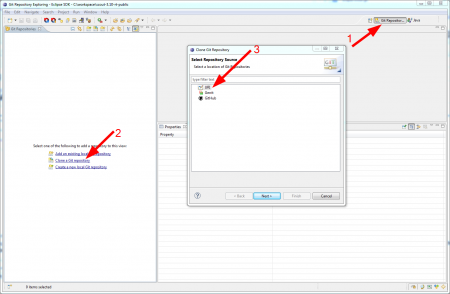
In your Eclipse IDE click on Windows -> Open Perspective -> Others... and select Git Repository Exploring. In the GIT perspective, click on Clone a Git repository and select URI as a repository source in the next dialog.
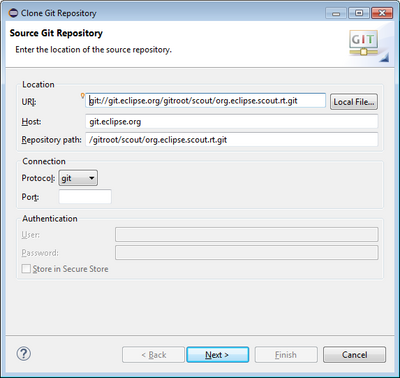
For the Scout RT repository we use the GIT protocol:
git://git.eclipse.org/gitroot/scout/org.eclipse.scout.rt.git
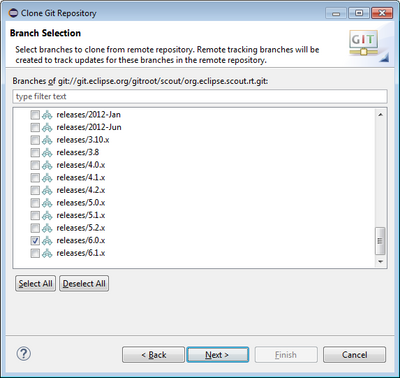
The GIT url is listed under Clone on the webpage of the repository: http://git.eclipse.org/c/scout/org.eclipse.scout.rt.git/. You only need to tick the branches that you would like to work with. Example: To work with the Scout Neon release go for branch releases/6.0.x.
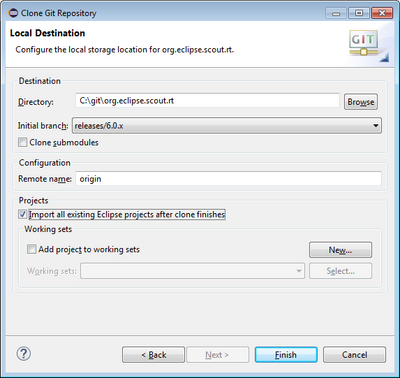
The Scout RT GIT repository will be cloned to a local destination. Choose C:\Users\<username>\git\<repositoryName>. Choose the release branch you would like to work with (e.g. releases/6.0.x) as the initial branch and enter origin to reference the remote GIT repository.
To import all Scout runtime projects into your workspace, tick the checkbox Import all existing Eclipse projects after clone finishes in the lower part of the Git clone wizard.
Finally, click on Finish to clone the Scout RT repository.
Import Plugins Projects into Workspace
The sources are not stored in your workspace. You may create multiple workspaces for different purposes and use the sources stored in the local git repository. You most probably need one workspace for scout.rt and import all runtime plugins.
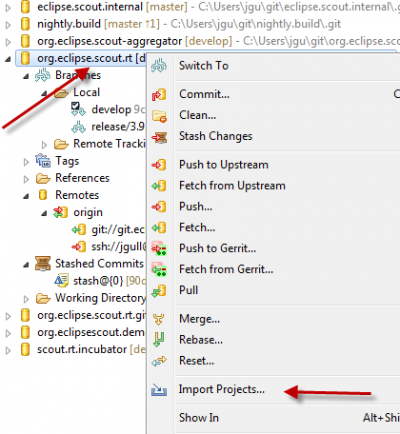
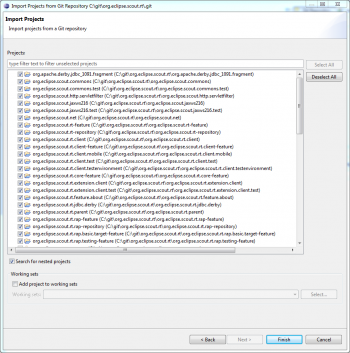
Double-click on the cloned repository org.eclipse.scout.rt and right-click on the Working Directory and select Import Projects.... Import Existing Projects and select all plugins. Click on Finish to start the import process.

