Notice: this Wiki will be going read only early in 2024 and edits will no longer be possible. Please see: https://gitlab.eclipse.org/eclipsefdn/helpdesk/-/wikis/Wiki-shutdown-plan for the plan.
Difference between revisions of "SMILA/Documentation/HowTo/Howto set up dev environment"
< SMILA | Documentation | HowTo
m (→Howto Build and Test Locally) |
m (→Howto Setup Development Environment) |
||
| Line 46: | Line 46: | ||
[[Image:Launch-smila.png]] | [[Image:Launch-smila.png]] | ||
| − | |||
| − | |||
| − | |||
| − | |||
| − | |||
| − | |||
=== Howto Run junit tests for OSGi bundles === | === Howto Run junit tests for OSGi bundles === | ||
Revision as of 09:06, 24 March 2009
Contents
Setup an Eclipse instance/installation for building
Checkout sources from Eclipse svn
First of all you have to checkout the sources, configuration files and build files from Eclipse svn to your harddrive (e.g. e:/Smila).
- svn location
http://dev.eclipse.org/svnroot/rt/org.eclipse.smila/
Installation and configuration of Eclipse (3.4)
After getting SMILA relevant files you have to install and configure Eclipse.
- Download an eclipse SDK, starting with at least eclipse-SDK-3.4.1-win32.zip.
- Download eclipse-3.4.1-delta-pack.zip.
- Unzip the archive and copy org.eclipse.equinox.executable_<version> from features into your features folder under your eclipse installation.
- Copy all necessary plug-ins (containing linux.x86 or win32.x86) from plugins into your plugins folder under your eclipse installation.
- Start that Eclipse and set up a custom target platform:
- Unzip SMILA-xxx-.zips:
- Unzip SMILA-incubation-win32.win32.x86.zip into a directory (e.g. E:\ SMILA-incubation-win32.win32.x86). You may download it from SMILA-incubation-win32.win32.x86.zip
- Unzip Smila-test-and-sample.zip into a directory (e.g. E:\Smila-test-and-sample). You may download it from SMILA-test-and-sample.zip
- Copy test specific plug-ins to Smila target platform:
- Copy org.junit_3.8.2xxx from the “plugins” folder of your eclipse installation or copy org.junit_3.8.2.v200706111738 from Smila-test-and-sample folder to your Smila installation (e.g. E:\ SMILA-incubation-win32.win32.x86/plugins).
- Copy org.eclipse.smila.test_0.5.0.jar from Smila-test-and-sample folder to your Smila installation (e.g. E:\ SMILA-incubation-win32.win32.x86/plugins).
- Start eclipse and set the target platform location to this folder (e.g. E:\SMILA-incubation-win32.win32.x86).
- Click Window --> Preferences --> Plug-in Development --> Target Platform
Import SMILA sources into your Eclipse workspace
- Start Eclipse and import SMILA sources:
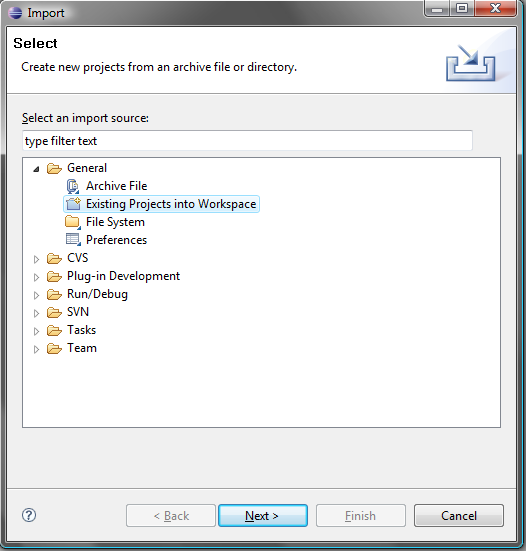
- Click File --> Import
- Expand General and choose Existing Projects into Workspace
-
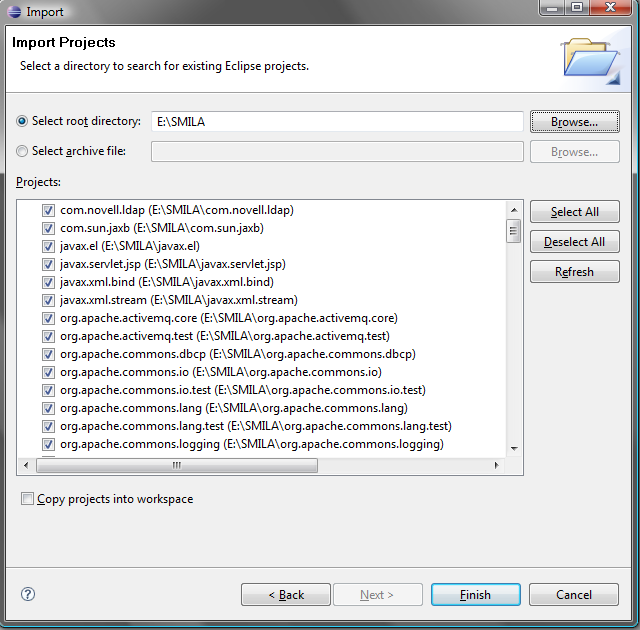
- Click Next, set the root directory (e.g. e:/Smila), select all and then click Finish
-
-
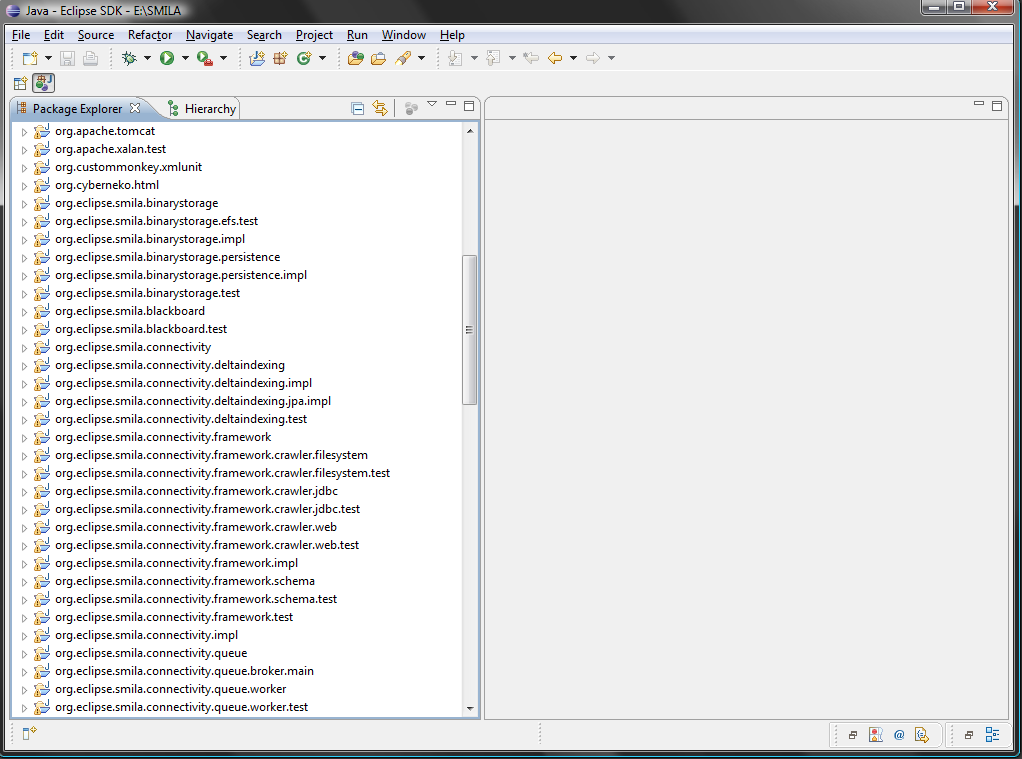
- After you followed the above steps, you should have the following structure in your Package Explorer
-
Launch SMILA in Eclipse
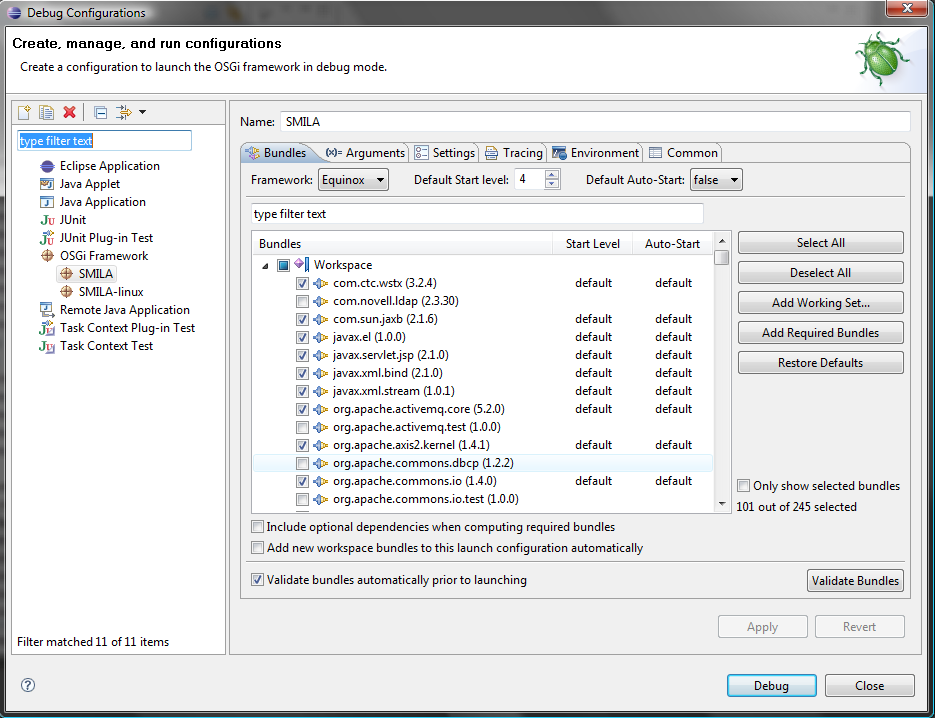
There is a folder SMILA.launch located in our trunk. This folder contains two launch configuration files for Eclipse. With these two files (one for windows 32bit and one for linux 32bit) you have the possibility to start SMILA in Eclipse. Follow the steps below:
- Click Debug --> Debug Configurations and expand OSGI Framework
Howto Run junit tests for OSGi bundles
- Plugin Junit Launch config
- write config.ini and ref it from lauch config.
- tip: use \ to brake up long lines to have better overview
- share the launch config
For further information see: Development Guidelines


