Notice: this Wiki will be going read only early in 2024 and edits will no longer be possible. Please see: https://gitlab.eclipse.org/eclipsefdn/helpdesk/-/wikis/Wiki-shutdown-plan for the plan.
Difference between revisions of "SAML2 IdP Development 1.0"
(→Check out sources automatically) |
|||
| Line 94: | Line 94: | ||
''Note #1: This checks out one project with all its dependencies. If you want to use both the saml2idp.server and saml2idp.test projects you will need to perform steps 6-11 twice.'' | ''Note #1: This checks out one project with all its dependencies. If you want to use both the saml2idp.server and saml2idp.test projects you will need to perform steps 6-11 twice.'' | ||
| − | ''Note #2 | + | ''Note #2: If after checking out the higgins.auto project Eclipse displays errors, try refreshing your workspace by clicking into the "Project Explorer" view and pressing F5. Also try cleaning and rebuilding the project by clicking Project -> Clean -> OK.'' |
| − | + | ||
| − | + | ||
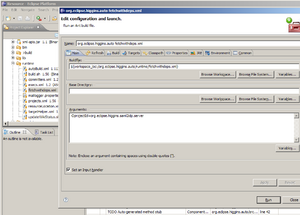
[[Image:saml2idp-setup18.png|thumb|none|Configuring parameters for the fetchwithdeps.xml build script]] | [[Image:saml2idp-setup18.png|thumb|none|Configuring parameters for the fetchwithdeps.xml build script]] | ||
Revision as of 18:58, 31 January 2008
This page describes how to download and build the Higgins SAML2 IdP. This deployment is a web application that is able to act as a SAML 2.0 IdP endpoint to authenticate users against a Higgins IdAS context. By default, an LDAP context is used, however any technology for which a Higgins context provider exists can be used instead.
In addition, a second web application is provided that acts as a sample relying party to test the IdP. This is not necessary if you have your own SAML 2.0 relying party application.
Note: In SAML 2.0 terminology, the terms "relying party" (RP) and "service provider" (SP) are synonymous.
This page contains instructions on how to check out and build the source code of the involved Higgins components. See SAML2 IdP Overview for more information on how the deployed web applications interact with each other, and see SAML2 IdP Deployment for information on how to deploy and configure the two web applications.
Contents
Prerequisites
This guide assumes you have the following software:
- Eclipse IDE 3.3 or later (see http://www.eclipse.org/)
- Web standard tools 2.0.1 or later (see http://www.eclipse.org/webtools/)
- Apache Tomcat 5.5 or later (or other servlet container)
- JDK/JRE 1.4 or later
Set up your Eclipse workspace
Open a blank workspace
After you start Eclipse, it should display a blank workspace. If you have already been working in Eclipse and your workspace is not empty, you can create a new empty one by selecting File -> Switch Workspace -> Other. Select a folder to use for your new, blank workspace.
Your workspace should look like this:
Configure JRE
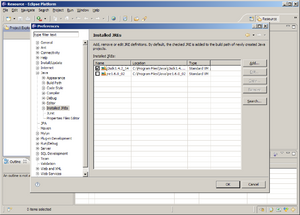
You should specify the JDK or JRE (Java Runtime Environment) you want to use to build the Higgins components. Click Window -> Preferences and select Java -> Installed JREs. The default JRE is the one that was used to launch Eclipse, however you may want to add a different one and set it as the workspace-default one for building. Higgins components are usually built with a Java 1.4 compiler.
Note: You should also check Java -> Compiler -> Compiler compliance level, and make sure this matches the JRE you use to build the projects.
Configure server runtime
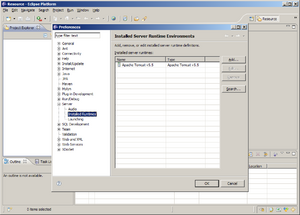
In order to work with web applications, Eclipse needs to know about the servlet container (e.g. Tomcat) you want to use. Click Window -> Preferences and select Server -> Installed Runtimes. Click "Add...". Select the server you want to use (e.g. Tomcat 5.5), click "Next", specify the installation directory and click "Finish".
Note: It is recommended to install Tomcat at a path that does not contain any spaces.
Populate the Eclipse workspace
The next step is to populate your Eclipse workspace with the required projects. There are two main ways of doing this:
- Download and import .war files. This is a quick and simple approach that already includes all third party libraries.
- Check out and build sources via download script. This will always give you the latest versions of all components. Simply import projects into eclipse workspace after the script complete it's work.
Download and import .WAR files
Two .WAR files (one for the IdP, one for the RP) are automatically built every night and can be downloaded on these pages:
http://www.eclipse.org/higgins/ver2/downloadsnew.php?loc=downloads/saml2idp.server (IdP web application)
http://www.eclipse.org/higgins/ver2/downloadsnew.php?loc=downloads/saml2idp.test (RP web application)
Click on the Build ID in the "Latest build" row. Download the "war.zip" file and decompress it.
Then in your blank Eclipse workspace, click File -> Import. In the import source list, select Web -> WAR file. Click "Browse" and select the saml2idp.server.war file from the archive you just downloaded. In the "Target runtime" drop-down list, select the server runtime you configured when setting up the workspace. Click "Finish". Eclipse will create a project containing the SAML2 IdP Server web application. When asked to switch to the Java EE perspective, click "Yes".
Optional: Also import the saml2idp.test.war file, if you want to use the RP as well.
Now your workspace should look like this:
Check out sources automatically
This section explains how you can use an automatic script to check out all required sources and dependencies.
First of all import org.eclipse.higgins.auto project into workspace, click File -> Import. In the import source list, select Other -> Checkout Projects from SVN. The URL for connecting to the Eclipse SVN is as follows:
| svn://dev.eclipse.org/svnroot/technology |
- Checkout org.eclipse.higgins.auto project from https://dev.eclipse.org/svnroot/technology/org.eclipse.higgins/trunk/builds/org.eclipse.higgins.auto
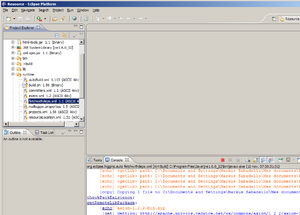
- Right click on org.eclipse.higgins.auto/runtime/fetchwithdeps.xml -> Run As ... -> Ant Build ... Then select the "Classpath" tab.
- Click on "User Entries" and then click "Add JARs ..."
- Add all jars from org.eclipse.higgins.auto/lib and auto-classes.jar from org.eclipse.higgins.auto/build/lib
- Select the "Main" tab, then in the "Arguments" textbox, type -DprojectId=<required_project_id> [-DbuildDirectory=<path_to_store_projects>].
- required_project_id - name of project you wish to check out (all dependencies (projects & libs) downloading automatically). For example org.eclipse.higgins.saml2idp.server or org.eclipse.higgins.saml2idp.test.
- path_to_store_projects - path where projects will be stored. This param is optional, by default projects stores into the same directory where org.eclipse.higgins.auto located (current eclipse workspace). May be relative to current eclipse workspace.
- Click Run button, wait until script complete work. Note: This may take several minutes, depending on your internet connection and current Eclipse server load.
- Click File -> import -> General -> Existing Projects into Workspace -> Next.
- Select root directory - currect workspace or path_to_store_projects if specified.
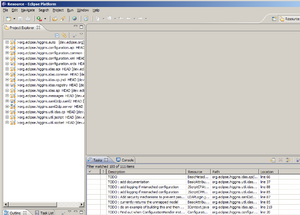
- If the org.eclipse.higgins.auto project is present in the list and checked, un-select it (since it already exists in workspace).
- Click Finish.
Note #1: This checks out one project with all its dependencies. If you want to use both the saml2idp.server and saml2idp.test projects you will need to perform steps 6-11 twice.
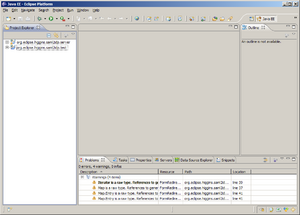
Note #2: If after checking out the higgins.auto project Eclipse displays errors, try refreshing your workspace by clicking into the "Project Explorer" view and pressing F5. Also try cleaning and rebuilding the project by clicking Project -> Clean -> OK.
Run the web applications from within Eclipse
To test the web applications, you can run them directly on your localhost from within Eclipse. To do so, follow these steps:
1. Make sure the Java EE perspective is open. Click Window -> Open Perspective -> Other. Select "Java EE".
2. Open the "Server" view. Click Window -> Show View -> Servers.
Note: Now if you already see a server in the Server view, you can omit the following three steps. Instead, right-click on the server and click "Add and remove projects.". Then proceed with step 6.
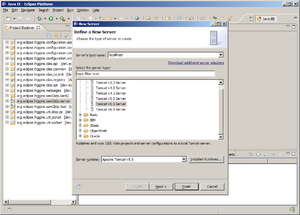
3. Right-click on the Server view and click New -> Server.
4. Select the server type and runtime you want to use. This should be the same as the one you configured when you set up your workspace.
5. Click "Next".
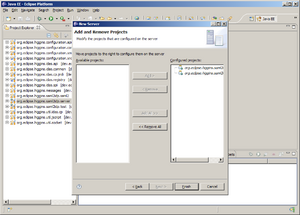
6. You are now asked to add web application projects to be deployed on the server. In the "Available projects" list there should be two projects (or only one if you did not download the test RP project).
7. Click "Add All".
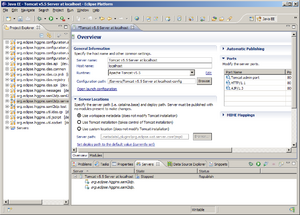
You should now see the new server in the Server view. If you double-click on it, you can further configure it. One setting you may want to check is the HTTP/1.1 TCP Port (set this to 80).
You can now start the server. Right-click on the server in the Server view and click "Start". Some logging information should appear in the Console view, and the server should be running.
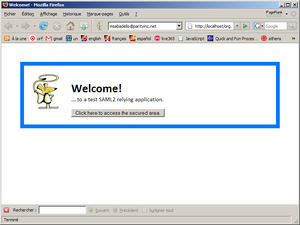
Try accessing http://localhost/org.eclipse.higgins.saml2idp.test/
Export the web applications to .WAR files
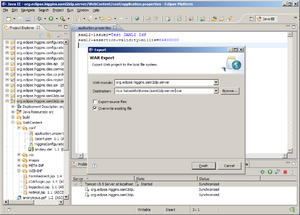
Deploying a web application on a production server usually requires a .WAR (web archive) file. If you want to create a .WAR file from the web applications in your Eclipse workspace, you can right-click on the project, then click Export -> WAR file. Enter a destination file name and click "Finish".
Further information
For information on how to configure and deploy the web applications, see here: SAML2 IdP Deployment

