Notice: this Wiki will be going read only early in 2024 and edits will no longer be possible. Please see: https://gitlab.eclipse.org/eclipsefdn/helpdesk/-/wikis/Wiki-shutdown-plan for the plan.
Platform UI/How to Contribute/Oomph
Contents
Setting up your SDK for code contributions
Our goal is to have a completely automated installer for setting up your workspace to contribute to Eclipse. There are still some manual steps in this setup guide but we're working on eliminating them.
Before we start, please note the installer works only on the 64bit version of Java and when the oomph setup files are updated by the platform team. So if you strictly need to use a 32bit version, or if you find the setup is not updated, please, follow the full guide to setup the SDK.
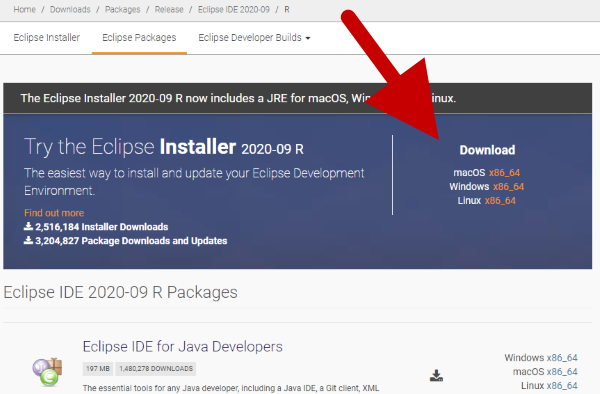
Go to Eclipse Downloads and download the installer for your platform.
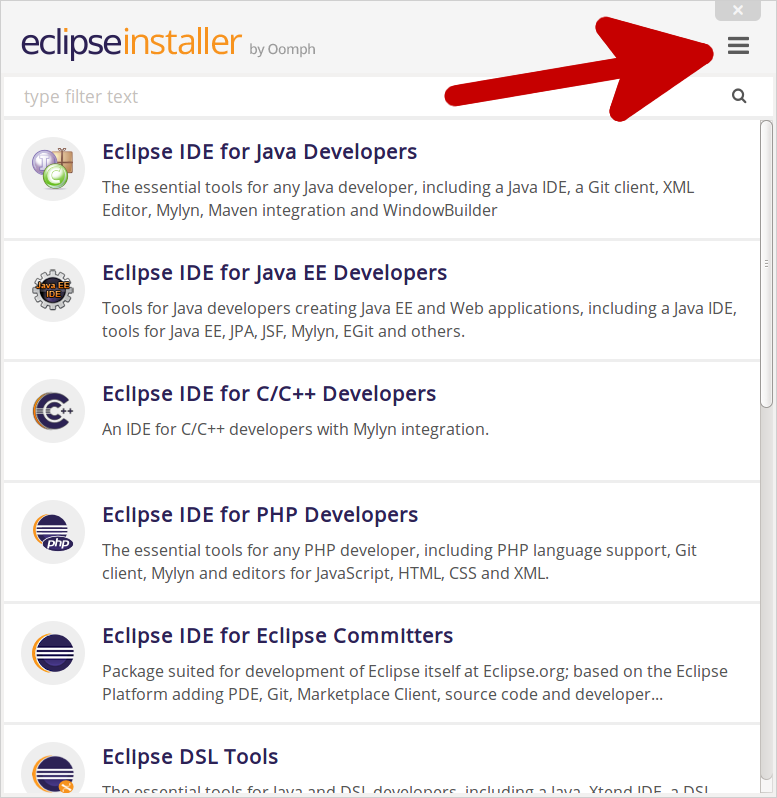
Launch the installer.
If you see a yellow exclamation mark in the top-right, it means the installer is out-of-date. Click on the exclamation mark and then click on the word UPDATE. After the installer finishes updating, it will restart and you can continue with these steps.
Click on the menu button in the upper-right.
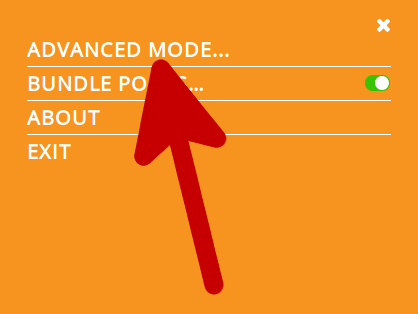
Click on ADVANCED MODE...
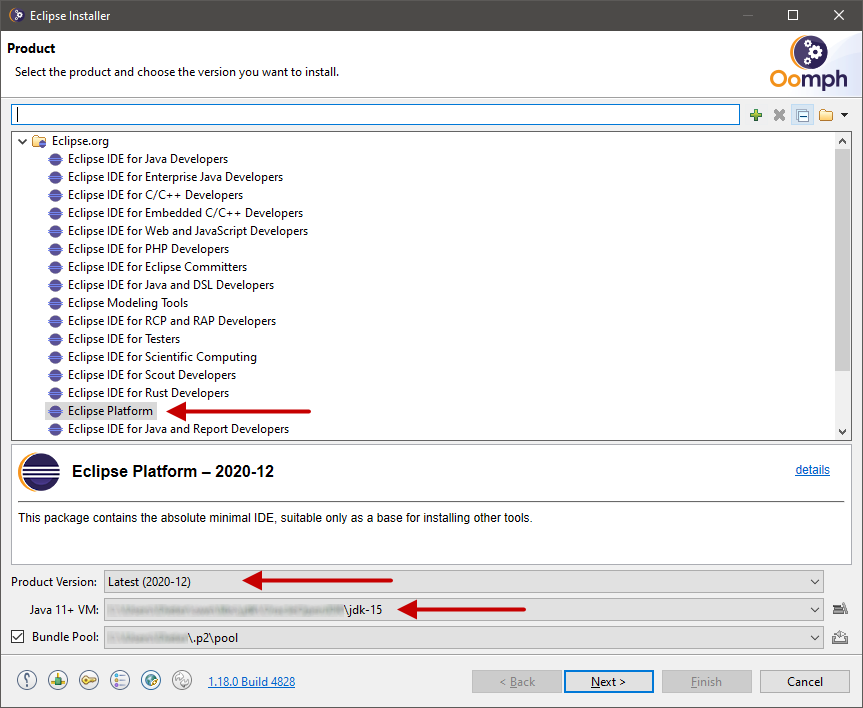
In the Product dialog
- Select the product "Eclipse Platform"
- Select the Product Version "Latest (YYYY-MM)"
- Select the location of a JDK at least version 11.
Click Next
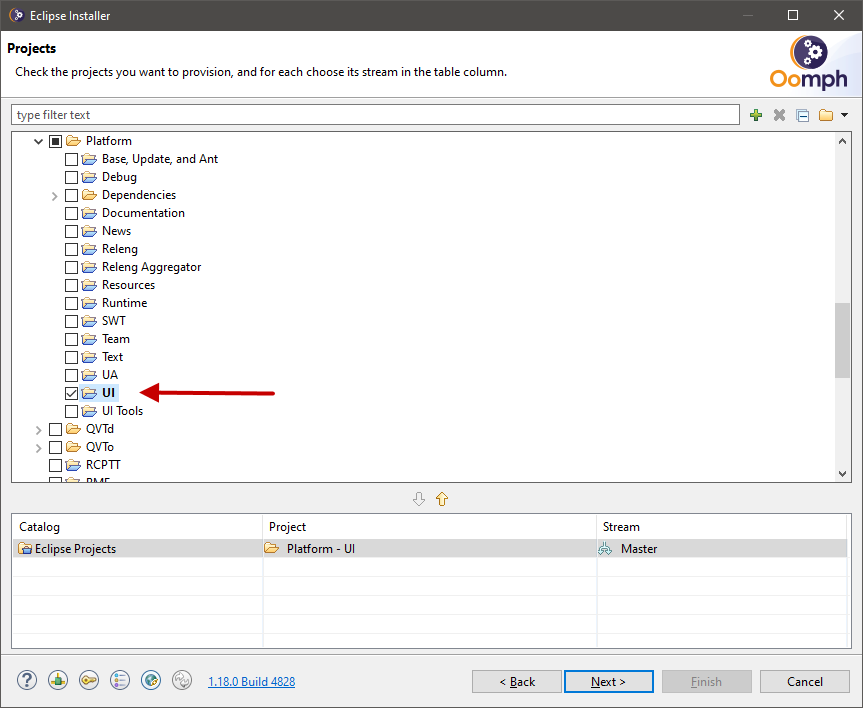
In the Projects dialog, tick the box for Platform -> UI
Feel free to select other projects in this menu you want to have.
Click Next
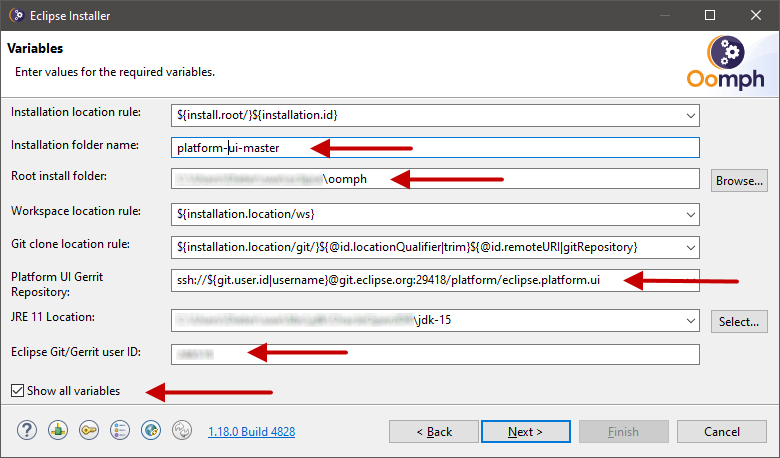
In the Variables Dialog
- Tick the box Show all variables at the bottom left
- For Root install folder select a location under which all your Eclipse installations will go.
- For Installation folder name choose the name of the folder for the Eclipse installation you are currently installing.
- For Platform UI Gerrit Repository select the SSH option
- For Eclipse Git/Gerrit user ID type in your Gerrit user ID. Is is only required if you plan to contrubute.
Leave the other values set to their defaults. Click Next
Click Next, Click Finish.
Accept the license agreements.
Wait for the message "Press Finish to close the dialog" then do that thing.
Wait for the new Eclipse workspace to start up, initialize, and build.
Launching Eclipse
When you want to launch Eclipse again, you'll find the executable in the "Root install folder" you selected above. The executable will be here:
<Root install folder>/<Installation folder name>/eclipse
For example, if I'm on Linux and selected ~/oomph for my root install folder and platform-master for my installation folder name, the executable I launch to run Eclipse will be called:
~/oomph/platform-master/eclipse/eclipse
Running specific builds
Following the steps above will put you on the integration build stream and cause your copy of Eclipse to auto-upgrade to each new integration build. If you want to always be using a specific integration build or - say - a the nightly build stream, follow these steps after you've finished installing Eclipse as described above.
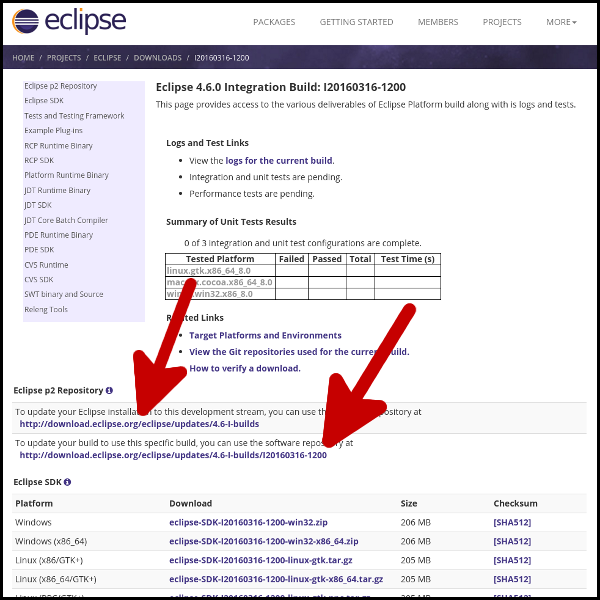
Go to the download site for the integration build you wish to use (or any nightly build if you want to be on the nightly build stream).
The download page for each build will contain two links to update sites. One is for the stream (which always points to the latest build of that type) and the other is for that specific build. Copy the URL for the one you want. The links look like this on the download page:
Go to Window > Preferences > Install/Update > Available Software Sites Add... Paste the URL of the update site and type in any name. Click OK > OK Go to Help > Check for updates Install any updates it finds Restart Eclipse if prompted
You will then be running the specific build you selected. If you selected a stream rather than a specific build, you can update to the latest build of that type by rerunning the "Check for updates" command. If you selected an older integration build, you may want to de-select the 4.7 I-builds update site to prevent Eclipse from auto-updating to a newer integration build.
See also
Eclipse Platform SDK Provisioning.
Active branches
Our currently active branches:
- master - development towards the next release (4.9)
- R4_7_maintenance - fixes for 4.7.x/Oxygen service releases, no active development but sometimes we cherry pick patches from master to it

