Notice: this Wiki will be going read only early in 2024 and edits will no longer be possible. Please see: https://gitlab.eclipse.org/eclipsefdn/helpdesk/-/wikis/Wiki-shutdown-plan for the plan.
Papyrus/UserGuide/Papyrus Constraints
Contents
Create and edit constraints
Papyrus supports the creation of UML constraints. Creating constraints comprises the following steps:
1. Specify the context
2. Specify the language
3. Specify the context text based on the constraint behaviour
4. (Optionally) Specify the element(s) to be constrained
Define a constraint and its context
To define a constraint, and associated context, in a diagram do the following:
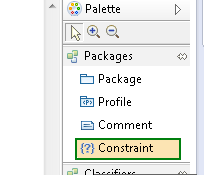
1. Within any Papyrus diagram select the constraint tool from the palette
2. Click at the position where you want to create the constraint on the diagram canvas
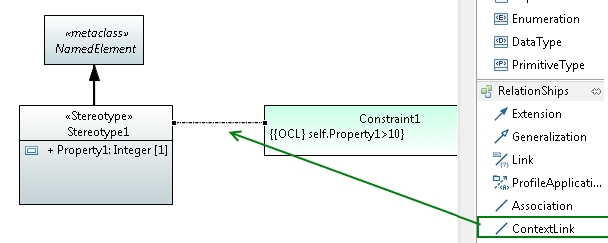
3. Automatically a ContextLink relationship will be created from the new constraint. This relationship should be connected to the element to be constrainted on the diagram, by clicking on the target element in the diagram (in two-click mode). If you are in one-click-mode (connection tool preference), click on the constraint and keep it pressed until the context object is selected. This ContextLink relationship defines the context for which the constraint will be evaluated.
To create a constraint, and associated context, via the Model Explorer do the following:
1. Within the Model Explorer right click a model element
2. Select New Child -> "Create a new Constraint" from the context menu. The context is automatically set to the parent of the constraint. This context can be changed via the Properties View if required.
Define a constraint specification
Each constraint has a specification containing a condition. Whereas it may be an arbitrary value specification, such as a StringExpression or LiteralInteger, it is in most cases useful to define an OpaqueExpression consisting of a language and body pair. The constraint body may be written in at least OCL, JAVA, or natural language. In order to make constraints evaluable by Papyrus the constraint must be written in either OCL or JAVA. To define a constraint's specification, first select a constraint on either a diagram or in the Model Explorer, then do the following:
- On the diagram open the default editor for constraints by selecting the constraint and then click on the middle of the already selected constraint. Youcan also select the constraint and then press F2. The editor assumes the language is OCL but this can be changed later via the Properties View. The constraint text is defined directly in the editor. The default editor can be controlled via the preferences.
- On the diagram select a specific editor via the context menu, as shown in the following screenshot.
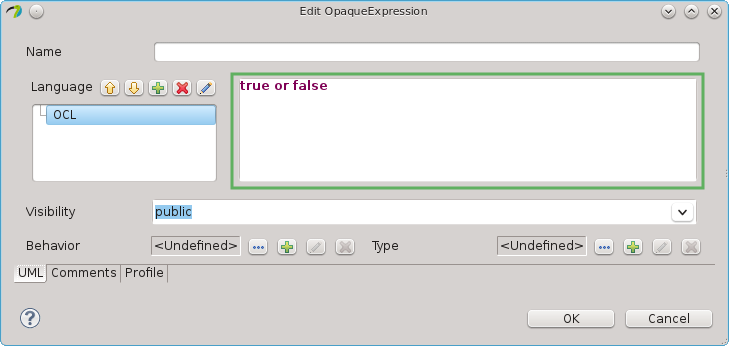
Use the Properties View to create a new or open an existing specification, as shown in the following figure. Here, we assume that the specification is an opaque expression.
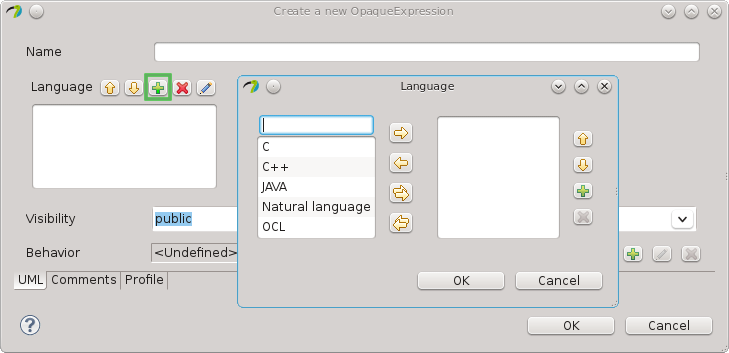
You can add the language, as follows:
Define the constrained elements
A constraint can be applied to many UML elements. To define a constraint's "Constrained Elements" in a diagram you can do the following:
1. Select the Link tool from the Edges palette
2. Click on the constraint to be modified
3. Click on the UML element which should be added to the "Constrained Elements" list
To define a constraint's "Constrained Elements" via the Model Explorer you can do the following:
1. Select the constraint to be modified
2. In the Properties View use the "Add elements" button to add the element you wish to constrain to the "Constrained Elements" list


