Notice: this Wiki will be going read only early in 2024 and edits will no longer be possible. Please see: https://gitlab.eclipse.org/eclipsefdn/helpdesk/-/wikis/Wiki-shutdown-plan for the plan.
Difference between revisions of "Papyrus/Papyrus User Guide/Toolbars/Alignment"
(→Hierarchy) |
(→Hierarchy) |
||
| Line 52: | Line 52: | ||
=== Hierarchy === | === Hierarchy === | ||
In this section, some examples of alignment in case of hierarchy between objects (parent / children). | In this section, some examples of alignment in case of hierarchy between objects (parent / children). | ||
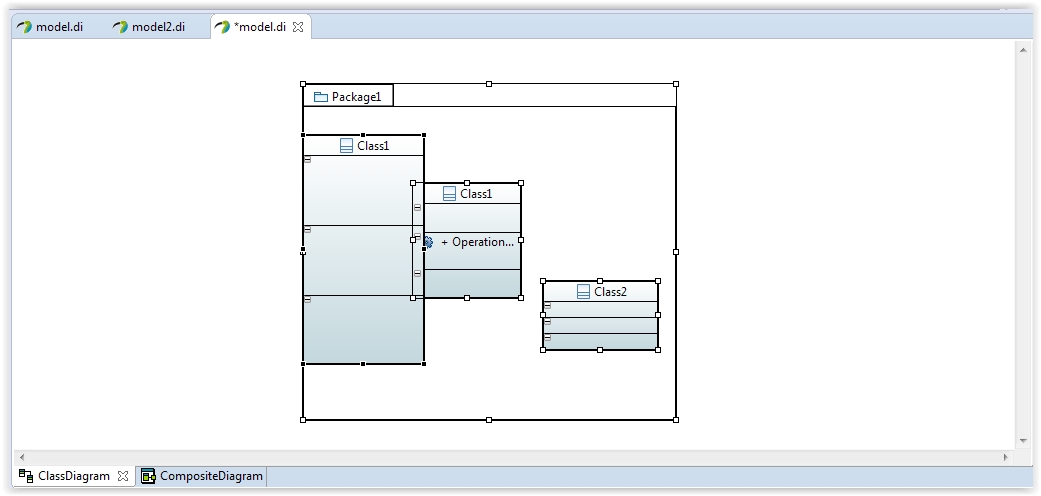
| − | # Example A: Only the parent is aligned [[File:Hierarchy _Align1_before.JPG]] | + | #Example A: Only the parent is aligned |
| − | :As shown in the result screenshot below , only the parent (the Package) has been aligned. [[File:Hierarchy _Align1_after.JPG]] | + | ::[[File:Hierarchy _Align1_before.JPG]] |
| − | # Example B: Alignment inside the Container bounds is available | + | ::As shown in the result screenshot below , only the parent (the Package) has been aligned. |
| + | ::[[File:Hierarchy _Align1_after.JPG]] | ||
| + | #Example B: Alignment inside the Container bounds is available | ||
::[[File:Hierarchy _Align2_before.JPG]] | ::[[File:Hierarchy _Align2_before.JPG]] | ||
::In the align options list, only the ones that keep the objects inside his container are enable. | ::In the align options list, only the ones that keep the objects inside his container are enable. | ||
Revision as of 11:28, 28 August 2014
Contents
Alignment Tool
Introduction
Alignment Tool is availbale in the Papyrus toolbar:

Alignment allows to align the different objects of the model based on a reference object.
The reference object is basically the last object selected (primary selection) and can be identified with the handles color:
 Normal Selection |
 Primary Selection |
To implement Alignment, some rules have been defined.
General Rules
The Alignment Tools allows 6 types of alignmeent:
- Horizontaly
- Left
- Center
- Right
- Verticaly
- Top
- Middle
- Bottom
These types can be disable if the alignment is not possible.
Here is the different rules on which the alignment is based:
- The alignment is available only if the selected object can be moved on the reference
- When an object and one or several children should be aligned on a third object, only the parent is aligned
- An object can only be aligned inside of its container's bounds.(In order to avoid scrollbar and invisible objects)
- An object cannot be aligned on one of its children.
Using of Alignment Tool
Here under, some examples of using of alignment tool.
General Case
Basically, alignment is used in order to make the model easier to be read and more aesthetical. To align objects:
- Select the object to be aligned
- Clic on the align tool
 button
 - Choose the proper type of alignment
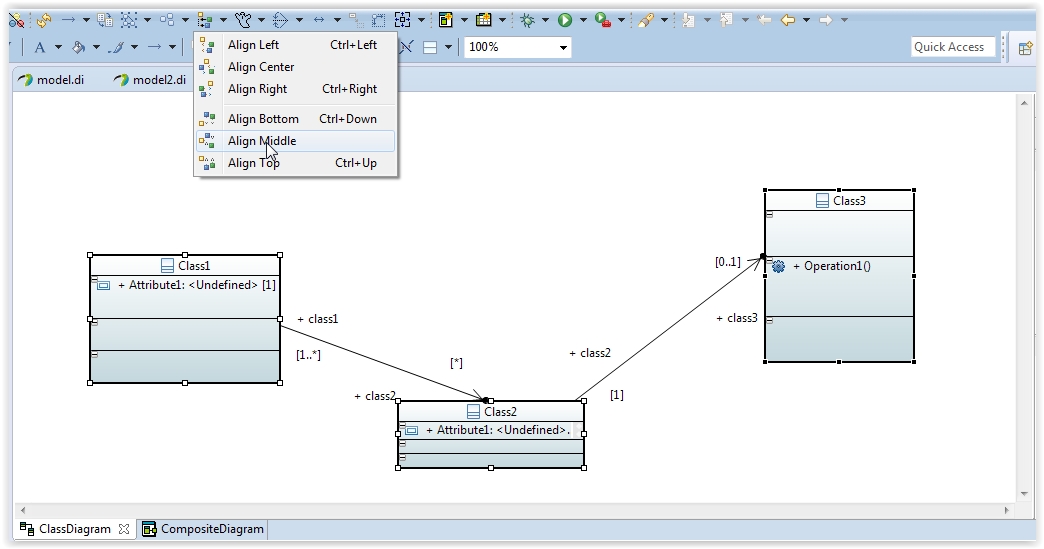
- The refrence object is here the right one.


In this second example, the object (the Class ) is aligned on his parent (the Package): The unauthorized alignment appears disable (in grey)


Hierarchy
In this section, some examples of alignment in case of hierarchy between objects (parent / children).
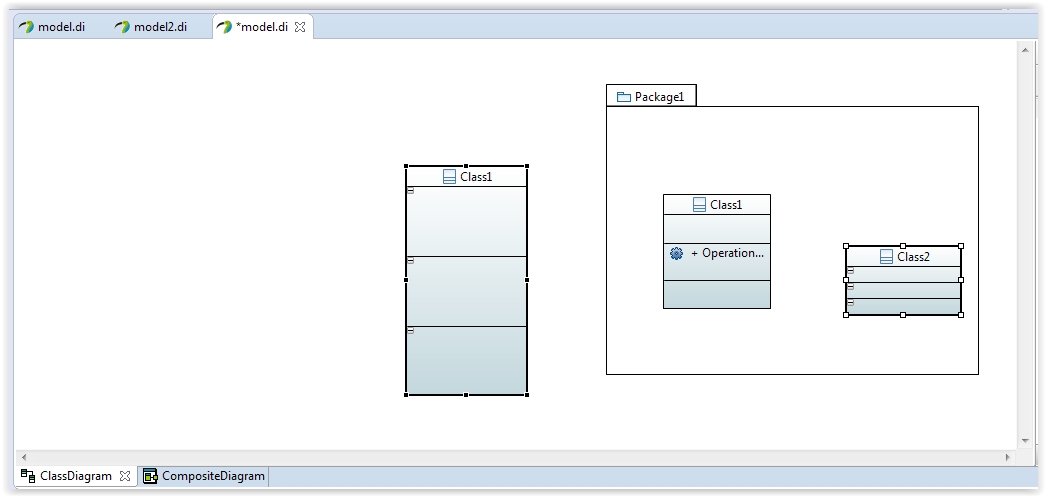
- Example A: Only the parent is aligned
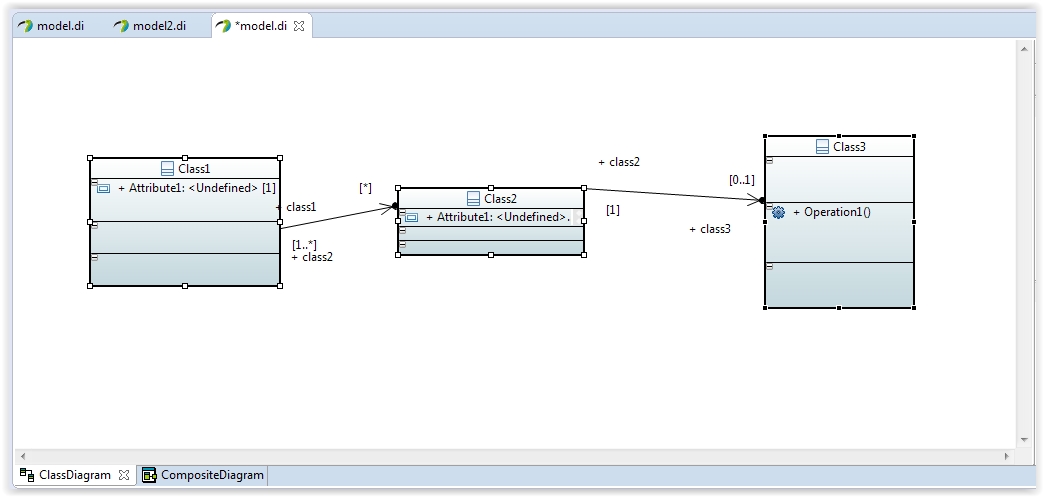
- As shown in the result screenshot below , only the parent (the Package) has been aligned.


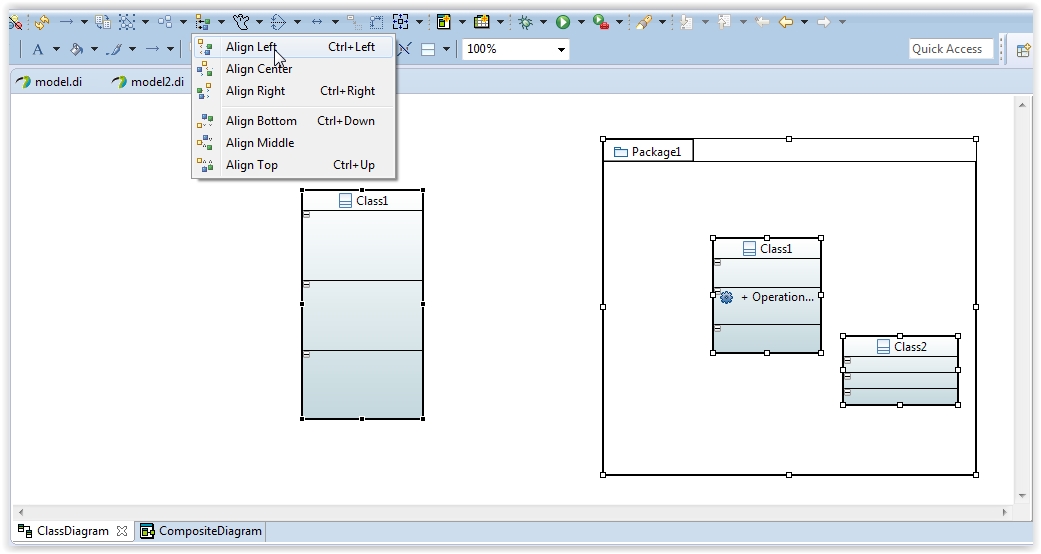
- Example B: Alignment inside the Container bounds is available
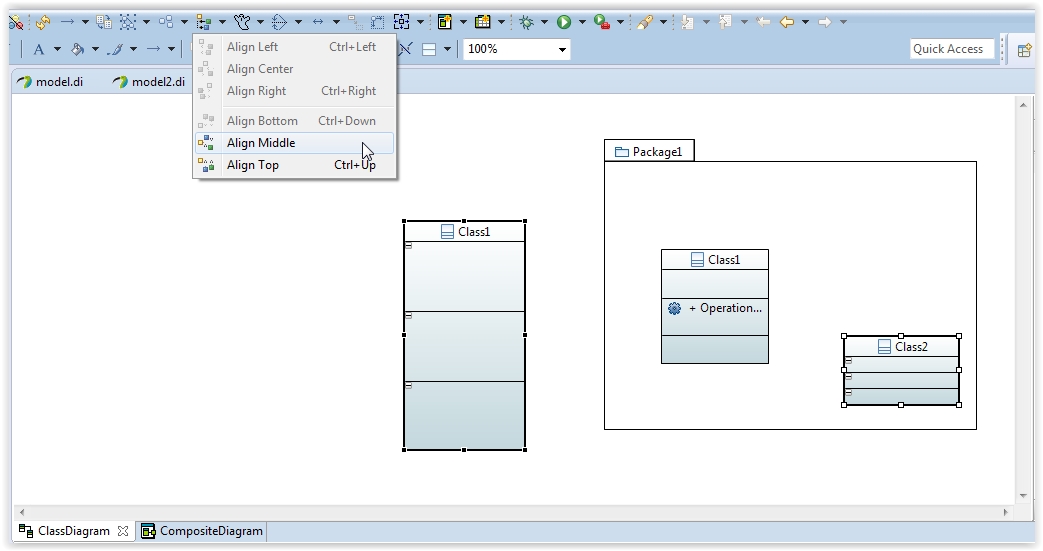
- In the align options list, only the ones that keep the objects inside his container are enable.