Notice: this Wiki will be going read only early in 2024 and edits will no longer be possible. Please see: https://gitlab.eclipse.org/eclipsefdn/helpdesk/-/wikis/Wiki-shutdown-plan for the plan.
Difference between revisions of "Papyrus/Papyrus Developer Guide/How to use the Hipp and its functionalities"
| Line 10: | Line 10: | ||
Their disk consumption, for both build artifacts, logs and workspaces can be viewed [https://hudson.eclipse.org/papyrus/plugin/disk-usage/ here]. Be mindful that those numbers do not increase to unreasonable sizes so as to not cannibalize the community's server resources for nothing. | Their disk consumption, for both build artifacts, logs and workspaces can be viewed [https://hudson.eclipse.org/papyrus/plugin/disk-usage/ here]. Be mindful that those numbers do not increase to unreasonable sizes so as to not cannibalize the community's server resources for nothing. | ||
| + | |||
| + | === The actions available to committers === | ||
| + | |||
| + | [[File:PapyrusHudsonWikiCommitterAccessTrim.png |200| authorizations]] | ||
| + | |||
| + | Those actions enable the user to create jobs and views as well as configure them to meet their needs. | ||
=== What is a View === | === What is a View === | ||
| Line 15: | Line 21: | ||
Hudson main pages can have a long list of configured jobs and therefore make it difficult for users and administrators to gather the information they need at a glance and find the job they are interested in. Hudson supports the addition of user specific views to the main page to filter out unnecessary jobs. | Hudson main pages can have a long list of configured jobs and therefore make it difficult for users and administrators to gather the information they need at a glance and find the job they are interested in. Hudson supports the addition of user specific views to the main page to filter out unnecessary jobs. | ||
| − | [[File:PapyrusHudsonWikiAllJobs.png | front page]] | + | [[File:PapyrusHudsonWikiAllJobs.png |1400px| front page]] |
| + | |||
| + | |||
| + | For example, from all those jobs, the Neon view can be created by selecting the relevant jobs from this pool. | ||
| + | |||
| + | [[File:PapyrusHudsonWikiNeonViewConf.png |800px| front page]] | ||
| + | |||
| + | resulting in the following view: | ||
| + | |||
| + | [[File:PapyrusHudsonWikiNeonView.png |1200px| front page]] | ||
| + | |||
| + | In this view you can see all the selected jobs as well as additional information such as the last successful build [1], the last failed build [2], the time taken by the last build (successful or not) [3] as well as its resulting console output [4]. Committers can also run new builds by clicking on the trigger button [5]. | ||
| + | |||
| + | |||
| + | === Creating a job === | ||
| + | |||
| + | To create your own job, click on the Create new task and give it a name [1]. Afterwards you can either choose to create it from scratch or clone an existing job that could be adapted to your needs [2]. | ||
| + | |||
| + | [[File:PapyrusHudsonWikiJobNew.png |1000px| front page]] | ||
| + | |||
| + | |||
| + | === Job interface === | ||
| + | |||
| + | The job will then have a user interface displaying various possibilities, provided the user has the rights to do so: | ||
| + | |||
| + | [[File:PapyrusHudsonWikiJobView.png |1400px| job interface]] | ||
| + | |||
| + | # Edit the job's name | ||
| + | # Edit the job's description. html can be used to format this description and insert, for example, links to other pages | ||
| + | # Edit the job further | ||
| + | # Trigger a new build | ||
| + | # See the active and past builds as well as their console outputs | ||
| + | # Browse the workspace created and used by the job | ||
| + | # Browse the build resulting artefacts | ||
| + | # Browse the last changes in the git repository and their related commits | ||
| + | # See the disc space taken by previous build artefacts | ||
| + | # See if the build will trigger additional jobs, and which ones | ||
| + | # See which builds were selected to be kept forever (or at least until someone doesn't need them anymore) | ||
Revision as of 09:59, 22 February 2017
This page is about the basic know-how and tips about the Papyrus Hipp, which can be found here. This page is not intended to be exhaustive and curious readers might want to take a look at the official Hudson page. Be mindful that most of the described actions are only accessible to committers, administrators or persons given special rights on jobs, as most contributors won't be able to see the items described further on.
Contents
Generalities
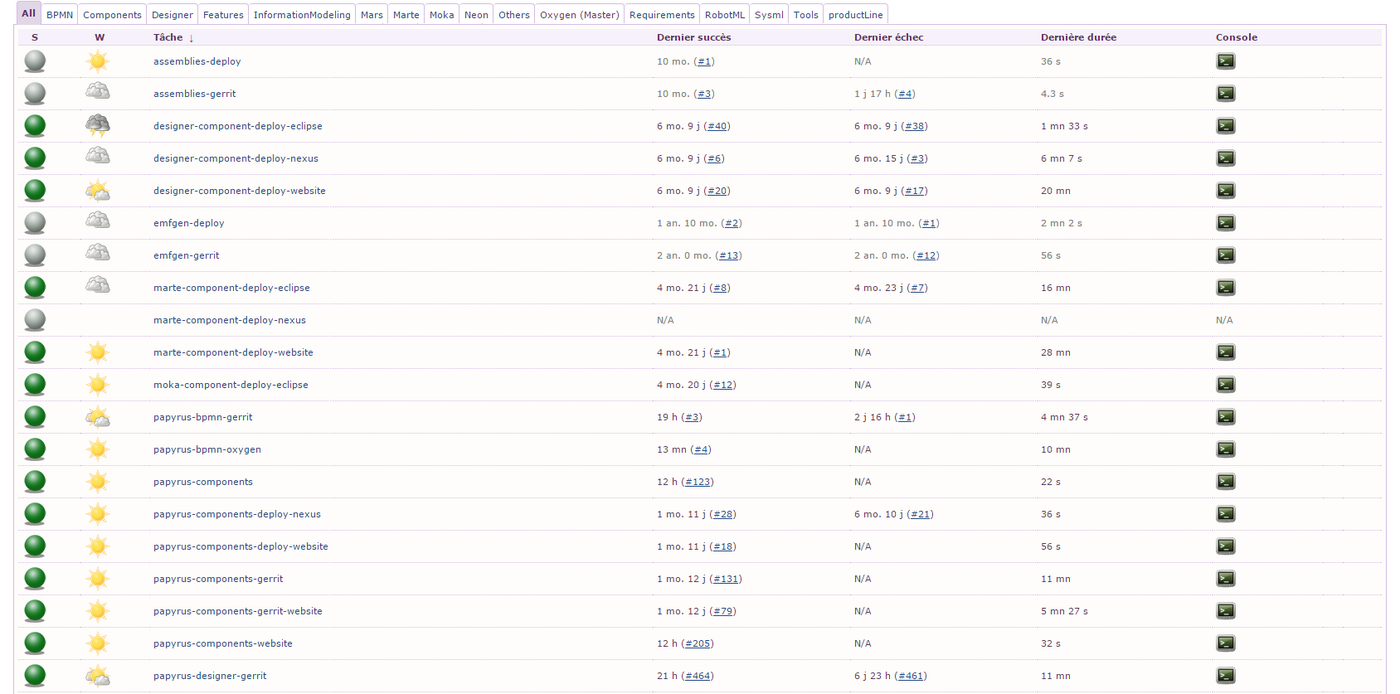
The front page will list all the jobs that are present on the Hudson page and are available to the user under the All view. Those same jobs are listed under their respective Views in order to separate them more efficiently and improve the overall vision.
Their disk consumption, for both build artifacts, logs and workspaces can be viewed here. Be mindful that those numbers do not increase to unreasonable sizes so as to not cannibalize the community's server resources for nothing.
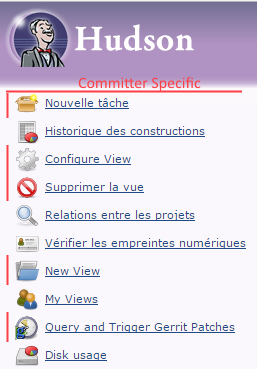
The actions available to committers
Those actions enable the user to create jobs and views as well as configure them to meet their needs.
What is a View
Hudson main pages can have a long list of configured jobs and therefore make it difficult for users and administrators to gather the information they need at a glance and find the job they are interested in. Hudson supports the addition of user specific views to the main page to filter out unnecessary jobs.
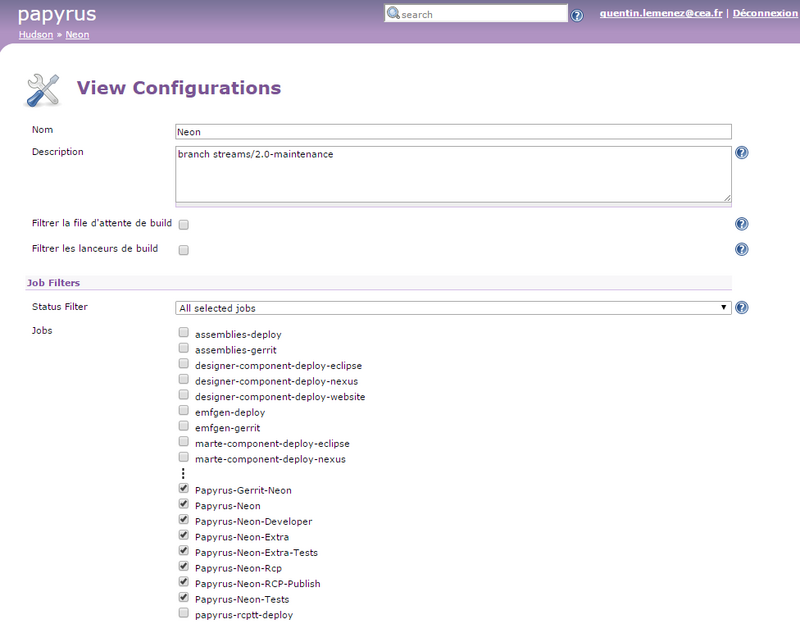
For example, from all those jobs, the Neon view can be created by selecting the relevant jobs from this pool.
resulting in the following view:
In this view you can see all the selected jobs as well as additional information such as the last successful build [1], the last failed build [2], the time taken by the last build (successful or not) [3] as well as its resulting console output [4]. Committers can also run new builds by clicking on the trigger button [5].
Creating a job
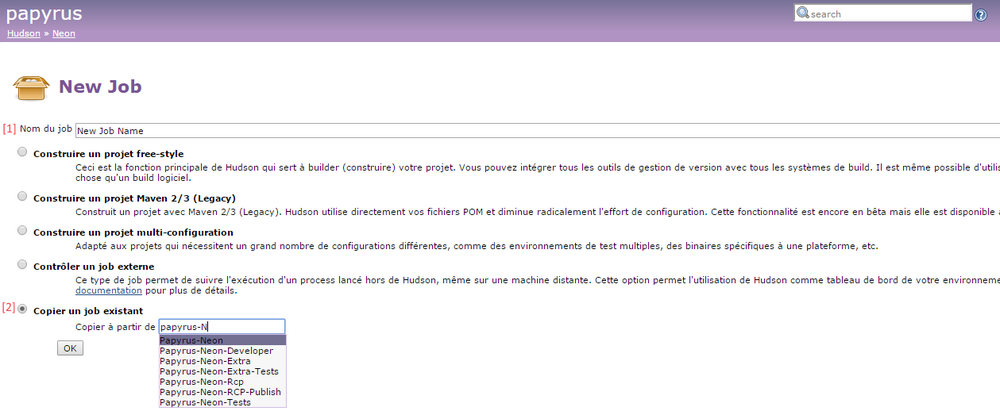
To create your own job, click on the Create new task and give it a name [1]. Afterwards you can either choose to create it from scratch or clone an existing job that could be adapted to your needs [2].
Job interface
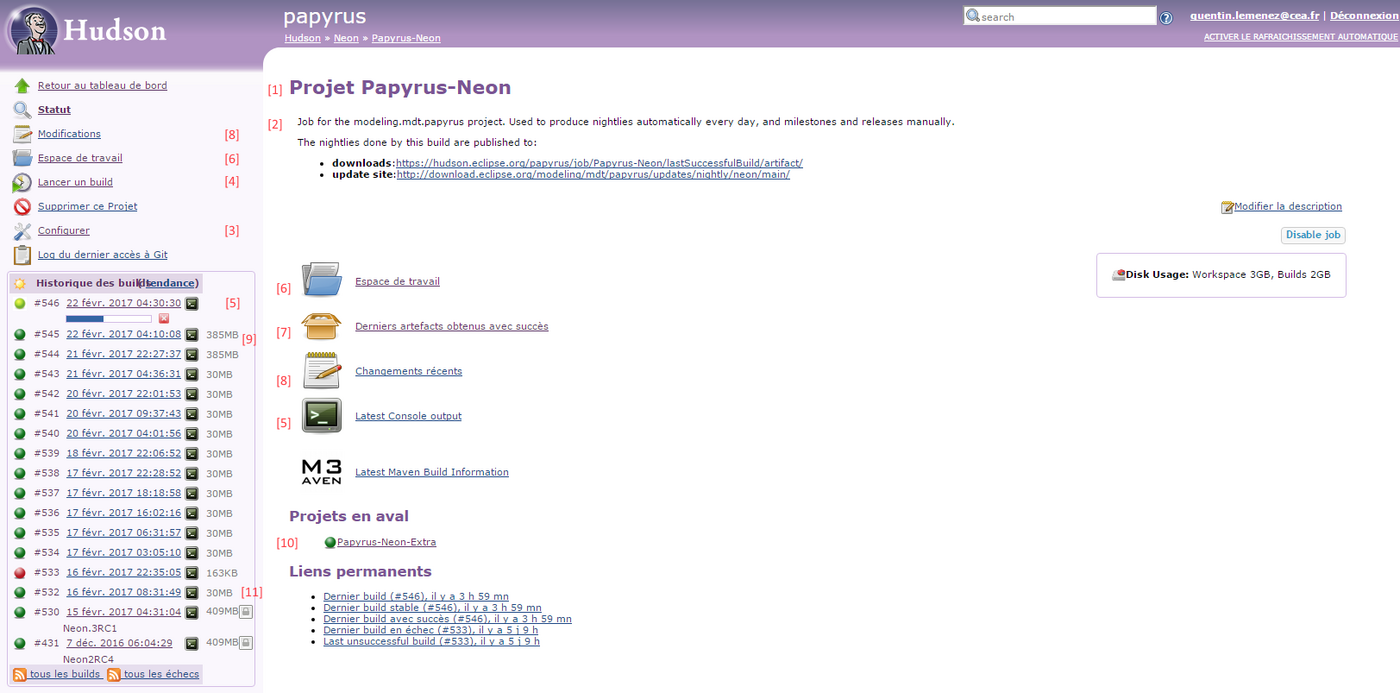
The job will then have a user interface displaying various possibilities, provided the user has the rights to do so:
- Edit the job's name
- Edit the job's description. html can be used to format this description and insert, for example, links to other pages
- Edit the job further
- Trigger a new build
- See the active and past builds as well as their console outputs
- Browse the workspace created and used by the job
- Browse the build resulting artefacts
- Browse the last changes in the git repository and their related commits
- See the disc space taken by previous build artefacts
- See if the build will trigger additional jobs, and which ones
- See which builds were selected to be kept forever (or at least until someone doesn't need them anymore)

