Notice: this Wiki will be going read only early in 2024 and edits will no longer be possible. Please see: https://gitlab.eclipse.org/eclipsefdn/helpdesk/-/wikis/Wiki-shutdown-plan for the plan.
Difference between revisions of "Papyrus-RT/Developer/Developer Guide/DevEnv"
(Removed step to manually add .setup project file) |
m |
||
| (One intermediate revision by the same user not shown) | |||
| Line 57: | Line 57: | ||
== Switch the the '''''Advanced Mode''''' == | == Switch the the '''''Advanced Mode''''' == | ||
| − | + | 2. Click on the icon at the top right (looks like three horizontal bars). | |
| − | + | ||
| − | + | ||
| − | + | ||
| − | 2. Click on the icon at the top right. | + | |
:<div class="figure">[[Image:papyrus-rt-dev-env-install-2.png]]</div> | :<div class="figure">[[Image:papyrus-rt-dev-env-install-2.png]]</div> | ||
| Line 67: | Line 63: | ||
3. Select "'''Advanced Mode...'''" | 3. Select "'''Advanced Mode...'''" | ||
| − | This has for effect to restart the Eclipse Installer in the "Advanced Mode" | + | This has for effect to restart the Eclipse Installer in the "Advanced Mode". |
:<div class="figure">[[Image:papyrus-rt-dev-env-install-3.png]]</div> | :<div class="figure">[[Image:papyrus-rt-dev-env-install-3.png]]</div> | ||
Revision as of 10:38, 29 April 2016
Setting up the Neon Developer Environment
Contents
- 1 Introduction
- 2 Requirements
- 3 Install the development environment for Papyrus for Real Time
- 3.1 Start the Eclipse Installer
- 3.2 Switch the the Advanced Mode
- 3.3 Select a base Eclipse Package
- 3.4 Select the Papyrus-RT setup project
- 3.5 Select the components to install
- 3.6 Configure your installation
- 3.7 Restarting
- 3.8 Generate code for EMF projects
- 3.9 Generate code for the Xtext project
- 3.10 Clean all
Introduction
This tutorial will show you how to setup the development environment for Papyrus for Real Time using the Oomph-based Eclipse Installer.
The installer will automatically perform several actions, including:
- Download and install a base Eclipse workbench for your platform
- Add the required update sites
- Download and install all required development tools (Eclipse features and plugins, such as the PDE, the JDT, EGit, MyLyn, etc.)
- Download and install all required dependencies (Eclipse features and plugins, such as UML2, Papyrus, Xtext, etc.)
- Clone the PapyrusRT git repository
- Import all the PapyrusRT projects into the workspace
- Create working sets in the workspace organizing the projects
- Install Bugzilla and Gerrit MyLyn connectors and synchronize queries for these connectors
- Configure the workbench (e.g. set the JVM and Java compiler compliance, set character encodings, code formatting and other user preferences)
Requirements
To install the developer environment you need only three things:
- Java 8.
- Older versions may not work. You can obtain the JDK 1.8 here: http://www.oracle.com/technetwork/java/javase/downloads/jdk8-downloads-2133151.html
- The Eclipse Installer
- Go to http://wiki.eclipse.org/Eclipse_Installer
- Download the "Eclipse Installer" package for your operating system
- Decompress the downloaded archive to a folder such as "~/Apps/EclipseInstaller/" (folder name and location will vary depending on operating system)
- An Eclipse account.
- This is needed to access Bugzilla and Gerrit queries in MyLyn, as well as to contribute changes to the source code via Gerrit.
- If you do not have an Eclipse account, go to https://dev.eclipse.org/site_login/ and fill out the form.
Install the development environment for Papyrus for Real Time
Now that the installer and project file are available, you can install the development environment.
Start the Eclipse Installer
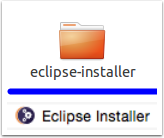
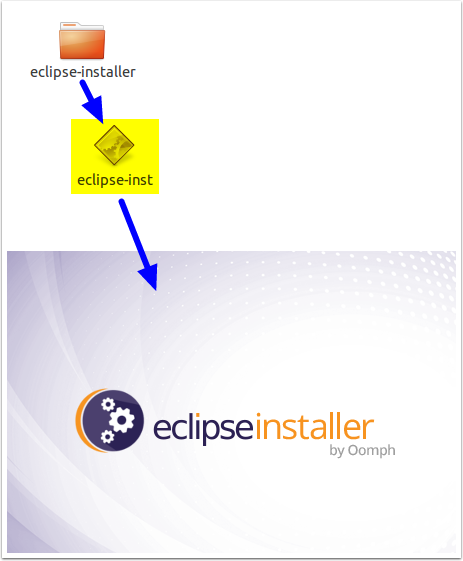
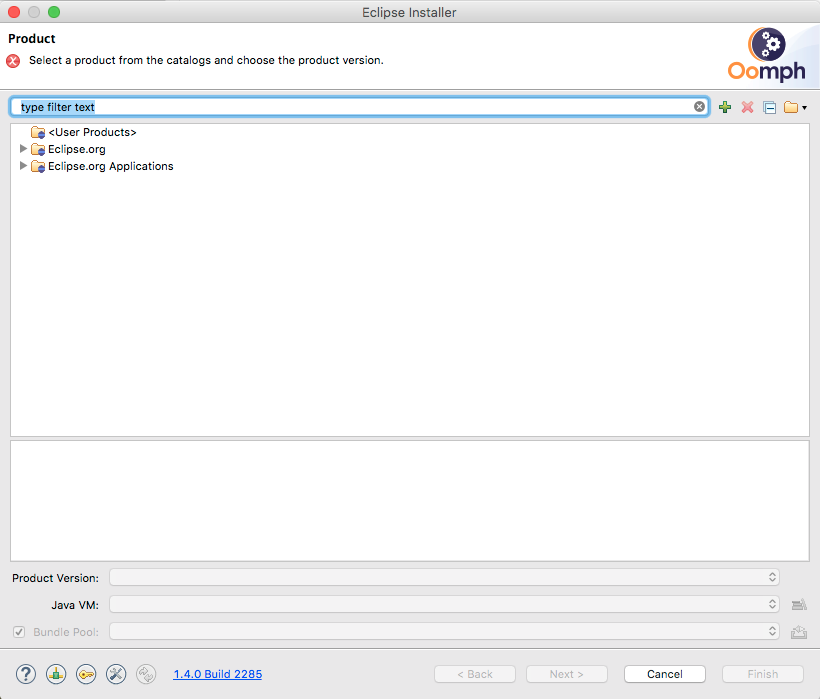
1. Open the eclipse-installer folder and double-click on the eclipse-inst application.
You should see this:
Switch the the Advanced Mode
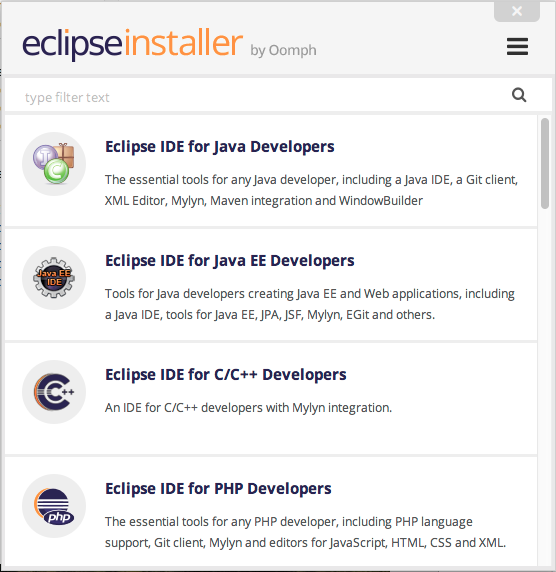
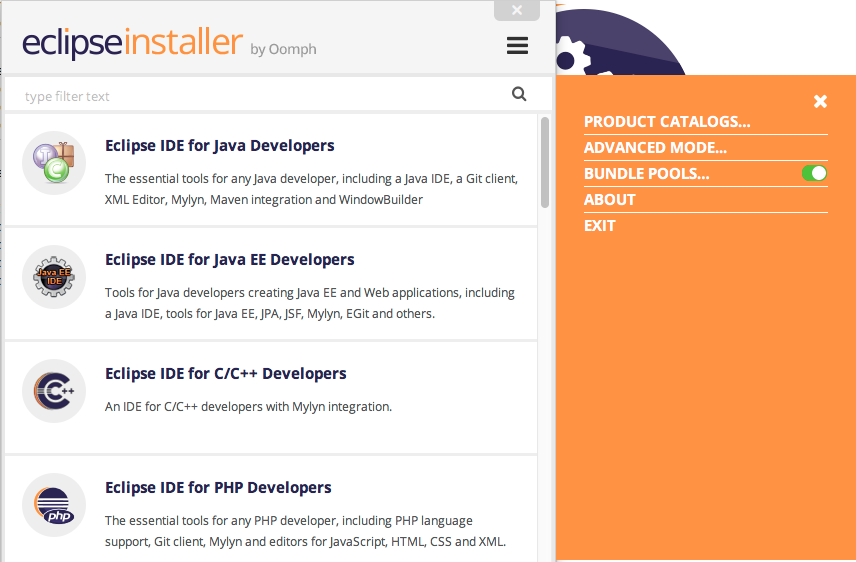
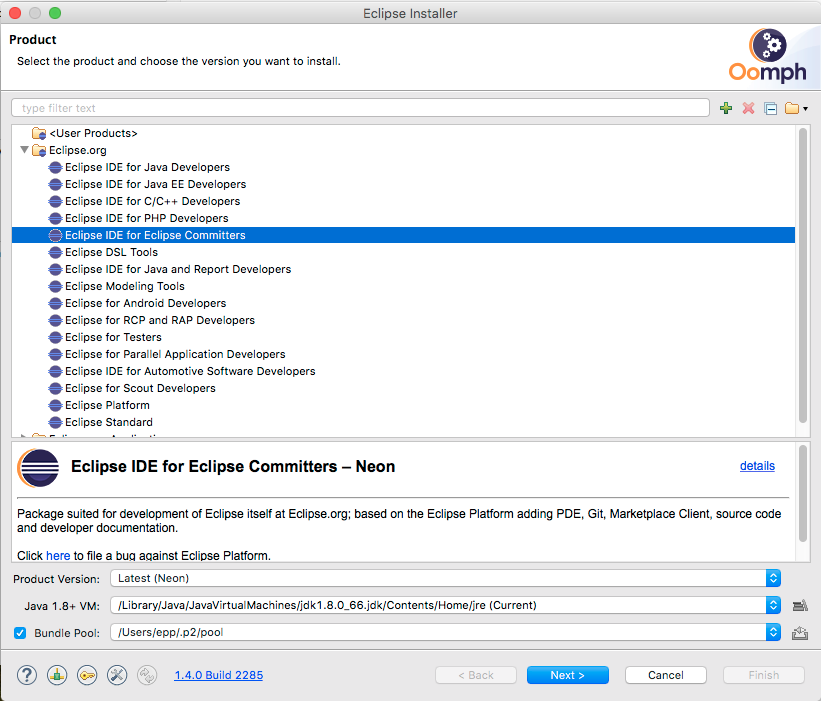
2. Click on the icon at the top right (looks like three horizontal bars).
3. Select "Advanced Mode..."
This has for effect to restart the Eclipse Installer in the "Advanced Mode".
Select a base Eclipse Package
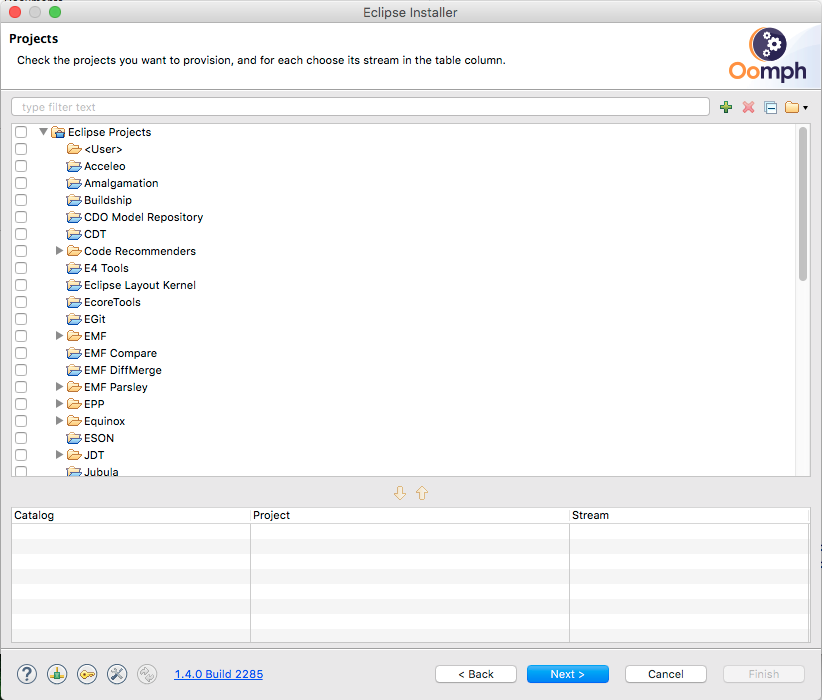
4. Select Eclipse.org from the list.
5. Click on the [>] left of Eclipse.org to unfold.
6. Select Eclipse IDE for Eclipse Committers.
7. In the bottom, under Product Version select Latest (Neon).
8. Under Java VM choose the appropriate Java 1.8 JVM (you may need to navigate through the file system to find the one you need).
9. Click [Next]
Select the Papyrus-RT setup project
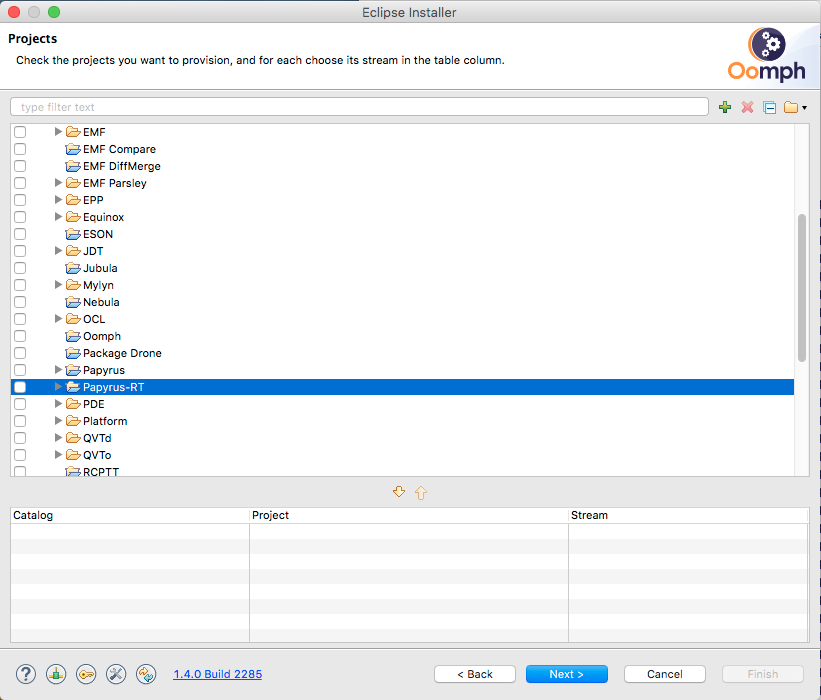
10. Scroll down to find and select the Papyrus-RT project.
Select the components to install
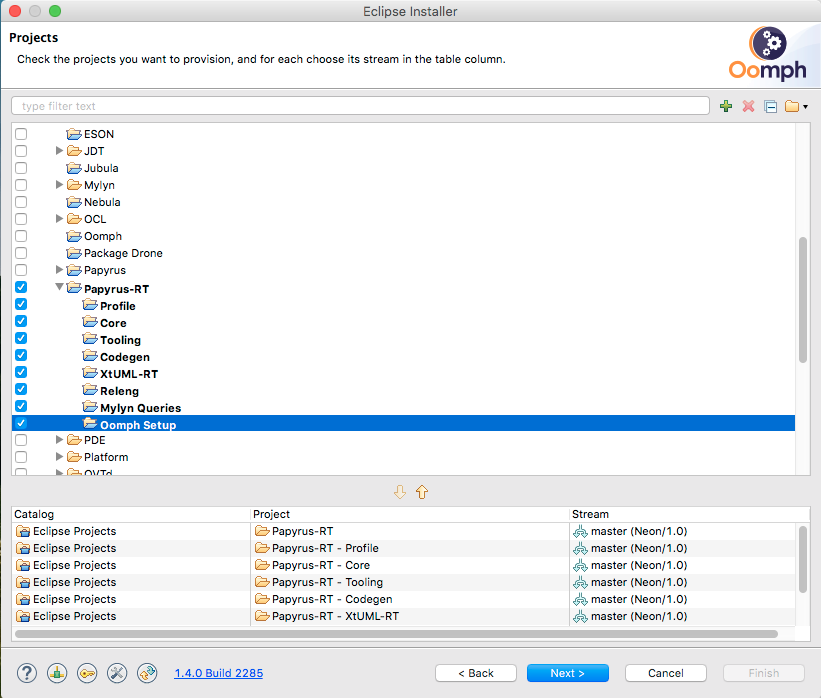
11. Unfold Papyrus-RT and check all the boxes on the left.
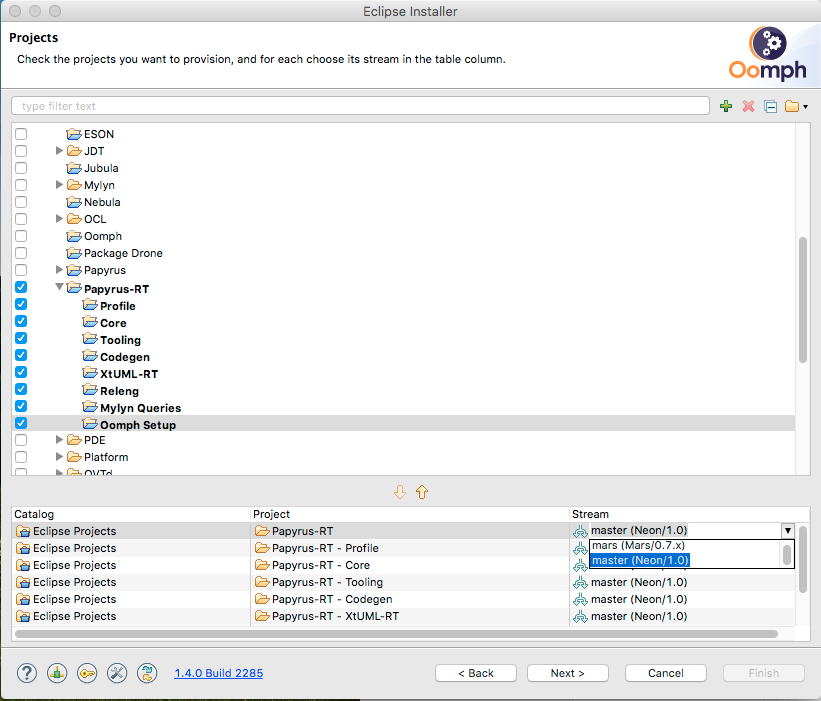
12. In the bottom of the dialog make sure that the Stream field in each entry is set to master (Neon/1.0) (You may need to click on each and select the appropriate stream).
Configure your installation
13. Click [Next].
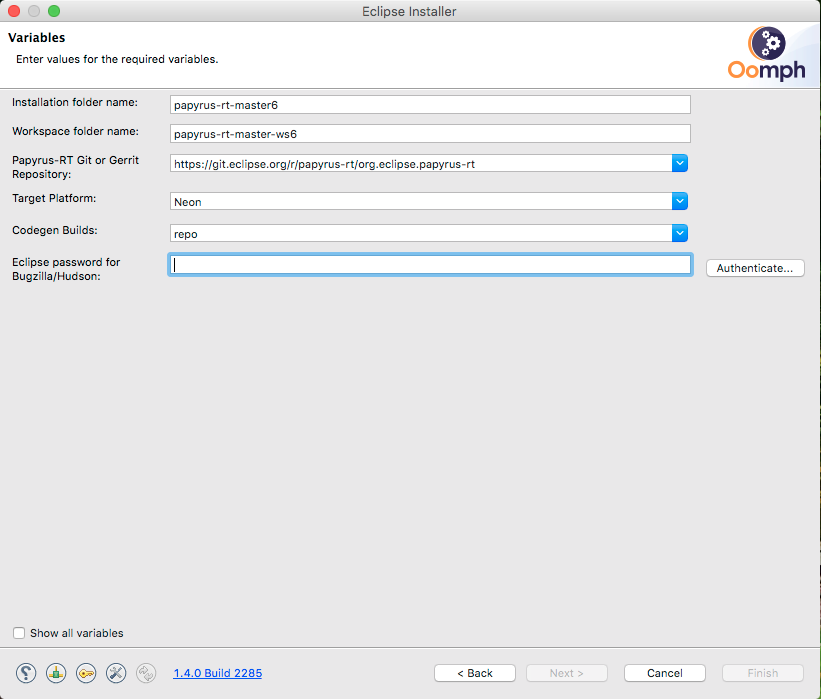
14. Enter your Eclipse password under Eclipse password for Bugzilla/Hudson.
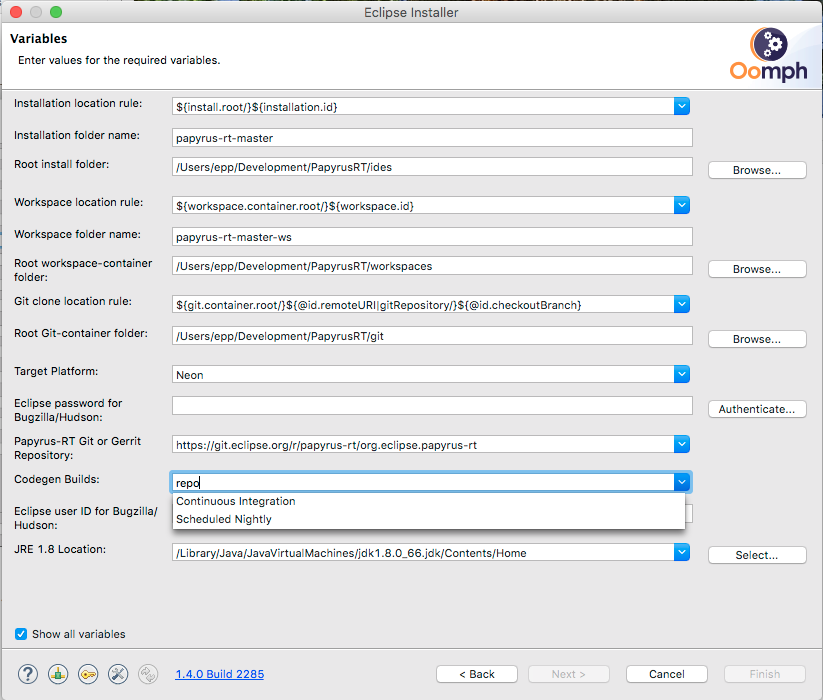
15. Choose your installation and workspace folders and enter your Eclipse password. You may customize these values and more by checking on Show all variables at the bottom.
This will give your options about the location of the workbench, the workspace, the git repository, the target platform, the JVM location and the repository used for the code-generator builds (Continuous Integration or Scheduled Nightly).
16. Click [Next].
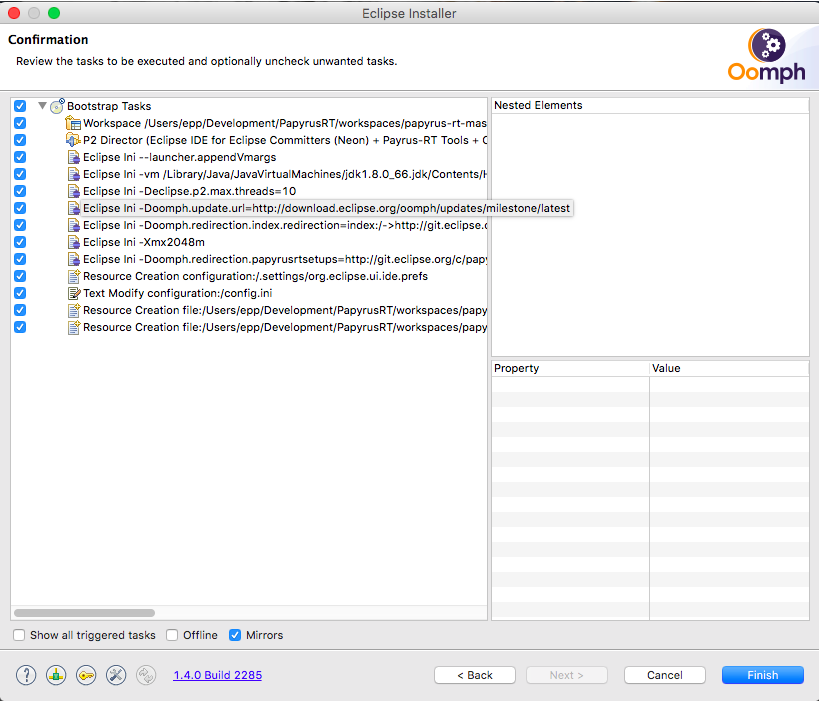
This shows the first set of tasks of the installation. The second set will be executed when Eclipse launches automatically.
17. Click [Finish].
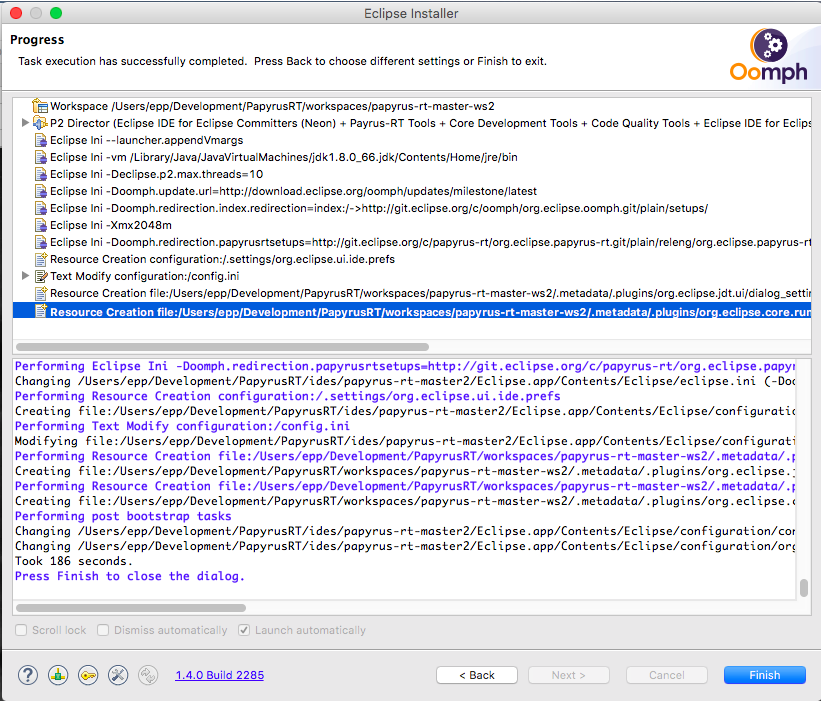
18. Click [Finish].
Restarting
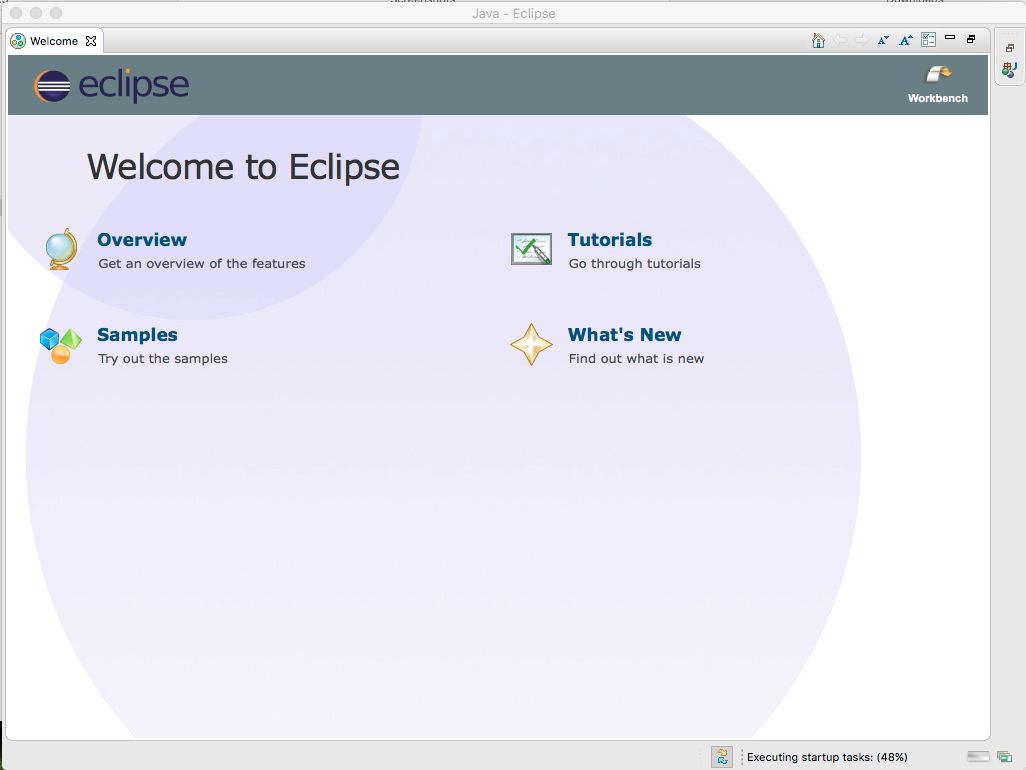
Eclipse will relaunch automatically and present you with a welcome screen:
On the bottom right it says Executing startup tasks. You can leave it alone, but it will take a few minutes to complete. If you'd like to see the progress, you can click on the icon to the left of this message (two circling arrows)
When it finishes it will look like this:
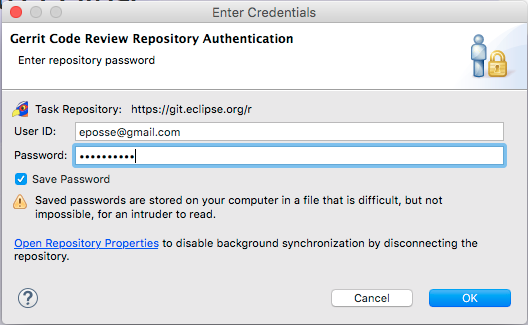
19. If asked for Gerrit Code Review Repository Authentication enter your Eclipse user ID and password.
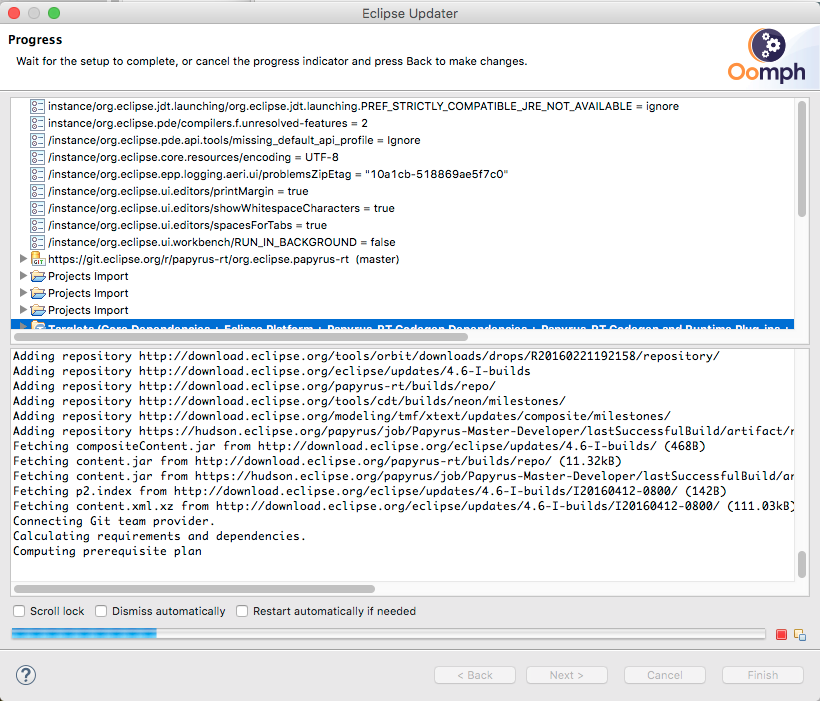
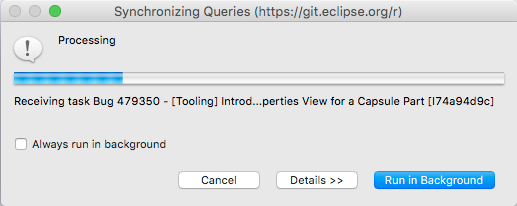
During setup, a few dialogs like the following will pop up:
These will setup and synchronize the various MyLyn queries for Bugzilla and Gerrit.
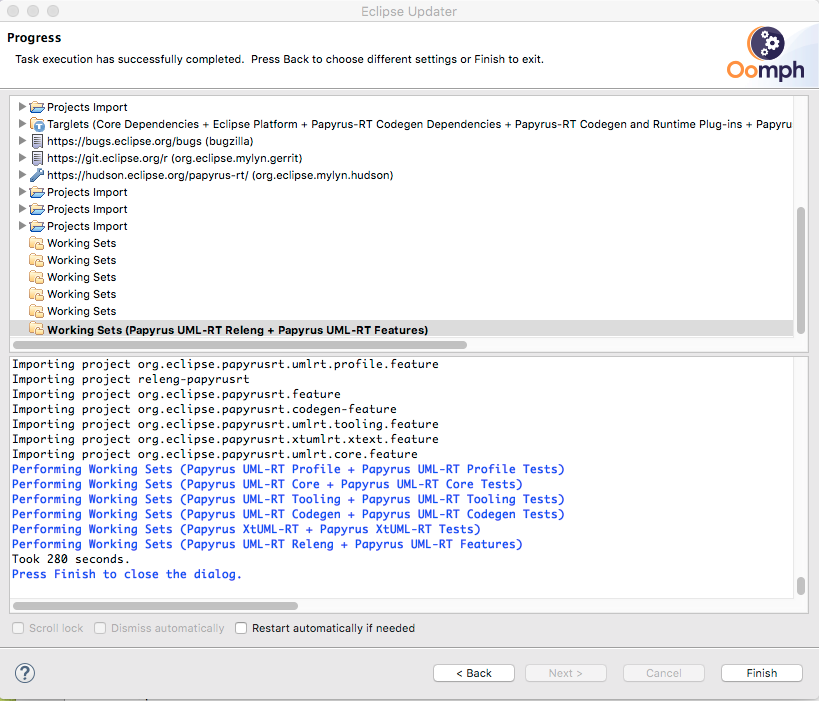
20. Once it's finished you can click [Finish] to close the setup dialog.
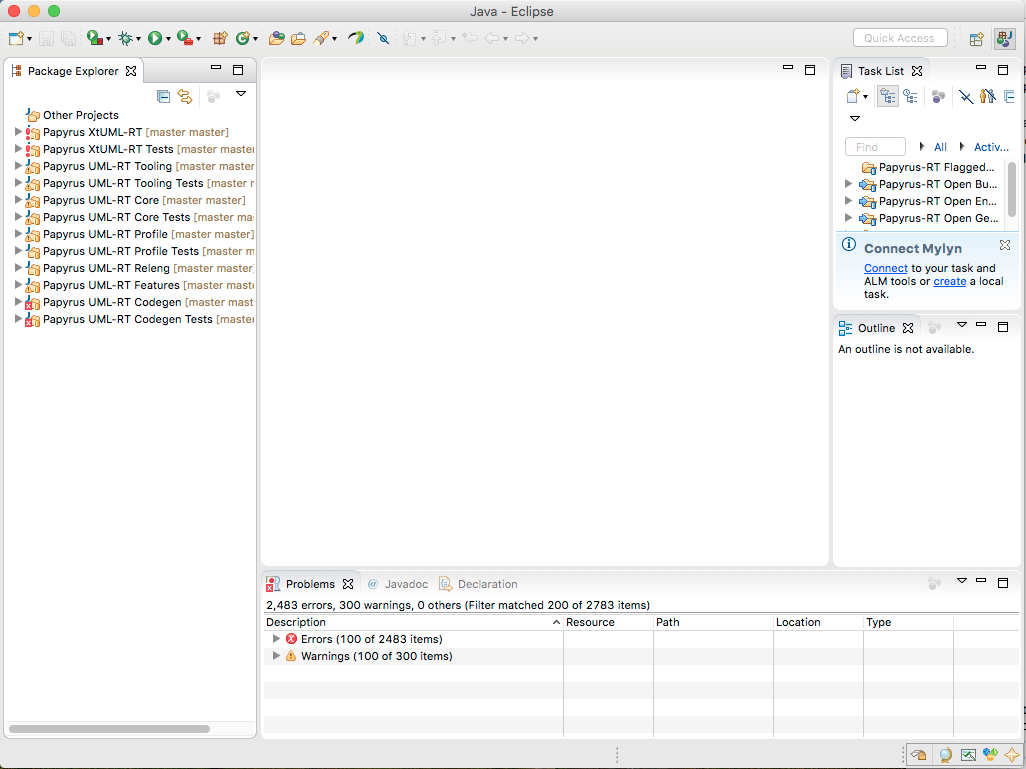
21. Click on Workbench in the Eclipse Welcome page. You should see something like this:
At this point you will have errors in several projects (and in the Error Log view). To clean up all the errors, a few additional steps are necessary.
Generate code for EMF projects
22. For each of the following projects (found under the Papyrus XtUML-RT working set), perform the steps below:
-
org.eclipse.papyrusrt.xtumlrt.common.model -
org.eclipse.papyrusrt.xtumlrt.statemach.model -
org.eclipse.papyrusrt.xtumlrt.statemach.ext.model -
org.eclipse.papyrusrt.xtumlrt.umlrt.model
Steps:
- Unfold the project
- Unfold the model folder
- Open the XXX
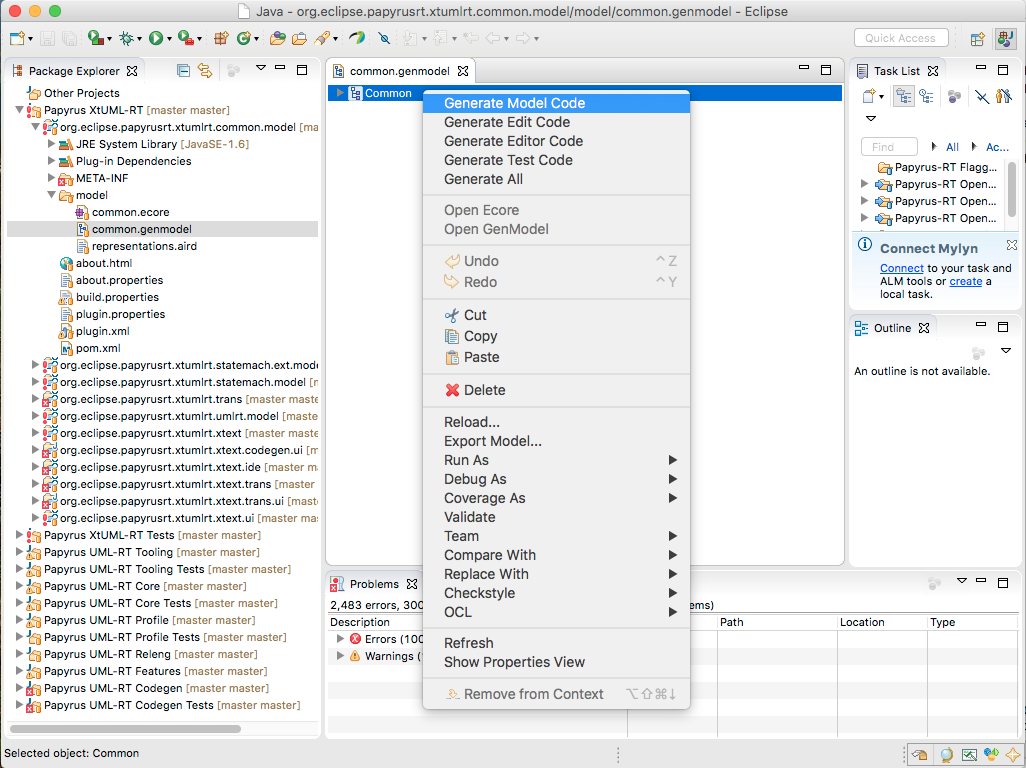
.genmodelfile (by double-clicking it), where XXX is the name of the model. - In the opened EMF editor, right-click the root element (named XXX)
- Select Generate Model Code
- Do the same for each of the projects mentioned above.
Generate code for the Xtext project
23. Generate Xtext Artifacts:
- Locate the
org.eclipse.papyrusrt.xtumlrt.xtextproject (under the Papyrus XtUML-RT working set), and then - Unfold the project
- Unfold the src folder
- Unfold the org.eclipse.papyrusrt.xtumlrt.xtext folder
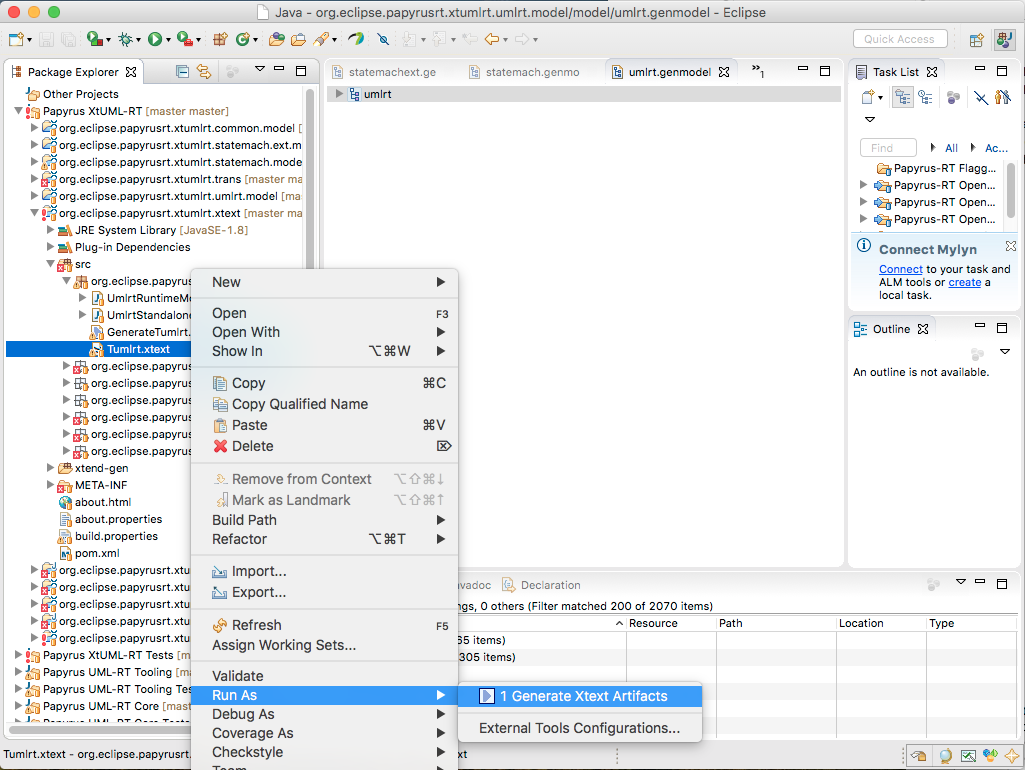
- Right-click on the Tumlrt.xtext file
- Select Run As
- Select Generate Xtext Artifacts
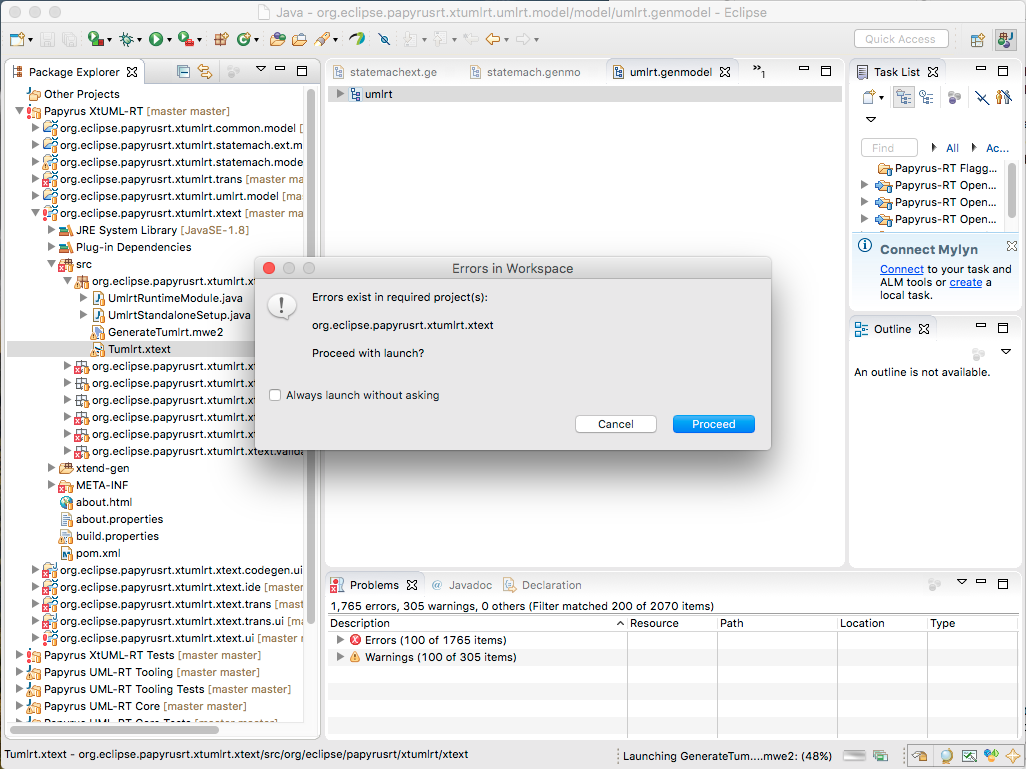
It will then say that there are errors and ask you is you want to proceed.
24. Click [Proceed]
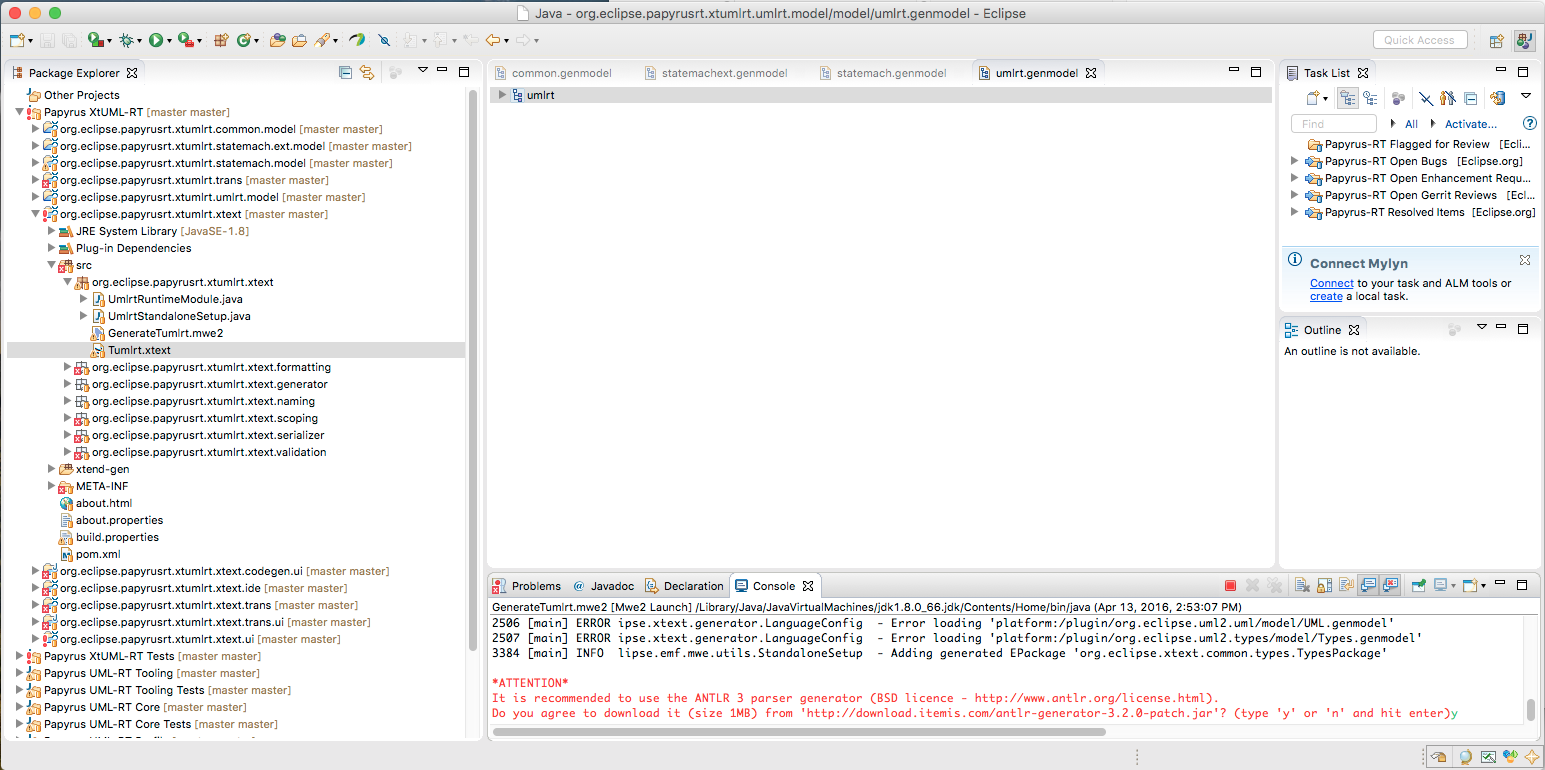
In the console view at the bottom, a message *ATTENTION* will appear and it will ask you if it can download the ANTLR 3 parser generator.
25. Put the cursor in the console after the question and type y[Enter].
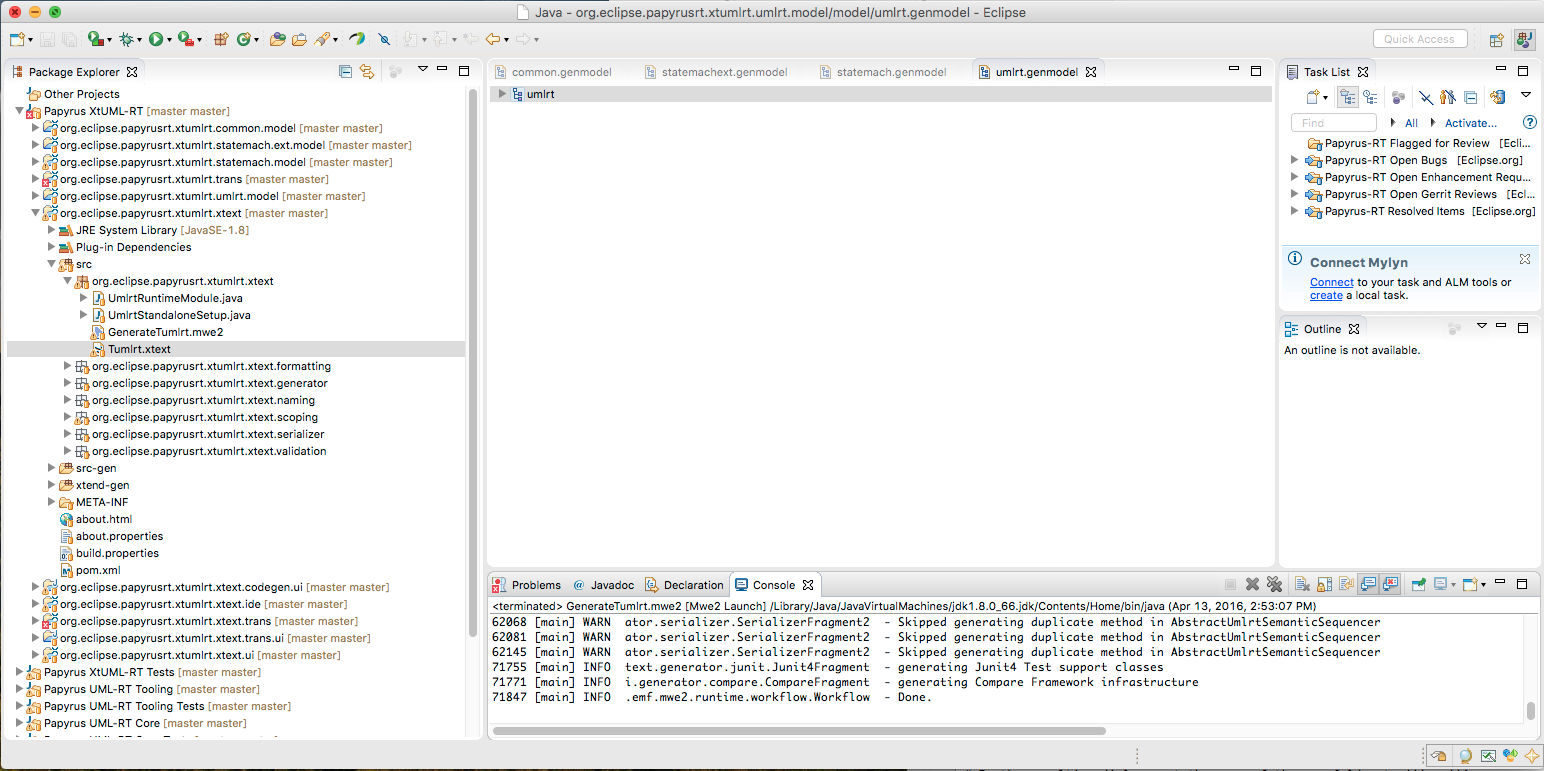
When it finishes generating the Xtext code it should look like this:
Clean all
There will still be a few errors in the workspace. To get rid of them
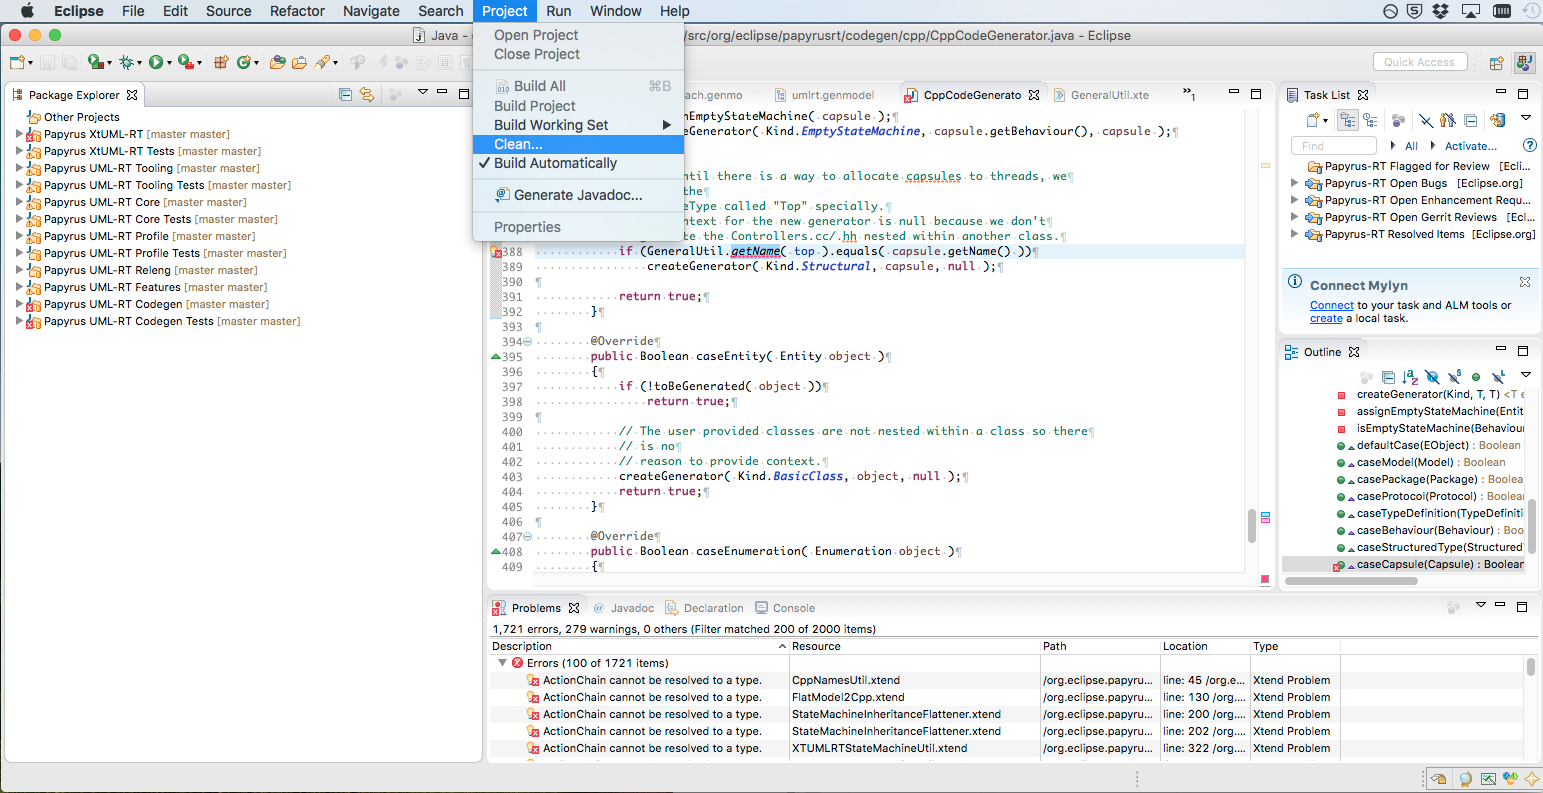
26. Click on Project → Clean...on the main menu.
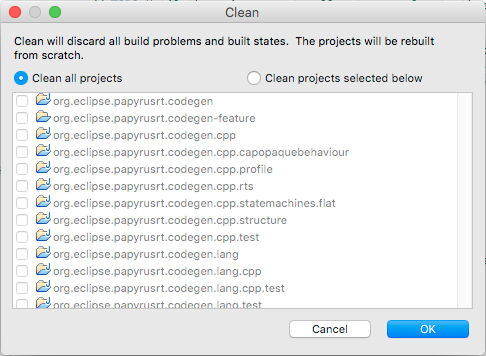
27. Select Clean all projects
28. Click [OK]
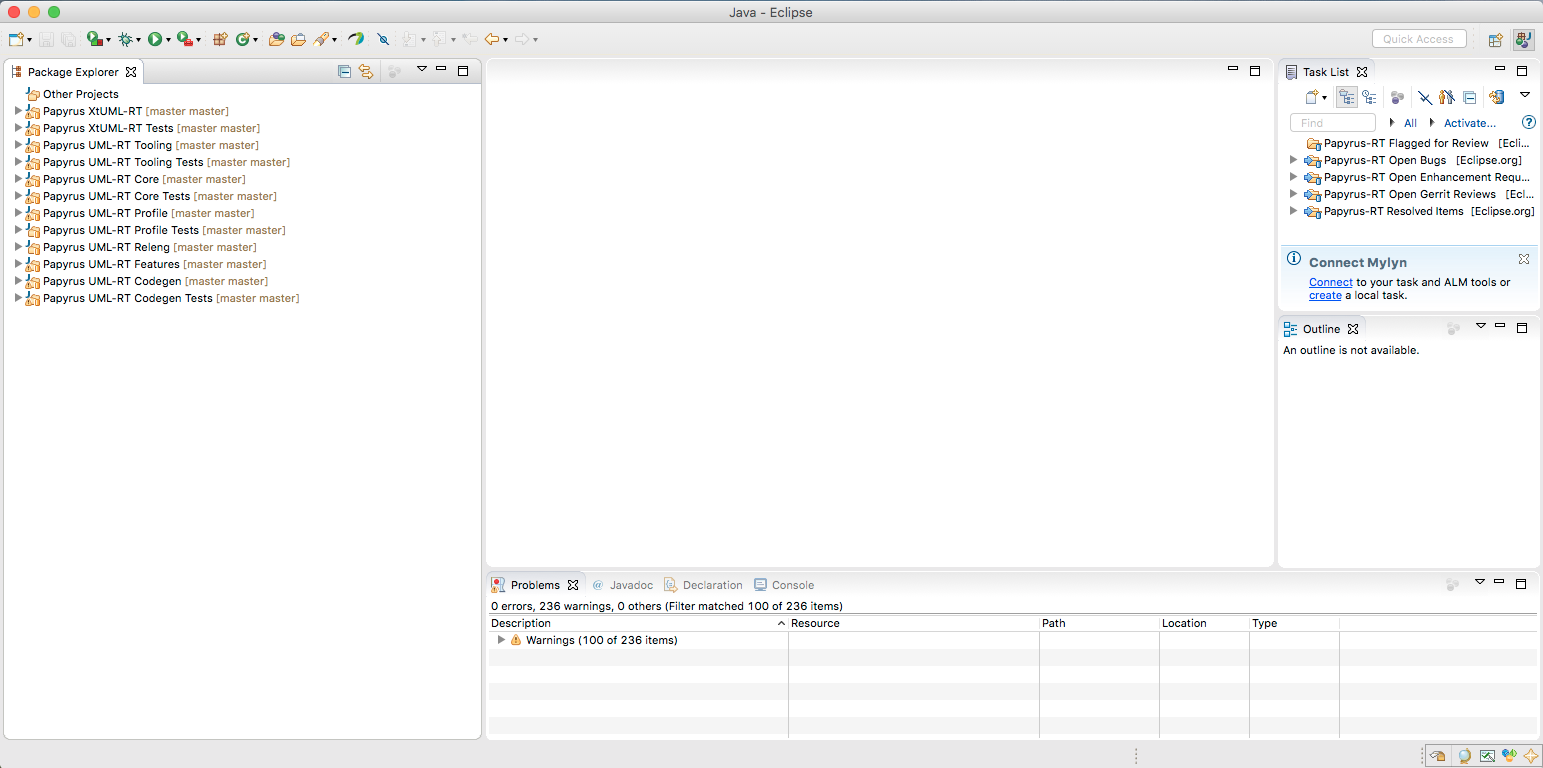
After if finishes, the workspace should have no errors and it should look like this:
Done!

