Notice: this Wiki will be going read only early in 2024 and edits will no longer be possible. Please see: https://gitlab.eclipse.org/eclipsefdn/helpdesk/-/wikis/Wiki-shutdown-plan for the plan.
Difference between revisions of "Papyrus-RT/Developer/Developer Guide/DevEnv"
(Created page with "== Introduction == This tutorial will show you how to setup the development environment for Papyrus for Real Time using the Oomph-based Eclipse Installer. {{Note | Java 8 |...") |
(Added note about the Papyrus build-type) |
||
| (36 intermediate revisions by 3 users not shown) | |||
| Line 1: | Line 1: | ||
| − | == Introduction | + | [[File:PapyrusForRealTime-Logo-Icon.png|left|bottom-align|]]<br/><span style="font-family: Helvetica,Arial,sans-serif; font-size: 48px;"><b>Setting up the Developer Environment</b></span><br/><br/><br/> |
| + | |||
| + | __TOC__ | ||
| + | |||
| + | = Introduction = | ||
This tutorial will show you how to setup the development environment for Papyrus for Real Time using the Oomph-based Eclipse Installer. | This tutorial will show you how to setup the development environment for Papyrus for Real Time using the Oomph-based Eclipse Installer. | ||
| − | {{Note | | + | {{ Note | Neon or Oxygen | The following instructions were originally written for the '''Neon''' release of Eclipse and this is reflected throughout the instructions in various screenshots. Nevertheless, the instructions will still work with the new Eclipse release, '''Oxygen''', so wherever the instructions tell you to select '''Neon''', you should now select '''Oxygen''' instead. }} |
| − | + | The installer will automatically perform several actions for you, including: | |
| − | + | * Download and install a base Eclipse workbench for your platform | |
| + | * Add the required update sites | ||
| + | * Download and install all required development tools (Eclipse features and plugins, such as the PDE, the JDT, EGit, MyLyn, etc.) | ||
| + | * Download and install all required dependencies (Eclipse features and plugins, such as UML2, Papyrus, Xtext, etc.) | ||
| + | * Clone the PapyrusRT git repository | ||
| + | * Generate code for several EMF models and Xtext projects | ||
| + | * Import all the PapyrusRT projects into the workspace | ||
| + | * Perform a clean build of all projects | ||
| + | * Create working sets in the workspace organizing the projects | ||
| + | * Install Bugzilla and Gerrit MyLyn connectors and synchronize queries for these connectors | ||
| + | * Configure the workbench (e.g. set the JVM and Java compiler compliance, set character encodings, code formatting and other user preferences) | ||
| − | = | + | = Requirements = |
| − | + | To install the developer environment you need only three things: | |
| − | + | * '''Java 8'''. | |
| − | + | *: Older versions may not work. You can obtain the JDK 1.8 here: [http://www.oracle.com/technetwork/java/javase/downloads/jdk8-downloads-2133151.html http://www.oracle.com/technetwork/java/javase/downloads/jdk8-downloads-2133151.html] | |
| − | + | ||
| − | + | * The '''Eclipse Installer''' | |
| − | + | *# Go to [http://wiki.eclipse.org/Eclipse_Installer http://wiki.eclipse.org/Eclipse_Installer] | |
| + | *# Download the "'''Eclipse Installer'''" package for your operating system | ||
| + | *# Decompress the downloaded archive to a folder such as "'''~/Apps/EclipseInstaller/'''" ''(folder name and location will vary depending on operating system)'' | ||
| − | + | * An Eclipse account. | |
| + | *:This is needed to access Bugzilla and Gerrit queries in MyLyn, as well as to contribute changes to the source code via Gerrit. | ||
| + | *# If you do not have an Eclipse account, go to [https://dev.eclipse.org/site_login/ https://dev.eclipse.org/site_login/] and fill out the form. | ||
| − | |||
| + | {{Note | Operating System | The development environment can be installed in any major platform supported by Eclipse, including Windows, Linux and Mac OS X. | ||
| − | + | The instructions in this tutorial are illustrated using screen captures from Mac OS X, but the steps are the same for other platforms. }} | |
| − | + | = Install the development environment for Papyrus for Real Time = | |
| − | <div class="figure">[[Image: | + | == Start the Eclipse Installer == |
| − | </div> | + | |
| + | 1. Start the '''Eclipse Installer''' application. | ||
| + | |||
| + | :<div class="figure">[[Image:papyrusrt-dev-install-01-eclipse-installer-icon.png]]</div> | ||
| + | |||
| + | :<div class="figure">[[Image:papyrusrt-dev-install-02-eclipse-installer-splash.png]]</div> | ||
You should see this: | You should see this: | ||
| − | <div class="figure">[[Image:papyrus-rt-dev- | + | :<div class="figure">[[Image:papyrusrt-dev-install-03-eclipse-installer-main.png]]</div> |
| − | </div> | + | |
| + | == Switch to the '''''Advanced Mode''''' == | ||
| + | |||
| + | 2. Click on the icon at the top right (looks like three horizontal bars). | ||
| + | |||
| + | :<div class="figure">[[Image:papyrusrt-dev-install-04-eclipse-installer-options-menu.png]]</div> | ||
| + | |||
| + | 3. Select "'''Advanced Mode...'''" | ||
| + | |||
| + | :<div class="figure">[[Image:papyrusrt-dev-install-05-eclipse-installer-options-adv-mode-selected.png]]</div> | ||
| + | |||
| + | This has for effect to restart the Eclipse Installer in the "Advanced Mode". | ||
| + | |||
| + | :<div class="figure">[[Image:papyrusrt-dev-install-06-eclipse-installer-advanced-mode.png]]</div> | ||
| + | |||
| + | == Select a base Eclipse Package == | ||
| + | |||
| + | 4. If the '''Eclipse.org''' item is folded, click on the arrow to its left to unfold it. | ||
| + | |||
| + | 5. Select '''Eclipse IDE for Eclipse Committers'''. | ||
| + | |||
| + | :<div class="figure">[[Image:papyrusrt-dev-install-07-eclipse-installer-product-selected.png]]</div> | ||
| + | |||
| + | {{ Note | Base package | You can choose a different base package, but this is the most tested base package.}} | ||
| + | |||
| + | 6. The bottom panel may look like this: | ||
| + | |||
| + | :<div class="figure">[[Image:papyrusrt-dev-install-08-eclipse-installer-bottom-panel.png]]</div> | ||
| + | |||
| + | Click on the '''Product Version''' field and select '''Oxygen''' or '''Latest (Oxygen)'''. | ||
| + | |||
| + | {{ Note | Oxygen vs. Neon | The latest version of Eclipse is '''Oxygen''', and you should select this product version instead of '''Neon'''. }} | ||
| + | |||
| + | :<div class="figure">[[Image:papyrusrt-dev-install-10-eclipse-installer-neon-selected.png]]</div> | ||
| + | |||
| + | The bottom panel should now look like this: | ||
| + | |||
| + | :<div class="figure">[[Image:papyrusrt-dev-install-11-eclipse-installer-bottom-panel-neon-selected.png]]</div> | ||
| + | |||
| + | 7. Under '''Java VM''' choose the appropriate Java 1.8 JVM. | ||
| + | |||
| + | ''Optional'': Manage JVMs. You may click on the icon to the right of the field to manage alternative JVMs. | ||
| + | |||
| + | :<div class="figure">[[Image:papyrusrt-dev-install-12-eclipse-installer-manage-jvm.png]]</div> | ||
| + | |||
| + | ''Optional'': Manage bundle pools. By default the installer is set to use ''bundle pools''. A bundle pool is a common plugins directory shared by several Eclipse installations, to avoid duplication of content and reduce download times. Bundle pools help to dramatically reduce disk footprint and to eliminate repeated downloads of the same bundles and features, thereby dramatically improving the performance of software updates and target platform provisioning. | ||
| + | |||
| + | If you unselect the '''Bundle Pool''' checkbox, all the plugins for Papyrus-RT will be installed in the target installation directory, resulting in a more isolated install, but without taking advantage of the pool, and duplicating plugins that you may have in other installations. | ||
| + | |||
| + | You may also choose to manage multiple pools, by clicking on the button to the right of the field. | ||
| + | |||
| + | :<div class="figure">[[Image:papyrusrt-dev-install-13-eclipse-installer-manage-pools.png]]</div> | ||
| + | |||
| + | 8. Once done with the Product Version, Java JVM and Bundle pools, click '''[Next]'''. | ||
| + | |||
| + | |||
| + | == Select the Papyrus-RT setup project == | ||
| + | |||
| + | You should see now a list of available Eclipse projects: | ||
| + | |||
| + | :<div class="figure">[[Image:papyrusrt-dev-install-14-eclipse-installer-projects.png]]</div> | ||
| + | |||
| + | 9. Scroll down to find and select the '''Papyrus-RT''' project. | ||
| + | |||
| + | :<div class="figure">[[Image:papyrusrt-dev-install-15-eclipse-installer-papyrus-rt-project.png]]</div> | ||
| + | |||
| + | {{ Note | Project selection | Select only the Papyrus-RT project. Do not select the Papyrus project, otherwise there may be conflicts during installation. }} | ||
| + | |||
| + | == Select the components to install == | ||
| + | |||
| + | 10. Unfold '''Papyrus-RT''' | ||
| + | |||
| + | :<div class="figure">[[Image:papyrusrt-dev-install-16-eclipse-installer-project-unfolded.png]]</div> | ||
| + | |||
| + | 11. Check all the boxes on the left. | ||
| + | |||
| + | :<div class="figure">[[Image:papyrusrt-dev-install-17-eclipse-installer-components-selected.png]]</div> | ||
| + | |||
| + | {{ Note | Which components to select | Papyrus-RT consists of several components, listed in view above. | ||
| + | To set up a development environment you '''must''' select the root Papyrus-RT component. | ||
| + | |||
| + | * '''Profile''': Contains the UML-RT profile. All components depend on it. | ||
| + | * '''Core''': Contains core utilities. Depends on '''Profile''', and the rest depend on it. | ||
| + | * '''Common''': Contains the common default language framework, including the runtime model library and the UI. Depends on '''Core''', and the rest depend on it. | ||
| + | * '''Tooling''': Contains the Tooling/UI plugins (e.g. diagrams, wizards, etc.). Depends on '''Common'''. | ||
| + | * '''Codegen''': Contains the code generator and runtime system. Depends on '''Common''' and '''XtUML-RT'''. | ||
| + | * '''XtUML-RT''': Contains the intermediate representation used by the code generator, as well as transformations to UML, and textual syntax support (Xtext plugins). | ||
| + | * '''C++''': Contains plugins for specific C++ support by both '''Tooling''' and '''Codegen'''. | ||
| + | * '''Model Migration''': Contains plugins to handle model migration from other tools, specially RSA. Depends on '''Profile'''. | ||
| + | * '''Releng''': Contains the release engineering projects, including target platform definitions, POM files and scripts to handle the build. | ||
| + | * '''Mylyn Queries''': Contains Mylyn queries to link Mylyn to the Papyrus-RT Bugzilla and Gerrit repository. | ||
| + | * '''Oomph Setup''': Contains the Papyrus-RT website and within it, the Oomph Setup models to provide custom user, tester and developer installations. | ||
| + | * '''Installer''': Contains a custom Papyrus-RT installer. | ||
| + | |||
| + | If you select a component, you must also select all its dependencies. For example, if you want to work on '''Codegen''', | ||
| + | you will need to select '''Profile''', '''Core''', '''Common''', '''XtUML-RT''' as a minimum. | ||
| + | |||
| + | If you are unsure, it is recommended to select all. | ||
| + | }} | ||
| + | |||
| + | {{ Note | On Linux | It has been reported that in some Linux platforms the checkboxes on the left may not appear. In that case, you can select the components by double-clicking on them. }} | ||
| + | |||
| + | 12. In the bottom of the dialog there is a panel showing all the selected components: | ||
| + | |||
| + | :<div class="figure">[[Image:papyrusrt-dev-install-18-eclipse-installer-components-panel.png]]</div> | ||
| + | |||
| + | Make sure that the ''Stream'' field in each and every entry is set to '''master (Oxygen/1.0)''' (You may need to click on each and select the appropriate stream). | ||
| + | |||
| + | :<div class="figure">[[Image:papyrusrt-dev-install-19-eclipse-installer-select-stream.png]]</div> | ||
| + | |||
| + | {{ Note | Stream selection | Some users specially on Mac OS X, have observed that sometimes clicking on the '''Stream''' field unselects the corresponding component. In that case just select the component again by either clicking on its check-box or double-clicking on it. The component will reappear at the end of the list. }} | ||
| + | |||
| + | After selecting the correct stream for all, it should look like this: | ||
| + | |||
| + | :<div class="figure">[[Image:papyrusrt-dev-install-20-eclipse-installer-all-streams-selected.png]]</div> | ||
| + | |||
| + | 13. Click '''[Next]'''. | ||
| + | |||
| + | |||
| + | == Configure your installation == | ||
| + | |||
| + | At this point, a dialog used to configure the installation '''Variables''' will appear: | ||
| + | |||
| + | :<div class="figure">[[Image:papyrusrt-dev-install-21-eclipse-installer-variables.png]]</div> | ||
| + | |||
| + | '''Configuration variables''': If this is an installation from scratch, all variables shown above will appear. If you are performing an additional installation, Oomph will have recorded the values you previously entered and only a few variables will show, e.g.: | ||
| + | |||
| + | :<div class="figure">[[Image:papyrusrt-dev-install-21-eclipse-installer-variables-additional-install.png]]</div> | ||
| + | |||
| + | You can always go back to see all variables by checking the '''Show all variables''' box at the bottom. | ||
| + | |||
| + | :<div class="figure">[[Image:papyrusrt-dev-install-28-eclipse-installer-variables-show-all.png]]</div> | ||
| + | |||
| + | There are many variables that you can configure such as the location of the application, the workspace, the git repositories, as well as the urls for cloning the repositories, the target platform, etc. | ||
| + | |||
| + | For the locations of the main installation folder, the workspace and the git repositories, there are several alternative rules. There is a "root install folder" and typically, other locations will be relative to this root folder, but you can also choose an absolute location: | ||
| + | |||
| + | :<div class="figure">[[Image:papyrusrt-dev-install-22-eclipse-installer-variables-install-location.png]]</div> | ||
| + | |||
| + | The installation location is the location of the Eclipse folder. By default is will be under the root folder. | ||
| + | |||
| + | The workspace location rules provide several options. The default is to have the workspace as a folder called "ws" within the installation location (next to the Eclipse folder): | ||
| + | |||
| + | :<div class="figure">[[Image:papyrusrt-dev-install-23-eclipse-installer-variables-workspace-location.png]]</div> | ||
| + | |||
| + | Similarly there are several options for the location of the cloned git repositories. The default is to have these in a folder called "git" within the installation location (next to the Eclipse folder): | ||
| + | |||
| + | :<div class="figure">[[Image:papyrusrt-dev-install-24-eclipse-installer-variables-git-clone-location.png]]</div> | ||
| + | |||
| + | {{ Note | Papyrus build type | Under "Papyrus build type" select "releases". This field concerns the base Papyrus used for the installation and will be used to determine the update site used to get Papyrus dependencies, but it must be "releases" rather than "nightly" or "milestones" because Papyrus-RT depends on the last Papyrus release (3.0 on Oxygen), and the Papyrus nightly update site has already moved to Photon so it may contain plugins that are incompatible with Papyrus-RT. }} | ||
| + | |||
| + | 14. Enter your Eclipse password under '''Eclipse password for Bugzilla/Hudson'''. | ||
| + | |||
| + | The Bugzilla ID field will be used to access your bugzilla queries. You may keep the ID as "anonymous", but you won't be able to access your own queries, or you may enter your Eclipse ID, in which case, a password field will appear: | ||
| + | |||
| + | :<div class="figure">[[Image:papyrusrt-dev-install-26-eclipse-installer-variables-bugzilla-password.png]]</div> | ||
| + | |||
| + | If you enter a password, it is recommended that you click the '''Authenticate...''' button. If you entered a valid password you should see this: | ||
| + | |||
| + | :<div class="figure">[[Image:papyrusrt-dev-install-27-eclipse-installer-variables-bugzilla-password-authentication.png]]</div> | ||
| + | |||
| + | 15. Click '''[Next]'''. | ||
| + | |||
| + | {{ Note | Passwords | Eclipse uses passwords for different purposes. In our case, passwords are needed to access Bugzilla entries, and to push changes to Gerrit. For this purpose, Eclipse uses a secure storage. | ||
| + | This secure storage has a master password created automatically. }} | ||
| + | |||
| + | If this is the first time you are installing Eclipse, you will see a dialog titled '''Secure Storage - Password Hint Needed''': | ||
| + | |||
| + | :<div class="figure">[[Image:papyrusrt-dev-install-29-eclipse-installer-master-password.png]]</div> | ||
| + | |||
| + | If you click '''Yes''', you will be asked for password recovery questions: | ||
| + | |||
| + | :<div class="figure">[[Image:papyrusrt-dev-install-30-eclipse-installer-password-recovery.png]]</div> | ||
| + | |||
| + | Now you should see the '''Confirmation''' dialog: | ||
| + | |||
| + | :<div class="figure">[[Image:papyrusrt-dev-install-31-eclipse-installer-confirmation.png]]</div> | ||
| + | |||
| + | This shows the first set of tasks of the installation. The second set will be executed when Eclipse launches automatically. | ||
| + | |||
| + | 17. Click '''[Finish]'''. | ||
| + | |||
| + | '''User Agreement''': If this is the first time installing, you will be asked to accept or defer acceptance of the Eclipse Foundation Software User Agreement: | ||
| + | |||
| + | :<div class="figure">[[Image:papyrusrt-dev-install-32-eclipse-installer-user-agreement.png]]</div> | ||
| + | |||
| + | Click '''[Accept Now]'''. | ||
| + | |||
| + | Now you should see a '''Progress''' dialog executing the first set of installation tasks as they progress: | ||
| + | |||
| + | :<div class="figure">[[Image:papyrusrt-dev-install-33-eclipse-installer-setup-first-phase.png]]</div> | ||
| + | |||
| + | '''Licenses''': If this is the first time installing you will see a dialog asking you to review and accept several licenses before the installation can proceed: | ||
| + | |||
| + | :<div class="figure">[[Image:papyrusrt-dev-install-34-eclipse-installer-licenses.png]]</div> | ||
| + | |||
| + | It is recommended that you check the '''Remember accepted licenses''' box so that you don't have to accept them again when upgrading: | ||
| + | |||
| + | :<div class="figure">[[Image:papyrusrt-dev-install-35-eclipse-installer-license-acceptance.png]]</div> | ||
| + | |||
| + | Also note that the '''Accept''' button is '''not''' highlighted, and '''Decline''' is the default option. Make sure you click on '''Accept'''. | ||
| + | |||
| + | '''Unsigned Content''': Several plugins and dependencies are not signed, so if this is your first installation, you will be asked to accept unsigned content: | ||
| + | |||
| + | :<div class="figure">[[Image:papyrusrt-dev-install-36-eclipse-installer-unsigned-content.png]]</div> | ||
| + | |||
| + | It is recommended that you check the '''Remember choice''' box so that you don't have to accept again when upgrading: | ||
| + | |||
| + | :<div class="figure">[[Image:papyrusrt-dev-install-37-eclipse-installer-unsigned-content-acceptance.png]]</div> | ||
| + | |||
| + | After the first set of tasks is finished, the Eclipse Installer dialog will look like this: | ||
| + | |||
| + | :<div class="figure">[[Image:papyrusrt-dev-install-38-eclipse-installer-finish.png]]</div> | ||
| + | |||
| + | 18. Click '''[Finish]'''. | ||
| + | |||
| + | |||
| + | == Restarting == | ||
| + | |||
| + | Eclipse will relaunch automatically: | ||
| + | |||
| + | :<div class="figure">[[Image:papyrusrt-dev-install-38-restart-neon-splash.png]]</div> | ||
| + | |||
| + | and present you with a welcome screen: | ||
| + | |||
| + | :<div class="figure">[[Image:papyrusrt-dev-install-40-new-workbench-welcome.png]]</div> | ||
| − | + | On the bottom right the status bar will show a message: '''Executing startup tasks'''. | |
| − | + | :<div class="figure">[[Image:papyrusrt-dev-install-41-new-workbench-startup-status.png]]</div> | |
| − | + | These startup tasks will complete the rest of the installation steps. | |
| − | + | If in step 11 you didn't select the '''XtUML-RT''' component, you can go to step 21. | |
| − | + | If in step 11 you did select the '''XtUML-RT''' component, then click on the icon to the left of this message (two circling arrows). | |
| − | + | ||
| − | + | You will see the '''Eclipse Updater''' dialog which shows the execution of the | |
| + | remaining installation tasks: | ||
| − | + | :<div class="figure">[[Image:papyrusrt-dev-install-42-new-workbench-startup-tasks.png]]</div> | |
| − | + | During the execution of these tasks you may see dialogs titled '''Auto share git projects''' like the one below. These will | |
| − | + | automatically close. | |
| − | = | + | :<div class="figure">[[Image:papyrusrt-dev-install-43-new-workbench-auto-share-git.png]]</div> |
| − | + | It is possible that after several minutes, progress will stop and you will see a | |
| + | message "<span style="color: red">*ATTENTION*</span>" in the console panel and it will ask you if it can download the ANTLR 3 parser generator. | ||
| − | + | If you see this message, you have to go to the console view in the workbench, since the console panel in the '''Eclipse Updater''' dialog does not accept keyboard input. | |
| − | + | ||
| − | + | ||
| − | + | First, you may have to move the '''Eclipse Updater''' dialog aside and bring the workbench window to the front: | |
| − | + | ||
| − | + | :<div class="figure">[[Image:papyrusrt-dev-install-45-new-workbench-startup-tasks-move.png]]</div> | |
| − | < | + | If you do not see this "<span style="color: red">*ATTENTION*</span>" message, when the setup finishes click '''[Finish]''', go to the workbench, select the menu '''Help → Perform Setup Tasks...''', if asked about the configuration variables click '''[Next]''', and then '''[Finish]'''. Then after several minutes you should see the "<span style="color: red">*ATTENTION*</span>" message and proceed from here. |
| − | </ | + | |
| − | |||
| + | == Accepting the ANTLR 3 parser generator == | ||
| − | + | {{ Note | ANTLR 3 Parser generator | Papyrus-RT includes support for textual UML-RT. This is implemented using Xtext, which itself relies on the ANTLR parser generator. Because of some intellectual property issues it is not possible to bundle the ANTLR parser generator with the development environment. This requires that the user gives explicit permission to download and install the parser generator. }} | |
| − | + | 19. Click on the '''Workbench''' button on the top-right: | |
| − | + | :<div class="figure">[[Image:papyrusrt-dev-install-46-new-workbench-go-to-workbench-button.png]]</div> | |
| − | + | Once opened, the workbench should look like this: (the '''Eclipse Updater''' dialog will be visible only if you clicked on the '''Executing startup tasks''' button.) | |
| − | + | ||
| − | + | :<div class="figure">[[Image:papyrusrt-dev-install-47-new-workbench-all.png]]</div> | |
| − | + | In the bottom, you should see the '''Console''' view: | |
| − | + | ||
| − | + | :<div class="figure">[[Image:papyrusrt-dev-install-48-new-workbench-console-view.png]]</div> | |
| − | + | You should see the <span style="color: red"> *ATTENTION*</span> message asking you if it can download the ANTLR 3 parser generator. | |
| − | < | + | 20. Scroll to the bottom right of the Console view and place your cursor immediately after the question: <span style="color: red">(type 'y' or 'n' and hit enter)</span> and type '''y''' and hit '''[Enter]'''. |
| − | </ | + | |
| − | + | :<div class="figure">[[Image:papyrusrt-dev-install-49-new-workbench-antlr-acceptance-console-view.png]]</div> | |
| − | + | Then the process will continue. If you have the '''Eclipse Updater''' dialog open, you will see something like this: | |
| − | <div class="figure">[[Image: | + | :<div class="figure">[[Image:papyrusrt-dev-install-50-new-workbench-startup-tasks-build.png]]</div> |
| − | </div> | + | |
| − | # | + | {{Note | In case you have problems downloading the ANTLR 3 parser generator | It has been reported that some people have trouble with downloading the ANTLR generator. In that case you should do the following: |
| + | # Download [http://download.itemis.com/antlr-generator-3.2.0-patch.jar http://download.itemis.com/antlr-generator-3.2.0-patch.jar] | ||
| + | # Rename it into '''.antlr-generator-3.2.0-patch.jar''' | ||
| + | # Place it in the root of <code>org.eclipse.papyrusrt.xtumlrt.xtext</code> | ||
| + | # Regenerate the Xtext Artifacts: find and run the '''GenerateTumlrt.mwe2''' run configuration, by either clicking the downwards arrow next to the '''Run As...''' toolbar button, or from the menu bar go to '''Run → Run Configurations...''', selecting '''GenerateTumlrt.mwe2''' found under '''Mwe2 Launch''' and clicking '''[Run]'''. | ||
| + | }} | ||
| − | |||
| − | |||
| − | + | == Gerrit passwords == | |
| − | + | During the rest of the installation you will be asked to enter your Gerrit credentials: | |
| − | + | ||
| − | + | :<div class="figure">[[Image:papyrusrt-dev-install-51-new-workbench-startup-tasks-gerrit-password.png]]</div> | |
| − | + | 21. Enter your Gerrit password (should be the same as your Eclipse password): | |
| − | + | ||
| − | + | :<div class="figure">[[Image:papyrusrt-dev-install-52-new-workbench-startup-tasks-save-gerrit-password.png]]</div> | |
| − | + | and check the '''Save Password''' box so that you don't have to re-enter it whenever you push to Gerrit. | |
| − | + | ||
| − | + | == Finishing == | |
| − | + | During the remainder you may see some dialogs briefly popping up and automatically closing, such as this: | |
| − | + | ||
| − | + | :<div class="figure">[[Image:papyrusrt-dev-install-52-new-workbench-startup-tasks-sync-queries.png]]</div> | |
| − | + | You may also see notifications related to Bugzilla and Gerrit queries such as this: | |
| − | <div class="figure">[[Image: | + | :<div class="figure">[[Image:papyrusrt-dev-install-53-new-workbench-startup-tasks-eclipse-notifications.png]]</div> |
| − | </div> | + | |
| − | + | At the end, if you had the '''Eclipse Updater''' dialog opened, it should look like this: | |
| − | <div class="figure">[[Image: | + | :<div class="figure">[[Image:papyrusrt-dev-install-54-new-workbench-startup-tasks-finish.png]]</div> |
| − | </div> | + | |
| − | + | And the workbench itself should look like this: | |
| − | + | :<div class="figure">[[Image:papyrusrt-dev-install-55-new-workbench-clean.png]]</div> | |
| − | + | If you selected all components in step 11, or selected a subset of components with all their dependencies, you should not have any errors in your workspace. Nevertheless, if you still have errors you can try one of the following options: | |
| − | + | ||
| − | + | ||
| − | + | ||
| − | + | a) Perform a clean build: click on Project → Clean..., then select "Clean all projects" and click '''[OK]'''. | |
| − | + | b) Perform setup tasks: click on Help → Perform Setup Tasks..., then in the "Confirmation" dialog click '''[Finish]'''. | |
| − | + | ||
| − | + | ||
| − | + | ||
| − | + | ||
| − | + | Finally, whenever you restart your new development environment, startup tasks will be executed, for example tasks to download new dependencies. Opening the '''Eclipse Updater''' dialog will show something like this: | |
| − | + | ||
| − | + | :<div class="figure">[[Image:papyrusrt-dev-install-56-new-workbench-restart-startup-tasks.png]]</div> | |
| − | + | Also, Eclipse may ask you if you want to enable error reporting: | |
| − | + | :<div class="figure">[[Image:papyrusrt-dev-install-57-new-workbench-startup-tasks-error-reporting.png]]</div> | |
| − | + | ||
| − | + | ||
| − | + | ||
| − | + | ||
| − | + | ||
| − | + | ||
| − | |||
| − | + | Done! | |
| − | + | ||
| − | + | ||
| − | + | ||
| − | + | ||
| − | + | ||
Latest revision as of 15:19, 29 August 2017
Setting up the Developer Environment
Contents
- 1 Introduction
- 2 Requirements
- 3 Install the development environment for Papyrus for Real Time
- 3.1 Start the Eclipse Installer
- 3.2 Switch to the Advanced Mode
- 3.3 Select a base Eclipse Package
- 3.4 Select the Papyrus-RT setup project
- 3.5 Select the components to install
- 3.6 Configure your installation
- 3.7 Restarting
- 3.8 Accepting the ANTLR 3 parser generator
- 3.9 Gerrit passwords
- 3.10 Finishing
Introduction
This tutorial will show you how to setup the development environment for Papyrus for Real Time using the Oomph-based Eclipse Installer.
The installer will automatically perform several actions for you, including:
- Download and install a base Eclipse workbench for your platform
- Add the required update sites
- Download and install all required development tools (Eclipse features and plugins, such as the PDE, the JDT, EGit, MyLyn, etc.)
- Download and install all required dependencies (Eclipse features and plugins, such as UML2, Papyrus, Xtext, etc.)
- Clone the PapyrusRT git repository
- Generate code for several EMF models and Xtext projects
- Import all the PapyrusRT projects into the workspace
- Perform a clean build of all projects
- Create working sets in the workspace organizing the projects
- Install Bugzilla and Gerrit MyLyn connectors and synchronize queries for these connectors
- Configure the workbench (e.g. set the JVM and Java compiler compliance, set character encodings, code formatting and other user preferences)
Requirements
To install the developer environment you need only three things:
- Java 8.
- Older versions may not work. You can obtain the JDK 1.8 here: http://www.oracle.com/technetwork/java/javase/downloads/jdk8-downloads-2133151.html
- The Eclipse Installer
- Go to http://wiki.eclipse.org/Eclipse_Installer
- Download the "Eclipse Installer" package for your operating system
- Decompress the downloaded archive to a folder such as "~/Apps/EclipseInstaller/" (folder name and location will vary depending on operating system)
- An Eclipse account.
- This is needed to access Bugzilla and Gerrit queries in MyLyn, as well as to contribute changes to the source code via Gerrit.
- If you do not have an Eclipse account, go to https://dev.eclipse.org/site_login/ and fill out the form.
Install the development environment for Papyrus for Real Time
Start the Eclipse Installer
1. Start the Eclipse Installer application.
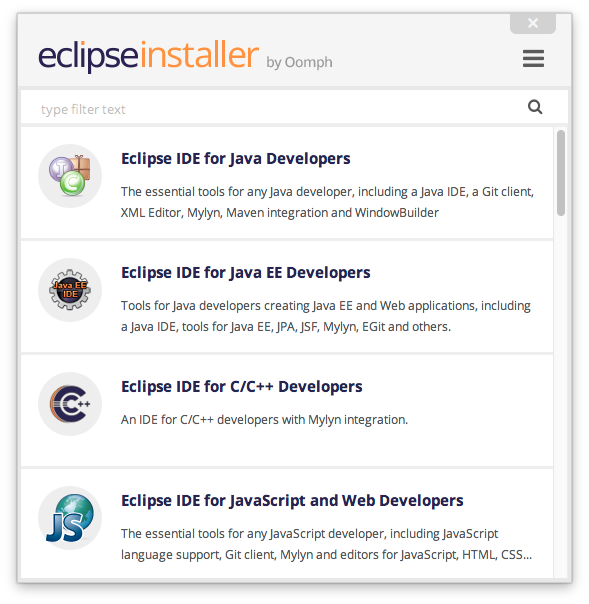
You should see this:
Switch to the Advanced Mode
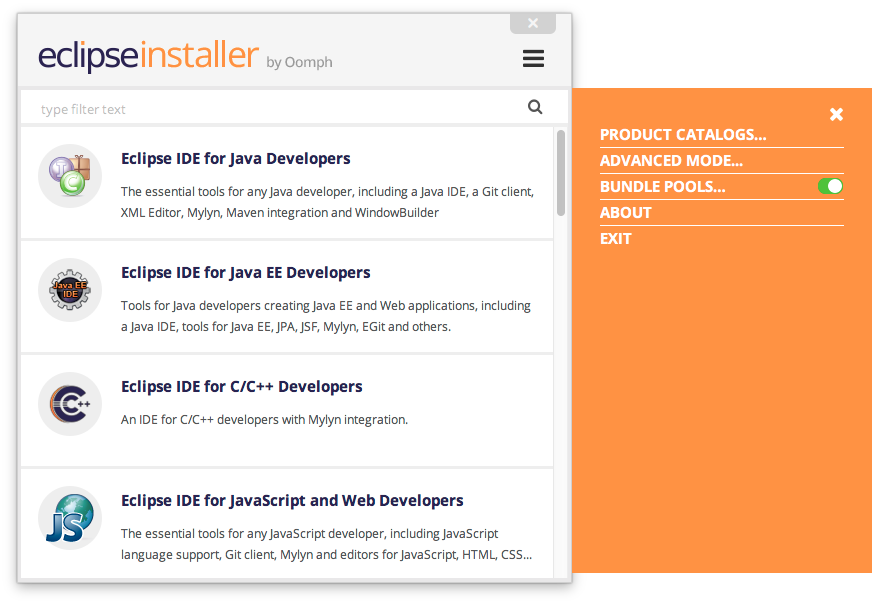
2. Click on the icon at the top right (looks like three horizontal bars).
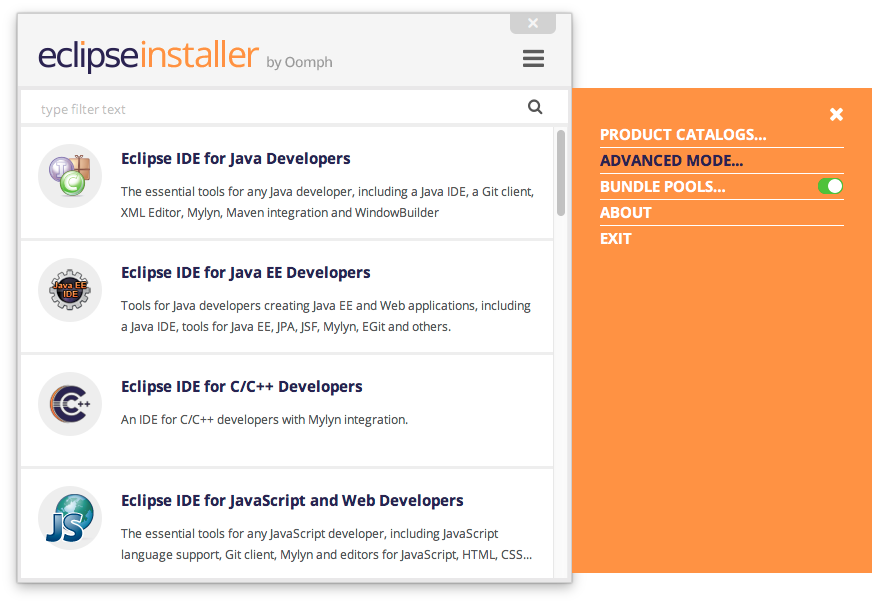
3. Select "Advanced Mode..."
This has for effect to restart the Eclipse Installer in the "Advanced Mode".
Select a base Eclipse Package
4. If the Eclipse.org item is folded, click on the arrow to its left to unfold it.
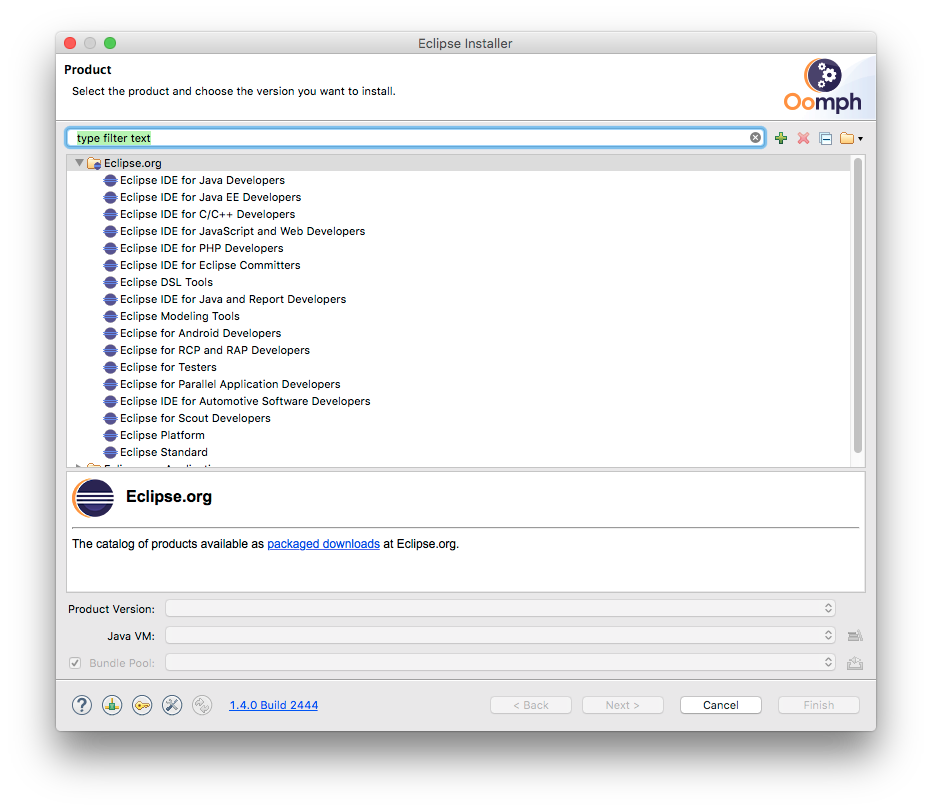
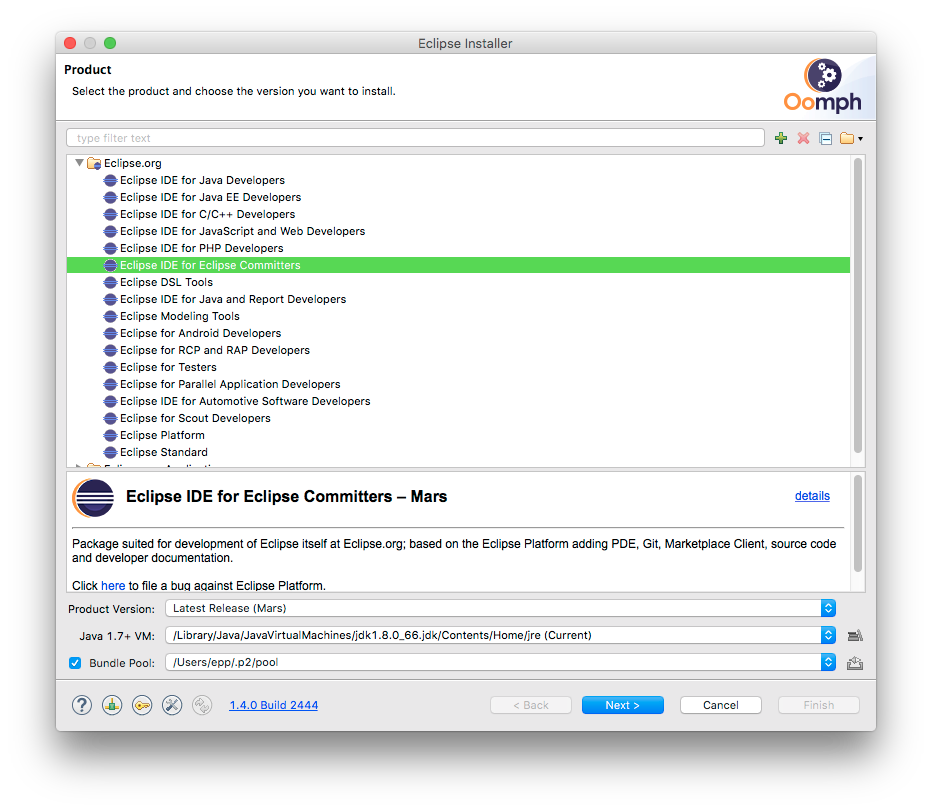
5. Select Eclipse IDE for Eclipse Committers.
6. The bottom panel may look like this:
Click on the Product Version field and select Oxygen or Latest (Oxygen).
The bottom panel should now look like this:
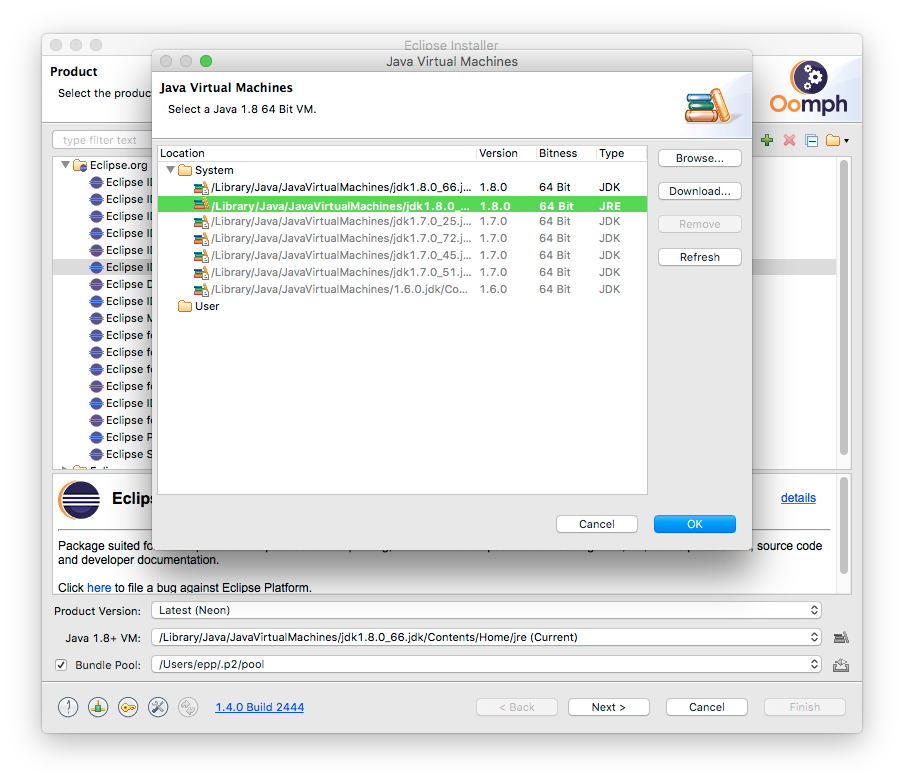
7. Under Java VM choose the appropriate Java 1.8 JVM.
Optional: Manage JVMs. You may click on the icon to the right of the field to manage alternative JVMs.
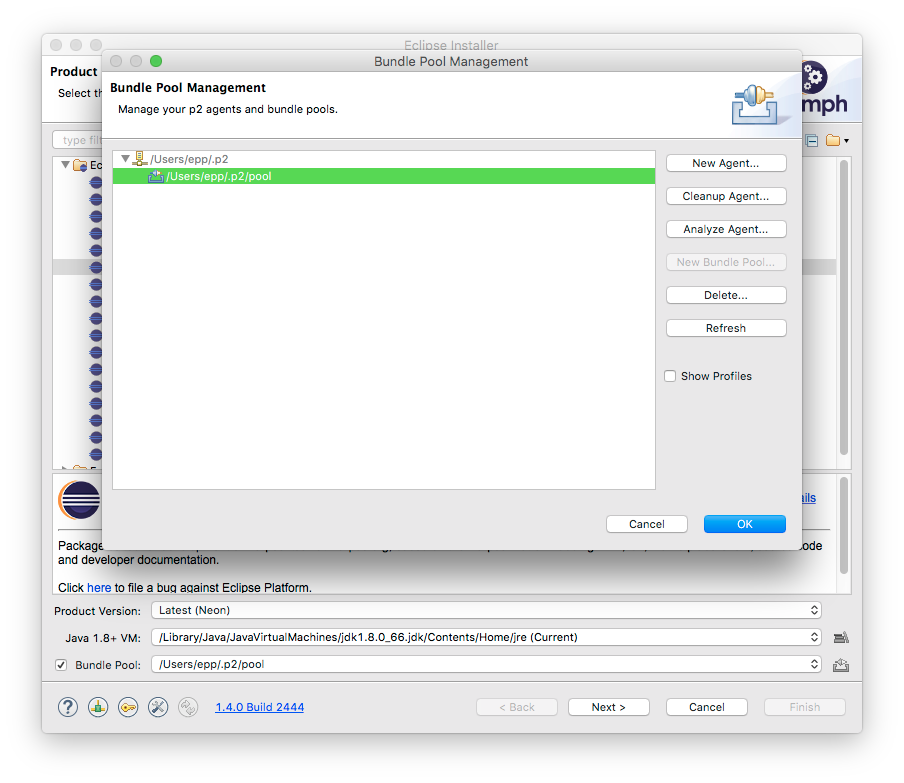
Optional: Manage bundle pools. By default the installer is set to use bundle pools. A bundle pool is a common plugins directory shared by several Eclipse installations, to avoid duplication of content and reduce download times. Bundle pools help to dramatically reduce disk footprint and to eliminate repeated downloads of the same bundles and features, thereby dramatically improving the performance of software updates and target platform provisioning.
If you unselect the Bundle Pool checkbox, all the plugins for Papyrus-RT will be installed in the target installation directory, resulting in a more isolated install, but without taking advantage of the pool, and duplicating plugins that you may have in other installations.
You may also choose to manage multiple pools, by clicking on the button to the right of the field.
8. Once done with the Product Version, Java JVM and Bundle pools, click [Next].
Select the Papyrus-RT setup project
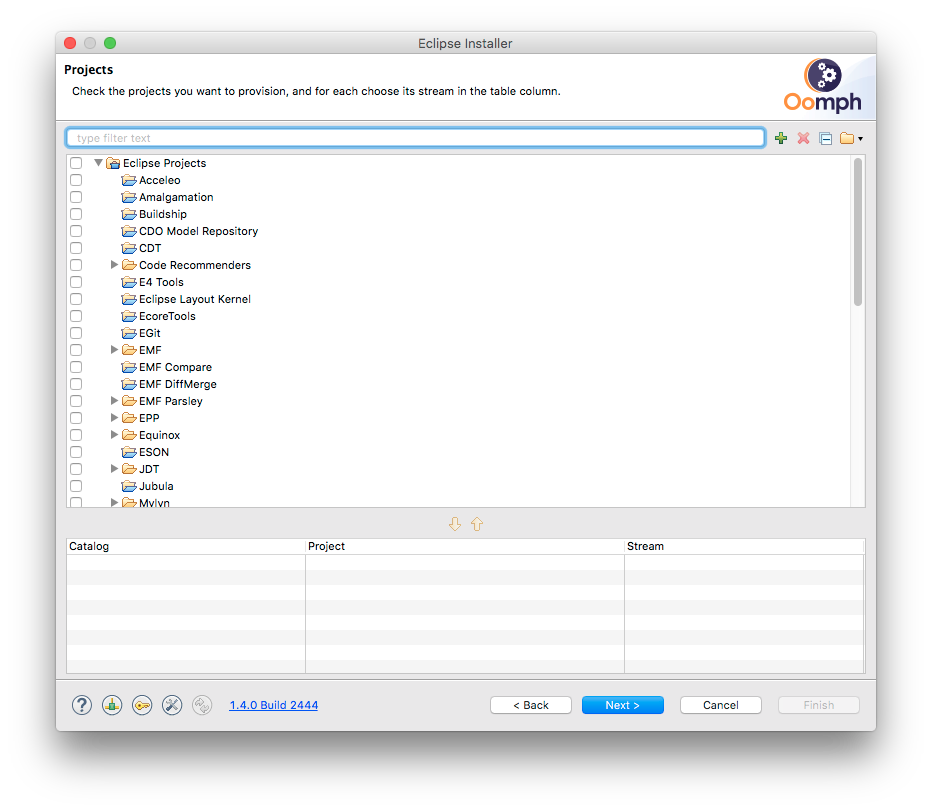
You should see now a list of available Eclipse projects:
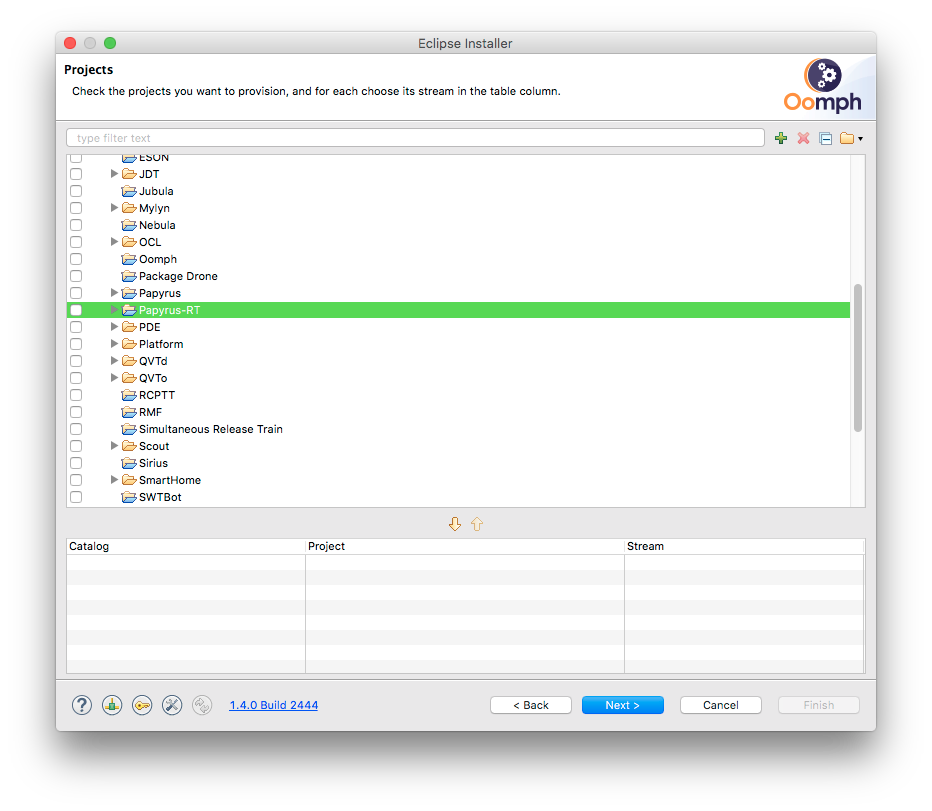
9. Scroll down to find and select the Papyrus-RT project.
Select the components to install
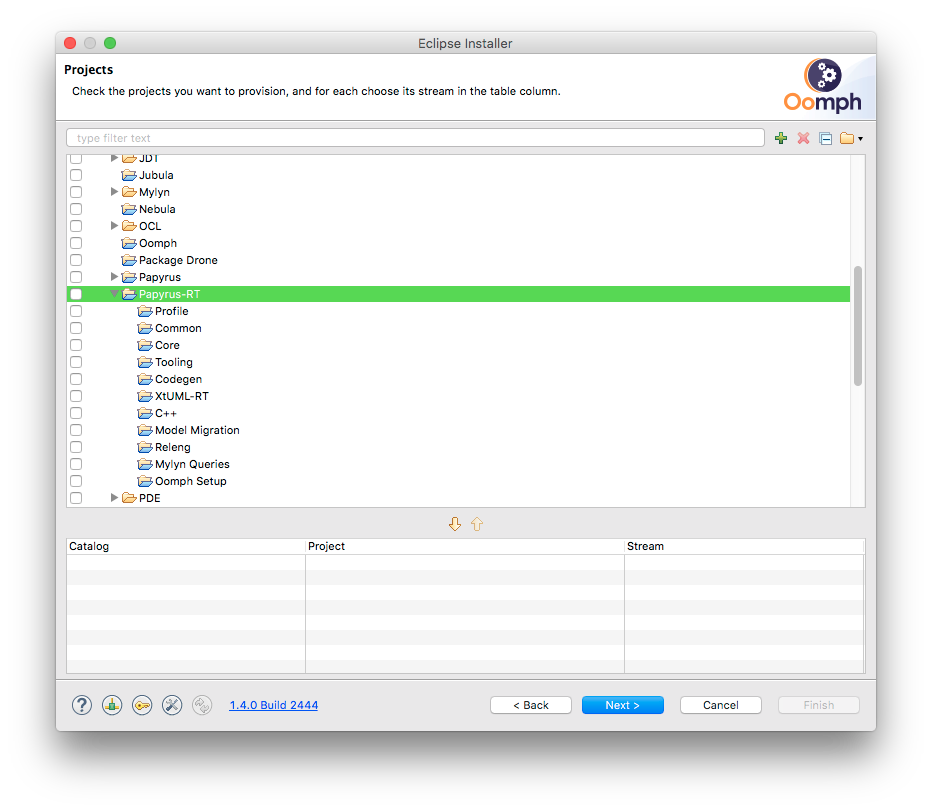
10. Unfold Papyrus-RT
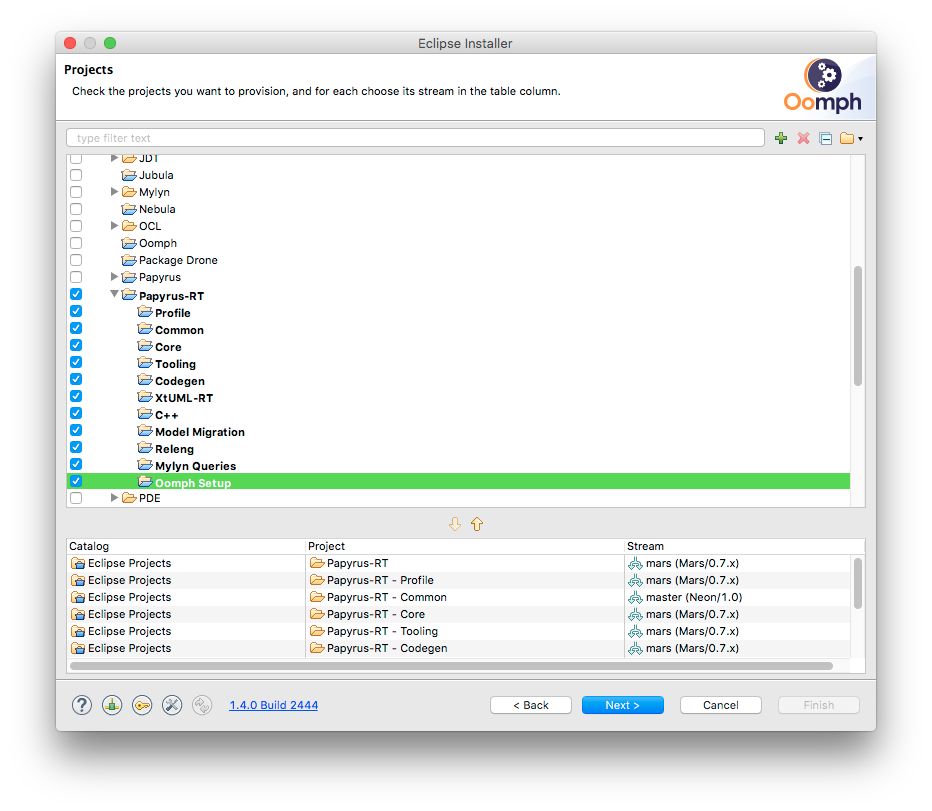
11. Check all the boxes on the left.
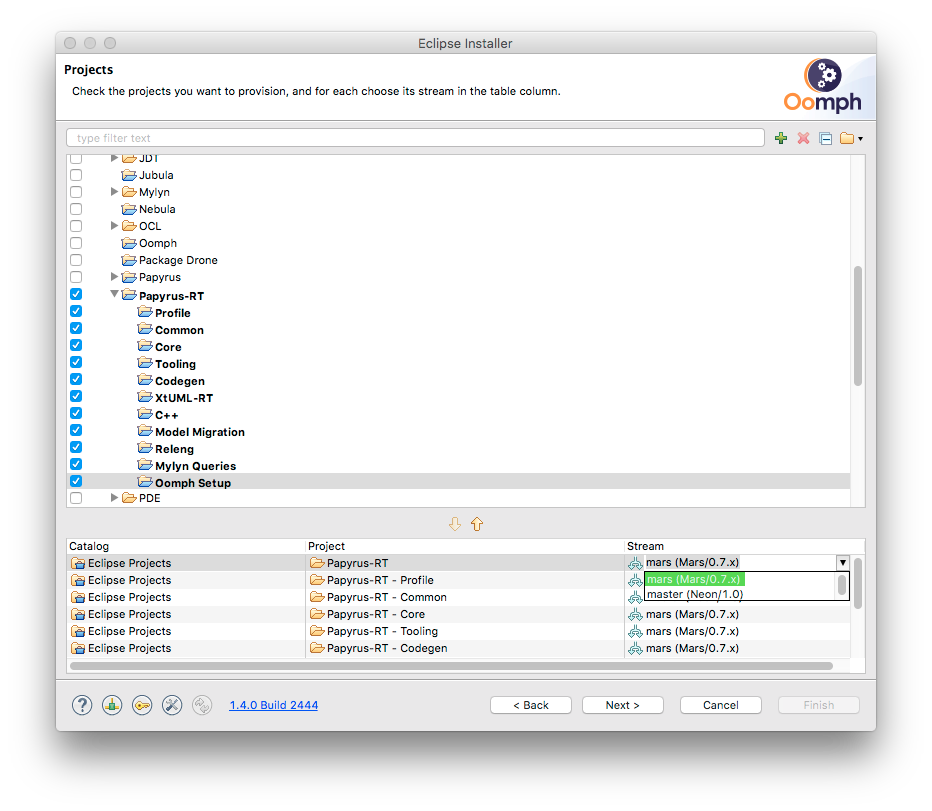
12. In the bottom of the dialog there is a panel showing all the selected components:
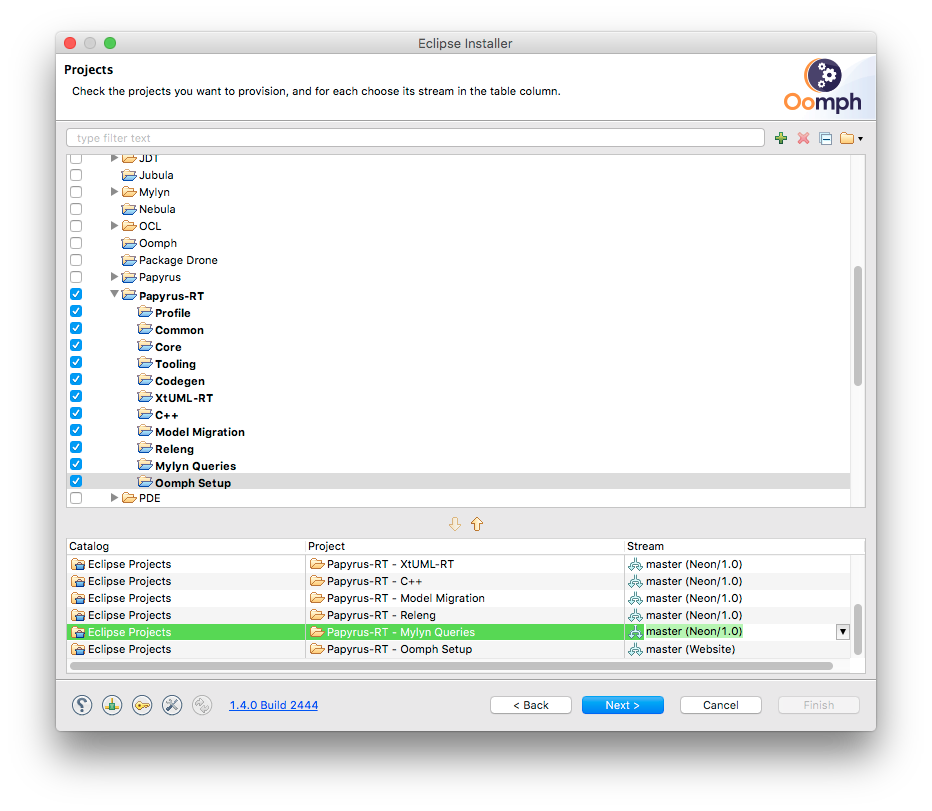
Make sure that the Stream field in each and every entry is set to master (Oxygen/1.0) (You may need to click on each and select the appropriate stream).
After selecting the correct stream for all, it should look like this:
13. Click [Next].
Configure your installation
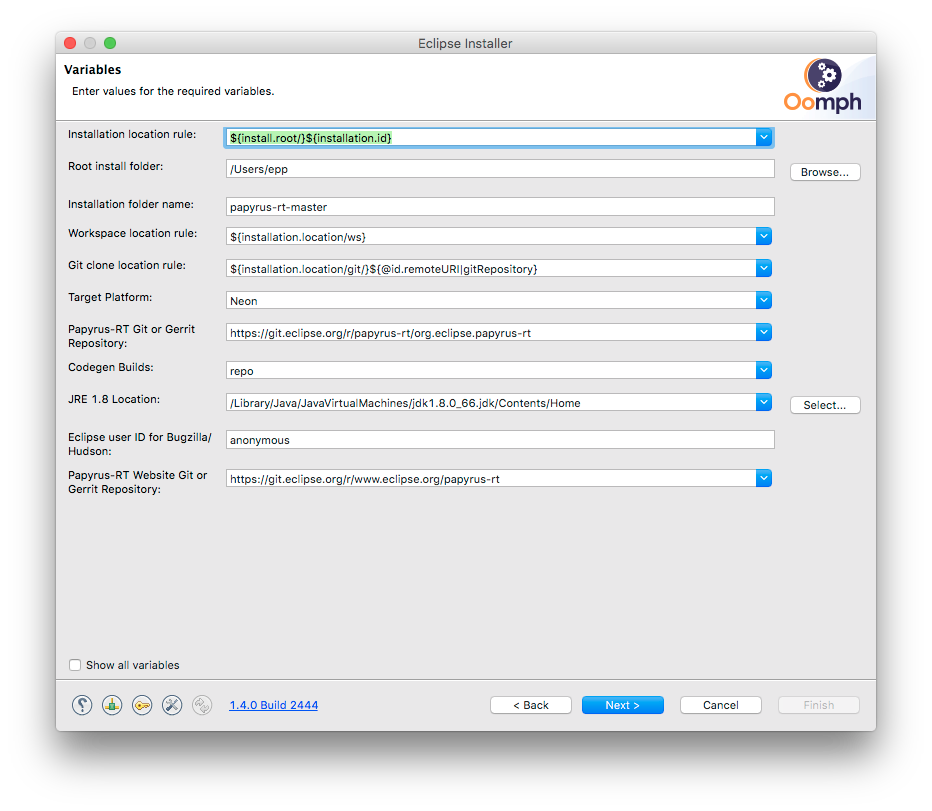
At this point, a dialog used to configure the installation Variables will appear:
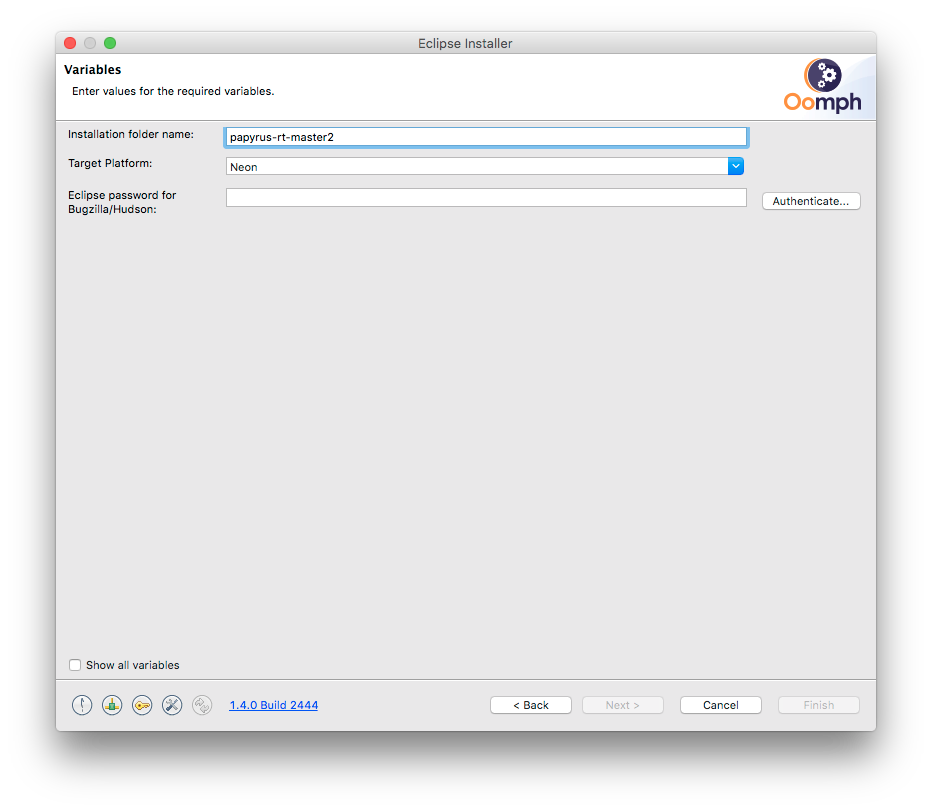
Configuration variables: If this is an installation from scratch, all variables shown above will appear. If you are performing an additional installation, Oomph will have recorded the values you previously entered and only a few variables will show, e.g.:
You can always go back to see all variables by checking the Show all variables box at the bottom.
There are many variables that you can configure such as the location of the application, the workspace, the git repositories, as well as the urls for cloning the repositories, the target platform, etc.
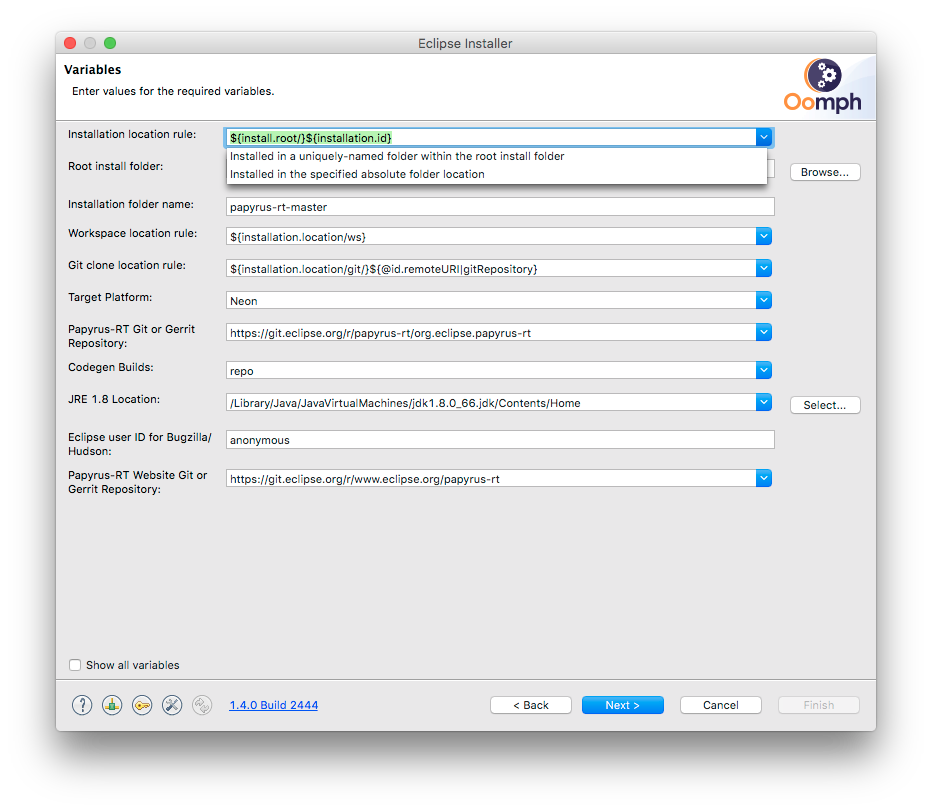
For the locations of the main installation folder, the workspace and the git repositories, there are several alternative rules. There is a "root install folder" and typically, other locations will be relative to this root folder, but you can also choose an absolute location:
The installation location is the location of the Eclipse folder. By default is will be under the root folder.
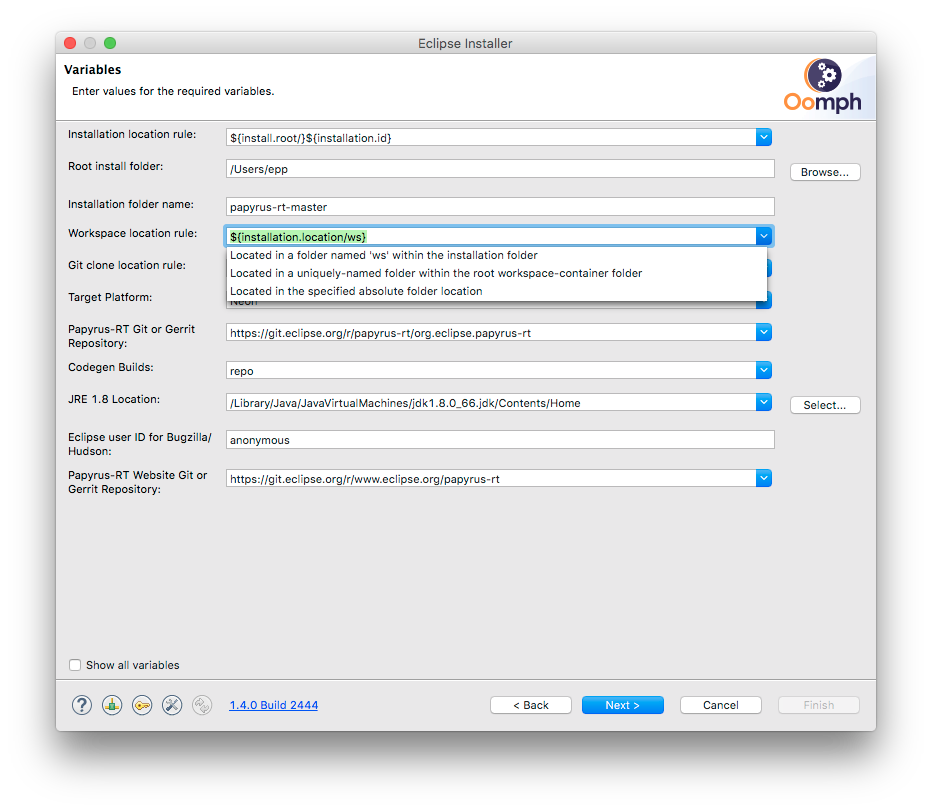
The workspace location rules provide several options. The default is to have the workspace as a folder called "ws" within the installation location (next to the Eclipse folder):
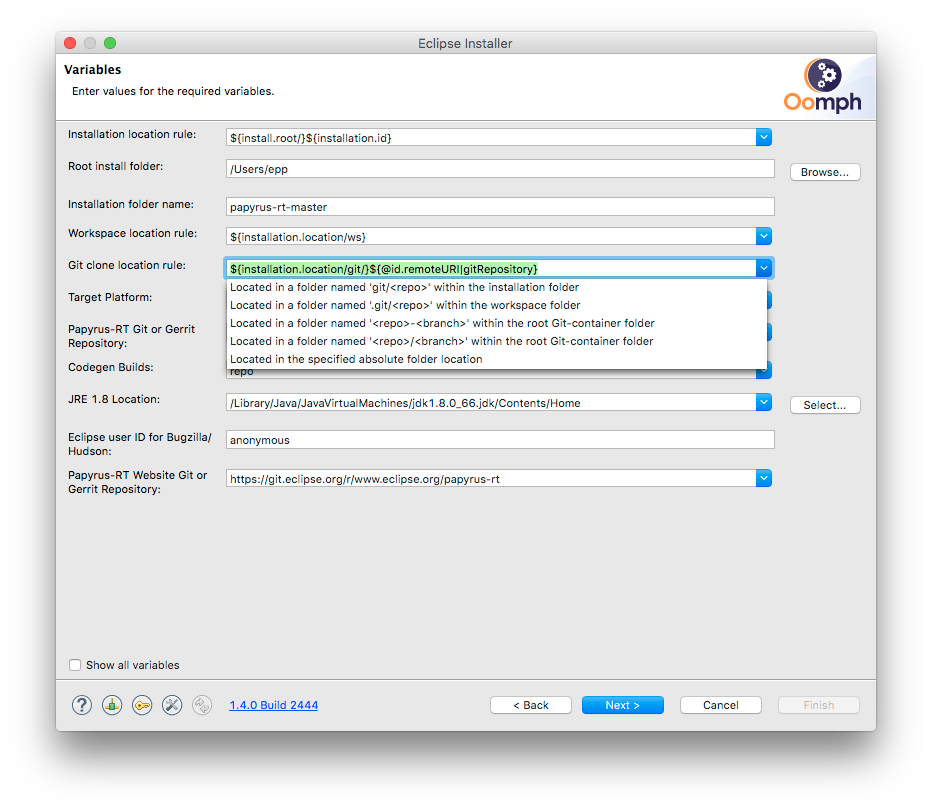
Similarly there are several options for the location of the cloned git repositories. The default is to have these in a folder called "git" within the installation location (next to the Eclipse folder):
14. Enter your Eclipse password under Eclipse password for Bugzilla/Hudson.
The Bugzilla ID field will be used to access your bugzilla queries. You may keep the ID as "anonymous", but you won't be able to access your own queries, or you may enter your Eclipse ID, in which case, a password field will appear:
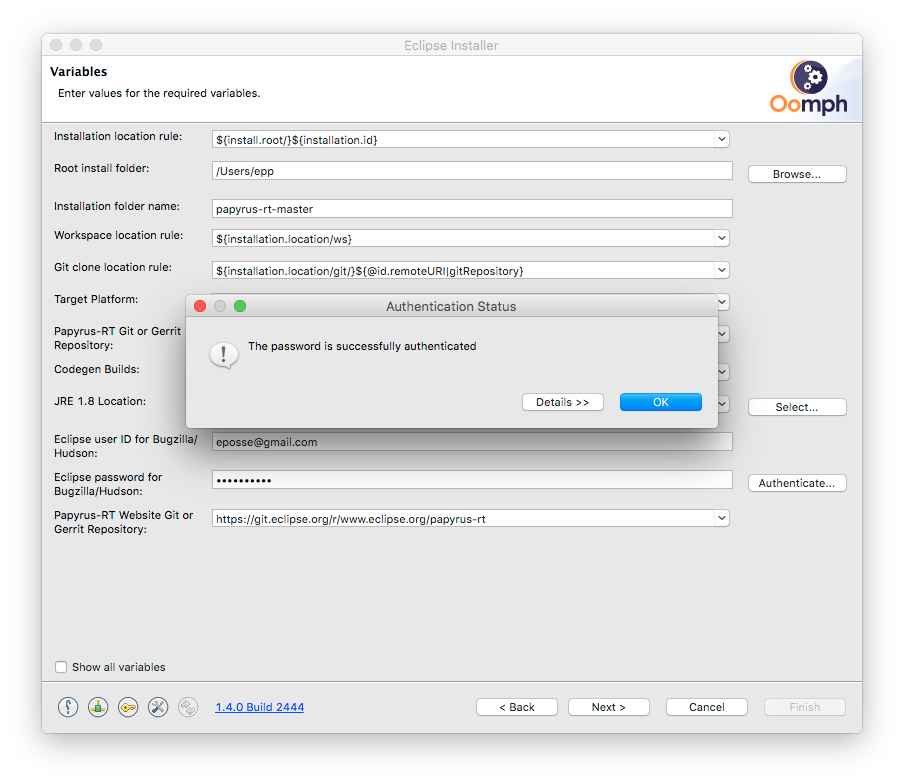
If you enter a password, it is recommended that you click the Authenticate... button. If you entered a valid password you should see this:
15. Click [Next].
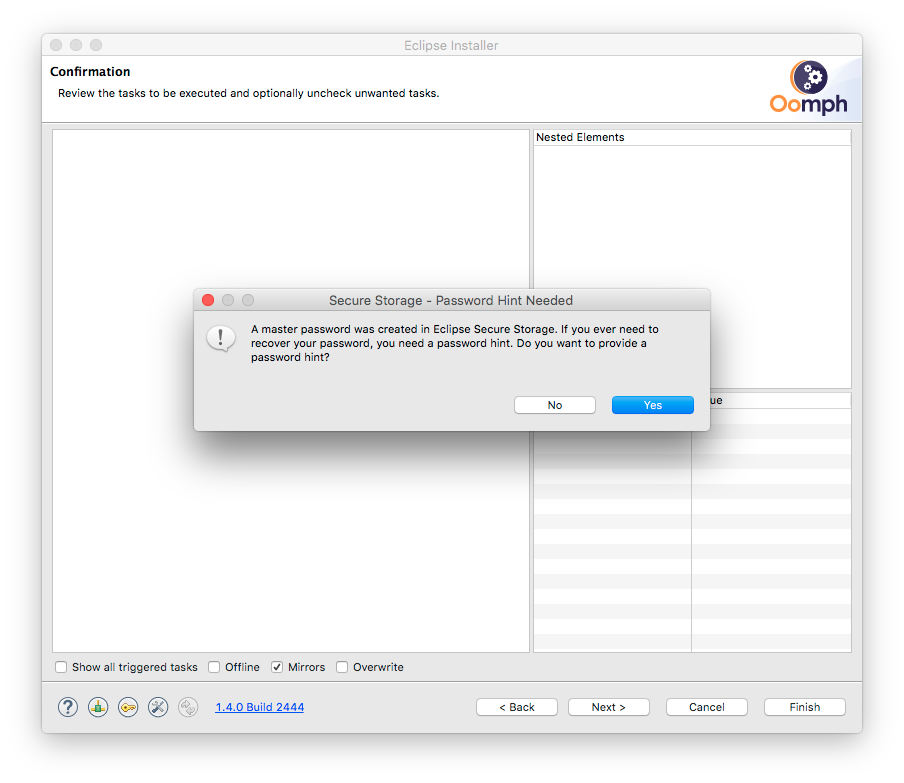
If this is the first time you are installing Eclipse, you will see a dialog titled Secure Storage - Password Hint Needed:
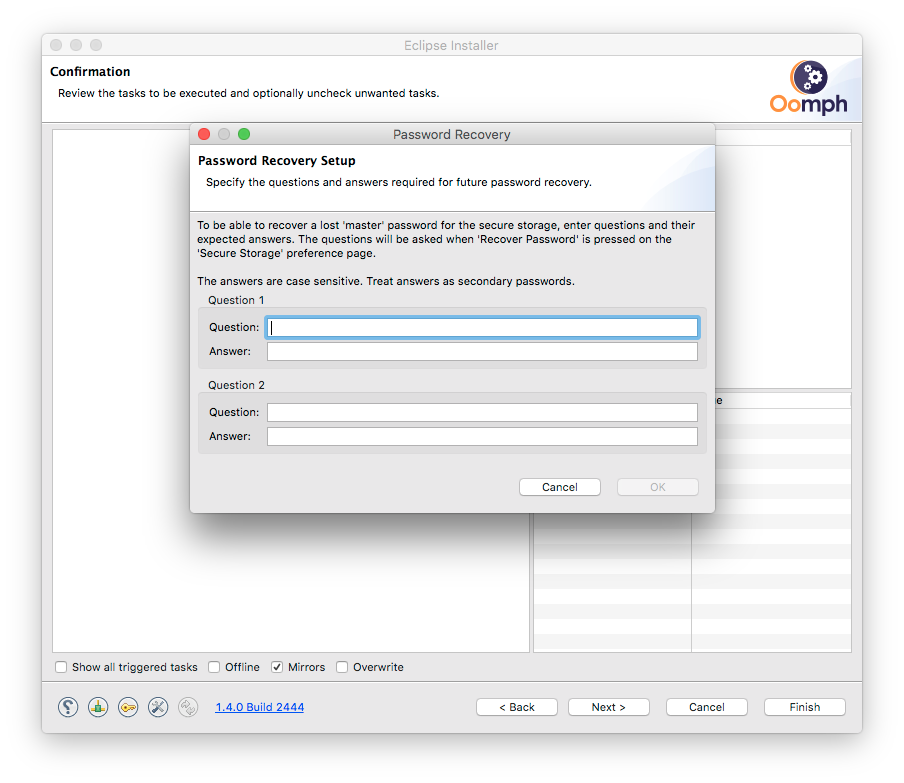
If you click Yes, you will be asked for password recovery questions:
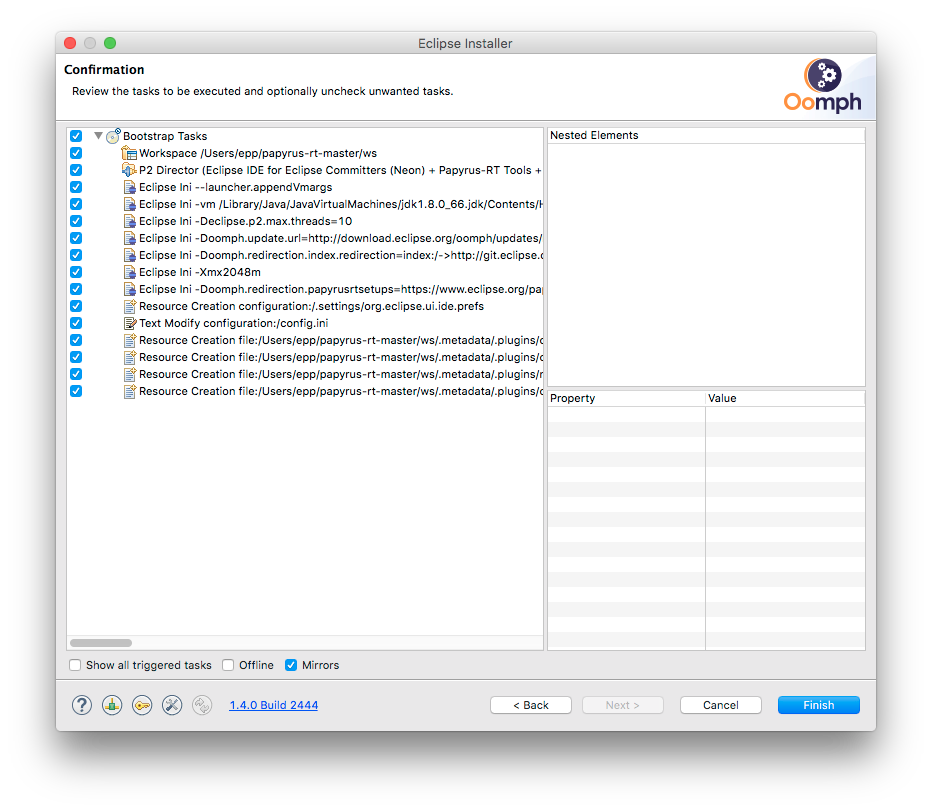
Now you should see the Confirmation dialog:
This shows the first set of tasks of the installation. The second set will be executed when Eclipse launches automatically.
17. Click [Finish].
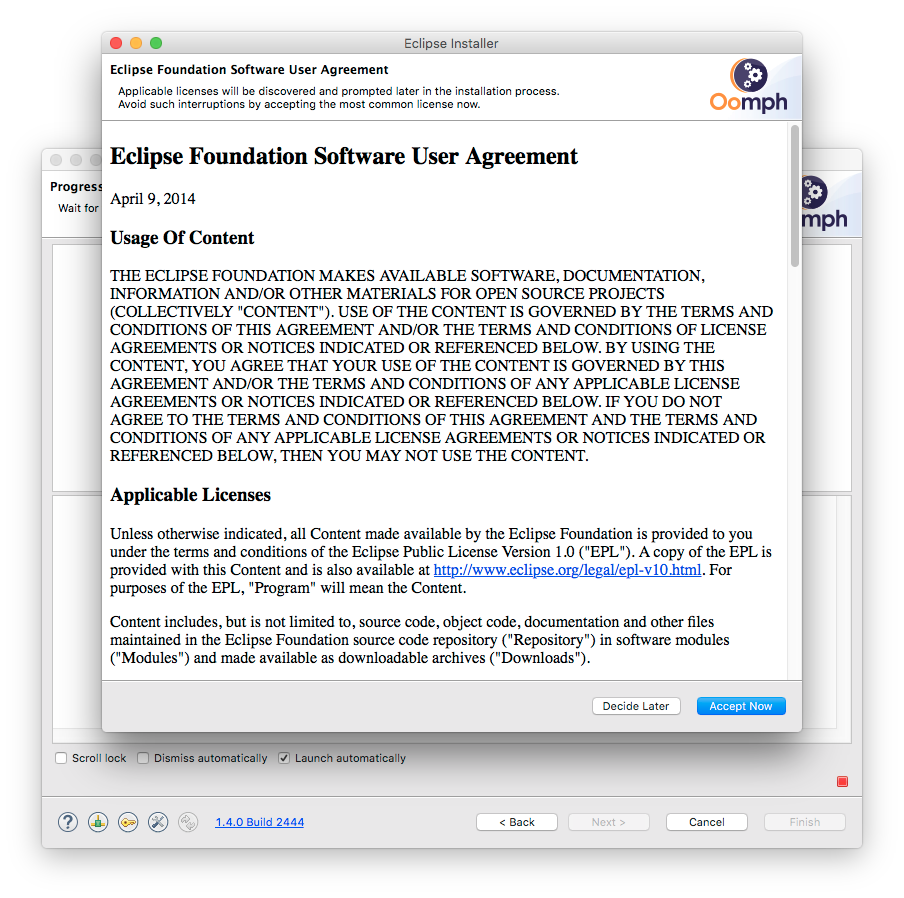
User Agreement: If this is the first time installing, you will be asked to accept or defer acceptance of the Eclipse Foundation Software User Agreement:
Click [Accept Now].
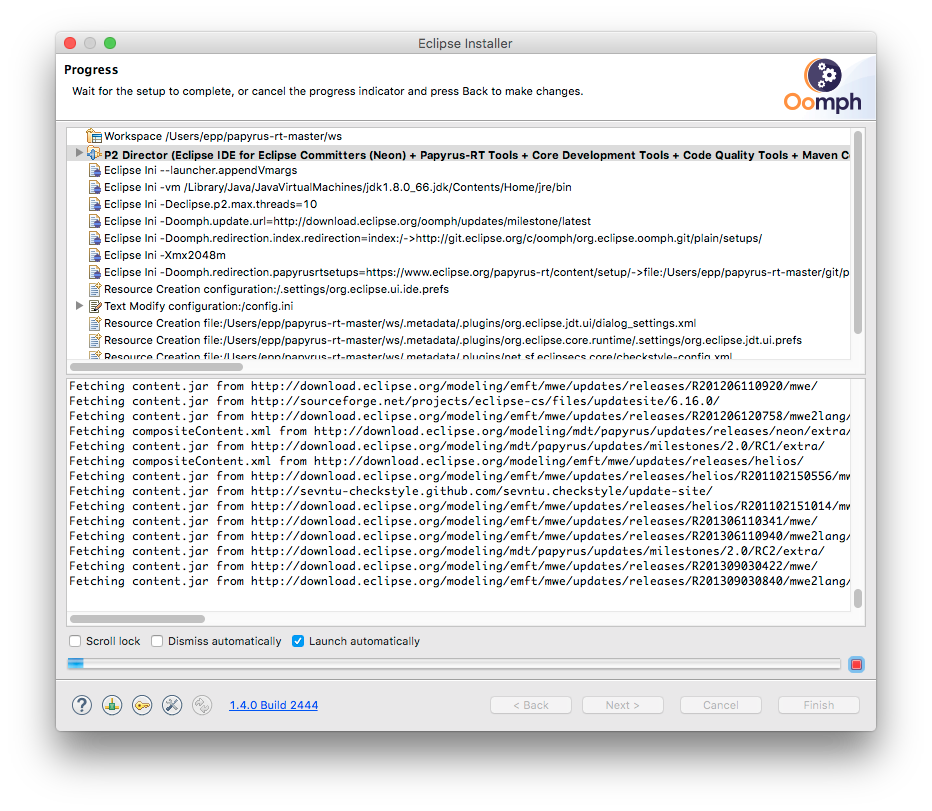
Now you should see a Progress dialog executing the first set of installation tasks as they progress:
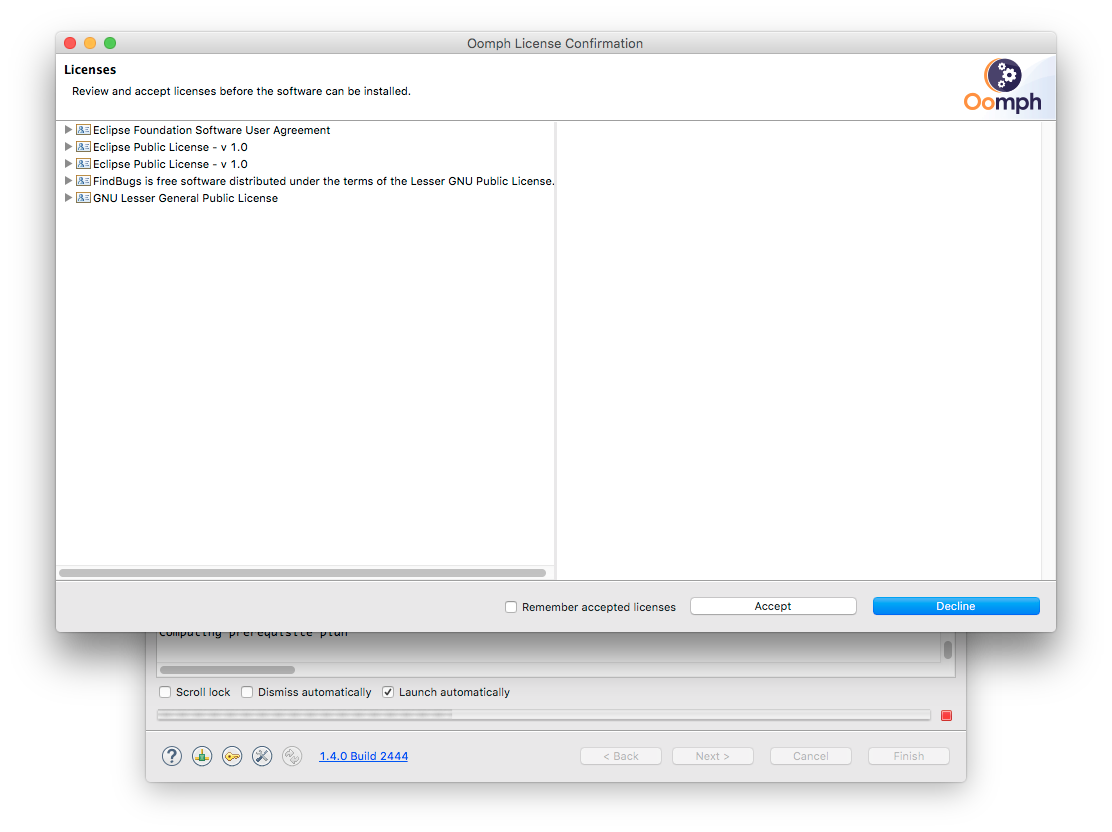
Licenses: If this is the first time installing you will see a dialog asking you to review and accept several licenses before the installation can proceed:
It is recommended that you check the Remember accepted licenses box so that you don't have to accept them again when upgrading:
Also note that the Accept button is not highlighted, and Decline is the default option. Make sure you click on Accept.
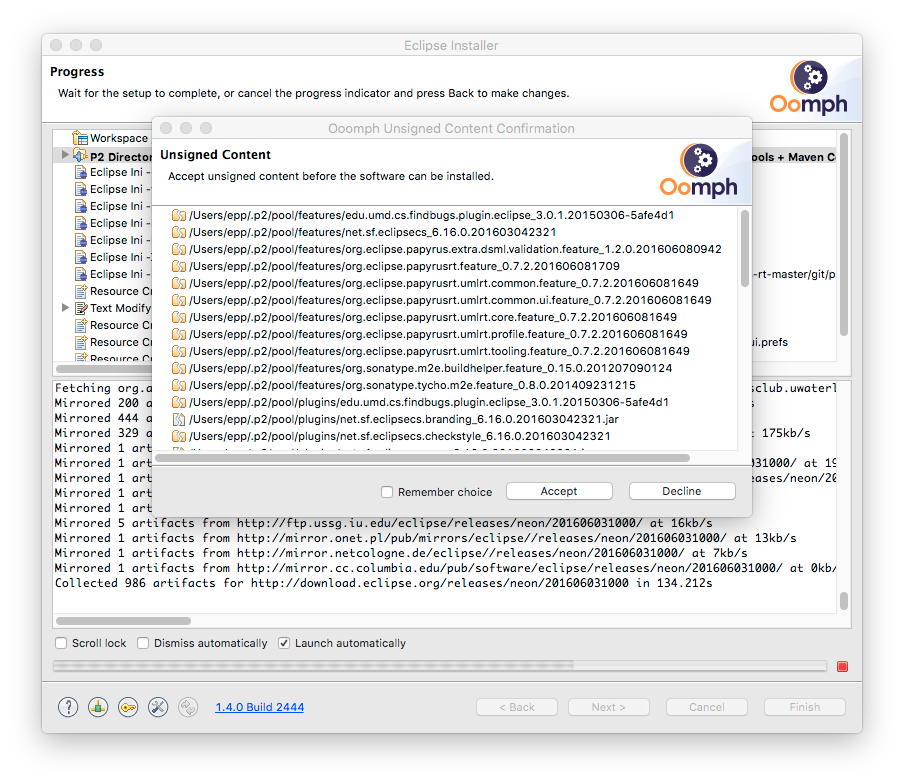
Unsigned Content: Several plugins and dependencies are not signed, so if this is your first installation, you will be asked to accept unsigned content:
It is recommended that you check the Remember choice box so that you don't have to accept again when upgrading:
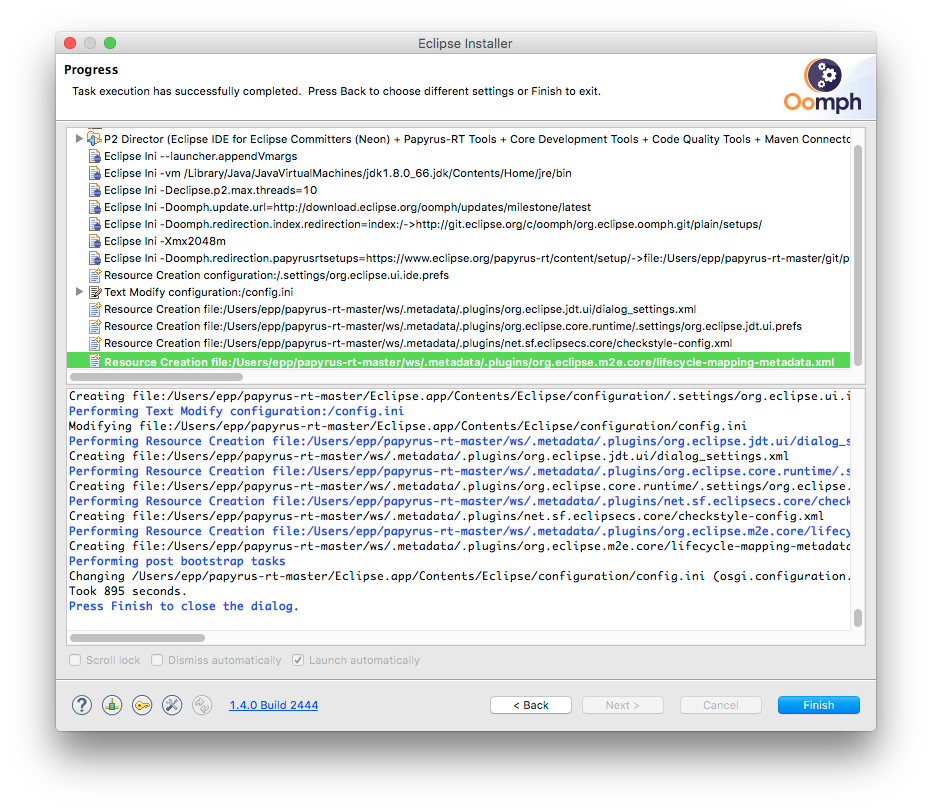
After the first set of tasks is finished, the Eclipse Installer dialog will look like this:
18. Click [Finish].
Restarting
Eclipse will relaunch automatically:
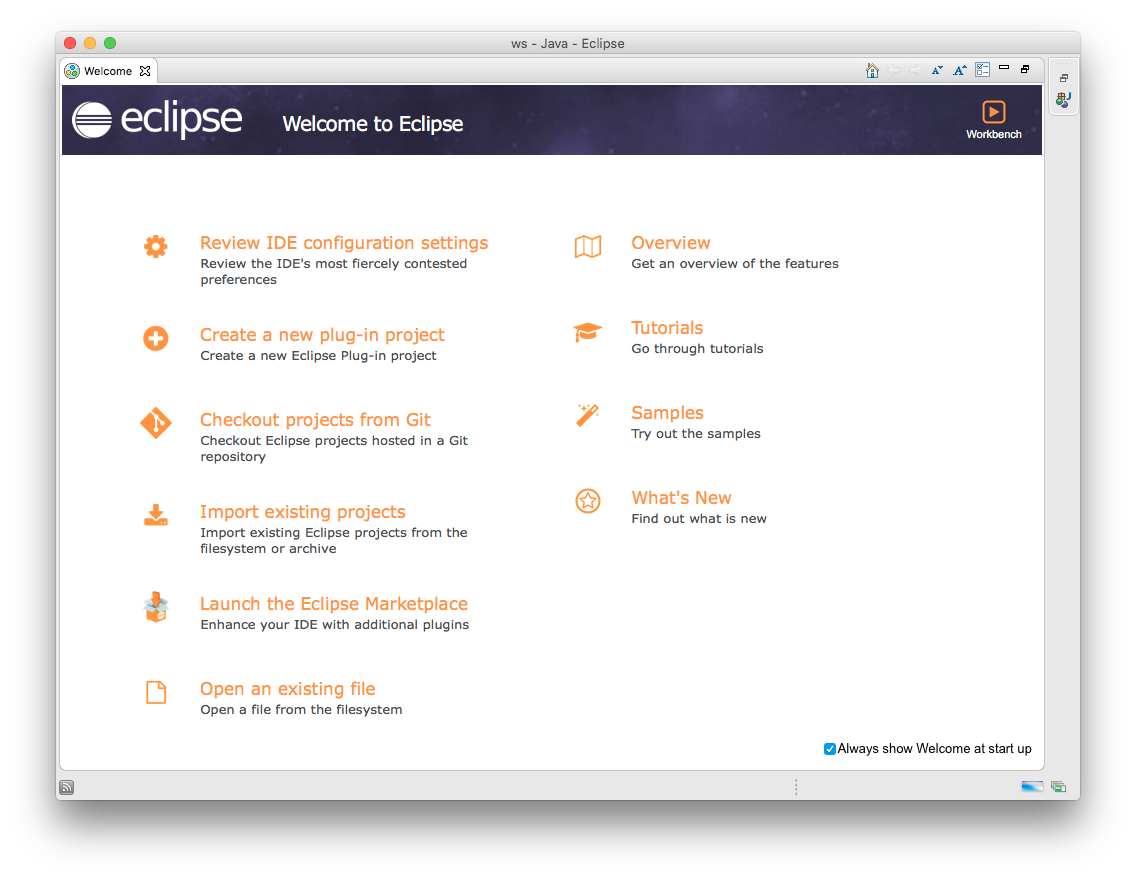
and present you with a welcome screen:
On the bottom right the status bar will show a message: Executing startup tasks.
These startup tasks will complete the rest of the installation steps.
If in step 11 you didn't select the XtUML-RT component, you can go to step 21.
If in step 11 you did select the XtUML-RT component, then click on the icon to the left of this message (two circling arrows).
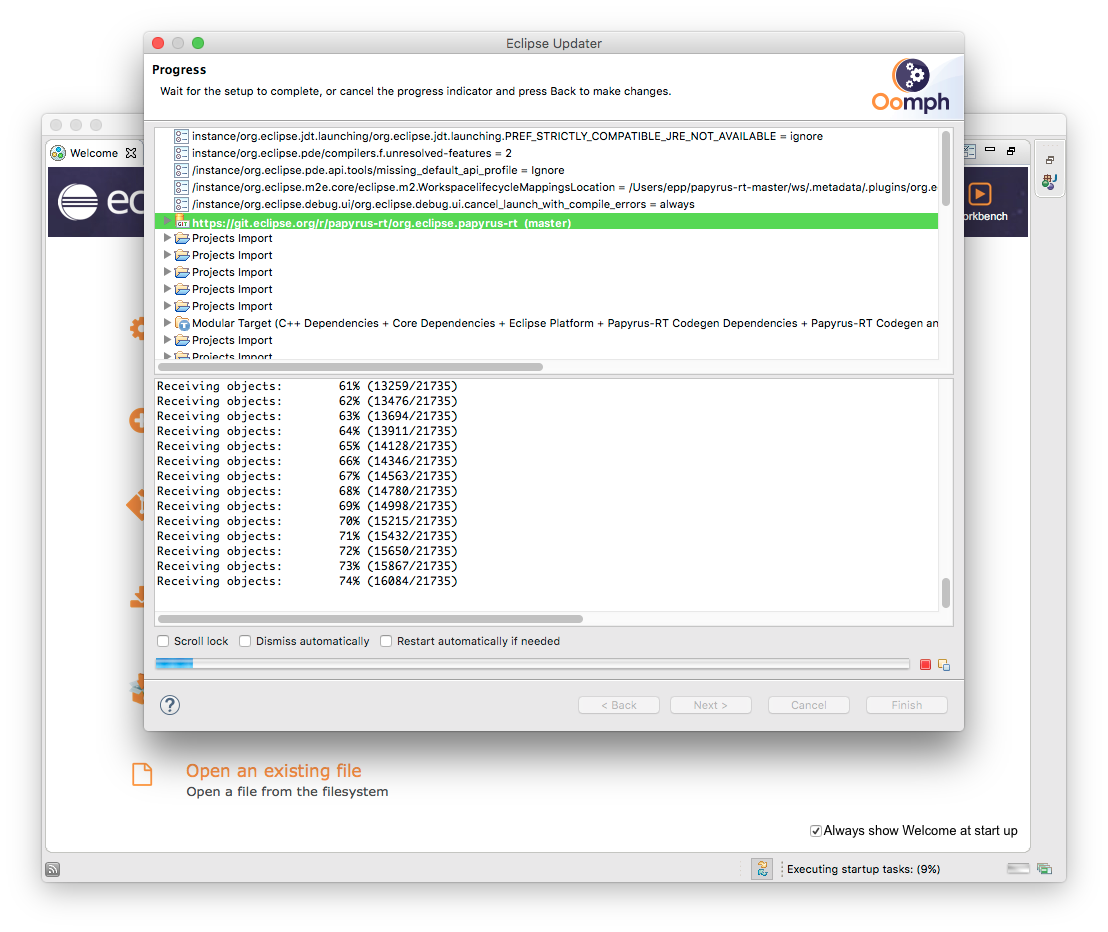
You will see the Eclipse Updater dialog which shows the execution of the remaining installation tasks:
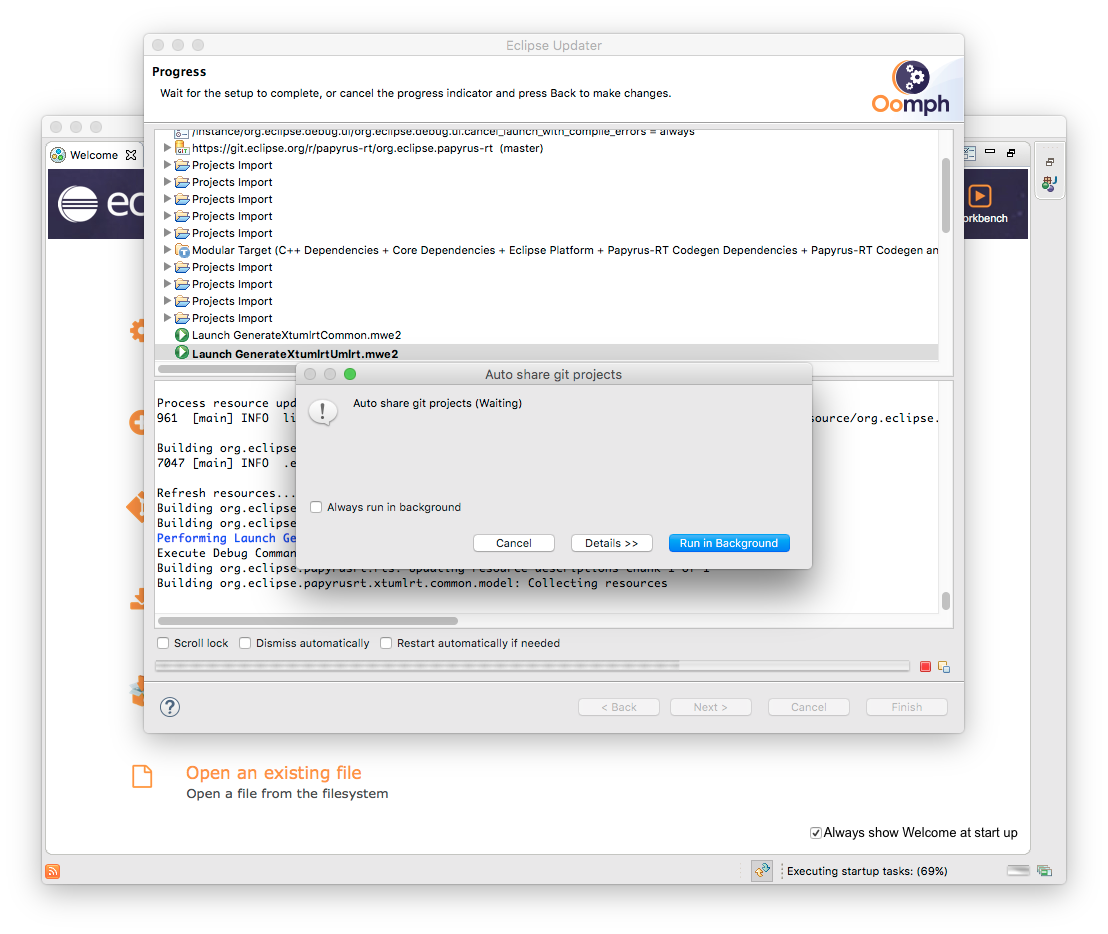
During the execution of these tasks you may see dialogs titled Auto share git projects like the one below. These will automatically close.
It is possible that after several minutes, progress will stop and you will see a message "*ATTENTION*" in the console panel and it will ask you if it can download the ANTLR 3 parser generator.
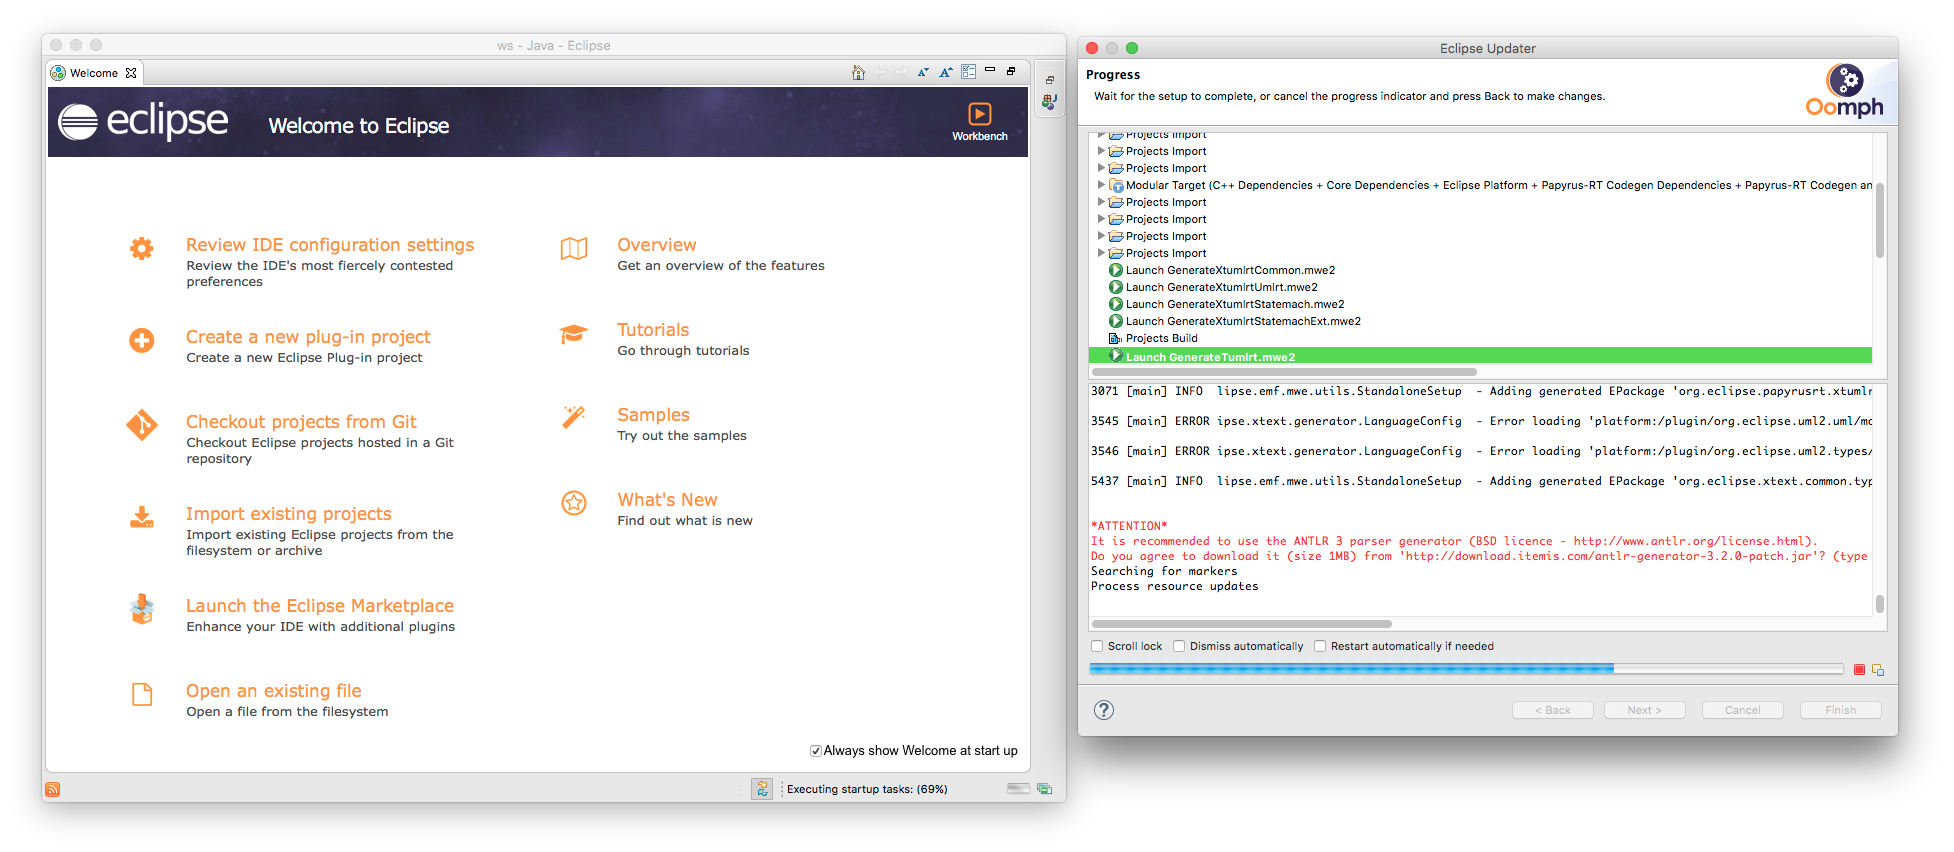
If you see this message, you have to go to the console view in the workbench, since the console panel in the Eclipse Updater dialog does not accept keyboard input.
First, you may have to move the Eclipse Updater dialog aside and bring the workbench window to the front:
If you do not see this "*ATTENTION*" message, when the setup finishes click [Finish], go to the workbench, select the menu Help → Perform Setup Tasks..., if asked about the configuration variables click [Next], and then [Finish]. Then after several minutes you should see the "*ATTENTION*" message and proceed from here.
Accepting the ANTLR 3 parser generator
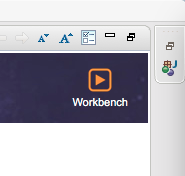
19. Click on the Workbench button on the top-right:
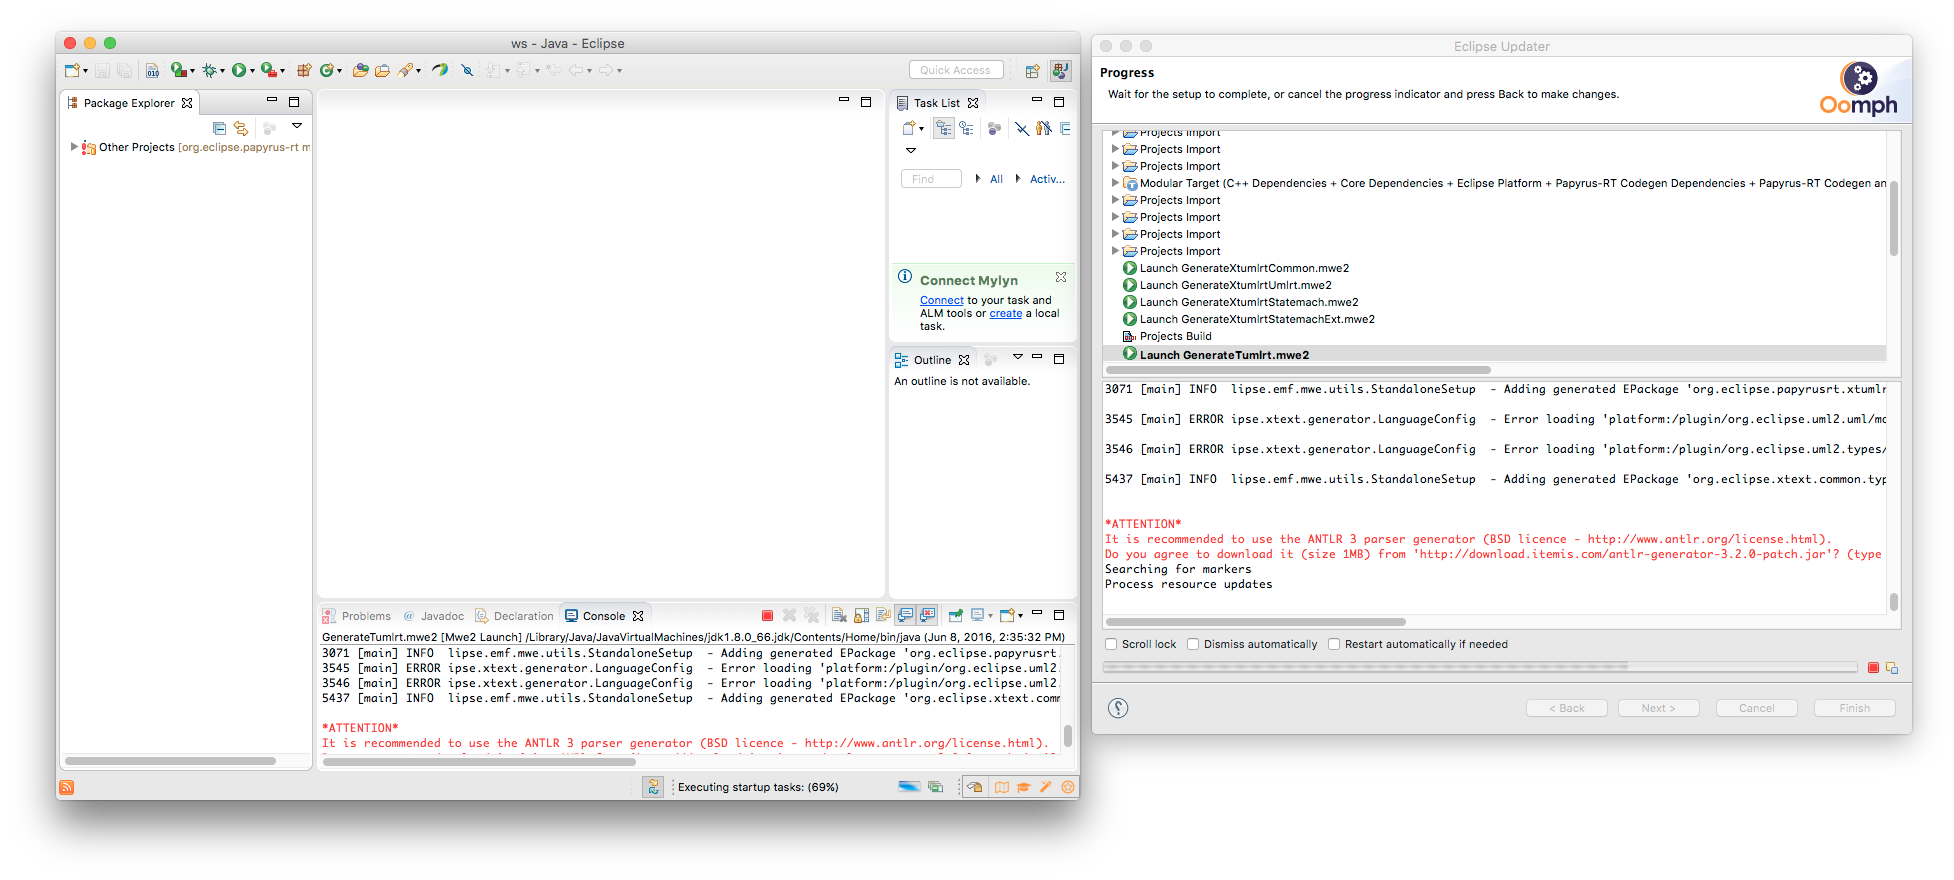
Once opened, the workbench should look like this: (the Eclipse Updater dialog will be visible only if you clicked on the Executing startup tasks button.)
In the bottom, you should see the Console view:
You should see the *ATTENTION* message asking you if it can download the ANTLR 3 parser generator.
20. Scroll to the bottom right of the Console view and place your cursor immediately after the question: (type 'y' or 'n' and hit enter) and type y and hit [Enter].
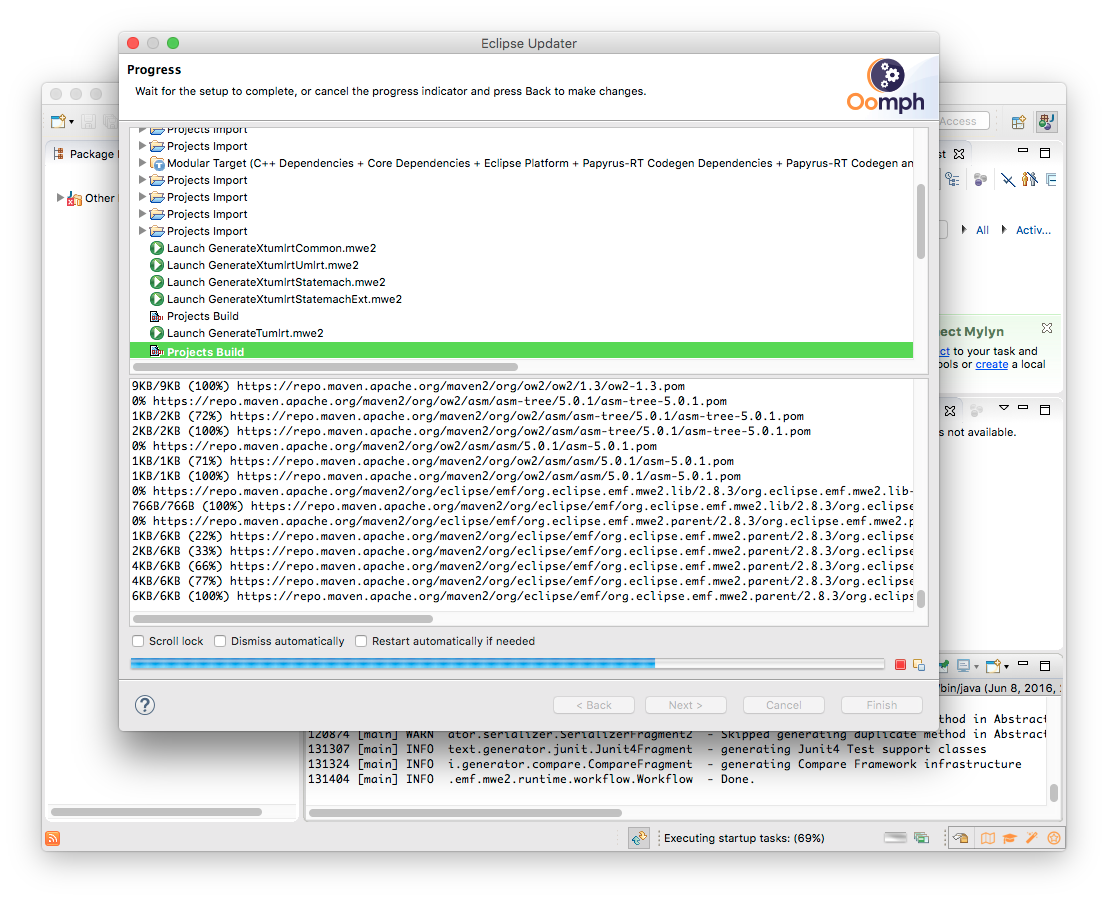
Then the process will continue. If you have the Eclipse Updater dialog open, you will see something like this:
Gerrit passwords
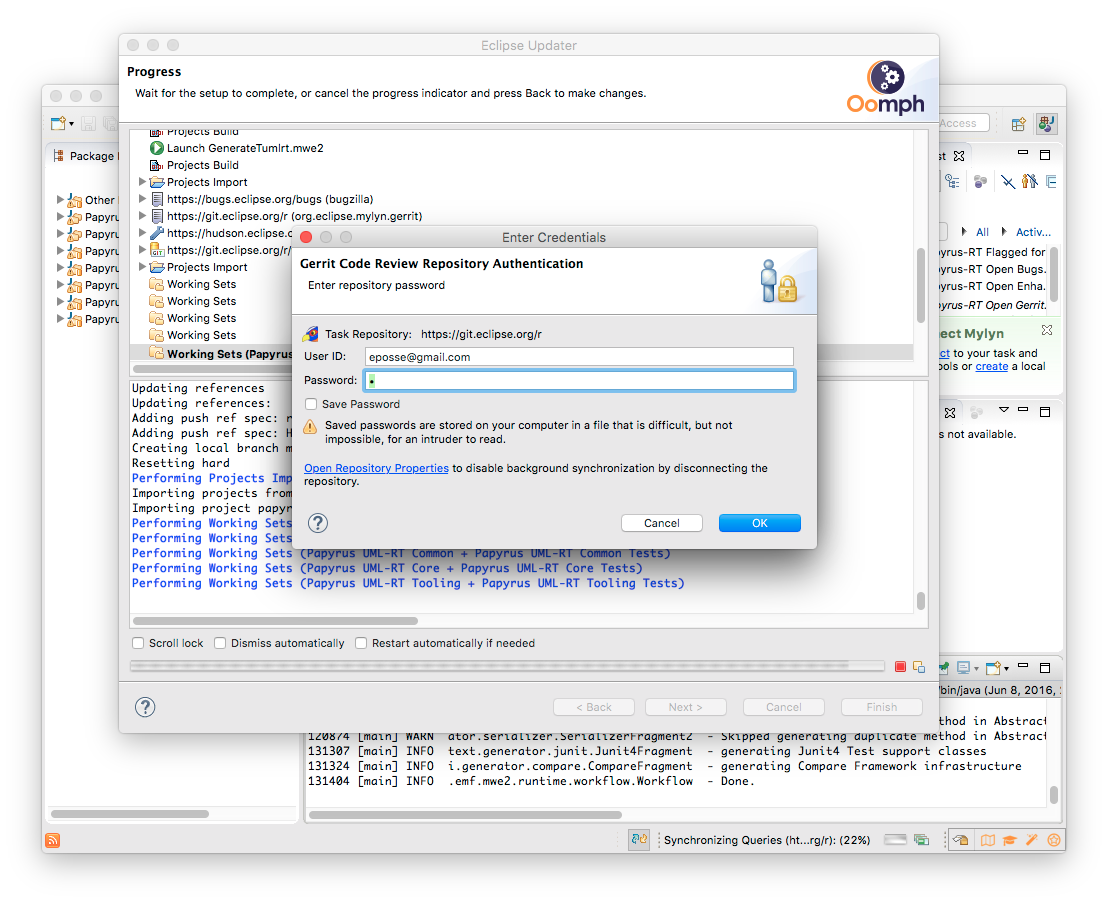
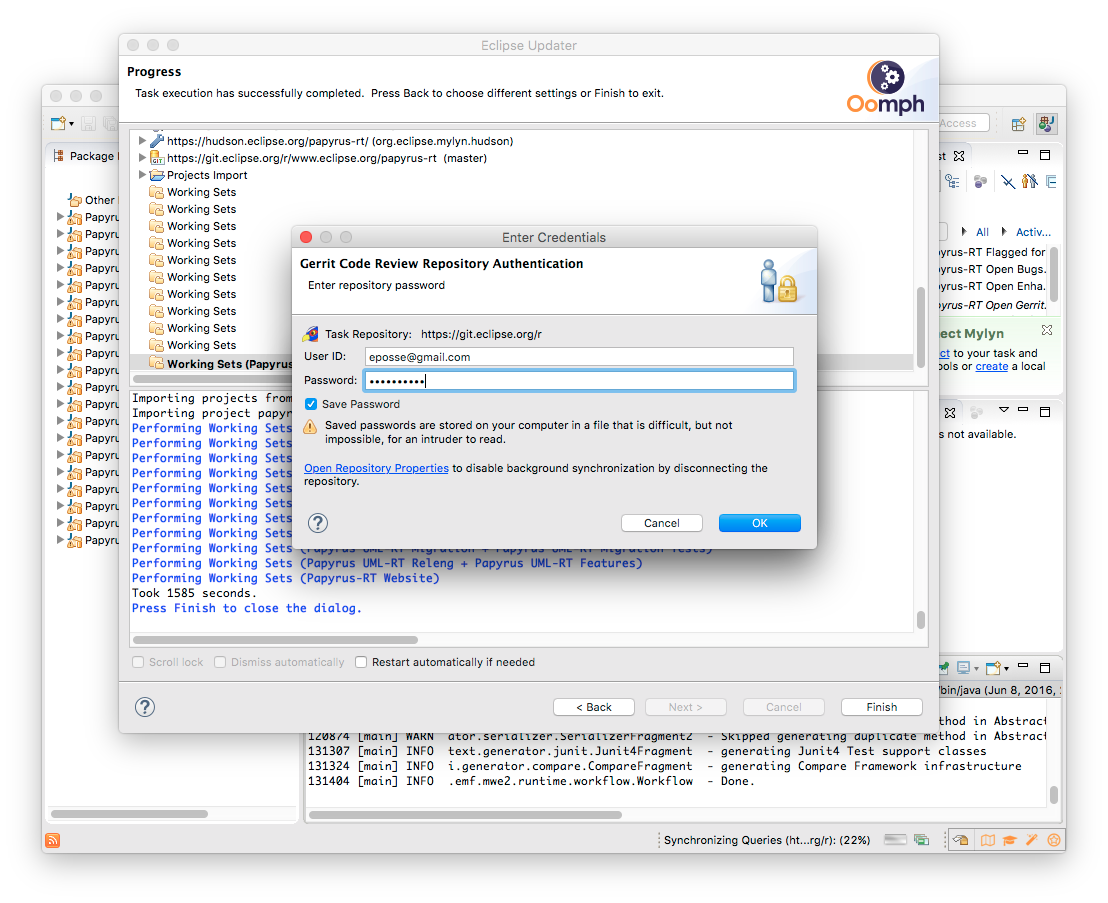
During the rest of the installation you will be asked to enter your Gerrit credentials:
21. Enter your Gerrit password (should be the same as your Eclipse password):
and check the Save Password box so that you don't have to re-enter it whenever you push to Gerrit.
Finishing
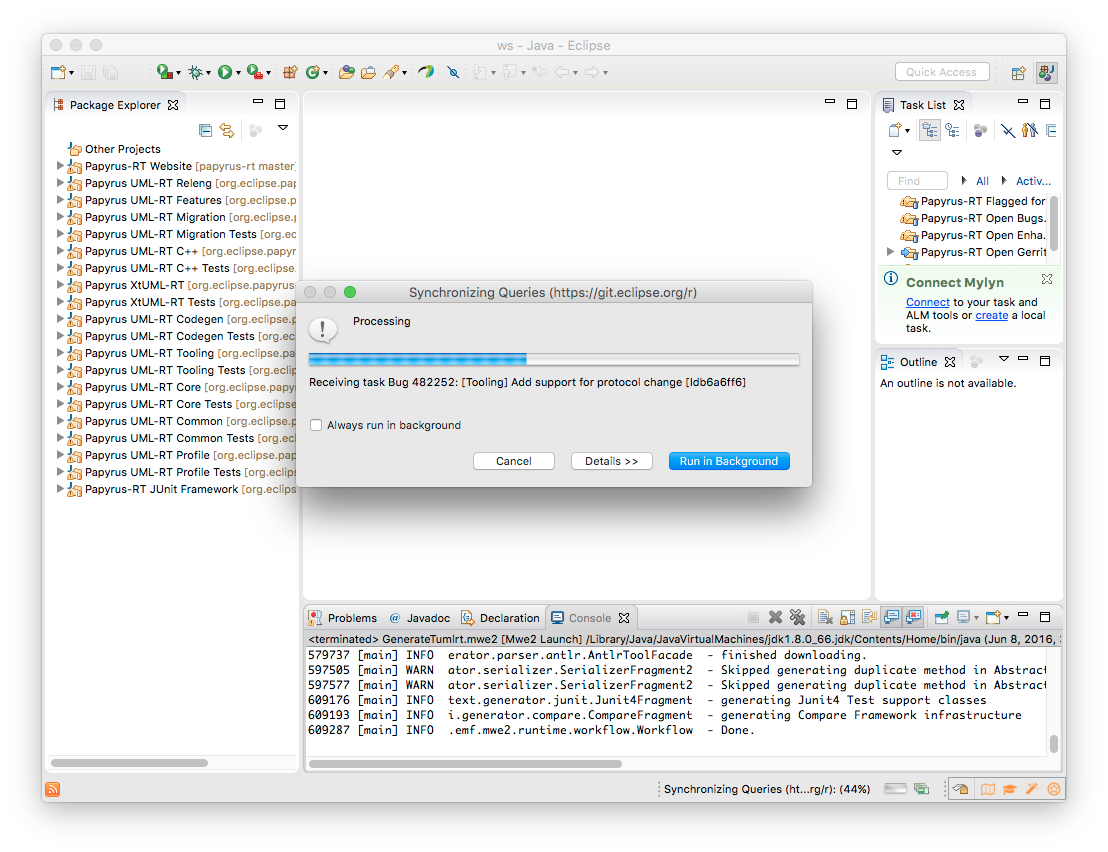
During the remainder you may see some dialogs briefly popping up and automatically closing, such as this:
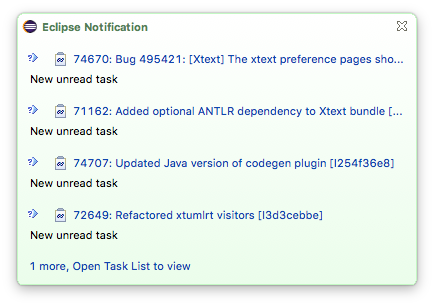
You may also see notifications related to Bugzilla and Gerrit queries such as this:
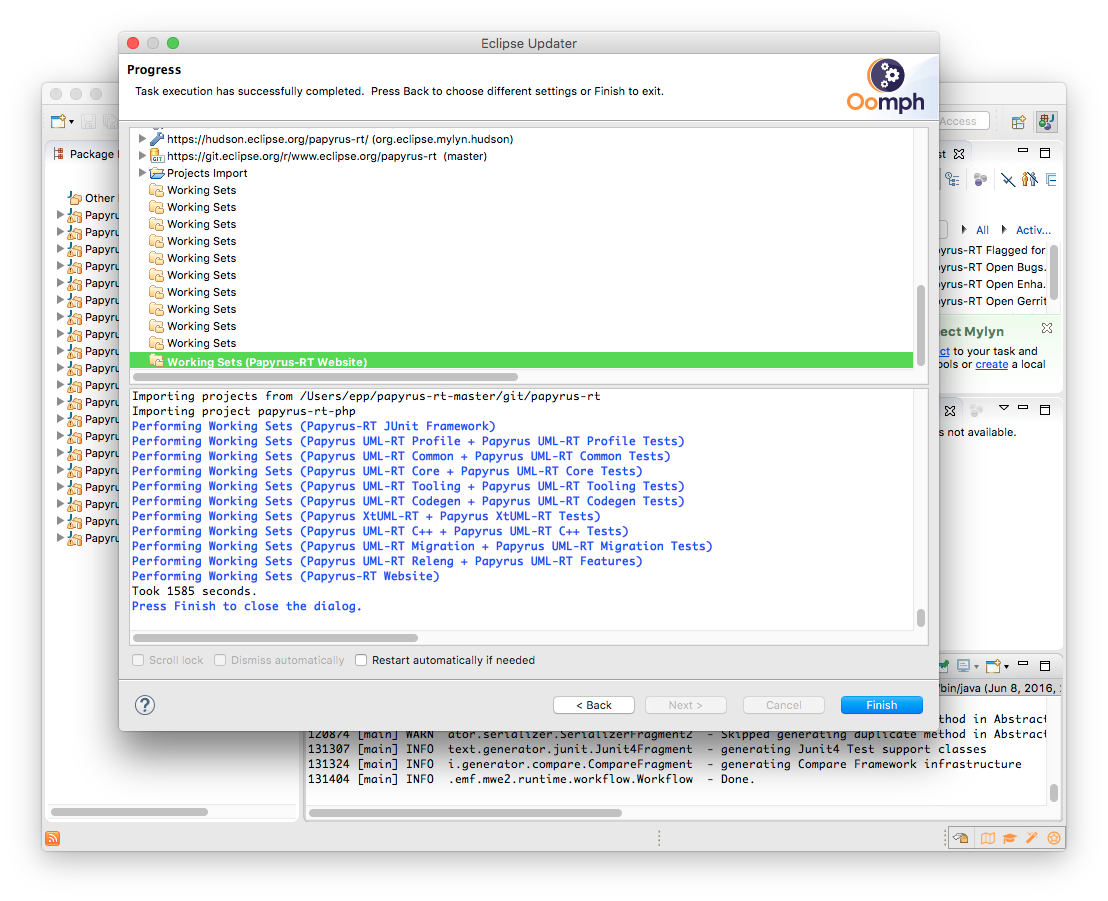
At the end, if you had the Eclipse Updater dialog opened, it should look like this:
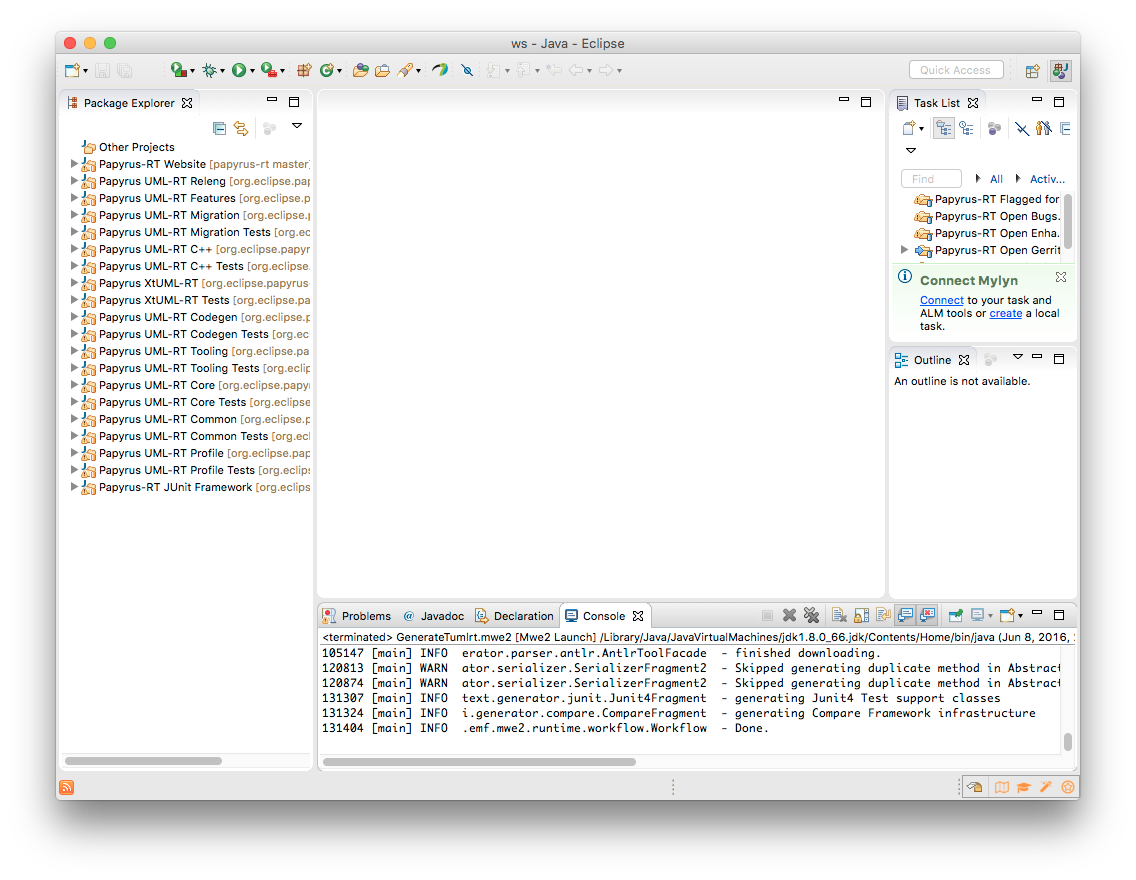
And the workbench itself should look like this:
If you selected all components in step 11, or selected a subset of components with all their dependencies, you should not have any errors in your workspace. Nevertheless, if you still have errors you can try one of the following options:
a) Perform a clean build: click on Project → Clean..., then select "Clean all projects" and click [OK].
b) Perform setup tasks: click on Help → Perform Setup Tasks..., then in the "Confirmation" dialog click [Finish].
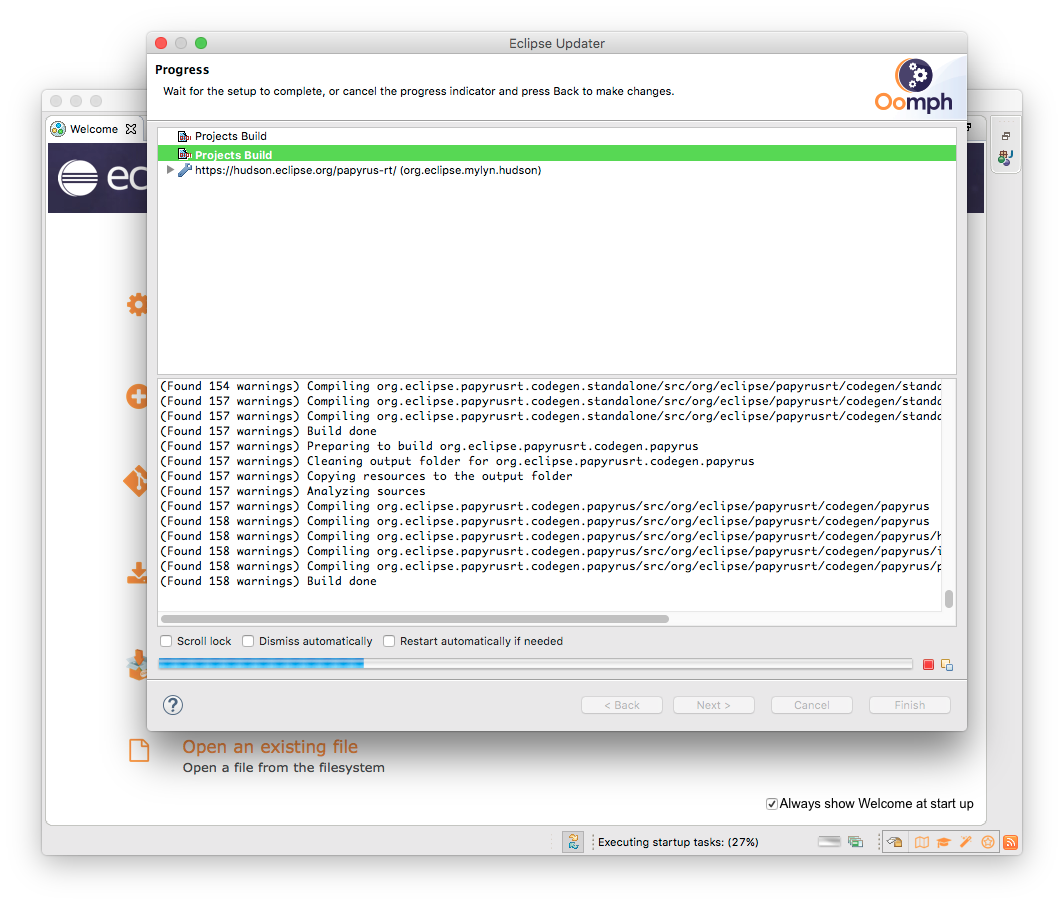
Finally, whenever you restart your new development environment, startup tasks will be executed, for example tasks to download new dependencies. Opening the Eclipse Updater dialog will show something like this:
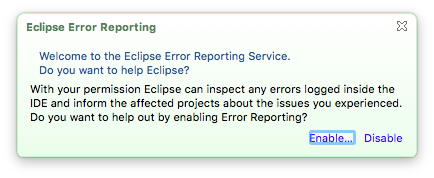
Also, Eclipse may ask you if you want to enable error reporting:
Done!

