Notice: this Wiki will be going read only early in 2024 and edits will no longer be possible. Please see: https://gitlab.eclipse.org/eclipsefdn/helpdesk/-/wikis/Wiki-shutdown-plan for the plan.
Difference between revisions of "Orion/How Tos/Installing A Plugin"
(→Install using Registry Page) |
(→Install using Registry Page: fix up links, instructions for 0.2) |
||
| Line 3: | Line 3: | ||
=== Install using Registry Page === | === Install using Registry Page === | ||
| − | *If your server runs on orionhub.org, go to [http://orionhub.org/ | + | *If your server runs on orionhub.org, go to [http://www.orionhub.org/plugin/list.html http://www.orionhub.org/plugin/list.html]. |
| − | *If your server runs on localhost, go to [http://localhost:8080/ | + | *If your server runs on localhost, go to [http://localhost:8080/plugin/list.html http://localhost:8080/plugin/list.html]. |
| − | *This page shows all installed plugins. | + | *This page shows all installed plugins. You'll see several plugins in the list already. These contribute some basic Orion functionality (for example, file support, Git, and JSLint). |
| − | *Enter a plugin URL into the text field | + | *Enter a plugin URL into the text field. For example, enter [http://jsbeautifier.org/orion/0.2/jsbeautify.html http://jsbeautifier.org/orion/0.2/jsbeautify.html] to install JavaScript code formatting functionality. Click "Install". |
| − | * | + | *You should see a success message, and the the tree will refresh. It should now contain the new plugin. |
| − | *The plugins are currently installed using local storage, which means that they are only active in one browser. If you would like to remove | + | *The plugins are currently installed using local storage, which means that they are only active in one browser. If you would like to remove an installed plugin: |
| + | **Select it in the tree | ||
| + | **Click the '''Copy Location''' button to put its URL into the text box | ||
| + | **Click '''Uninstall''', then OK to the prompt. | ||
| + | **The plugin should disappear from the list. | ||
<!-- | <!-- | ||
| + | click on the red X.<br> [[Image:Orion-install-plugin.png]]<br> | ||
=== Install using add-extension page === | === Install using add-extension page === | ||
In Orion M7, | In Orion M7, | ||
Revision as of 17:18, 17 June 2011
This page explains how an end-user can install third-party functionality so that it is available to the Orion editor.
Install using Registry Page
- If your server runs on orionhub.org, go to http://www.orionhub.org/plugin/list.html.
- If your server runs on localhost, go to http://localhost:8080/plugin/list.html.
- This page shows all installed plugins. You'll see several plugins in the list already. These contribute some basic Orion functionality (for example, file support, Git, and JSLint).
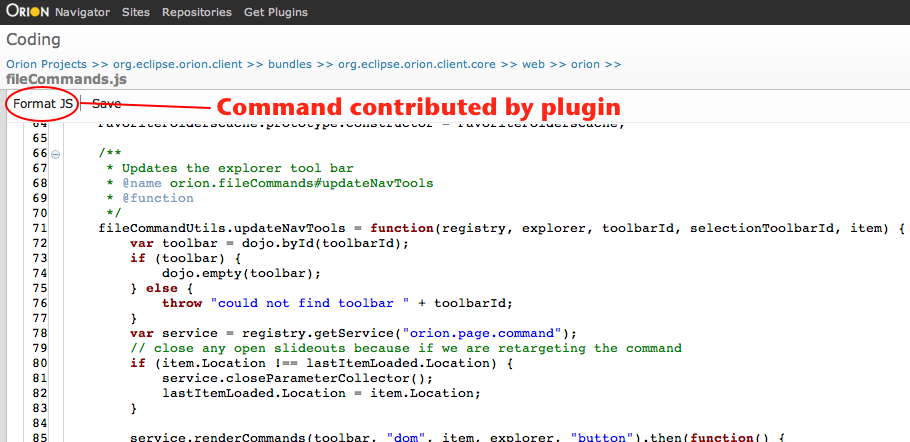
- Enter a plugin URL into the text field. For example, enter http://jsbeautifier.org/orion/0.2/jsbeautify.html to install JavaScript code formatting functionality. Click "Install".
- You should see a success message, and the the tree will refresh. It should now contain the new plugin.
- The plugins are currently installed using local storage, which means that they are only active in one browser. If you would like to remove an installed plugin:
- Select it in the tree
- Click the Copy Location button to put its URL into the text box
- Click Uninstall, then OK to the prompt.
- The plugin should disappear from the list.
Use installed functionality
- Installed plugins currently show up as actions in the editor toolbar.
- Click on the toolbar item to invoke the action. Some actions may have defined a key binding (which we don't display in the UI yet).
- Actions have access to the selected text in the editor, the complete editor buffer, and the current selection. As a result of invoking an action, the action can replace the current selection with a new text, change the complete editor buffer, and/or change the selection.
- If you have ideas for actions but need more or different API to implement it, please file a bug.

