Notice: this Wiki will be going read only early in 2024 and edits will no longer be possible. Please see: https://gitlab.eclipse.org/eclipsefdn/helpdesk/-/wikis/Wiki-shutdown-plan for the plan.
Difference between revisions of "OM2M/Developer"
< OM2M
| Line 20: | Line 20: | ||
* In the third page, check the “clone submodules” and “import all existing projects after clone finishes” checkboxes and click “Finish”. | * In the third page, check the “clone submodules” and “import all existing projects after clone finishes” checkboxes and click “Finish”. | ||
| + | [[File:git_clone3.png|thumb|center|1000px|Git clone]] | ||
| + | |||
* The OM2M project is now cloned and is visible on the Git repositories’ and Package’ explorers. | * The OM2M project is now cloned and is visible on the Git repositories’ and Package’ explorers. | ||
| + | [[File:git_clone4.png|thumb|center|1000px|Git clone]] | ||
| + | |||
* Now we will add the required libraries. This step will be removed when all third libraries will be validated by Eclipse. | * Now we will add the required libraries. This step will be removed when all third libraries will be validated by Eclipse. | ||
* Download the libraries from this link: http://wiki.eclipse.org/OM2M/Download | * Download the libraries from this link: http://wiki.eclipse.org/OM2M/Download | ||
| Line 30: | Line 34: | ||
'''Build OM2M using maven''' | '''Build OM2M using maven''' | ||
* Before building the OM2M project, you need to add “Tycho” to Maven plugin. (Why? more details) To do so, click Window -> Preferences -> maven -> discovery -> open catalog and type Tycho. Check the “Tycho Configurator” checkbox. | * Before building the OM2M project, you need to add “Tycho” to Maven plugin. (Why? more details) To do so, click Window -> Preferences -> maven -> discovery -> open catalog and type Tycho. Check the “Tycho Configurator” checkbox. | ||
| + | [[File:git_clone5.png|thumb|center|1000px|Git clone]] | ||
| + | |||
* Select “org.eclipse.om2m” package and right click. Select “Run as -> maven install”. | * Select “org.eclipse.om2m” package and right click. Select “Run as -> maven install”. | ||
* Two Eclipse products will be generated after a successful built: | * Two Eclipse products will be generated after a successful built: | ||
Revision as of 09:18, 1 August 2014
Contents
Prerequisite
- Eclipse kepler IDE: available on this link: http://www.eclipse.org/kepler/
- OM2M source code: you can download OM2M from this link: http://wiki.eclipse.org/OM2M/Download
- Maven: It’s available on the the Eclipse Kepler IDE
- Tycho: Available on the marketplace of maven
Build OM2M from source: step by step
Download OM2M source code
- Select Windiow->Show View -> Other .
- In the dialog box, select the Git view.
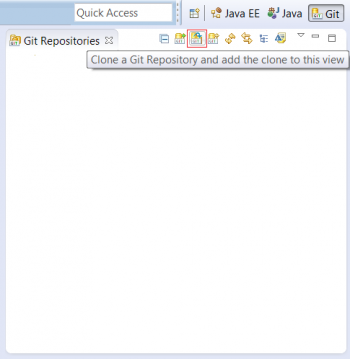
- Click on “Clone a Git repository”.
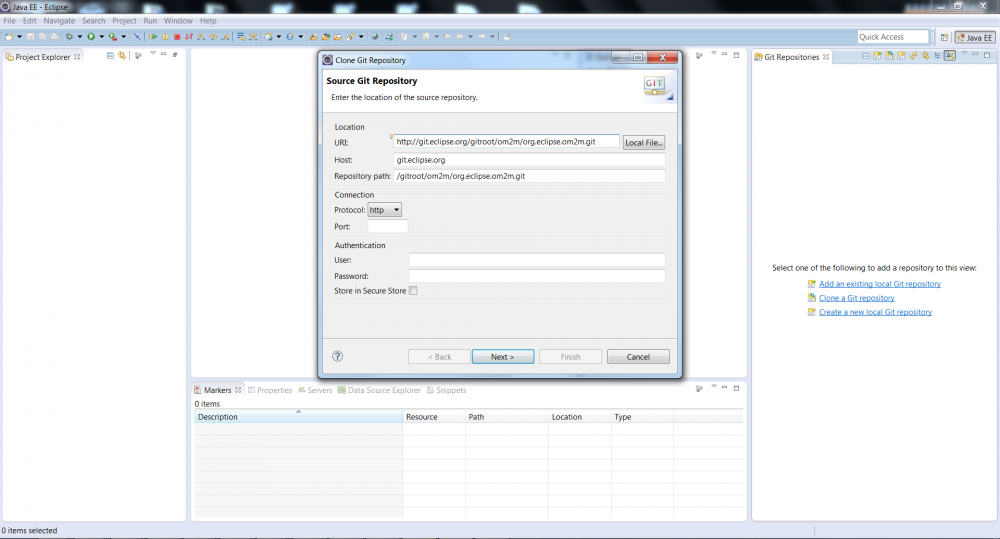
- Clone the OM2M project using the following link: http://git.eclipse.org/gitroot/om2m/org.eclipse.om2m.git. In the first page, enter the mentionned link in the URI’s location field. Click Next .
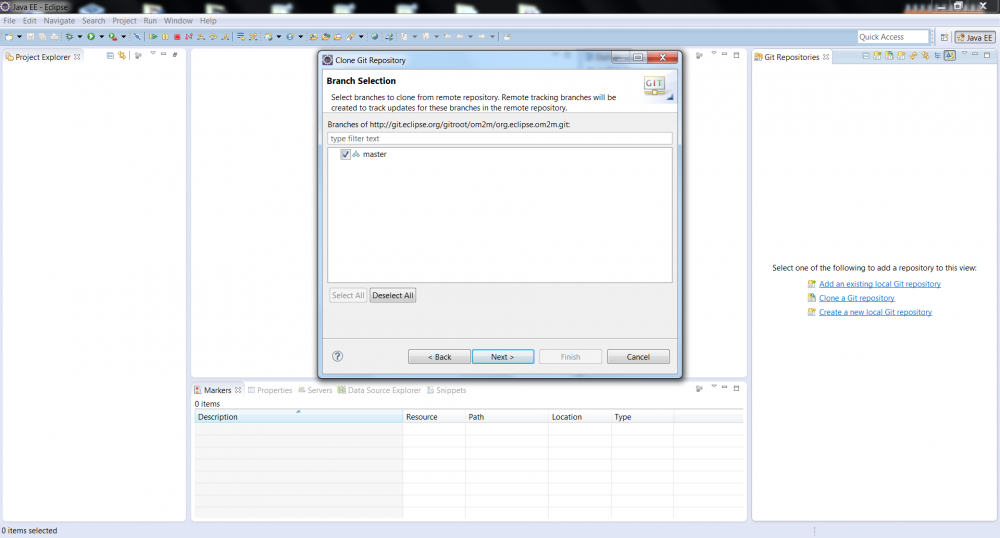
- In the second page, keep the “master” branch checkbox selected and click Next.
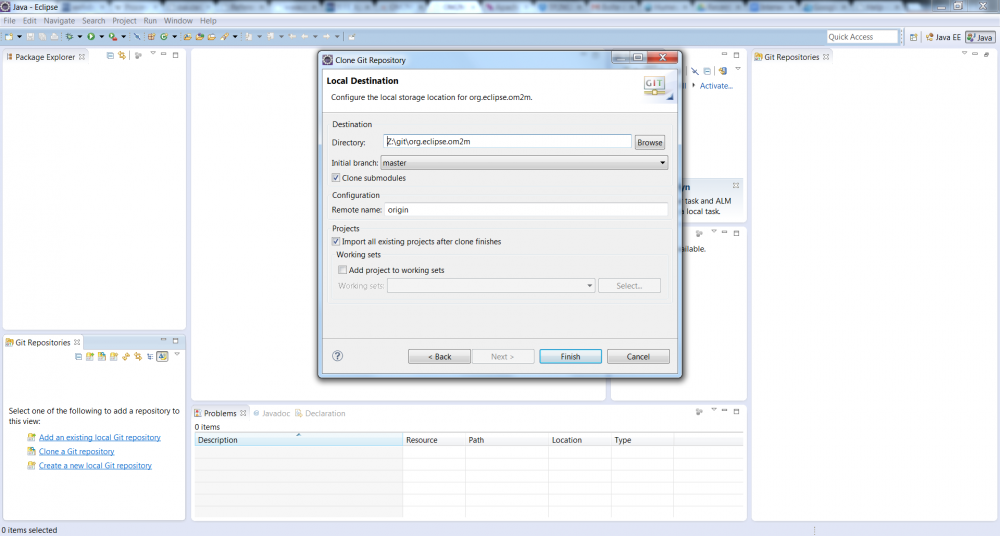
- In the third page, check the “clone submodules” and “import all existing projects after clone finishes” checkboxes and click “Finish”.
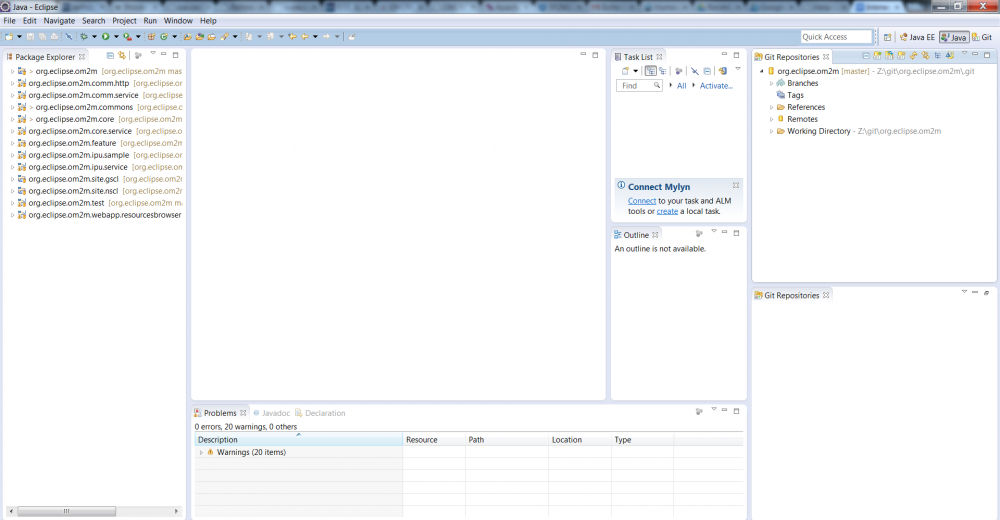
- The OM2M project is now cloned and is visible on the Git repositories’ and Package’ explorers.
- Now we will add the required libraries. This step will be removed when all third libraries will be validated by Eclipse.
- Download the libraries from this link: http://wiki.eclipse.org/OM2M/Download
- Extract OM2M-libs and add the following libraries to "org.eclipse.om2m" repository as follows:
- "db4o-core-java5-8.1-SNAPSHOT.jar" library under "org.eclipse.om2m.core\libs",
- "obix.jar" library under "org.eclipse.om2m.commons\libs",
- "xsd" folder under "org.eclipse.om2m.commons\src\main\resources".
Build OM2M using maven
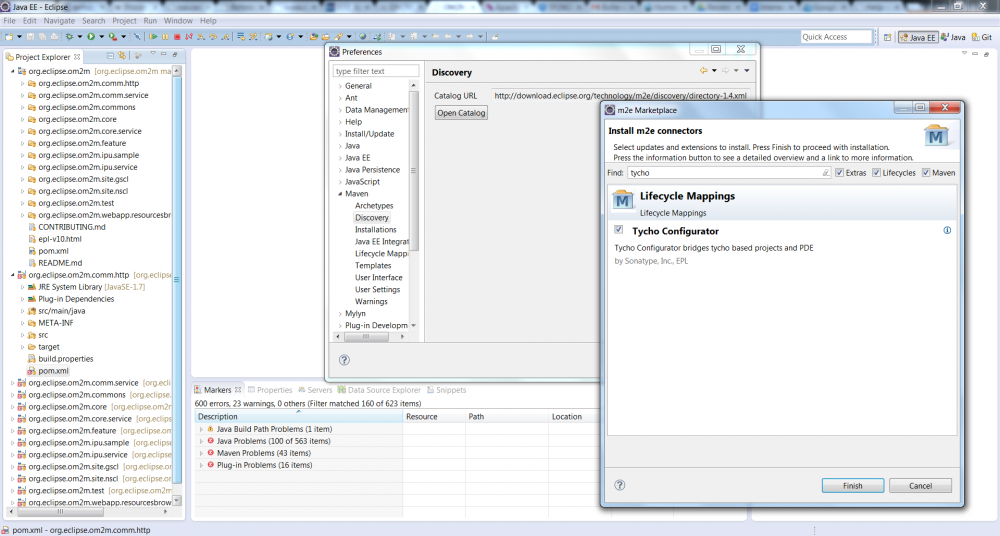
- Before building the OM2M project, you need to add “Tycho” to Maven plugin. (Why? more details) To do so, click Window -> Preferences -> maven -> discovery -> open catalog and type Tycho. Check the “Tycho Configurator” checkbox.
- Select “org.eclipse.om2m” package and right click. Select “Run as -> maven install”.
- Two Eclipse products will be generated after a successful built:
- The NSCL product can be found on this directory: "om2m/org.eclipse.om2m/org.eclipse.om2m.site.nscl/target/products/nscl/<os>/<ws>/<arch>"
- The GSCL product can be found on this directory: "om2m/org.eclipse.om2m/org.eclipse.om2m.site.gscl/target/products/gscl/<os>/<ws>/<arch>"

