Notice: this Wiki will be going read only early in 2024 and edits will no longer be possible. Please see: https://gitlab.eclipse.org/eclipsefdn/helpdesk/-/wikis/Wiki-shutdown-plan for the plan.
Nebula WindowBuilder
Introduction
This tutorial explains how to integrate a widget into WindowBuilder.
This is work in progress version that will be continued and completed.
Contents
Setup
First of all, get the source code on github : [1].
Then create a projet in Eclipse and import all plugins into your workspace (if you use Egit, go to the EGit perspective, expand the node Working Tree, select all projects, right-click then choose Import projects).
Java part
Create the class
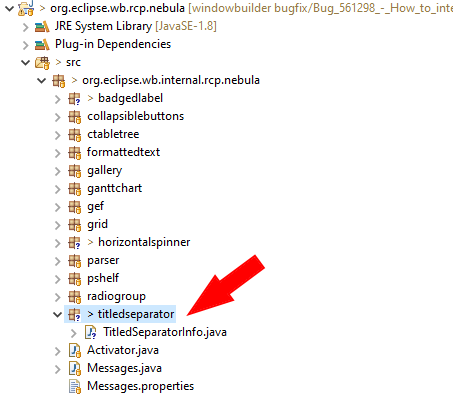
Open the plugin org.eclipse.wb.rcp.nebula and go to the directory src, package org.eclipse.wb.internal.rcp.nebula
Create a new package org.eclipse.wb.internal.rcp.nebula.XXX where XXX is you widget name :
In this package create a Java Class called XXXInfo where XXX is you widget name. This class is very simple, it extends CompositeInfo and contains a constructor.
public class TitledSeparatorInfo extends CompositeInfo {
 public TitledSeparatorInfo(AstEditor editor,
       ComponentDescription description,
       CreationSupport creationSupport) throws Exception {
   super(editor, description, creationSupport);
   // listener for setting property to default
   InstanceObjectPropertyEditor.installListenerForProperty(this);
 }
}
Add a new extension in your plugin.xml file
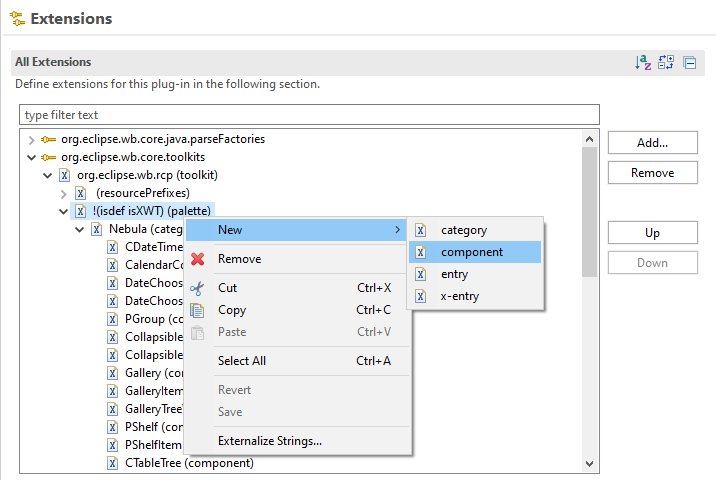
Open file plugin.xml of this plugin, , go to the Extensions tab and add a new entry under Nebula (category). The type of this entry is Component :
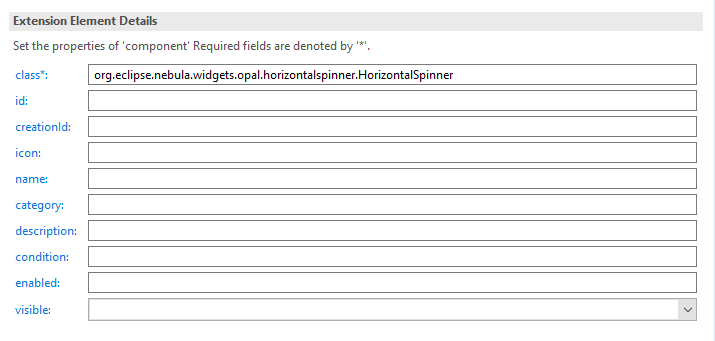
Just fill the class attribute with the qualified name of your Nebula widget (org.eclipse.nebula.widget.yyy).
Update Manifest.mf file
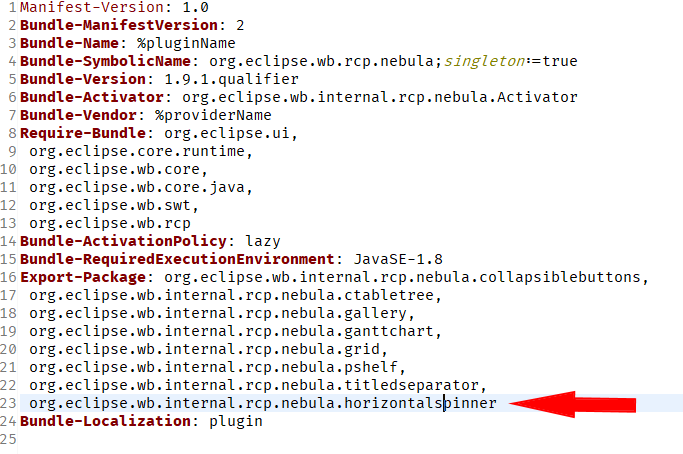
Open the manifest.mf file and in the Export-Package part add the package of you XXXXInfo class :
Icon
Create an icon that will be displayed in the palette. It is a PNG or GIF file, 16x16 pixels.
XML Configuration part
Create the folder
Go to the directory /wbp-meta/org/eclipse/nebula/widgets and create a folder XXX where XXX is the name of your widget (for example /wbp-meta/org/eclipse/nebula/widgets/pgroup).
Paste the icon
In this directory, paste the icon you have created.
XML File
XML is very verbose, so it is easier to copy an existing file (for example RadioGroup.wbp-component.xml) and paste it in the folder you have created.
The filename is WidgetName.wbp-component.xml
Now you have to complete/modify tags.
Tag model
Fill the class attribute. The value is the qualified name of the "xxxInfo" class you created
<model class="org.eclipse.wb.internal.rcp.nebula.titledseparator.TitledSeparatorInfo"/>
Tag description
Enter a description for your widget. The description will be displayed as a tooltip in the palette.
<description>An enhanced separator, with a title and/or an image.</description>
Tag creation
You need to add a <source> tag. The value is a CDATA element.
This tag describes how to instantiate a widget.
<source><![CDATA[new org.eclipse.nebula.widgets.opal.titledseparator.TitledSeparator(%parent%, org.eclipse.swt.SWT.NONE)]]></source>
The important information are the following :
- Use the qualified name of the constructeur (org.eclipse.nebula.widget...)
- %parent% represents the parent composite
- The second argument is the qualified name of the default SWT attribute
If you want to initialize the widget just after its creation, use the invocation tag
- The attribute signature is the signature of the called method
- The value is a CDATA value
<invocation signature="setText(java.lang.String)"><![CDATA["New TitledSeparator"]]></invocation>
Tag constructors
This tag contains the list of constructors. Child elements are contructor
For each constructor you'll have to specify the parameters. Because widgets complains with Control's constructor, the structure is always the same
- The fist constructor is a Composite
- The second constructor is a style. The
editortag is used to simplify user's choice by presenting a combo box.
Here is a typical constructors tag :
	<!-- CONSTRUCTORS -->
	<constructors>
		<constructor>
			<parameter type="org.eclipse.swt.widgets.Composite" parent="true"/>
			<parameter type="int" defaultSource="org.eclipse.swt.SWT.NONE">
				<editor id="style">
					<parameter name="class">org.eclipse.swt.SWT</parameter>
					<parameter name="set">LEFT RIGHT CENTER</parameter>
				</editor>
			</parameter>
		</constructor>
	</constructors>
Tag exposing-rules
In this section you tell that the package of the widget is excluded for WB :
	<!-- EXPOSING RULES -->
	<exposing-rules>
		<exclude package="org.eclipse.nebula.widgets.progresscircle"/>
	</exposing-rules>
Tag properties
Tag properties-preferred
This tags contains a list of preferred properties. These properties will be displayed in bold.
	<!-- EXPOSING RULES -->
	<properties-preferred names="image text alignment"/>
Tag property-tag
This tag described the type of the properties. By default, when one edits a property, the field is a text field. If your property is a text, an image or a combo, you can set up the type to change the way the data should be updated.
Here is a sample for typing a text, an image or a combo
	<property-tag name="text" tag="isText" value="true"/>
	<property-tag name="image" tag="isImage" value="true"/>
	<property id="setAlignment(int)">
		<editor id="staticField">
			<parameter name="class">org.eclipse.swt.SWT</parameter>
			<parameter name="fields">LEFT RIGHT CENTER</parameter>
		</editor>
	</property>
Testing
Right-click on a plugin (for example org.eclipse.wb.rcp.nebula), choose Run as then Eclipse Application. In your Eclipse application create a new project.
Very import: do not forget to include the jar files that contain your widget in your project. You can retrieve the latest stable version here: [2]
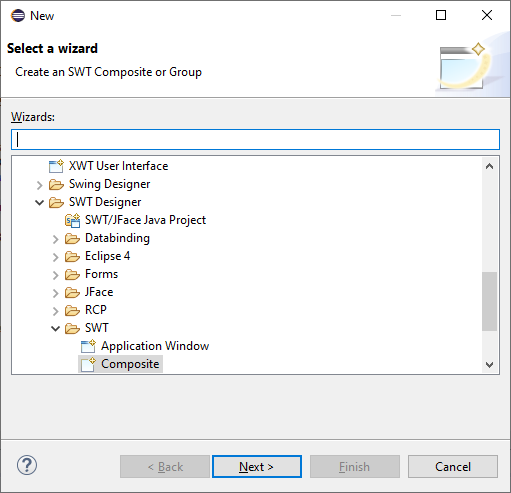
Right-click on the src folder, choose New > Others..., then choose SWT Designer > SWT > Composite
You'll find your widget in the "Nebula" part of the palette.
Documentation
Open the project org.eclipse.wb.rcp.doc.user.
Go to the folder html/palettes and edit the file swt_palette.html
Add you widget and a short description.

