Notice: this Wiki will be going read only early in 2024 and edits will no longer be possible. Please see: https://gitlab.eclipse.org/eclipsefdn/helpdesk/-/wikis/Wiki-shutdown-plan for the plan.
Difference between revisions of "Jetty WTP Plugin/Jetty WTP Websocket Wizard"
m |
|||
| Line 1: | Line 1: | ||
{{ Jetty }} | {{ Jetty }} | ||
| + | |||
| + | {{Jetty Deprecated}} | ||
== Using the Jetty Websocket Wizard == | == Using the Jetty Websocket Wizard == | ||
Latest revision as of 15:23, 23 April 2013
Using the Jetty Websocket Wizard
The plugin, org.eclipse.jst.server.jetty.ui.websocket, provides a wizard that you can use to create a Jetty WebSocket.
This document provides examples for the following tasks:
- Creating an implementataion of the org.eclipse.jetty.websocket.WebSocketServlet, which uses an implementation of org.eclipse.jetty.websocket.WebSocket
- Modifying the web.xml to declare the WebSocketServlet createdt-name + servlet-mapping). ??
- TODO : create an HTML page that calls the WebSocketServlet.
To create a WebSocketServlet, complete the following steps.
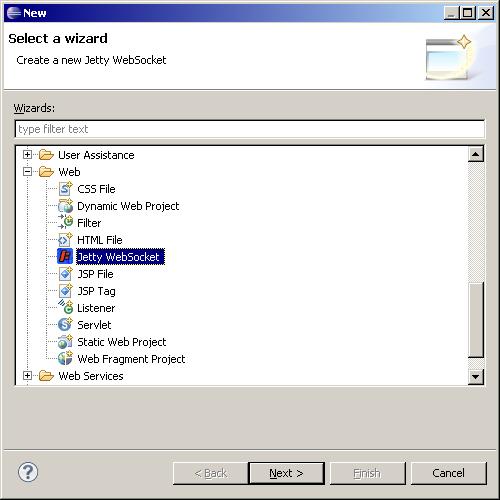
- In the Eclipse menu, navigate to File->New>-Other. The Select a wizard dialog box opens.
- Select Web/Jetty WebSocket. The Create Jetty-WebSocket dialog box opens.
- In the Java package field, enter org.sample.websocket.
- In the Class name field, enter ChatWebSocketServlet. The Superclass field is automatically filled as org.eclipse.jetty.websocket.WebSocketServlet.
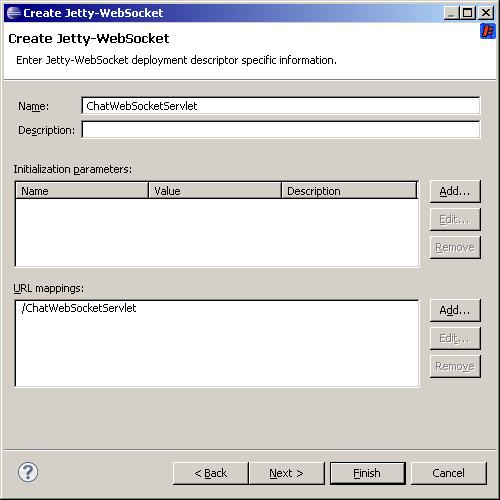
- Click Next. The Create Jetty-WebSocket Deployment Descriptor dialog box opens.
- Here you can define the servlet-mappings.
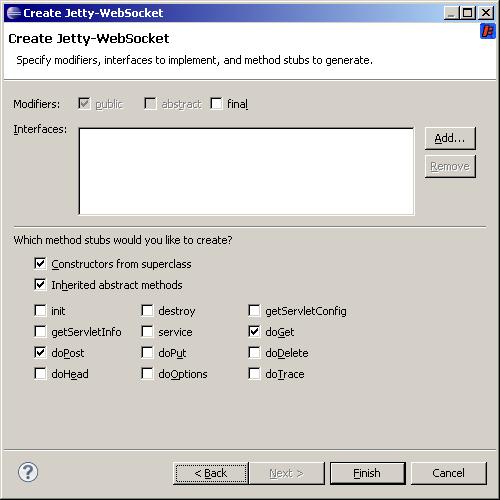
- Click Next. The Create Jetty-WebSocket Modifiers, Interfaces and Methods dialog box opens.
- Here you can generate some methods. The wizard generates doPost for WebSocket using ???
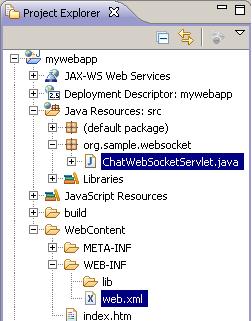
- Click Finish. Your workspace looks like this :
- a class ChatWebSocketServlet :
.
This is the same dialog box that the Servlet uses.
The wizard generates :
package org.sample.websocket;

import java.io.IOException;
import java.util.Set;
import java.util.concurrent.CopyOnWriteArraySet;
import javax.servlet.ServletException;
import javax.servlet.http.HttpServletRequest;
import javax.servlet.http.HttpServletResponse;
import org.eclipse.jetty.websocket.WebSocket;
import org.eclipse.jetty.websocket.WebSocketServlet;

/**
 * Jetty WebSocketServlet implementation class ChatWebSocketServlet
 */
public class ChatWebSocketServlet extends WebSocketServlet {
	private static final long serialVersionUID = 1L;

    /**
     * @see WebSocketServlet#WebSocketServlet()
     */
    public ChatWebSocketServlet() {
        super();
        // TODO Auto-generated constructor stub
    }
	private final Set<ChatWebSocket> members = new CopyOnWriteArraySet<ChatWebSocket>();

	/**
	 * @see HttpServlet#doGet(HttpServletRequest request, HttpServletResponse response)
	 */
	protected void doGet(HttpServletRequest request, HttpServletResponse response) throws ServletException, IOException {
		// TODO Auto-generated method stub
	}

	/**
	 * @see HttpServlet#doPost(HttpServletRequest request, HttpServletResponse response)
	 */
	protected void doPost(HttpServletRequest request, HttpServletResponse response) throws ServletException, IOException {
		getServletContext().getNamedDispatcher("default").forward(request, response);
	}

	/*
	 * @see org.eclipse.jetty.websocket.WebSocketServlet#doWebSocketConnect(javax.servlet.http.HttpServletRequest, java.lang.String)
	 */
	protected WebSocket doWebSocketConnect(HttpServletRequest request, String protocol) {
		return new ChatWebSocket();
	}

	class ChatWebSocket implements WebSocket {
		private Outbound outbound;

		public void onConnect(Outbound outbound) {
			this.outbound = outbound;
			members.add(this);
		}

		/*
		 * @see org.eclipse.jetty.websocket.WebSocket#onMessage(byte, byte[],
		 * int, int)
		 */
		public void onMessage(byte frame, byte[] data, int offset, int length) {
		}

		/*
		 * @see org.eclipse.jetty.websocket.WebSocket#onMessage(byte,
		 * java.lang.String)
		 */
		public void onMessage(byte frame, String data) {

			for (ChatWebSocket member : members) {
				try {
					member.outbound.sendMessage(frame, data);
				} catch (IOException e) {
					// org.eclipse.jetty.util.log.Log.warn(e);
					e.printStackTrace();
				}
			}
		}

		/*
		 * @see org.eclipse.jetty.websocket.WebSocket#onDisconnect()
		 */
		public void onDisconnect() {
			members.remove(this);
		}
	}


}
1.web.xml is modified like this :
  <servlet>
    <description></description>
    <display-name>ChatWebSocketServlet</display-name>
    <servlet-name>ChatWebSocketServlet</servlet-name>
    <servlet-class>org.sample.websocket.ChatWebSocketServlet</servletclass>
  </servlet>
  <servlet-mapping>
    <servlet-name>ChatWebSocketServlet</servlet-name>
    <url-pattern>/ChatWebSocketServlet</url-pattern>
  </servlet-mapping>


