Notice: this Wiki will be going read only early in 2024 and edits will no longer be possible. Please see: https://gitlab.eclipse.org/eclipsefdn/helpdesk/-/wikis/Wiki-shutdown-plan for the plan.
Difference between revisions of "Jetty WTP Plugin/Jetty WTP Create Server"
m |
m |
||
| Line 1: | Line 1: | ||
{{Jetty}} | {{Jetty}} | ||
| − | |||
To create a Jetty Server entry, complete the following steps. | To create a Jetty Server entry, complete the following steps. | ||
| − | From the main Eclipse window, select '''File -> New | + | From the main Eclipse window, select '''File -> New -> Other'''. The ''Select a Wizard'' dialog box opens. |
[[Image:Jetty-wtp-create1.jpg]] | [[Image:Jetty-wtp-create1.jpg]] | ||
| − | # In the Wizards list box, scroll down to select '''Server -> Server'''. | + | # In the ''Wizards'' list box, scroll down to select '''Server -> Server'''. |
# Click '''Next'''. The ''Define a New Server'' dialog box opens. | # Click '''Next'''. The ''Define a New Server'' dialog box opens. | ||
| Line 14: | Line 13: | ||
# In the ''Select the server type'' field, scroll down to select '''Jetty -> Jetty 7.x''' or '''Jetty 8.x Server'''. This document uses the Jetty 7.x Server. | # In the ''Select the server type'' field, scroll down to select '''Jetty -> Jetty 7.x''' or '''Jetty 8.x Server'''. This document uses the Jetty 7.x Server. | ||
| − | # Click '''Next'''. | + | # Click '''Next'''. The ''New Server'' dialog box opens. |
| − | |||
[[Image:Jetty-wtp-create3.jpg]] | [[Image:Jetty-wtp-create3.jpg]] | ||
| − | + | # To specify the installation directory for Jetty, either use the '''Browse''' button OR click '''Download and Install''' to download Jetty v7. This document illustrates the latter option. The ''Download and Install'' dialog box opens. | |
| − | + | ||
[[Image:Jetty-wtp-create4.jpg]] | [[Image:Jetty-wtp-create4.jpg]] | ||
| − | + | Accept the license and click '''Finish'''. You return to the New Server dialog box. | |
[[Image:Jetty-wtp-create5.jpg]] | [[Image:Jetty-wtp-create5.jpg]] | ||
| − | Once you | + | # Select the base directory where you want to install the Jetty server. This example selects D:\Servers\jetty-distribution-7.2.x and the download places the stable Jetty v7 server in this folder. |
| + | #:Once you select a folder, the download begins. You have an error because the wizard checks that start.jar exists in the D:\Server\jetty-distribution-7.2.x (this JAR doesn't exist because the download is not finished). | ||
| + | #:In some cases the download is slow. | ||
| − | # When the download completes, click the enabled '''Finish''' button. You now have a D:\Server\jetty-distribution-7.2.x directory that contains the start.jar...from | + | # When the download completes, click the newly enabled '''Finish''' button. You now have a D:\Server\jetty-distribution-7.2.x directory that contains the start.jar...from Jetty 7 : |
[[Image:Jetty-wtp-create6.jpg]] | [[Image:Jetty-wtp-create6.jpg]] | ||
| − | Click '''Next'''. The | + | Click '''Next'''. The Add and Remove dialog boxopens. |
[[Image:Jetty-wtp-create7.jpg]] | [[Image:Jetty-wtp-create7.jpg]] | ||
| Line 41: | Line 40: | ||
| − | + | Here you can select an existing Dynamic Web project from your workspace. In this example, there are no WTP Dynamic WebProjects. | |
| + | |||
Click '''Finish'''. | Click '''Finish'''. | ||
| Line 49: | Line 49: | ||
[[Image:Jetty-wtp-create8.jpg]] | [[Image:Jetty-wtp-create8.jpg]] | ||
| − | Servers | + | The Servers folder includes the Jetty v7.0 Server at localhost-config folder, which contains: |
| − | * start.ini | + | * start.ini from the Jetty install (D:\Servers\jetty-distribution-7.2.x) |
| − | * start.config | + | * start.config from the JAR start.jar from the Jetty install. Notice that Server/start.config is not the same as Jetty install/start.jar. Jetty Home is not the Jetty Install server but a WTP folder (created in the .metadata of your workspace). |
| − | * the jetty*.xml files which are declared in the original start.ini. Jetty*.xml files are preprocessed too to transform <Property to <SystemProperty. | + | * the jetty*.xml files, which are declared in the original start.ini. Jetty*.xml files are preprocessed too to transform <Property to <SystemProperty. |
| − | * webdefault.xml is modified to avoid locking HTML files under Windows when Jetty is started and HTML files are modified (published) with the option : | + | * webdefault.xml is modified to avoid locking HTML files under Windows when Jetty is started and HTML files are modified (published) with the following option: |
<source lang="xml"> | <source lang="xml"> | ||
Revision as of 12:44, 18 November 2010
To create a Jetty Server entry, complete the following steps.
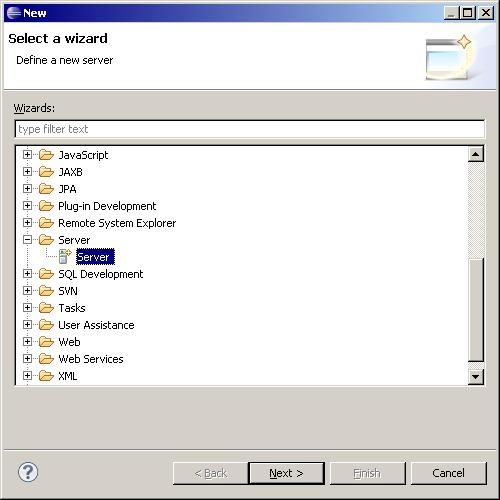
From the main Eclipse window, select File -> New -> Other. The Select a Wizard dialog box opens.
- In the Wizards list box, scroll down to select Server -> Server.
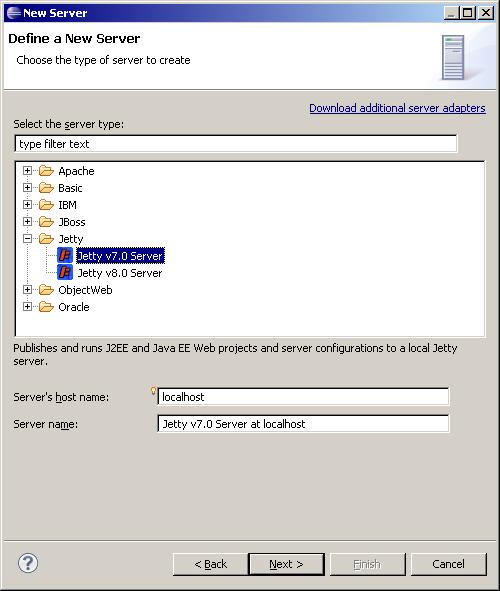
- Click Next. The Define a New Server dialog box opens.
- In the Select the server type field, scroll down to select Jetty -> Jetty 7.x or Jetty 8.x Server. This document uses the Jetty 7.x Server.
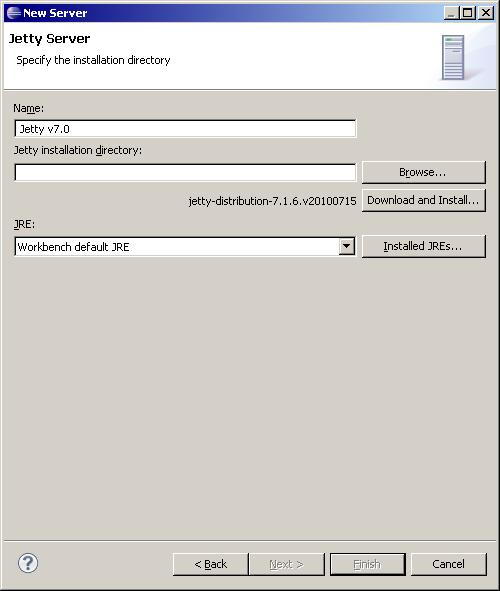
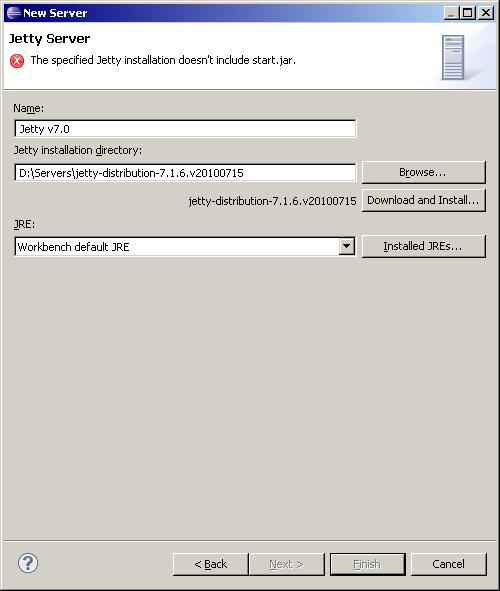
- Click Next. The New Server dialog box opens.
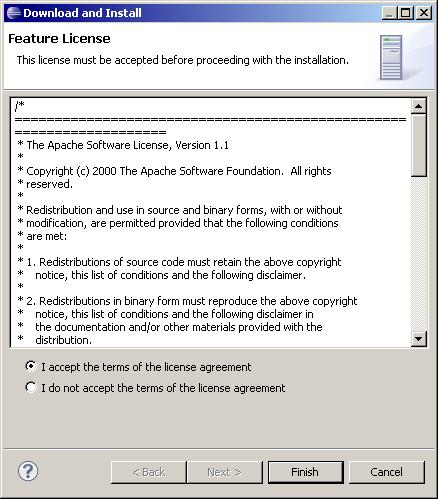
- To specify the installation directory for Jetty, either use the Browse button OR click Download and Install to download Jetty v7. This document illustrates the latter option. The Download and Install dialog box opens.
Accept the license and click Finish. You return to the New Server dialog box.
- Select the base directory where you want to install the Jetty server. This example selects D:\Servers\jetty-distribution-7.2.x and the download places the stable Jetty v7 server in this folder.
- Once you select a folder, the download begins. You have an error because the wizard checks that start.jar exists in the D:\Server\jetty-distribution-7.2.x (this JAR doesn't exist because the download is not finished).
- In some cases the download is slow.
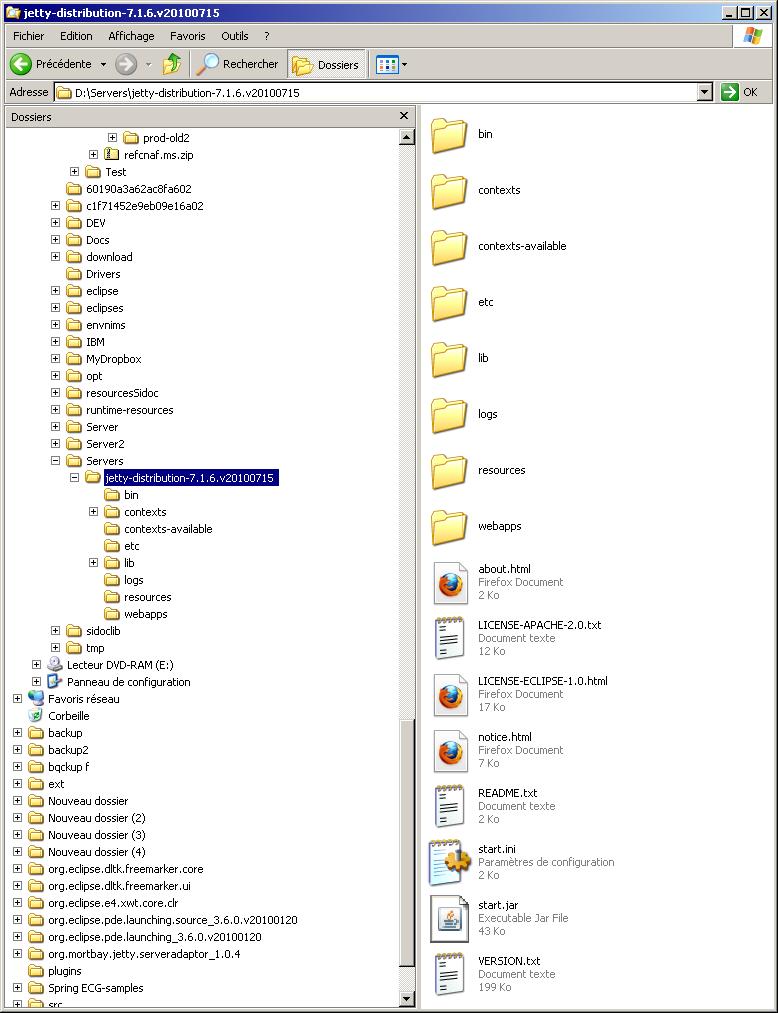
- When the download completes, click the newly enabled Finish button. You now have a D:\Server\jetty-distribution-7.2.x directory that contains the start.jar...from Jetty 7 :
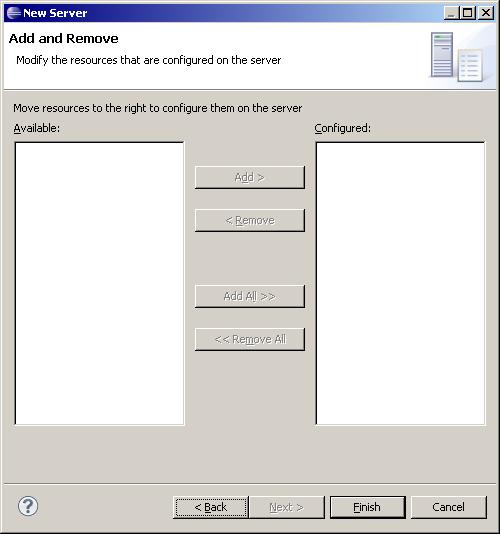
Click Next. The Add and Remove dialog boxopens.
Here you can select an existing Dynamic Web project from your workspace. In this example, there are no WTP Dynamic WebProjects.
Click Finish.
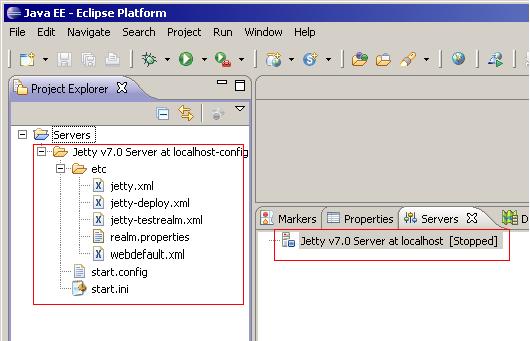
- A Server Project is created in the workspace
- if you go to WTP Server View , you see the option to launch Jetty v7.0 Server at localhost, which you can use to start/stop/debug the installed Jetty server.
The Servers folder includes the Jetty v7.0 Server at localhost-config folder, which contains:
- start.ini from the Jetty install (D:\Servers\jetty-distribution-7.2.x)
- start.config from the JAR start.jar from the Jetty install. Notice that Server/start.config is not the same as Jetty install/start.jar. Jetty Home is not the Jetty Install server but a WTP folder (created in the .metadata of your workspace).
- the jetty*.xml files, which are declared in the original start.ini. Jetty*.xml files are preprocessed too to transform <Property to <SystemProperty.
- webdefault.xml is modified to avoid locking HTML files under Windows when Jetty is started and HTML files are modified (published) with the following option:
  <init-param>
    <param-name>useFileMappedBuffer</param-name>
    <param-value>false</param-value>
  </init-param>
When Jetty server is called it uses:
- -Djetty.home : which is the WTP folder.
- -Dinstall.jetty.home : which is the Jetty install folder.

