Notice: this Wiki will be going read only early in 2024 and edits will no longer be possible. Please see: https://gitlab.eclipse.org/eclipsefdn/helpdesk/-/wikis/Wiki-shutdown-plan for the plan.
JSDT/Setup WTP Dev Env
This article explains how to prepare the IDE and create a target platform for the development of JSDT. This setup works for any subproject of the WebTools Platform (WTP), like Java EE Tools, EJB Tools, Dali JPA tools, Source Editing, WebServices tool, etc.
Find the Integration Build Page
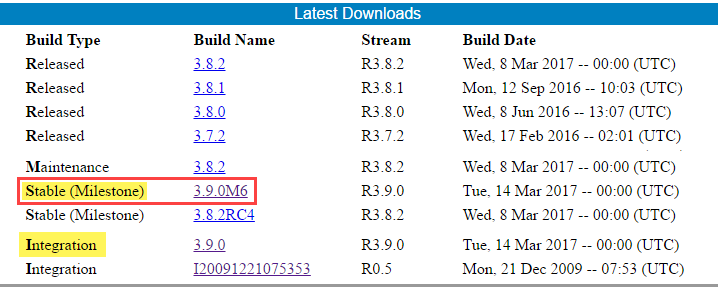
Start from the Eclipse Web Tools Platform (WTP) Downloads page, go to the latest downloads section, and find the link to the Latest Milestone (or Integration if you need the latest features).
Open the latest Milestone (or Integration) build page, and go to the prerequisites section. The prerequisites are references to archives needed to create a *target platform* and to prepare the *development environment* for the WTP subprojects.
The Prerequisites section is split in two parts. The upper part contains the links to the packages needed to build the Target Platform. The bottom part, contains the link to plug-ins to add to the development environment, and the link to the orbit repositories containing some third-party bundles required in the target platform.
Prepare Development Environment
Download The Eclipse IDE for RCP and RAP developers. Unzip the archives *eclipse-test-framework-4.7M5.zip* and *org.eclipse.releng.tools-4.7M5.zip*, then install the local update site contents via menu Help > Install new Software.
Optionally, as you will be working with Eclipse Plug-ins, you could also install the E4 Spies.
Prepare Target Platform
The target platform is the set of plugins needed to run the project. To build a target platform that works for JSDT and all the WTP subprojects, we unzip the downloaded eclipse, and we add all the zips in the upper part of the prerequisites section.
The integration build pages are updated manually on the build date, and are not automated. Often happens that the links are not working, and in this case is your responsibility to find the equivalent archive, to replace the needed ones.
For example, at the time of writing, several links were not working, and I ended up downloading the following list of equivalent archives:
- eclipse-SDK-4.7M5-win32-x86_64.zip - emf-xsd-SDK-2.13.0M5.zip - GEF3-Update-5.0.0.zip - dtp-repository-1.14.0.201701131441.zip - emf-transaction-runtime-1.10.0.zip - emf-validation-runtime-1.10.0.zip - org.eclipse.graphiti.site_0.14.0M3.201610311154.zip
Once you downloaded all the packages, unzip *eclipse-SDK-xxx.zip* and launch it. This instance of Eclipse will be our *Target Platform*, where we will install all the prerequisites.
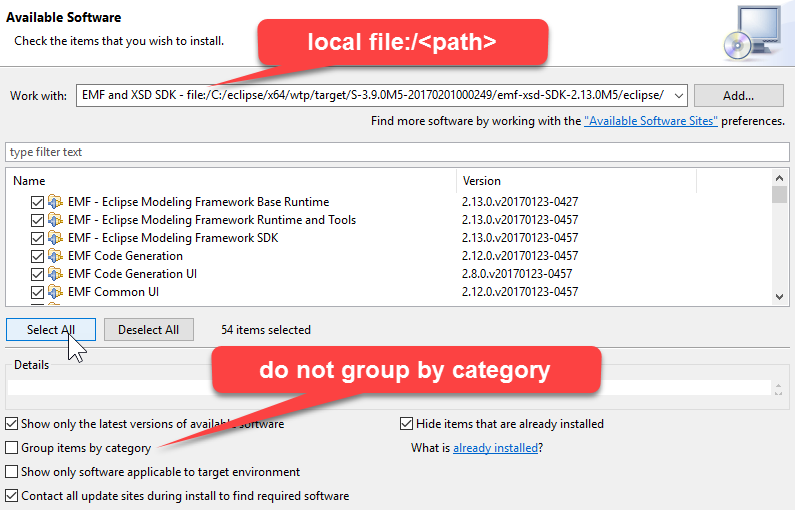
Unzip all the remaining archives, each one in a separate folder, then install the prerequisites via menu: *Help > Install New Software*.
In the *Install* _Available Software_ wizard, uncheck the "Group items by category", and for each unzipped archive, add the local path in the *Work with:* field.
After we installed all the prerequisites, this instance of Eclipse will be our Target Platform.
Keep in mind that this instance of Eclipse is not for development, but it will be the Target Platform. Now we will install all the prerequisites in this instance of Eclipse.


