Notice: this Wiki will be going read only early in 2024 and edits will no longer be possible. Please see: https://gitlab.eclipse.org/eclipsefdn/helpdesk/-/wikis/Wiki-shutdown-plan for the plan.
Difference between revisions of "HOWTO: Shared Code Plugin"
(→Step 2) |
|||
| Line 24: | Line 24: | ||
# For this demo, it's necessary to use two or more Eclipse instances. I will use only two Eclipse instance(Itacare and Trancoso). | # For this demo, it's necessary to use two or more Eclipse instances. I will use only two Eclipse instance(Itacare and Trancoso). | ||
# Make sure to use different workspaces, because this demo is on the same machine. | # Make sure to use different workspaces, because this demo is on the same machine. | ||
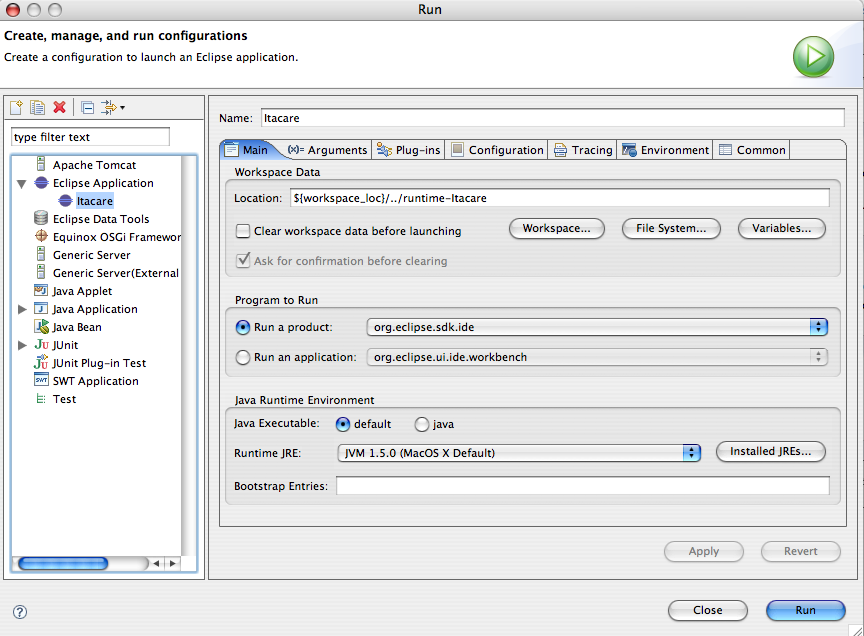
| − | Click on the Run->Run, change the launcher name to "Itacare" | + | * Click on the Run->Run, change the launcher name to "Itacare" |
[[Image:Itacare.png]] | [[Image:Itacare.png]] | ||
| − | Click on the Run->Run, change the launcher name to "Trancoso" | + | |
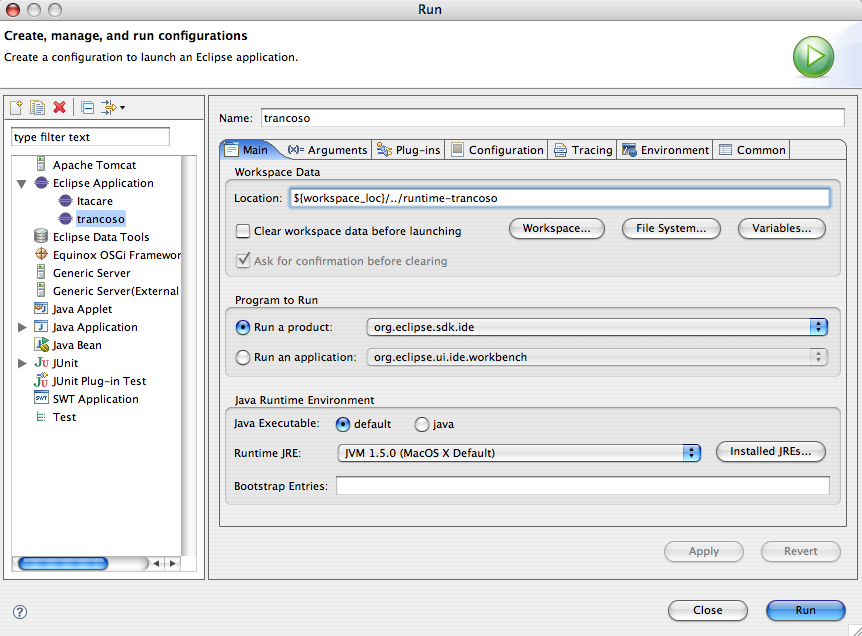
| + | * Click on the Run->Run, change the launcher name to "Trancoso" | ||
[[Image:Trancoso.png]] | [[Image:Trancoso.png]] | ||
| − | Adjust workspace data as necessary. You need to setup different "Location" to each Eclipse instance, and each instance needs to point to the same ECF server. | + | |
| + | * Adjust workspace data as necessary. You need to setup different "Location" to each Eclipse instance, and each instance needs to point to the same ECF server. | ||
===Step 3=== | ===Step 3=== | ||
Revision as of 14:33, 7 July 2006
Contents
Installation and Running of the SCP
This is a description of how to install and run the Shared Code plug'in. It should guide you to having a working SCP demo in minutes.
Steps
Step 0
Prerequisites:
- Eclipse 3.1 or higher
- ECF 0.8 or higher
After installing Eclipse and ECF, verify that they are all available in your Eclipse environment.
Step 1
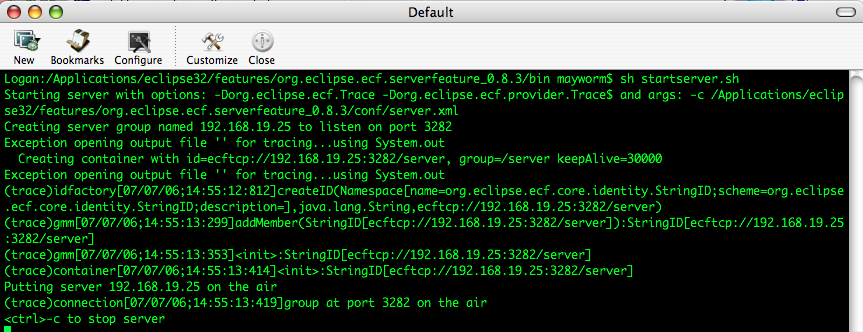
Starting ECF Local Server.
- Start a shell.
- CD to the Eclipse features directory.
- CD to org.eclipse.ecf.serverfeature_X.X.X\bin directory (X.X.X is the ecf version number).
- Run startserver.sh for OS X/Linux
- The default settings are fine for now.
Step 2
- For this demo, it's necessary to use two or more Eclipse instances. I will use only two Eclipse instance(Itacare and Trancoso).
- Make sure to use different workspaces, because this demo is on the same machine.
- Click on the Run->Run, change the launcher name to "Itacare"
- Click on the Run->Run, change the launcher name to "Trancoso"
- Adjust workspace data as necessary. You need to setup different "Location" to each Eclipse instance, and each instance needs to point to the same ECF server.
Step 3
Connect SCP to ECF Local Server
- In the Itacare launched workbench, click on the
 in toolbar
 - In the Trancoso launched workbench, click on the
 in toolbar


