Notice: this Wiki will be going read only early in 2024 and edits will no longer be possible. Please see: https://gitlab.eclipse.org/eclipsefdn/helpdesk/-/wikis/Wiki-shutdown-plan for the plan.
Difference between revisions of "Graphical Shared-Editor Example Application"
(→How to Run) |
|||
| Line 11: | Line 11: | ||
[[Image:gefeditor.png]] | [[Image:gefeditor.png]] | ||
| − | ==How to Run== | + | ==How to Run Like Above== |
| − | + | # Run two Eclipse clients in addition to your workspace (you can use the launch configs added by plugins in workspace: GEF Editor 1, GEF Editor 2, GEF Editor 3 | |
| − | + | # For each client, create the same project (e.g. 'foo') in that client's workspace. | |
| − | + | # For each client, add the "Communications" commands to the current perspective via Window->Customize Perspective->Commands (tab)->Communications (check box) | |
| − | + | # For each client, connect to default collaboration server ecftcp://ecf.eclipse.org:3282/server | |
| − | + | # For each client, choose File->New->Other...->ECF Graphshare Examples->Shared GEF Diagram. Put the new file in the 'foo' project (i.e. the one created above), and call it the same name (e.g. my_new.diagram). It's very important that the file have the same project name and same file name as this path is the unique identifier. | |
| − | + | # You should be able to use the shared editor as per the picture above. | |
Revision as of 17:54, 18 September 2007
Required Elements
- Eclipse 3.3 (or 3.4M1)
- ECF 1.1
- EMF 2.3+
- GEF 3.3+
- Plugins from gefeditor project set file (save this project set file and import plugins into workspace)
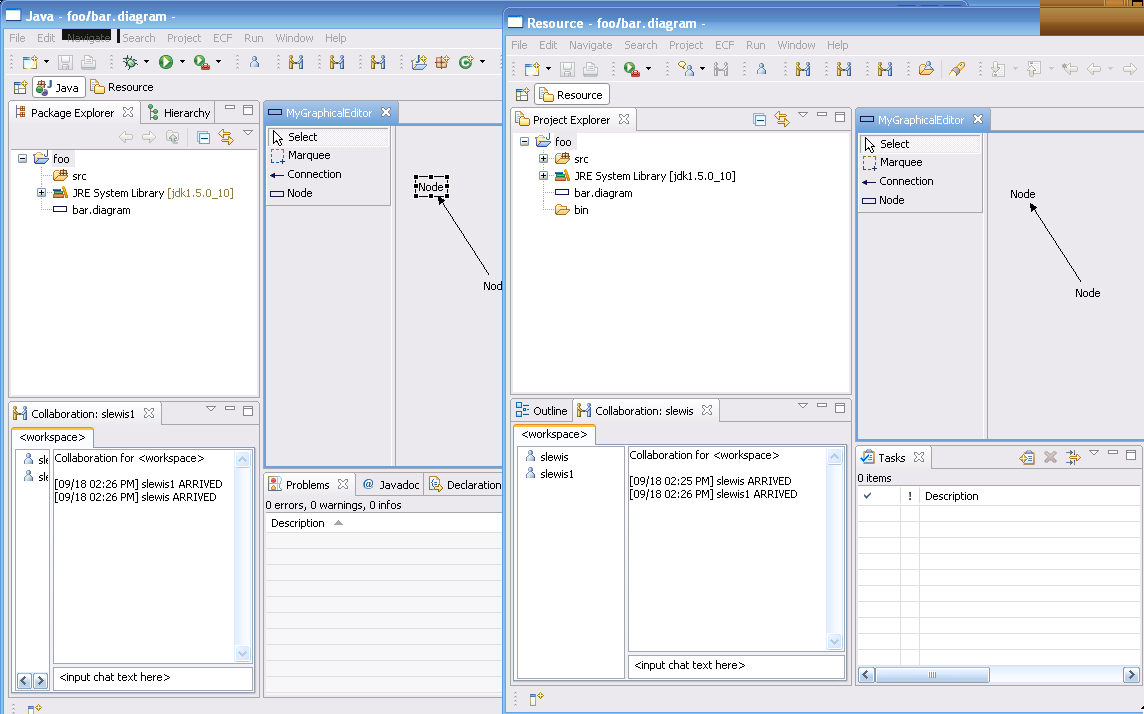
Two clients editing with simple node editor
How to Run Like Above
- Run two Eclipse clients in addition to your workspace (you can use the launch configs added by plugins in workspace: GEF Editor 1, GEF Editor 2, GEF Editor 3
- For each client, create the same project (e.g. 'foo') in that client's workspace.
- For each client, add the "Communications" commands to the current perspective via Window->Customize Perspective->Commands (tab)->Communications (check box)
- For each client, connect to default collaboration server ecftcp://ecf.eclipse.org:3282/server
- For each client, choose File->New->Other...->ECF Graphshare Examples->Shared GEF Diagram. Put the new file in the 'foo' project (i.e. the one created above), and call it the same name (e.g. my_new.diagram). It's very important that the file have the same project name and same file name as this path is the unique identifier.
- You should be able to use the shared editor as per the picture above.

