Notice: this Wiki will be going read only early in 2024 and edits will no longer be possible. Please see: https://gitlab.eclipse.org/eclipsefdn/helpdesk/-/wikis/Wiki-shutdown-plan for the plan.
EclipseLink/Development/Testing/MOXy
Contents
Quick Start Guide for MOXy Eclipse Development
In this quick quide we will create Eclipse workspace and run one JUnit test within Eclipse IDE.
Prerequisites: JDK 1.6+, Eclipse (tested on Eclipse Luna), git 1.7+
1. clone repository
git clone http://git.eclipse.org/gitroot/eclipselink/eclipselink.runtime.git
Directory eclipselink.runtime will be created. This directory is our ECLIPSELINK_HOME.
2. start eclipse
3. import existing projects from ECLIPSELINK_HOME
File -> Import -> Existing Projects into Workspace -> Next -> Select root directory ... Browse to ECLIPSELINK_HOME
Deselect All and Check the following projects:
- eclipselink.moxy.test
- org.eclipse.persistence.core
- org.eclipse.persistence.moxy
- org.eclipse.persistence.moxy.dynamic
- org.eclipse.persistence.nosql
- org.eclipse.persistence.jpa.jpql
Click on Finish.
Now you have imported minimal set of projects to do some MOXy development. But there is still a lot of red errors in Problems view.
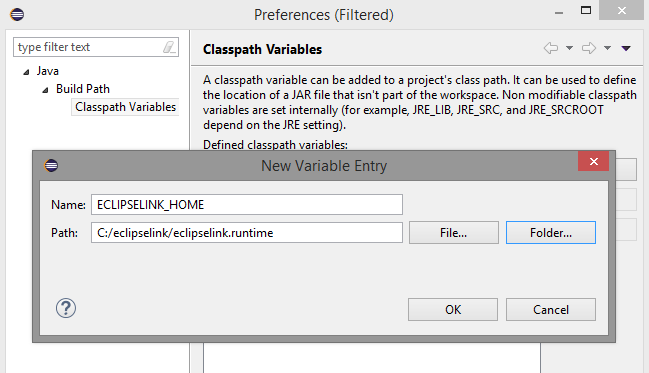
4. set ECLIPSELINK_HOME classpath variable
It should look similar to the following screenshot.
4.1 JMockit dependency
Create directory to store exernal libraries which are not stored in EclipseLink repository.
Add jmockit-1.10.jar and jmockit-1.10-sources.jar to this directory. You can download these jars from maven.
http://central.maven.org/maven2/org/jmockit/jmockit/1.10/jmockit-1.10.jar
http://central.maven.org/maven2/org/jmockit/jmockit/1.10/jmockit-1.10-sources.jar
Set EXTENSION_LIB_EXTERNAL classpath variable (similar to point 4).
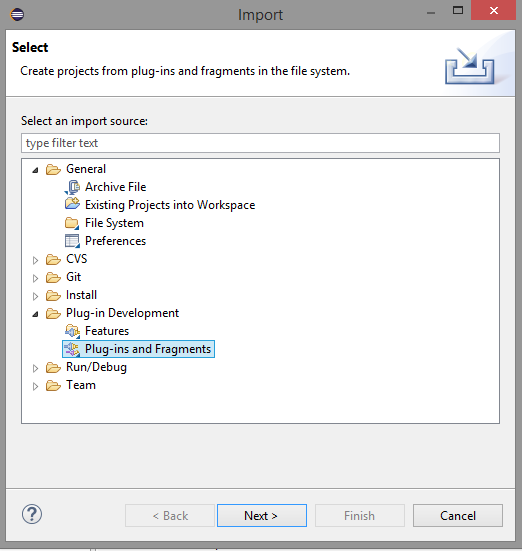
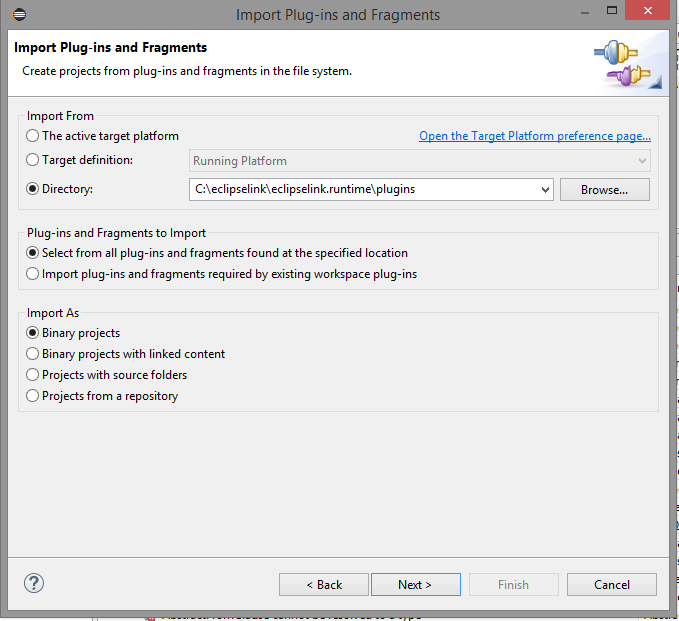
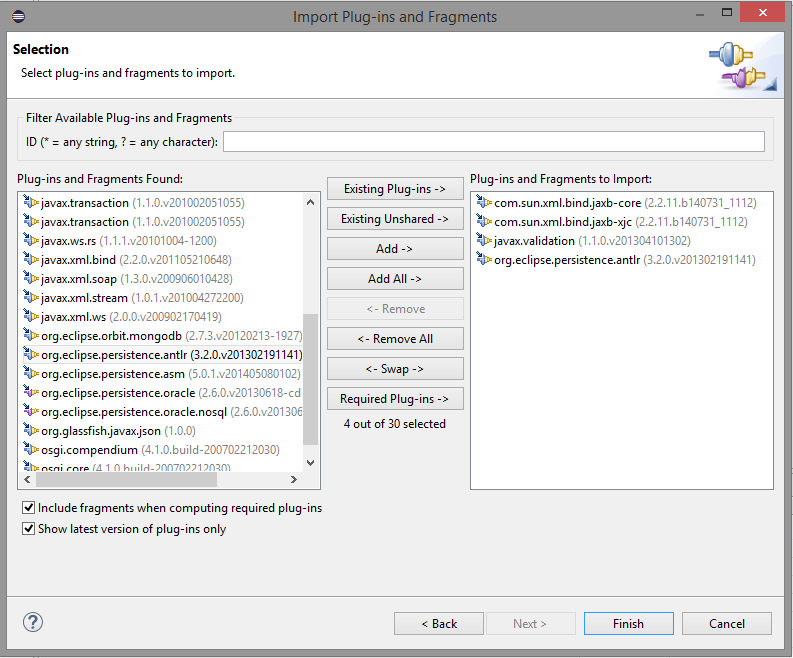
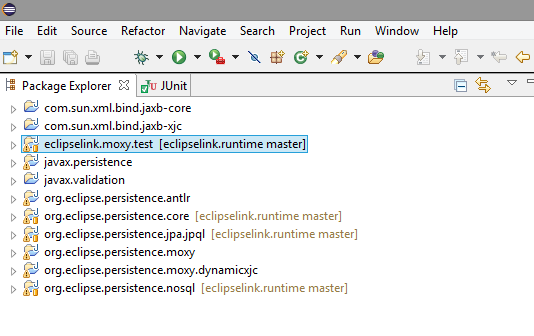
5. import plugins from ECLIPSELINK_HOME/plugins directory
- com.sun.xml.bind.jaxb-core
- com.sun.xml.bind.jaxb-xjc
- javax.validation
- org.eclipse.persistence.antlr
Click on Finish.
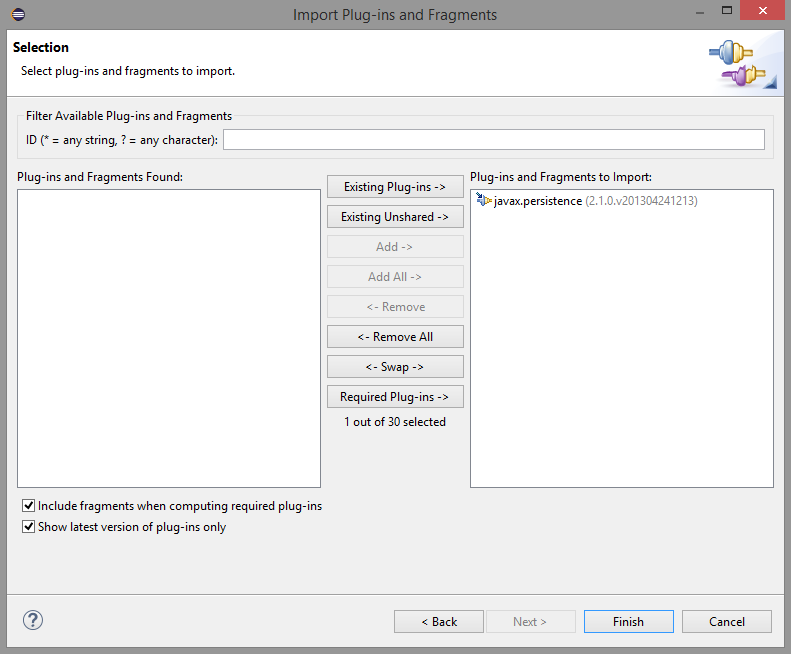
6. Import javax.persistence plugin from ECLIPSELINK_HOME/jpa/plugins directory
Click on Finish.
7. clean all build
Project -> Clean -> Clean All -> OK
Now you should see no errors in Problems view.
8. Run JUnit test from within Eclipse IDE
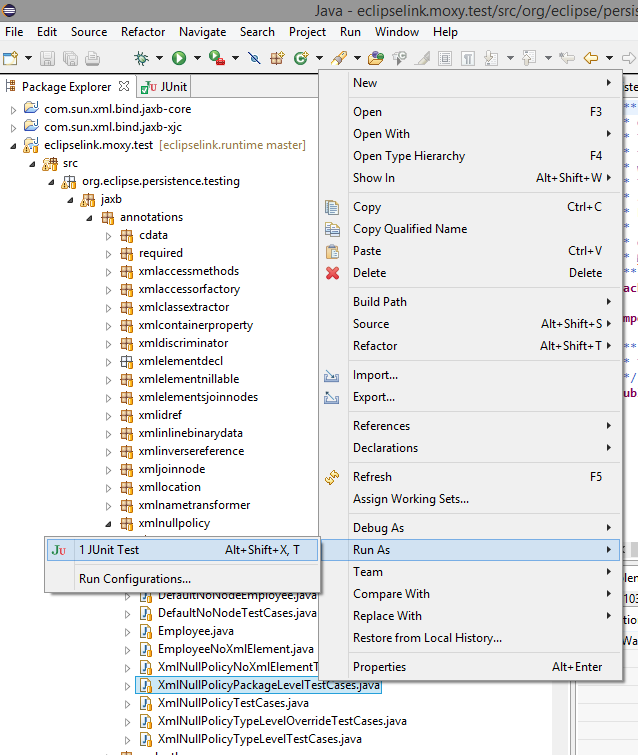
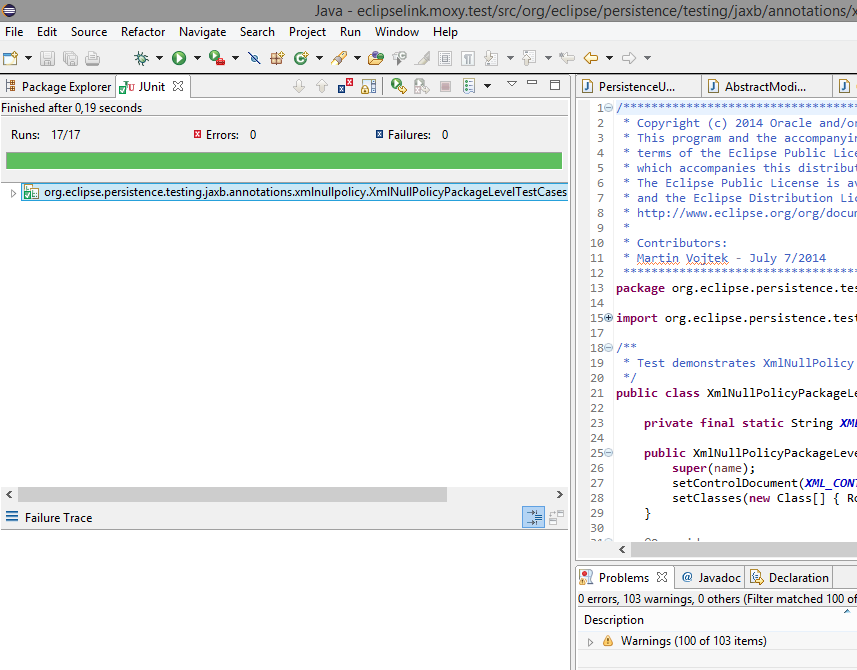
Go to o.e.p.testing.jaxb.annotations.xmlnullpolicy.XmlNullPolicyPackageLevelTestCases.java and run this JUnit TestCase.
And that's all.
Building & Running MOXy Unit Tests
There are two scenarios discussed on this page describing how to run the MOXy unit tests. The first scenario deals with the case where a user checks out the MOXy (and other required) Eclipse projects from the Eclipse repository and wishes to build the source and run the unit tests from that context. The second scenario deals with the case where a user wishes to build the source and run the unit tests within a working copy of the Eclipse repository. Ant 1.7 or greater is recommended when using EclipseLink's Ant build files.
Building & Running within an Eclipse Workspace
- Building & running the MOXy test suites
- There is an ANT build script and properties file in the eclipselink.moxy.test project folder, named build.xml and build.properties respectively. The default target (test) will compile all required source, then clean and compile the MOXy test source, then run the unit tests. Simply type "ant" in the eclipselink.moxy.test project folder to compile and run the MOXy unit tests.
- The MOXy tests consist of OXM and JAXB test suites. The OXM tests are run in four different modes:
- DOM
- SAX
- Deployment XML
- Document Preservation
- The JAXB and OXM tests can be run separately:
- 'test.jaxb' - this target will compile and run the JAXB tests
- 'test.oxm' - this target will compile and run the OXM tests
- The results of the tests are written to two separate .html files: the OXM test results are written to eclipselink.moxy.test/reports/oxm/junit-noframes.html and the JAXB results are written to eclipselink.moxy.test/reports/jaxb/junit-noframes.html.
- Required projects:
- eclipselink.core
- eclipselink.core.lib
- eclipselink.moxy
- eclipselink.moxy.lib
- Additional libraries:
- junit.jar - the "junit.lib" property in build.properties must be set to point to a version of junit.jar
Building & Running within a Subversion Working Copy
In the root folder of your working copy (a.k.a. the Eclipse repository trunk) there is a build.xml file and a build.properties file. This single build script will allow you to build the EclipseLink source, as well as run a number of the EclipseLink unit tests against this source.
- Building EclipseLink source
- The default target (all) will clean and compile all of the EclipseLink source (including MOXy), then add the compiled classes to the eclipselink.jar (which resides in the trunk as well). Simply type "ant" in the working copy root folder to compile and JAR EclipseLink. This JAR is required by the MOXy tests.
- Additional libraries:
- oracle.extensions.depend.dir - this property (in build.properties) should point to a folder that contains the following JAR files:
- xdb.jar
- aqapi.jar
- xmlparserv2.jar
- ojdbc14dms_10.jar
- sdoapi.jar
- oracle.extensions.depend.dir - this property (in build.properties) should point to a folder that contains the following JAR files:
- Building & running the MOXy test suites
- The MOXy tests consist of OXM and JAXB test suites. The OXM tests are run in four different modes:
- DOM
- SAX
- Deployment XML
- Document Preservation
- There are three different MOXy test targets in the root build.xml file:
- 'test.moxy' - runs the MOXy test suites (both JAXB and OXM suites)
- 'test.jaxb' - runs only the JAXB suite
- 'test.oxm' - runs only the OXM test suite
- Simply type "ant test.xxxx" in the root folder of your working copy to run the tests
- The results of the tests are written out to .html files: the OXM test results are written to <working copy root>/moxy/eclipselink.moxy.test/reports/oxm/junit-noframes.html and the JAXB results are written to <working copy root>/moxy/eclipselink.moxy.test/reports/jaxb/junit-noframes.html.
- Additional libraries:
- junit.jar - the "junit.lib" property in build.properties must be set to point to a version of junit.jar
- tools.jar - the "tools.lib" property in build.properties must be set to point to a version of tools.jar
- The MOXy tests consist of OXM and JAXB test suites. The OXM tests are run in four different modes:

