Notice: this Wiki will be going read only early in 2024 and edits will no longer be possible. Please see: https://gitlab.eclipse.org/eclipsefdn/helpdesk/-/wikis/Wiki-shutdown-plan for the plan.
Creating Custom Form Editors in ICE
Contents
Introduction
ICE has a very carefully constructed architecture for creating and displaying items using forms. Usually an item will be registered through the item builder, and will be constructed in the item methods setUpForm() and setUpFormWithServices(), which tailor the form to the item's specific needs. The item then is displayed using the ICE form editor and the specific widgets that are used for most of the items in ice. These widgets cover almost all cases for what is needed to display items, but sometimes a developer may want to tailor an editor to use specifically for one item or form. This case requieres constructing your own set of custom widgets and registering them as custom widgets in ice's widget factory service. This is a step by step tutorial on how to register a new editor for your items.
Creating the new Bundle
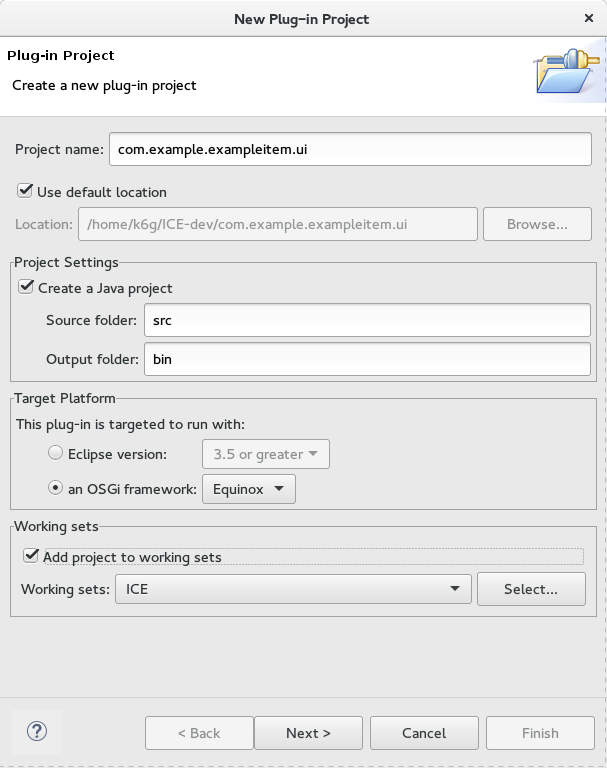
The first step is to create a new bundle or plug in project. Typically it is named after your item's bundle with an added .ui at the end. As an example throughout this tutorial, I will be using ExampleItem as my item, with the name "Example Item". To create a plug in project, simply go to File-> New-> Plug-in Project. The wizard should look like this:
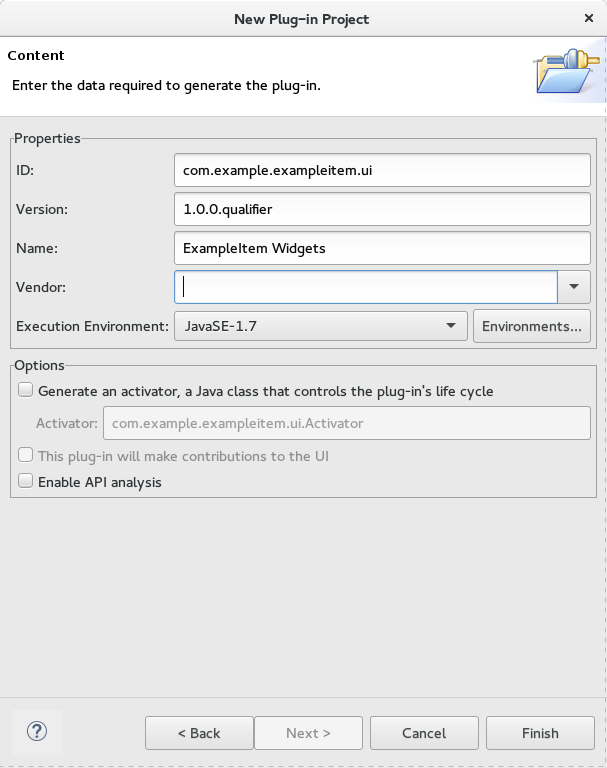
Note that most of this depends on your project specifications, but you should check the 'an OSGi framework' and select Equinox. After the information is filled out click next. Now fill out the ID, Version, Name, and Vendor fields:
Set the execution environment to at least 1.7, and do not create an activator. We do not need one. Once the fields are filled out to your projects needs, click finish and the new bundle will appear in your workspace, along with the MANIFEST.MF file open, displaying the properties you just set. While here, check both the 'Activate this plug-in when one of its classes is loaded' and 'This plug-in is a singleton' check boxes.
FormWidgetBuilder, FormWidget, and FormEditor
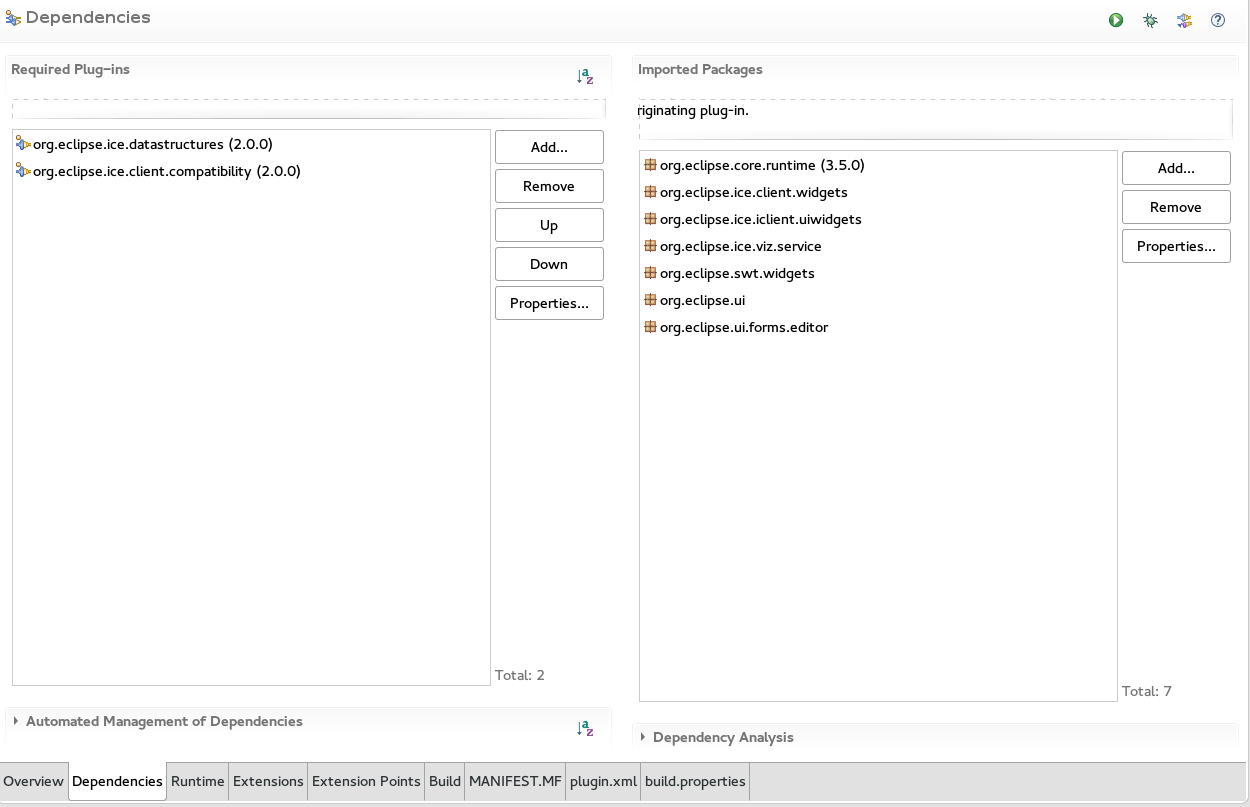
Now you will need to create three classes that are all necessary to have a custom editor. First here is the list of imports that I needed for my MANIFEST.MF file, so that everything you need is already imported into your bundle.
The FormWidgetBuilder
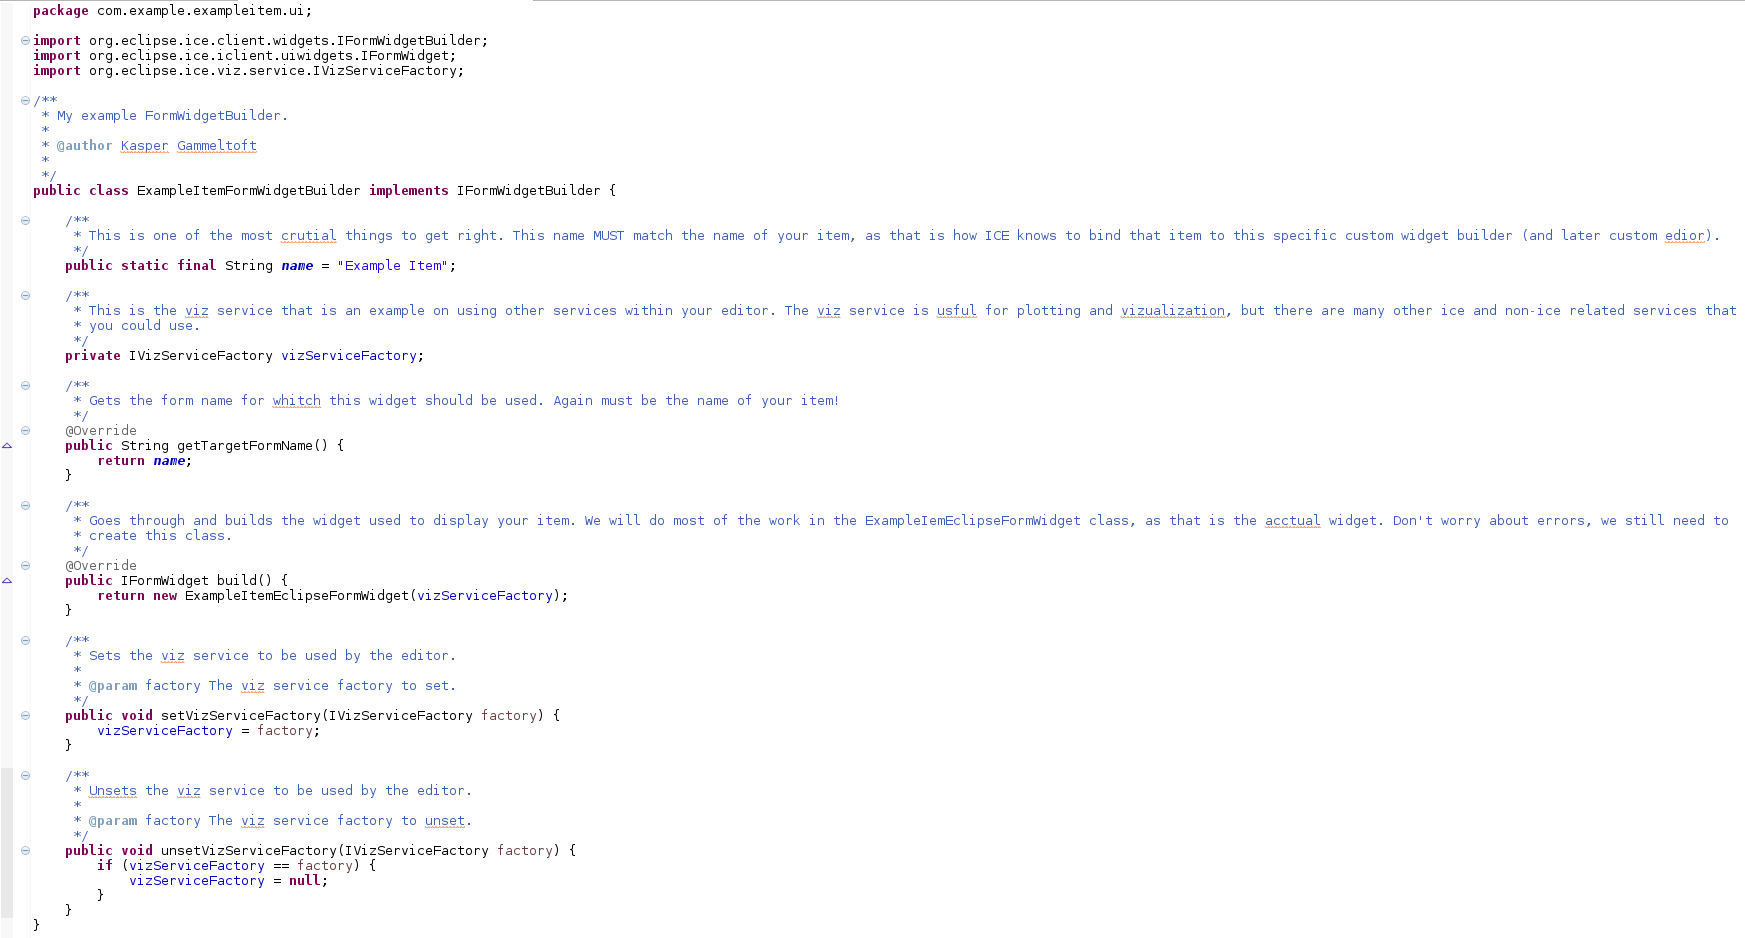
This class needs to implement IFormWidgetBuilder. The typical naming scheme is YourItemFormWidgetBuilder, so I called mine ExampleItemFormWidgetBuilder. Implementing IFormWidgetBuilder is necissary because that enables it to be registered as an OSGi service with eclipse's DS functionality. Put this class in a package that follows the same name as the bundle name, so for me it would be com.example.exampleitem.ui. The IFormWidgetBuilder interface has two methods to implement: getTargetFormName() which returns a String and build() which returns an IFormWidget. Below is my code for ExampleItemFormWidgetBuilder:
It still needs the EclipseFormWidget, but that will come. First we can now crate a plug in component to register this FormWidgetBuilder as an OSGi declarative service. Create a folder in your bundle named OSGI-INF, and right click that to bring up the menu. Select New-> Other or press Ctrl+N with the folder selected. The New Wizard will open. Scroll to the folder called Plug-in Development and select Component Definition.


