Notice: This Wiki is now read only and edits are no longer possible. Please see: https://gitlab.eclipse.org/eclipsefdn/helpdesk/-/wikis/Wiki-shutdown-plan for the plan.
Difference between revisions of "SMILA/Documentation/HowTo/3rd party bundle"
< SMILA | Documentation | HowTo
m |
m |
||
| Line 5: | Line 5: | ||
# Add the third-part bundle to the extension folder at <tt>SMILA.extension/eclipse/plugins</tt>. | # Add the third-part bundle to the extension folder at <tt>SMILA.extension/eclipse/plugins</tt>. | ||
# Restart Eclipse or reload your target defenition (check if the bundle is really activated). | # Restart Eclipse or reload your target defenition (check if the bundle is really activated). | ||
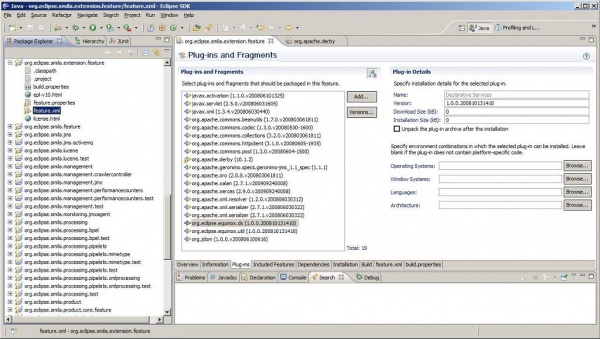
| − | # Include plug-in information into "org.eclipse.smila.extension.feature" | + | # Include plug-in information into "org.eclipse.smila.extension.feature": <br> [[Image:ExtensionFeature.jpg|600 px]] |
| − | + | ||
| − | [[Image:ExtensionFeature.jpg]] | + | |
Latest revision as of 12:25, 25 January 2012
It is easy to add third-party code to SMILA if it is already provided as an OSGi bundle (which is just a Java JAR with some additional entries in the MANIFEST.MF file). Many open source projects provide their libraries this way. Additionally, you can download many libraries from the Eclipse Orbit project.
To add them to SMILA:
- Add the third-part bundle to the extension folder at SMILA.extension/eclipse/plugins.
- Restart Eclipse or reload your target defenition (check if the bundle is really activated).
- Include plug-in information into "org.eclipse.smila.extension.feature":