Notice: this Wiki will be going read only early in 2024 and edits will no longer be possible. Please see: https://gitlab.eclipse.org/eclipsefdn/helpdesk/-/wikis/Wiki-shutdown-plan for the plan.
SensiNact/studio-basic-usage
Studio first start
First of all, launch the Studio by clicking its icon or by using the following command line in a terminal:
sensinact-studio
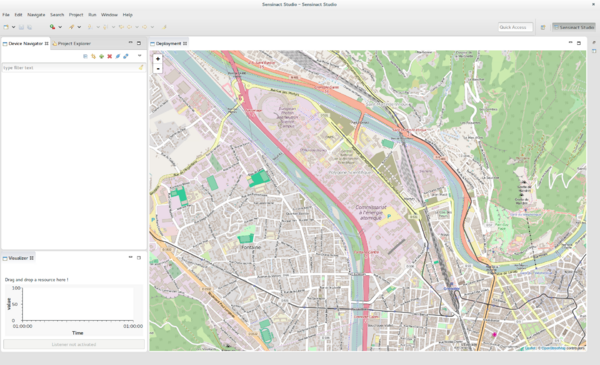
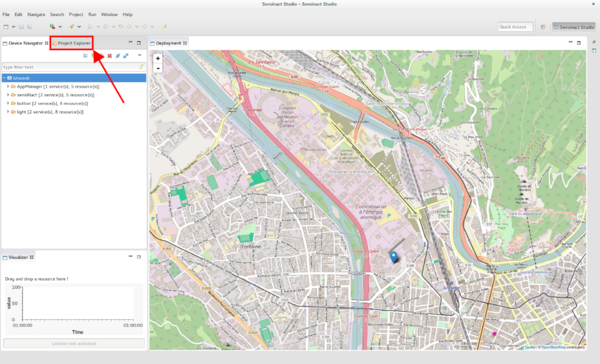
Once the Studio is launched, you should obtain something like this:
On the left, in the Device Navigator view, click on Add Gateway.
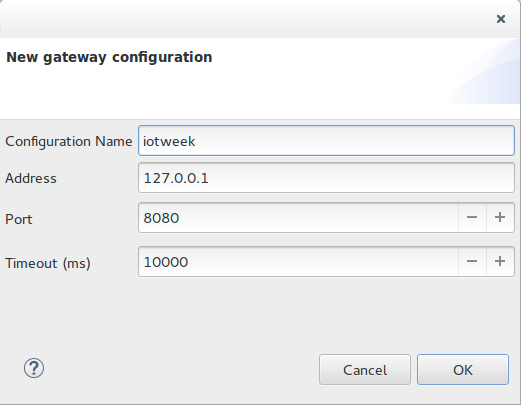
In the new window, provide the name of your choice, the address of the gateway, the port of the gateway and then, click on OK.
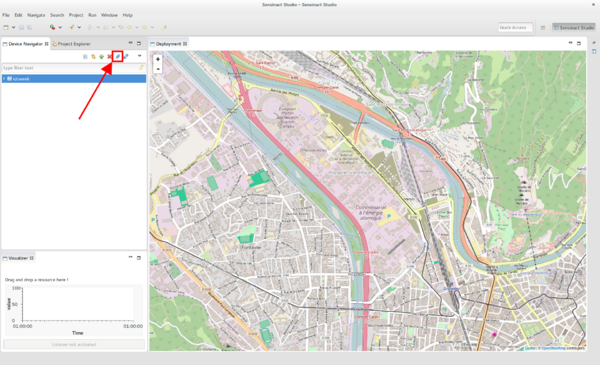
Finally, select the gateway in the Device Navigator view and then click on Connect gateway to connect to the gateway.
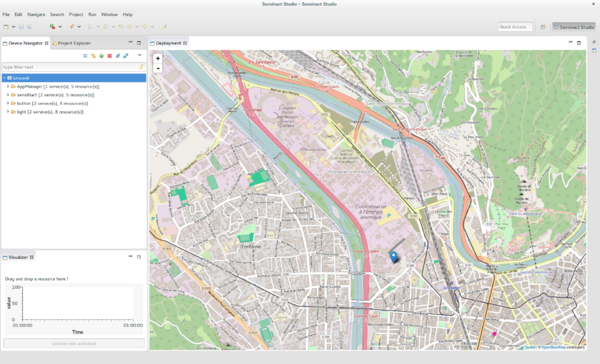
In the Device Navigator view, the gateway should appear and list the available devices connected on the gateway.
Create an application
Once the Studio has been configured, you can create an application. Click on the Project Explorer view on the left side of the Studio.
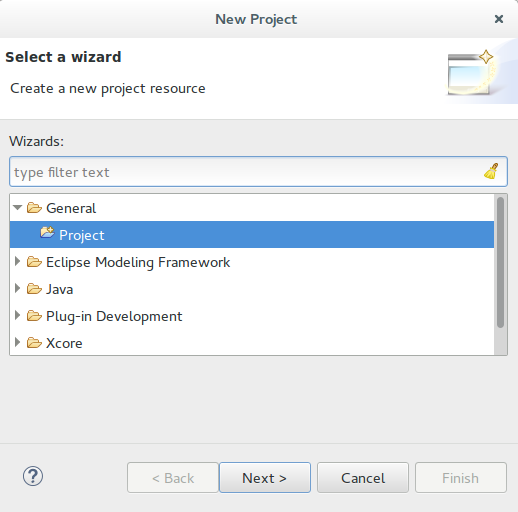
Right click on the window and select the menu New -> Project.... Then create a new project: select General -> Project.
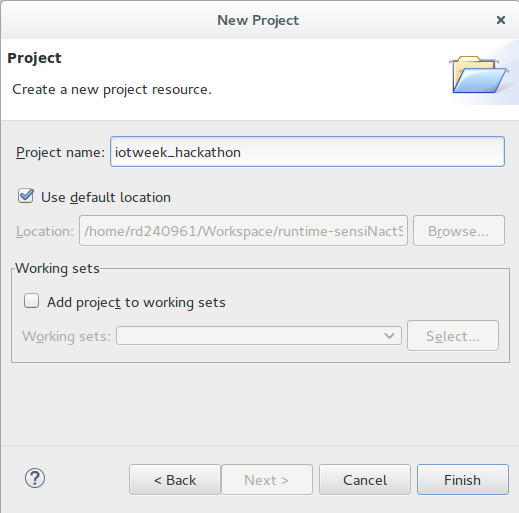
Provide a name for the project (for example: iot_week_belgrad) and click finish.
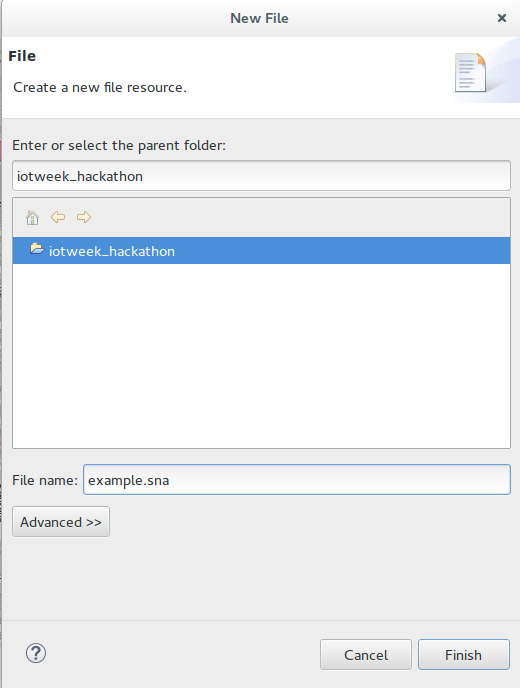
In the newly created project, create a sNa file: right click on the newly created project, then New -> File and finally provide a name for your application (be careful to use an unique name for your application in order to avoid conflict with others applications from others participants). End the name of the file with the extension .sna. Finally click on Finish.
You may have a popup window asking: "Do you want to add the Xtext nature to the project ?". Answer Yes.
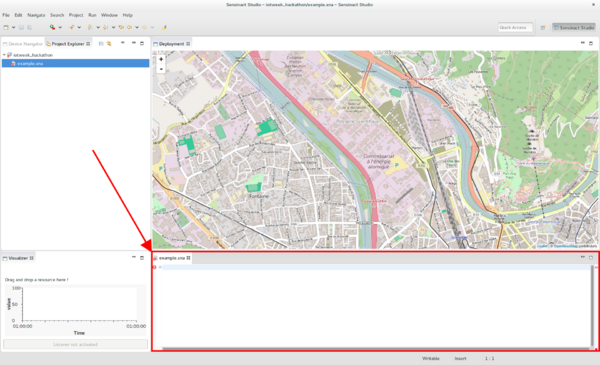
The Studio should have opened a text view, with the name of your file, in the bottom of the main window. You can now write your application.
To ease the development of an application, the Studio provides an auto-completion feature using the Ctrl + Space key combo.
Now, we will explain the structure of an application. A sensiNact application is based on the Event-Condition-Action axiom. First your define the resources you are going to use in your application. To do this, you use the resource keyword followed by a custom name for reusing your resource later in your application. Next, you associate your custom name with the URL of the real resource. For example, you can have something like that:
resource myCustomeName1=[nameOfTheGateway/device/service/resource1]
resource myCustomeName2=[nameOfTheGateway/device/service/resource2]
Next, you define on which event the application will be triggered. You use the on keyword followed by the resource the application will listen for events. You end your sentence by the subscribe() keyword. For example:
on myCustomResource1.subscribe()
Then, you define the condition that will enable to perform the actions. You use the if keyword followed by a condition and ended by the do keyword. For example:
if myCustomName1.get() == true do
You can also use the else if <condition> do or the else do keywords to create more complex applications.
And finally, you perform the action using the act() keyword. You can perform multiple actions in the same condition, simply separate them using a comma.
myCustomName2.act()
Each sNa application ends with the end if keyword. Save your work, your first application has been created.
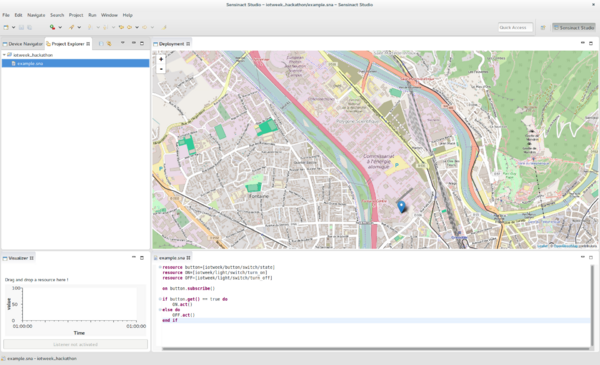
At the end, your sNa application should look like the following example (running on a local gateway):
resource button=[localgateway/button/switch/state]  // The button sensor
resource ON=[localgateway/light/switch/turn_on]     // The ON actuator of the light
resource OFF=[localgateway/light/switch/turn_off]   // The OFF actuator of the light

on button.subscribe()                               // The button that will trigger the application

if button.get() == true do                          // The condition to satisfy to perform the action
    ON.act()                            // Turning on the light
else do
    OFF.act()                          // Turning off the light
end if
This example turns on a light when the button is pressed the first time (returning true value) and switch off the light when the button is pressed a second time (returning false value).
Deploy and start an application
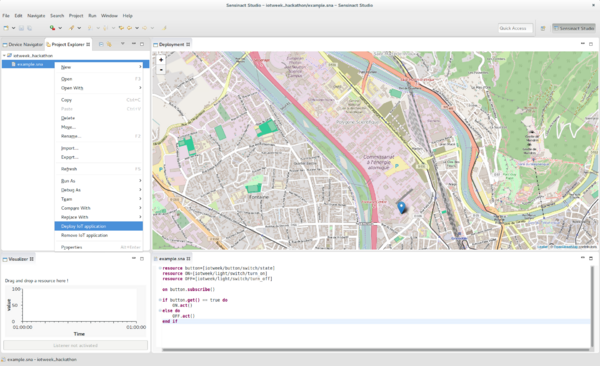
To deploy an application, you just have to be connected to the gateway (follow the Configure Studio section). In the Project Explorer view, right click on the file you just created and fulfilled with your sNa application and select Deploy IoT application.
This will send your application into the gateway and install it. A window should pop, notifying you that the application has been successfully installed.
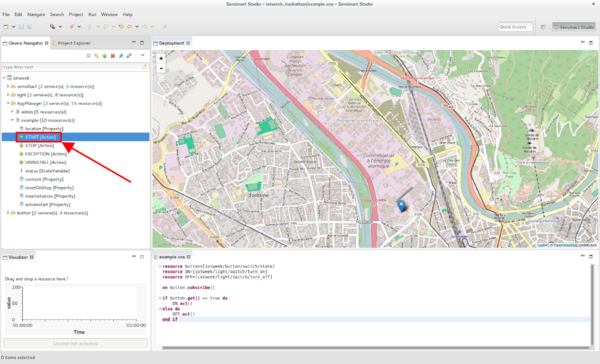
Returns to the Device Navigator view and roll out the AppManager device. Your application should be there. Roll out your application and double click the START button.
Your application is now started, thus when the event is sent, the action is performed.
Enjoy :-)

