Notice: This Wiki is now read only and edits are no longer possible. Please see: https://gitlab.eclipse.org/eclipsefdn/helpdesk/-/wikis/Wiki-shutdown-plan for the plan.
Papyrus/Papyrus Developer Guide/Papyrus With Oomph
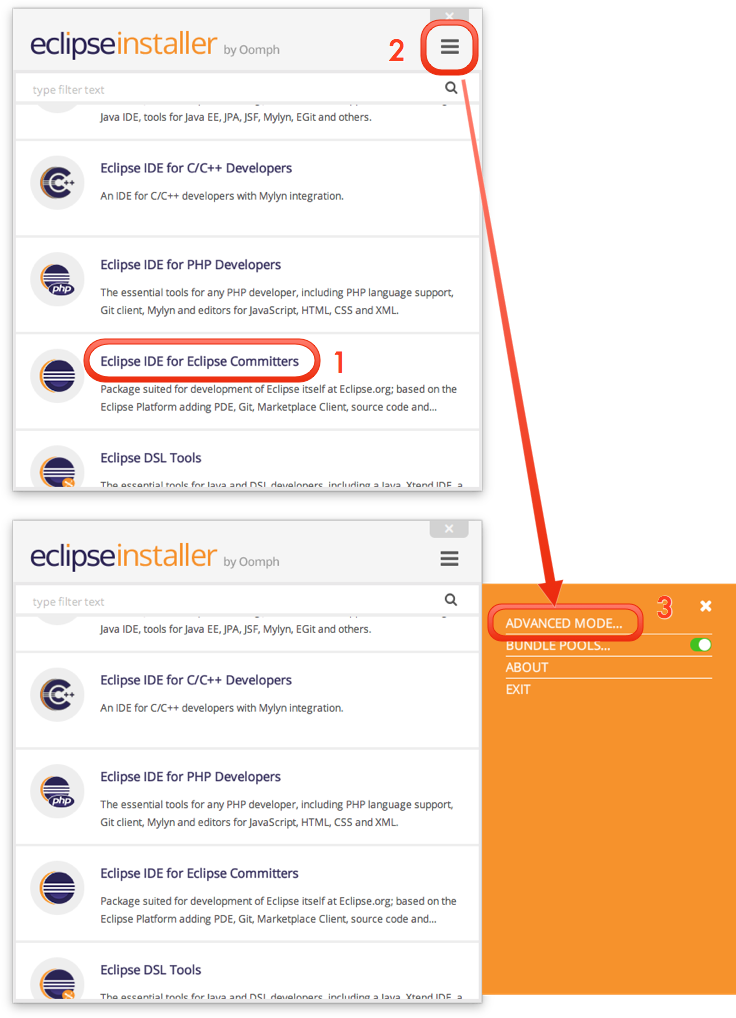
When you first launch the Eclipse Installer, it will show the default "simple mode" installer presentation:
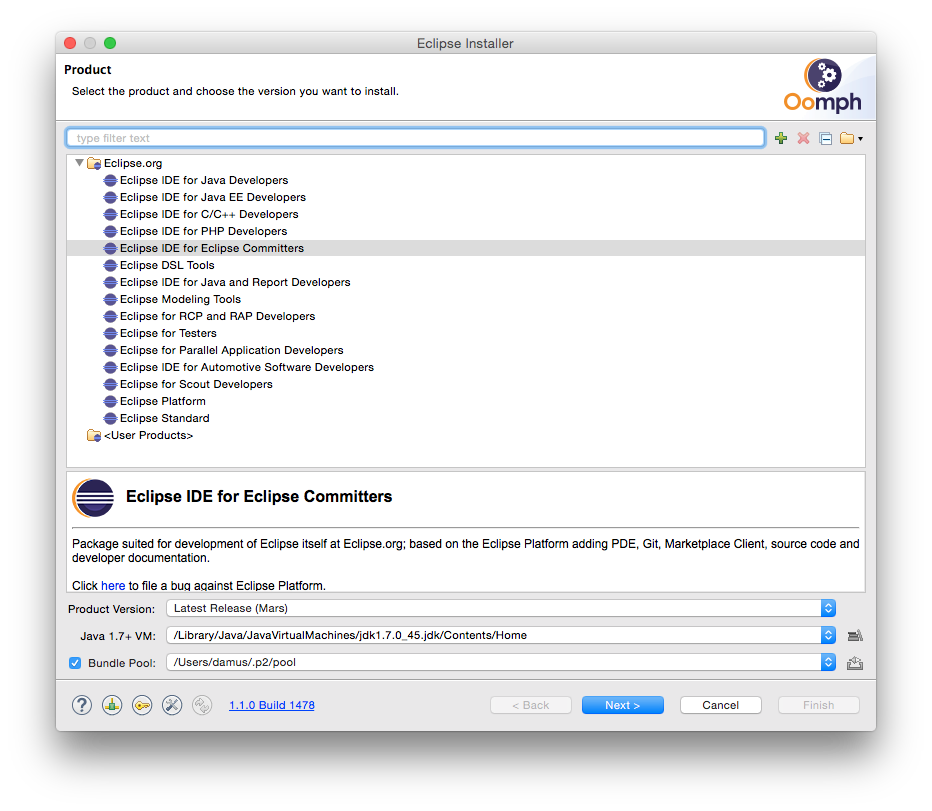
You can choose to proceed from here, picking for example the "Eclipse IDE for Committers" package to install, which is the minimal configuration, and later using Oomph to import the Papyrus sources into the workspace (box 1 in the screenshot). However, you may as well select all of the Papyrus content that you need in your development environment now to set everything up in one go. To do that, switch to the "advanced mode": open the dialog tray by clicking on the button (box 2) and select "Advanced Mode..." (box 3). Now you should see the dialog reconfigured as shown below:
Again, the simplest option is to start with the "Eclipse IDE for Committers" package because the setup model will add everything else you need for working on Papyrus's various code and models.
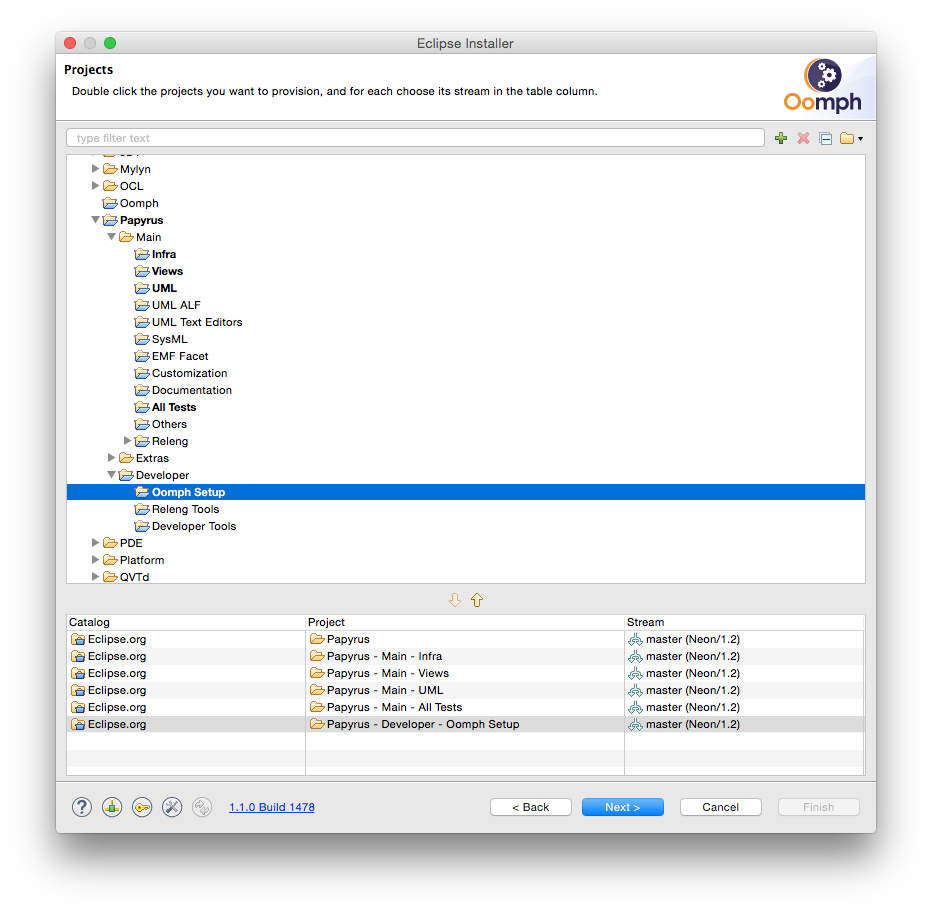
On the second page, pick whatever Papyrus components you need to import into the workspace:
.
If you need to work on and test the Papyrus setup model, itself, then you should also import the "Papyrus / Developer / Oomph Setup" project (selected in the screenshot above) to configure the workbench to load the Papyrus setup model from your Git checkout instead of from the central Git repository via HTTP.
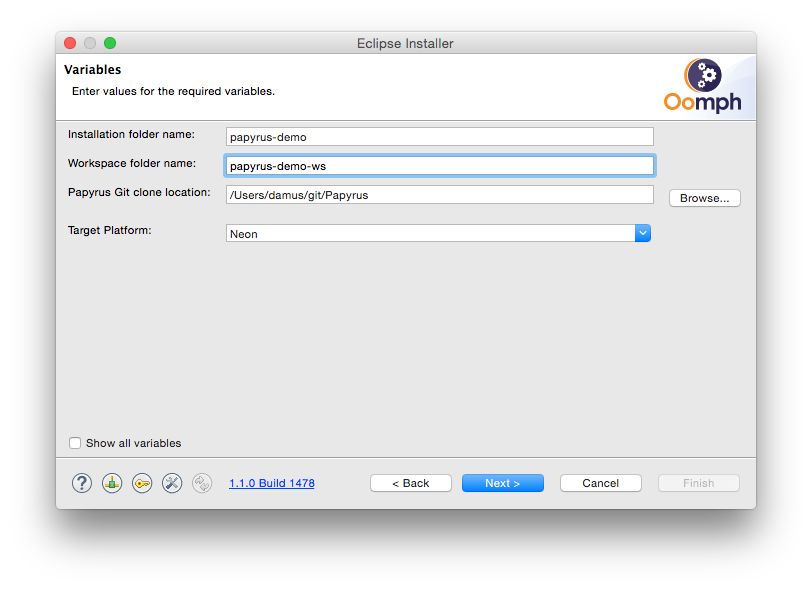
Next, tell Oomph where to check out the Papyrus repository, where to install Eclipse, and where to create the workspace:
Note that exactly how this page looks will depend on the options you choose for how to manage installation and workspace locations, and whether you have previously used Oomph to install other Eclipse instances (I have).
Note also that if you do not see the target platform that you need in the 'Target Platform' pick-list (for example, Neon to start working on the Papyrus Neon branch that is the master at the time of this writing), then you can just type the name into the field.
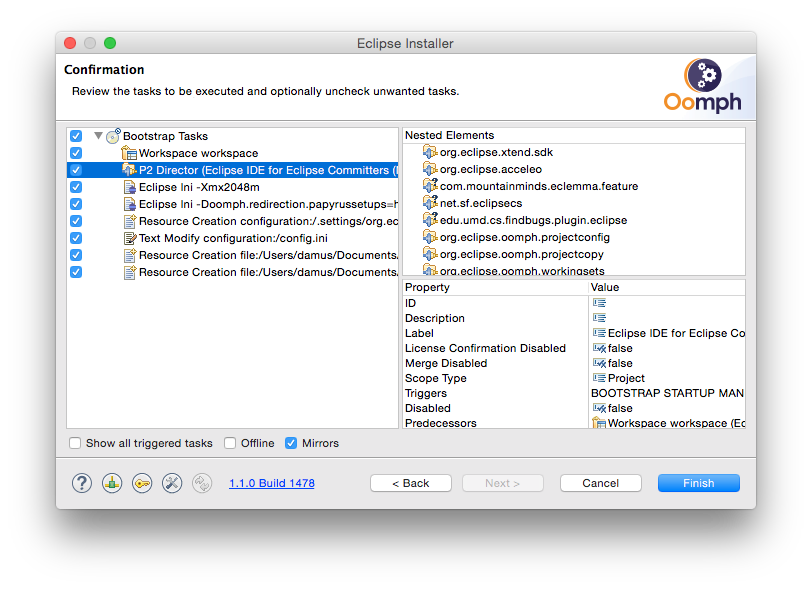
The last page summarizes the steps that Oomph will follow to start the installation:
After the newly installed Eclipse instance starts up, it will complete the setup by performing the rest of the tasks that have to be done in the workspace that didn't exist initially. These include the git checkout, importing projects from the checkout into the workspace, creating working sets, Mylyn queries, and more. Once these steps have completed, you will be ready to start working on the Papyrus code.
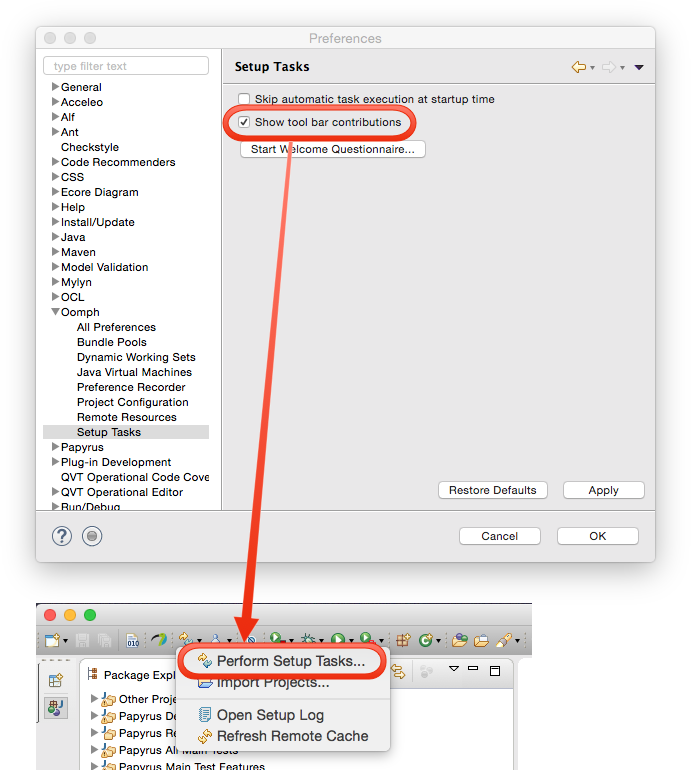
If you used Oomph's "simple mode" to create your Eclipse workspace, or if you need to make changes to what Papyrus bits you have imported (even for setting up the set-up model redirection), you can do this at any time by launching the Oomph installer wizard from within the Eclipse workbench. Note that you will first have to make the Oomph setup actions available in the toolbar be enabling the preference:
This launches essentially the same wizard as the "advanced mode" of the Oomph Installer.

