Notice: This Wiki is now read only and edits are no longer possible. Please see: https://gitlab.eclipse.org/eclipsefdn/helpdesk/-/wikis/Wiki-shutdown-plan for the plan.
Papyrus/Papyrus Developer Guide/Papyrus Git Tutorial
The following tutorial will focus on the main repository but every repository in the papyrus constellation can be found in the Papyrus project developer resources page.
Contents
Retrieve Papyrus code
To retrieve the papyrus code:
- via https : https://git.eclipse.org/r/papyrus/org.eclipse.papyrus.git
- via ssh : ssh://user_id@git.eclipse.org:29418/papyrus/org.eclipse.papyrus.git
You can find a list of all available papyrus repositories here :
Configure access
Via EGit
First, you will have to clone the Git repository.
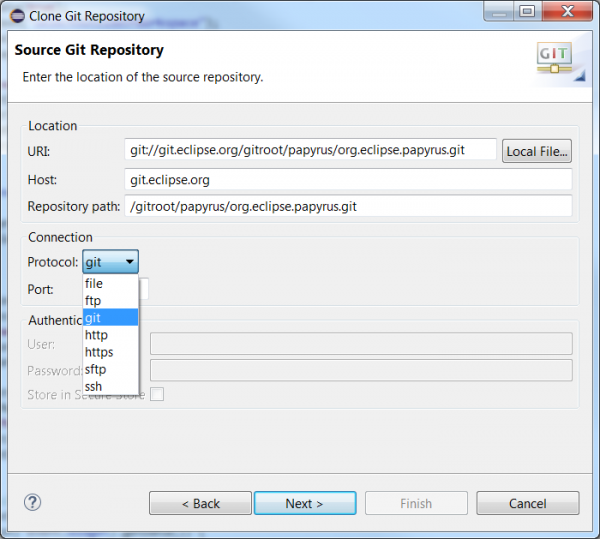
Select the clone by URI.
As you can see, you have access to a number of ways to import the Git repository. Select the way you prefer and enter the corresponding address.
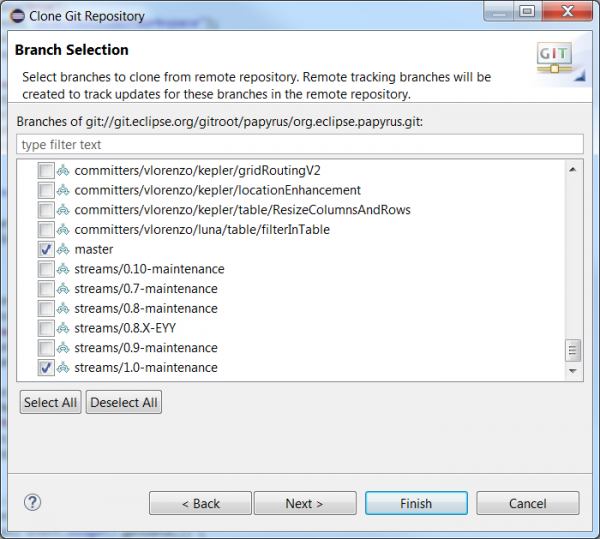
You then have to select the branches you want to import.
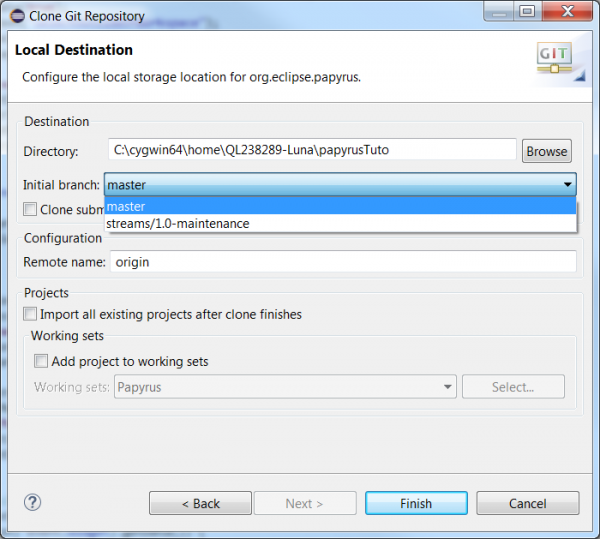
Then, at the moment of the creation, you will be asked which branch you want to be created by default.
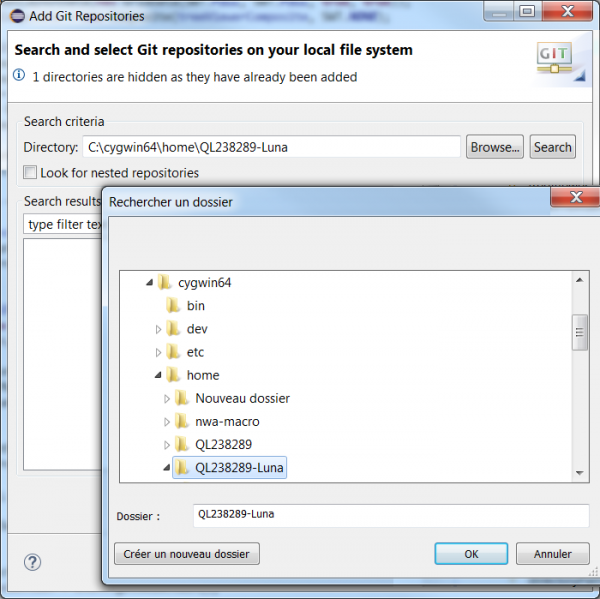
Once you already have a cloned Git repository, you have to add it to your "Git repository" view.
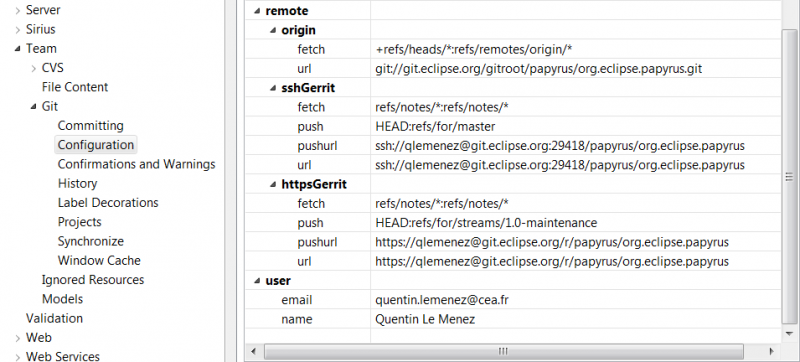
To allow the user to commit anything Git will have to know your id and email. As such you can enter those variables in Preferences>Team>Git>Configuration and add the two entries:
- key: user.name / value: [your name]
- key: user.email / value: [your email]
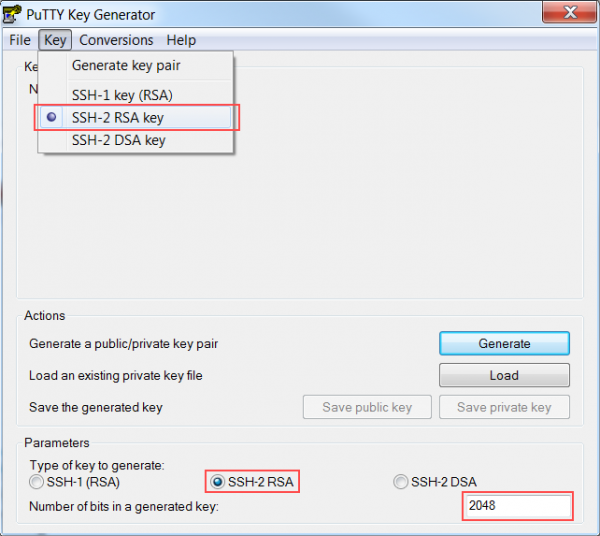
If you do not have an ssh key yet, you can generate one using PuTTYgen ( http://the.earth.li/~sgtatham/putty/latest/x86/puttygen.exe ). Select Key>SSH-2 RSA key in 2048 bits in length and just click generate. It is important to know that the key is generated by the random movements of the mouse inside the window, so don't wait for it to generate itself. then, save both keys in your .ssh folder.
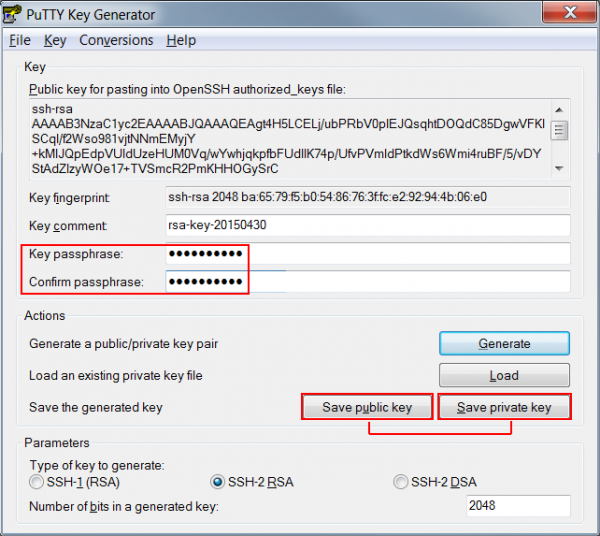
Save your private key and your public key with the corresponding buttons. It is preferable to protect your key by adding a pass-phrase to it that will be asked every time you use it as a precaution. You should get two keys by the time this is finished: xxxx.pub (for your public key) and xxxx (for your private one). PuTTy may name your keys with its owned extensions but ignore it and rename them accordingly.
Via command line
To clone the repository:
- git clone [URI to clone the Git] [Folder in which you want to clone the repository]
For the configuration:
- git config --global user.name "[your name]"
- git config --global user.email "[your email]"
If you want to check your info:
- git config --list
For the ssh key, just type the following command:
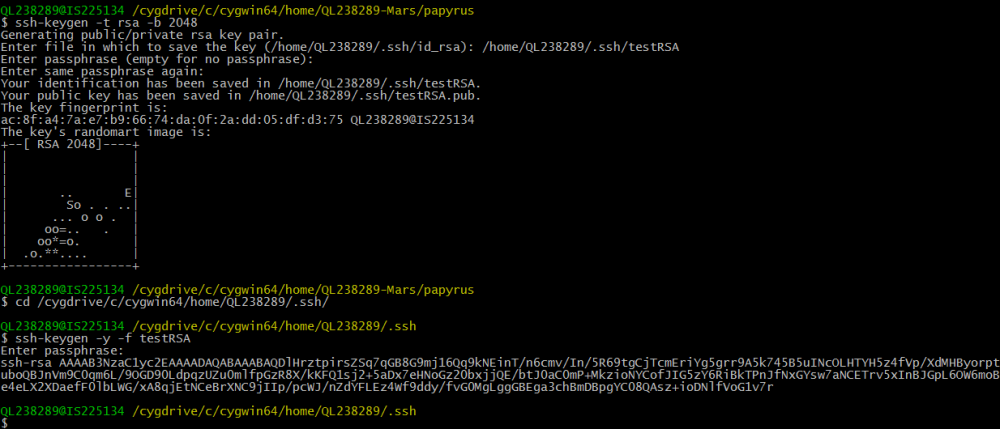
- ssh-keygen -t [your key's type] -b [number of bits in length]
The steps are essentially the same as with PuTTY: generate the key, say where to save it and enter a pass-phrase. You can then test your new pair by entering ssh-keygen -y -f [private key name], you will be prompt for the pass-phrase (if any) and your public key will pop up.
Adding the ssh key
Furthermore your will have to add the ssh key (if you want to commit via ssh) to Preferences>General>Network Connection>SSH2 by setting the path to your .ssh folder and adding the name of your key to the private keys list.
As an example here is what this should look like when viewed inside your eclipse's Preferences page:


