Notice: this Wiki will be going read only early in 2024 and edits will no longer be possible. Please see: https://gitlab.eclipse.org/eclipsefdn/helpdesk/-/wikis/Wiki-shutdown-plan for the plan.
Xcore
{{#eclipseproject:modeling.tmf.xtext}}
Contents
Modeling for Programmers and Programming for Modelers

Xcore is an extended concrete syntax for Ecore that, in combination with Xbase, transforms it into a fully fledged programming language with high quality tools reminiscent of the Java Development Tools. You can use it not only to specify the structure of your model, but also the behavior of your operations and the conversion logic of your data types. It eliminates the dividing line between modeling and programming, combining the advantages of each. All this is supported for both generated and dynamic models.
Getting Started
The first version of Xcore will be part of the Juno release train and is currently available in the Juno p2 repository. To get started, you'll need to install the hardware-appropriate platform version of Eclipse 4.2 or Eclipse 3.8. Once you have that installed and running, you're ready to install Xcore.
- Use "Help → Install New Software..." to bring up the "Install" wizard; the Juno repository should be available in the "Work with" dropdown.
- Select Juno and wait for the content of the wizard to populate.
- Either enter "Xcore" in the filter field or locate "Modeling → EMF - Eclipse Modeling Framework Xcore SDK" in the content and check mark it.
- Drive the wizard to completion.
Xcore and everything it needs will be automatically installed. Of course you'll need to restart Eclipse for the changes to property take effect.
Creating an Xcore Project
Xcore can be used in any properly-configured Java project. There's a convenient wizard for creating an empty pre-configured project.
- Use "File → Project..." and enter "Xcore" in the filter field or locate "Xcore → Xcore Project".
- Use "Next" to advance the "New Project" wizard and enter the name of your project. It's best to use a qualified name that will be appropriate as a plug-in ID and as a prefix for your Java packages, i.e, org.example.library.
- Use "Finish" to complete the wizard.
In your workspace you'll see your new project.

It's a project with a Java, PDE, and Xtext natures that contains the following:
- A "src" folder for your hand written Java code.
- A "src-gen" folder in which your model code will be generated by default.
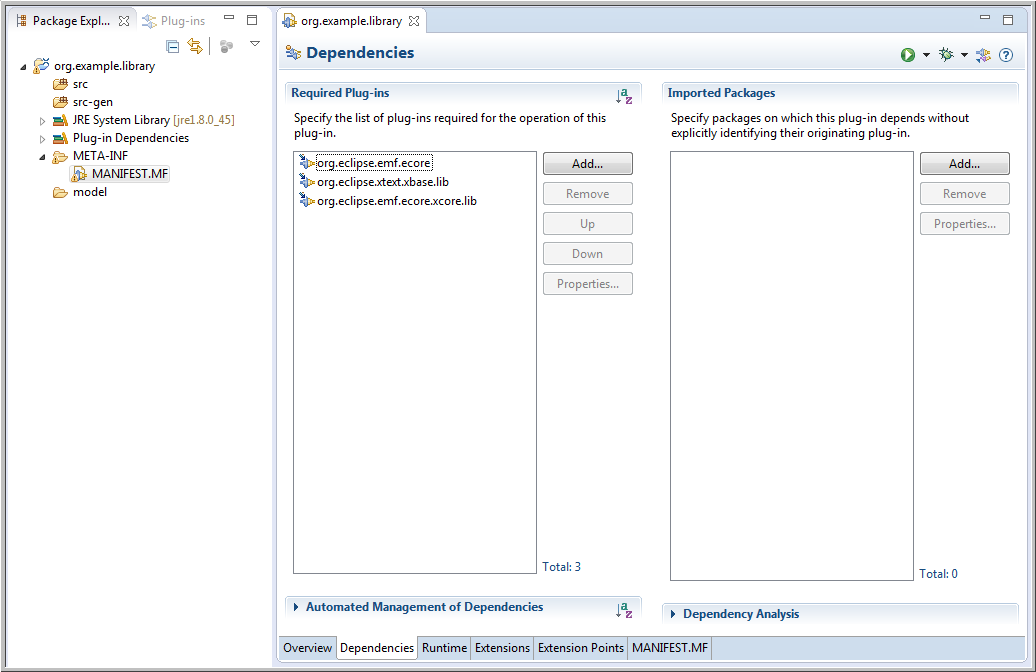
- A MANIFEST.MF with prepopulated dependencies for EMF Ecore and Xtext Xbase.
- And an empty model folder.
Of course it's possible to start with any Java project and use the "Convert → Add Xtext Nature" or "Convert → Convert to Plug-in Projects to introduce the missing natures and to edit the MANIFEST.MF to add missing dependencies.
Creating an Xcore model
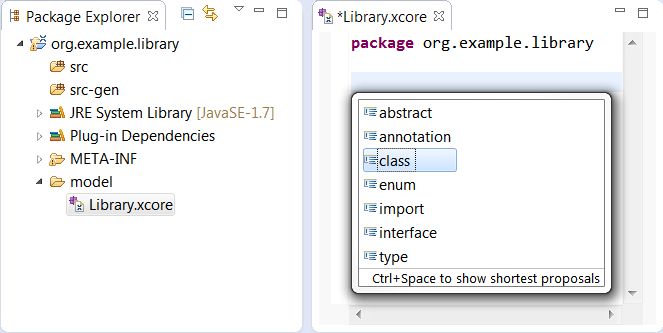
An Xcore model is created in the "model" folder via its context menu using "New → File" to create an empty new file with extension ".xcore", e.g., "Company.xcore". This will open the Xcore-aware editor. It starts out with an error marker, because an empty file isn't a valid Xcore instance.
Specifying a Package
The editor supports syntax completion so if you enter Ctrl-Space, you'll see it fills in the "package" keyword. Next you need to enter a package name, e.g., org.example.company. If you save, you'll see the error markers go away. You've created an empty Xcore package. As you can see, like Java, an Xcore model starts with a package declaration but note that that there's no semicolon. Note too that nothing is generated in the "src-gen" folder yet; EMF doesn't generate anything for empty packages.
Specifying a Class
Now you're ready to create something more meaningful. Add two blank lines and try hitting Ctrl-Space again to see what you're allowed to enter next.

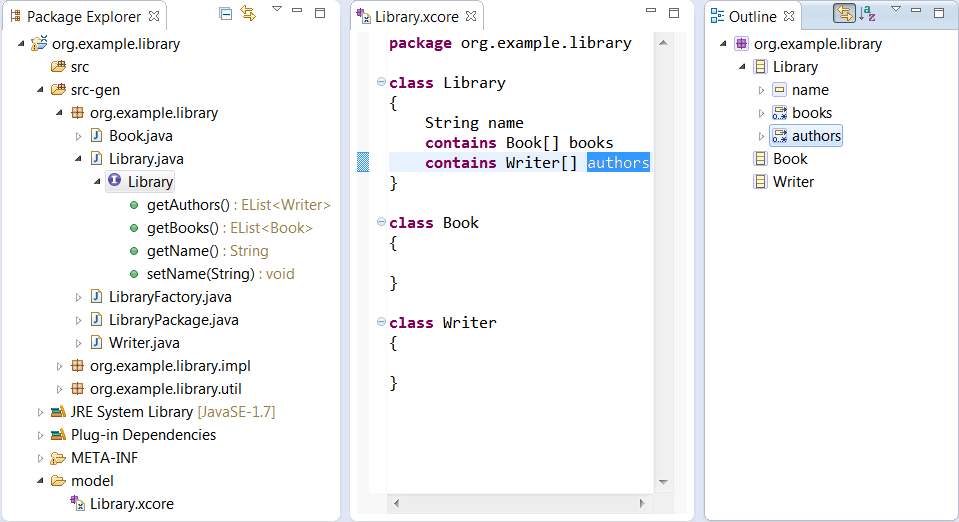
We'll start by defining a class called "Library". After entering the "class" keyword and the name of the class, type a curly brace: the closing curly brace is automatically inserted. If you now save the editor, you'll see the following:
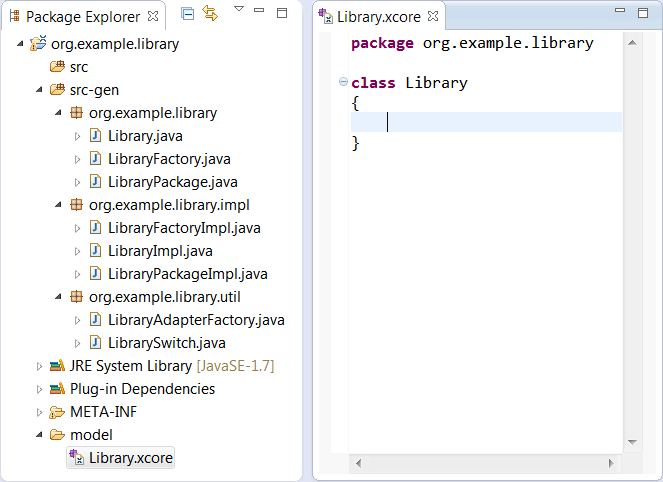

Noticed that the model code has been generated automatically.
Specifying an Attribute
Now you're ready to define the structure of the "Library" class. Within the curly braces, hit Ctrl-Space to see what you're allowed to enter next.
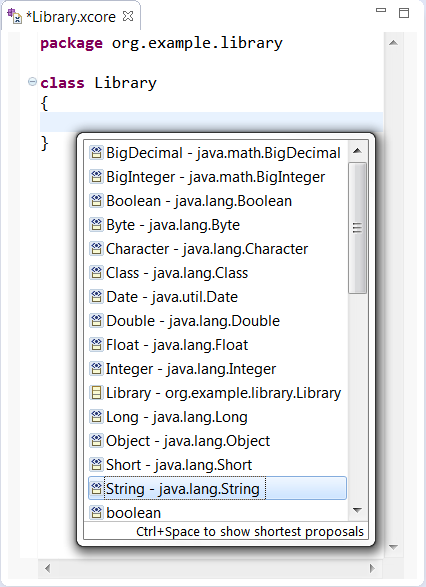

To specify an attribute, you need to specify the name of a data type followed by the name of the feature. So if you choose "String", enter "name", and save, you'll see the following:
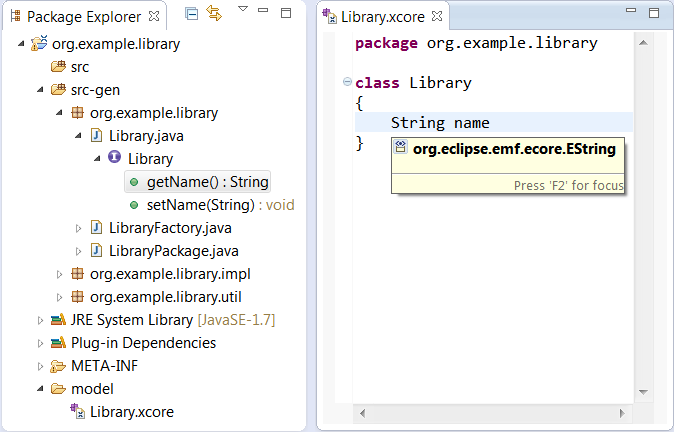

Of course the corresponding feature accessor methods, i.e., getName() and setName(String), will immediately be generated in the "Library" interface. Note that while the Xcore source shows the use of "String", which in the completion proposal you saw earlier was listed as "java.lang.String", from the hover information you can see that the reference actually resolves to the "EString" data type from the built-in "Ecore" package. Xcore provides familiar aliases for all of the Ecore data types that correspond to Java built-in and mathematical types.
Specifying a Containment Reference
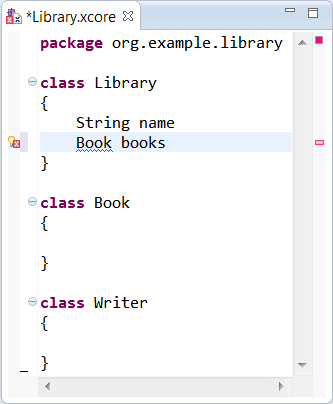
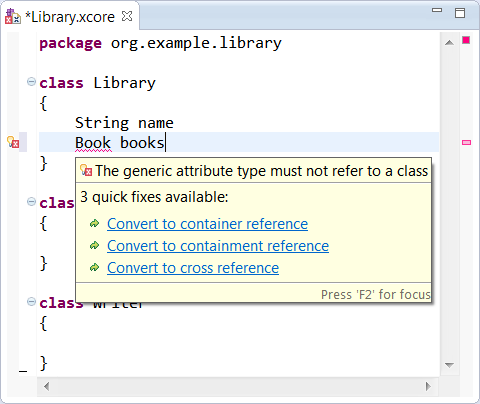
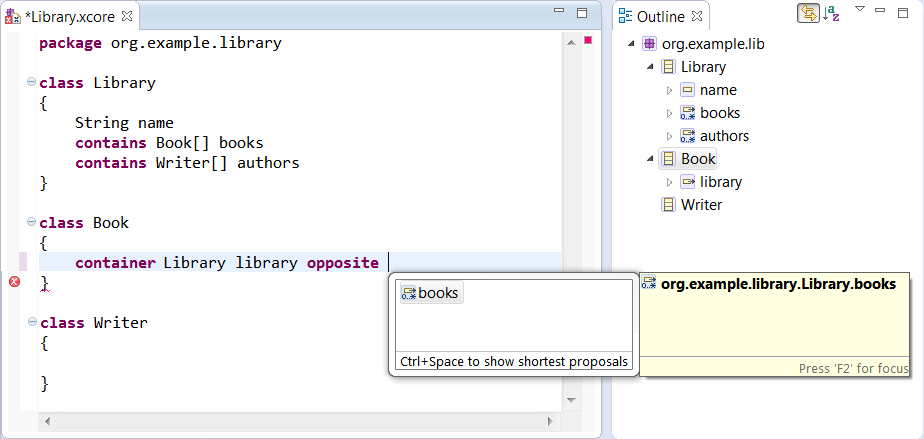
We'll want libraries to contain books and authors, so let's add two more empty classes, "Book" and "Writer" so that we can specify references to them in the library. If we try the same approach as defining the name feature, you'll end up with the following:

That's because Xcore interprets this as an attribute and the type of an attribute must be a data type, not a class. If you hover over the error indicator, you'll see how to fix the problem.

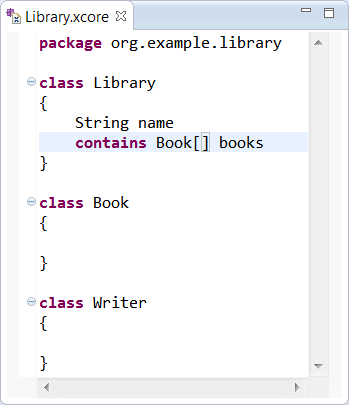
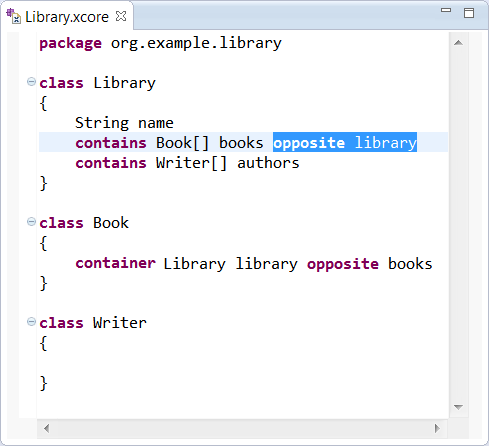
In this case, we want to define a containment reference, so choose that option. Notice that if you select the reference to "Book" you can use "F3" to navigate to the definition for the "Book" class. Of course we wanted to define this to be a multi-valued reference and here have specified a single-valued reference. The multiplicity of a feature is specified with the bounds in square brackets, where "[]" is used as a short-hand for "[0..*]" as follows:

Let's define another multi-valued containment reference called "authors" and save the result, which will look as follows:

Again, the expected results are immediately generated. Notice that the outline view uses icons are much like the GenModel's icons, though with a purplish cast rather than a bluish one.
Specifying a Container Reference
If you wanted a convenient API for navigating from a "Book" or "Writer" to its containing "Library" you'd specify container reference with an opposite like this:

Notice that completion support is available for specifying the opposite. When you select a choice, the opposite is automatically updated to refer back.

Let's add container feature for "Writer" as well, and let's define "title" and "pages" features for "Book" and a "name" feature for writer to produce the following:
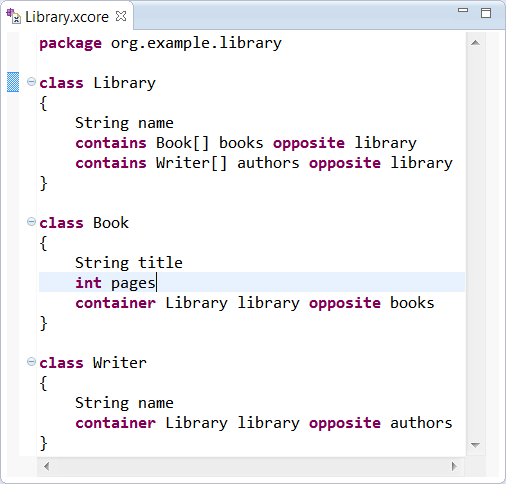

Note how we've made use of "int" as an alias for "EInt" to define the type for "pages".
Specifying a Cross Reference
The most important thing left to complete the picture is specifying the bidirectional relationship between "Books" and "Writers". Specifying a cross reference is done much like we did for containment and container references, but using the "refers" keyword. We start by specifying one of the two references, i.e, a "Book" has "authors", then the other, i.e., a "Writer" has "books", at which point we can also specify the opposite.
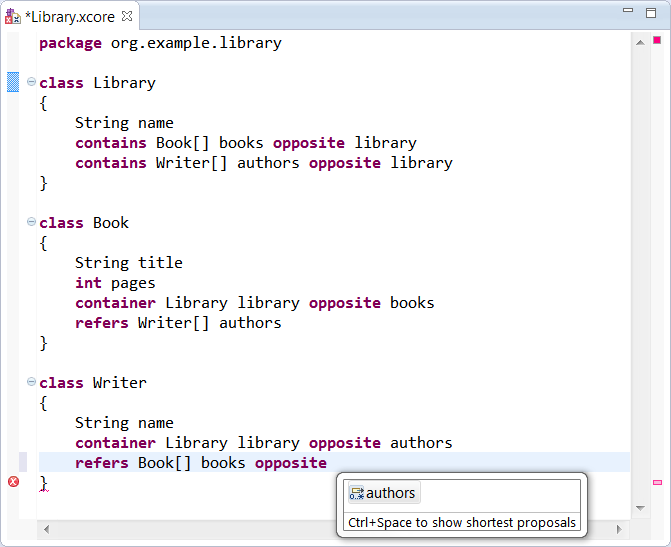

Notice that opposite completion is supported here as well and that upon completion, both opposites are properly paired. Of course "F3" navigation is supported the reference to an opposite.